Installing beadboard on the ceiling can completely change the look and feel of a room. It adds warmth, texture, and a classic touch that many people love. At first, the idea might seem a bit challenging, especially if you have not worked with beadboard before.
However, with the right planning, tools, and steps, almost anyone can get professional-looking results. Whether you want to cover old drywall, hide a popcorn ceiling, or simply add a touch of charm, attaching beadboard to your ceiling is a project worth considering.
This guide walks you through every important step, from choosing the right materials to the finishing touches. You will learn how to measure, cut, and install beadboard, as well as how to handle tricky areas like corners and light fixtures.
Along the way, you will find tips that help avoid common mistakes and make your work easier. If you pay attention to the details and follow each step, you can add value and beauty to your home with your own hands.
Why Install Beadboard On Your Ceiling?
Beadboard is a type of wood paneling with narrow vertical grooves or “beads.” It has been a favorite in homes for over a hundred years. People choose beadboard ceilings for several reasons:
- Hides imperfections: Beadboard covers cracks, stains, or rough surfaces in old ceilings.
- Adds character: The texture creates interest and gives a classic or cottage feel.
- Increases value: Quality beadboard work can boost a home’s value and appeal.
- Easy to paint: Beadboard can be painted or stained to match any room style.
Many homeowners use beadboard to cover ceilings in kitchens, bathrooms, porches, and even living rooms. It is a practical way to upgrade a space without a full renovation.
Tools And Materials Needed
Before starting, it is important to gather everything you need. Having the right tools and materials will make your work smoother and faster.
Essential Tools
- Tape measure – For accurate measurements.
- Level – Ensures your panels are straight.
- Chalk line – Makes straight guidelines on the ceiling.
- Circular saw or miter saw – For cutting beadboard panels.
- Jigsaw – Cuts around obstacles like lights or vents.
- Cordless drill/driver – For installing furring strips and beadboard.
- Hammer – Useful for nailing trim or panels.
- Pneumatic nail gun (optional) – Speeds up panel installation.
- Utility knife – For trimming edges or scoring panels.
- Stud finder – Locates ceiling joists for secure attachment.
- Ladder or scaffolding – For safe ceiling access.
- Caulking gun – For applying adhesive or filling gaps.
- Putty knife – For smoothing caulk or filler.
Materials
- Beadboard panels or planks (usually 4×8 feet sheets or tongue-and-groove boards)
- Furring strips (typically 1×2 or 1×3 lumber)
- Construction adhesive (panel adhesive)
- Finishing nails or brad nails (1 ¼” to 2” length)
- Wood filler or spackle
- Paint or stain
- Primer (if painting)
- Trim or molding (crown, quarter round, or cove molding)
- Sandpaper (medium and fine grit)
- Painter’s tape
- Drop cloths
Extra Items For Specific Situations
- Vapor barrier (for bathrooms or humid areas)
- Screws and anchors (for attaching furring strips to concrete or masonry)
Example Table: Tools Vs. Their Purpose
| Tool | Main Purpose |
|---|---|
| Stud finder | Locates joists for nailing |
| Circular saw | Cuts beadboard sheets to size |
| Pneumatic nail gun | Attaches panels quickly and neatly |
Having these tools and materials ready will help you finish the job without delays.

Credit: wellshetried.com
Planning And Preparation
Success starts with good planning. Before you cut or install anything, take time to prepare your space and materials.
Measure Your Ceiling
- Use a tape measure to find the length and width of your ceiling.
- Multiply the two to get the total square footage.
- Add at least 10% extra to your beadboard order to allow for mistakes and small cuts.
Decide On Panel Direction
- Most people run beadboard panels across the shortest ceiling dimension. This makes rooms look wider.
- In long hallways, run planks lengthwise to draw the eye forward.
Check The Ceiling Surface
- For old homes or uneven ceilings, look for dips or bumps.
- Mark the ceiling joists with a pencil or chalk line.
Remove Obstacles
- Take down light fixtures and vents.
- Remove any crown molding or trim if you plan to replace it later.
Acclimate Beadboard
- Bring beadboard into the room at least 48 hours before installation.
- Lay panels flat so they adjust to room temperature and humidity. This prevents warping after installation.
Non-obvious Insight:
Many beginners forget to acclimate beadboard, which can lead to gaps or buckling later. Skipping this step is a common mistake, especially in older homes.
Ceiling Preparation: Furring Strips Or Direct Attachment
Not every ceiling is the same. Some beadboard can go directly onto the ceiling joists or drywall, while other situations require furring strips.
When To Use Furring Strips
Furring strips are thin wood boards (usually 1×2 or 1×3) attached perpendicular to the ceiling joists. They give you a flat, secure base for beadboard.
- Uneven ceilings: Furring strips help create a level surface.
- Covering popcorn texture: Attach strips over the texture, then install beadboard.
- Old or damaged drywall: Furring adds strength.
How To Install Furring Strips
- Mark ceiling joists with a chalk line.
- Cut furring strips to length.
- Attach strips to joists every 16-24 inches with wood screws.
- Use a level to keep strips flat.
- If needed, use shims under strips to correct dips.
Direct Attachment
If your ceiling is flat and in good condition, beadboard can attach straight to the joists or drywall.
- Use a stud finder to mark joists.
- Panels must be nailed into joists for strength.
- For drywall, consider adhesive plus nails.
Table: When To Use Furring Strips
| Ceiling Condition | Furring Strips Needed? |
|---|---|
| Popcorn or textured | Yes |
| Flat drywall | No (optional) |
| Unlevel joists | Yes |
Cutting Beadboard Panels Or Planks
Cutting beadboard is a key part of the process. Accuracy ensures a neat look and makes installation easier.
Types Of Beadboard
- Sheet panels: 4×8 ft panels, good for fast coverage.
- Tongue-and-groove planks: Narrow boards that fit together, offer a more traditional look.
How To Cut Beadboard Panels
- Measure twice: Mark the cut line with a pencil.
- Use a circular saw: For straight cuts, a circular saw is best. Place the panel face down to avoid chipping.
- Jigsaw for curves: Use a jigsaw for cuts around lights or vents.
- Test fit: After cutting, hold the panel up to the ceiling to check the fit.
Cutting Around Obstacles
- Trace the shape of light boxes or vents onto the panel.
- Drill a starter hole in the panel.
- Use a jigsaw to cut out the shape.
- Dry fit before installing.
Pro Tip:
Label each panel or plank as you cut. This helps you remember the order and location for installation.
Attaching Beadboard To The Ceiling
Now comes the main part: attaching the beadboard. Take your time—good installation makes the final result look professional.
Starting The First Row
- Begin at one wall, usually the most visible.
- Use a chalk line to mark where the first panel edge will go.
- Hold the panel in place with a helper or temporary screws.
Applying Adhesive
- Squeeze a zigzag bead of construction adhesive onto the back of the panel or plank.
- Press the panel to the ceiling, holding for 30–60 seconds.
- Adhesive helps prevent sagging and reduces the number of nails needed.
Nailing The Panels
- Use finishing nails or a nail gun to secure the panel.
- Space nails every 12–16 inches along the edges and in the center.
- Nail into furring strips or joists for best strength.
Tongue-and-groove Method
If using tongue-and-groove boards:
- Nail through the tongue at a 45-degree angle (blind nailing).
- This hides nails and creates a smooth look.
Stagger Seams
- If your ceiling is larger than a 4×8 panel, stagger the seams between rows.
- This makes joints less noticeable.
Repeat The Process
- Continue installing panels or boards, fitting edges together tightly.
- Use a utility knife to trim small edges or fit around corners.
Table: Adhesive Vs. Nailing
| Attachment Method | Pros | Cons |
|---|---|---|
| Adhesive only | Clean look, no visible nails | May sag if used alone, not for heavy panels |
| Nails only | Strong hold, easy to adjust | Visible nail holes, possible splitting |
| Adhesive + nails | Best hold, less sagging | Takes more time |
Credit: www.ninahendrick.com
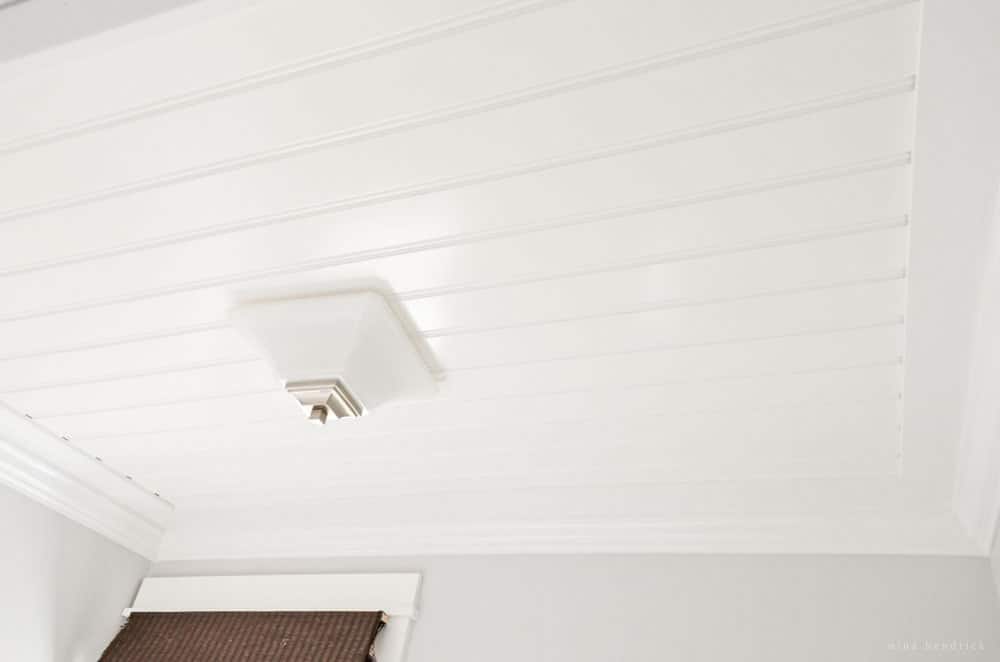
Dealing With Corners, Edges, And Light Fixtures
Some areas of the ceiling require extra attention.
Inside And Outside Corners
- Measure carefully and cut panels to fit snugly.
- If corners are not square, use a scribe tool or cardboard template.
- Small gaps can be filled with caulk or wood filler.
Edges And Trim
- Finish ceiling edges with crown molding, cove, or quarter round.
- This hides small gaps and gives a professional finish.
- Nail trim in place and fill nail holes before painting.
Light Fixtures And Vents
- Turn off power before working around electrical boxes.
- Cut beadboard to fit around fixtures, leaving space for the box.
- After the beadboard is up, reinstall fixtures.
Non-obvious Insight:
For a neater look, use a metal or plastic medallion around ceiling lights. It covers rough cuts and adds style.
Filling Seams And Nail Holes
After installing beadboard, the surface will have seams and nail holes.
Filling Nail Holes
- Use wood filler or spackle to fill nail holes.
- Smooth with a putty knife and let dry.
- Sand lightly with fine-grit sandpaper.
Hiding Seams
- For sheet beadboard, seams are more visible.
- Fill with caulk or wood filler before painting.
- For tongue-and-groove, seams are hidden by the design.
Caulking Edges
- Run a bead of paintable caulk along edges and trim.
- This seals gaps and keeps the ceiling looking neat.

Credit: www.pineandprospecthome.com
Painting Or Staining Beadboard
Finishing is just as important as installation.
Priming
- Always prime bare wood beadboard before painting.
- Use a stain-blocking primer to prevent stains.
Painting
- Use a high-quality ceiling paint or semi-gloss for durability.
- Apply with a brush or roller, following the direction of the grooves.
- Two coats give best coverage.
Staining
- If staining, use a wood conditioner first for even color.
- Apply stain with a brush or cloth.
- Finish with a clear polyurethane for protection.
Pro Tip:
Painting beadboard before installation can make the job easier. Touch up nail holes and seams after.
Cleaning Up And Final Touches
After painting or staining, do a final clean-up.
- Remove painter’s tape and drop cloths.
- Reinstall light fixtures and vents.
- Touch up any marks or missed spots.
Stand back and admire your work! A beadboard ceiling brings a fresh look and lasting value.
Common Mistakes And How To Avoid Them
Even experienced DIYers can make mistakes. Here are common problems and how to prevent them:
- Skipping acclimation – Always let beadboard sit in the room to avoid warping.
- Not using enough nails – Too few nails can cause sagging.
- Missing joists or furring strips – Panels must be attached securely.
- Rushing cuts – Take time to measure and cut accurately.
- Ignoring surface prep – Clean, level surfaces help beadboard adhere better.
- Overfilling seams – Too much filler looks messy; use just enough.
- Not priming – Skipping primer can lead to stains or poor paint adhesion.
Cost And Time Estimates
Before you start, it helps to know what to expect in terms of budget and time.
Cost Breakdown
- Beadboard panels: $20–$40 per 4×8 sheet (higher for real wood or special finishes)
- Furring strips: $1–$2 per linear foot
- Adhesive and nails: $20–$40 total
- Trim/molding: $1–$4 per linear foot
- Paint/stain: $20–$50
*Example:* For a 12×12-foot room, total costs may range from $300–$700, depending on materials and finishes.
Time Estimates
- Preparation: 2–4 hours
- Cutting and fitting panels: 2–4 hours
- Installation: 4–8 hours
- Finishing (filling, painting): 2–4 hours
Most DIYers can finish a standard ceiling in a weekend.
Safety Tips
Safety should always come first.
- Use a sturdy ladder or scaffolding.
- Wear eye and hearing protection when cutting.
- Turn off power when working near electrical fixtures.
- Ventilate the room when using adhesive, paint, or stain.
If you are unsure about any electrical or structural work, consult a licensed professional.
Example Project: Covering A Popcorn Ceiling
Let’s look at a practical example—covering a popcorn ceiling with beadboard.
- Prep: Scrape off any loose texture. Install furring strips 16 inches apart.
- Panels: Use 4×8 beadboard sheets for faster coverage.
- Attachment: Adhesive plus nails into furring strips.
- Finish: Caulk seams, install crown molding, and paint.
This method hides the old ceiling and updates the room with a fresh, stylish look.
Maintenance And Longevity
A beadboard ceiling is easy to care for.
- Dust regularly with a duster or vacuum brush.
- Touch up paint as needed.
- For bathrooms or kitchens, use a mildew-resistant paint.
With proper installation and care, beadboard can last 20 years or more.
When To Call A Professional
Some situations require expert help:
- Very high or vaulted ceilings (dangerous for DIY)
- Ceiling damage or mold issues
- Electrical work beyond fixture removal
A professional installer has the right tools and experience for complex jobs. For most flat, standard rooms, DIY works well if you follow the steps above.
For more on beadboard and ceiling upgrades, the This Old House website offers additional tips.
Frequently Asked Questions
How Do I Attach Beadboard To A Plaster Ceiling?
For plaster ceilings, it’s best to use furring strips anchored into ceiling joists. Attach beadboard to the furring strips with adhesive and nails. This avoids damaging the plaster and gives a secure base.
Can Beadboard Be Installed In Bathrooms Or Humid Rooms?
Yes. Choose moisture-resistant beadboard and use a vapor barrier if possible. Prime all surfaces, use mildew-resistant paint, and seal all seams with caulk to protect against humidity.
What’s The Difference Between Beadboard Panels And Planks For Ceilings?
Panels cover large areas quickly, making them good for big rooms or ceilings. Planks (tongue-and-groove boards) offer a more traditional look and can handle uneven ceilings better. Planks are slower to install but often give a higher-end finish.
Do I Need To Remove Popcorn Ceiling Before Installing Beadboard?
No, beadboard can be installed over popcorn ceilings using furring strips. However, any loose or flaking texture should be scraped off first, and the ceiling checked for asbestos if the home was built before 1980.
How Do I Hide Seams Between Beadboard Panels?
Use caulk or wood filler to fill seams before painting. For best results, stagger panel seams and cover edges with trim or molding. Tongue-and-groove planks naturally hide seams better than sheet panels.
Attaching beadboard to a ceiling is a project that brings big rewards, both in style and value. With careful planning, the right tools, and attention to detail, you can create a ceiling that looks beautiful for many years. Take your time, follow each step, and enjoy the transformation your work brings to your home.