Basement floors often hold a hidden challenge for homeowners: white, chalky patches that seem to return no matter how often you clean them. This is efflorescence, a common sign of moisture issues in concrete. While it may look harmless, efflorescence is a warning that water is moving through your basement floor, carrying dissolved salts to the surface. Left untreated, it can signal bigger problems ahead—damage to floors, ruined finishes, and even ongoing mold risks.
Understanding how to stop efflorescence on your basement floor is essential if you want a dry, healthy, and attractive space. Many people try to scrub away these marks, but true solutions require a deeper approach. In this guide, you’ll discover why efflorescence happens, how to identify the real causes, and the most effective ways to stop it for good.
You’ll also see real-world examples, learn about common mistakes, and get clear, step-by-step strategies you can apply—even if you’re not a building expert.
What Is Efflorescence?
Efflorescence is a powdery, white deposit that appears on concrete, brick, or stone surfaces. It forms when water moves through a porous material like your basement floor, dissolving salts inside the concrete. As the water reaches the surface and evaporates, the salts stay behind as a visible residue.
Some key facts about efflorescence:
- It’s not mold or mildew, but it does mean you have moisture movement.
- It doesn’t damage concrete directly, but it can ruin paint, tiles, or carpets.
- Persistent efflorescence often means a bigger water or humidity problem.
Efflorescence can be a clue that your basement floor is not as dry as it should be, even if you don’t see standing water.
Why Does Efflorescence Form On Basement Floors?
To fix efflorescence, you must first understand how water gets into your basement floor. Concrete is naturally porous, so water finds tiny passages as it moves from the ground into the basement. This water picks up natural salts from soil, cement, or mortar. When it evaporates at the surface, salts are left behind.
Common causes include:
- High groundwater: After rain or snow melts, water rises under the basement slab.
- Poor drainage: Downspouts, gutters, or landscaping direct water toward the house.
- Cracks in the floor: Even small cracks allow water and vapor to enter.
- No vapor barrier: Older homes often lack a plastic sheet under the slab, making water movement easy.
- High indoor humidity: Moist air can also contribute, especially if the basement is not ventilated.
Understanding the source is key. If you only clean the surface, efflorescence will return—sometimes worse than before.
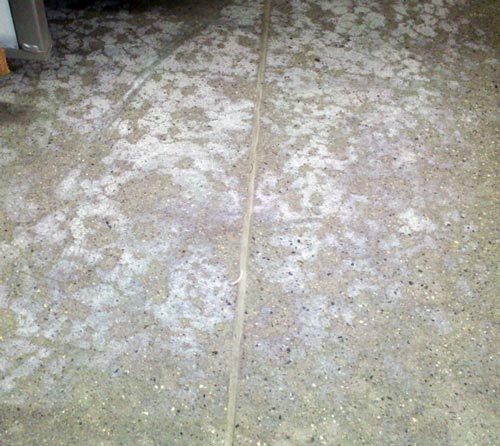
Credit: concretecountertopinstitute.com
How To Identify Efflorescence (and Not Mistake It For Mold)
Not every white stain is efflorescence. Sometimes, basements develop mold, mildew, or mineral stains that look similar. Here’s how you can tell the difference:
- Efflorescence: Feels powdery and dry. Wipes off easily with your finger or a dry cloth. No smell.
- Mold or mildew: Feels fuzzy or slimy. May be gray, black, or green. Smells musty and is hard to wipe away.
- Lime or mineral scaling: Forms thick, hard crusts that don’t brush away easily.
A simple test: sprinkle a few drops of water on the patch. If it dissolves or disappears, it’s likely efflorescence. If it stays or feels slimy, it’s probably mold.
The Real Risks Of Ignoring Efflorescence
Some homeowners think efflorescence is just a cosmetic problem. In reality, it’s a sign of ongoing moisture that can lead to:
- Peeling paint or floor coatings
- Warped or rotten flooring
- Increased risk of mold and mildew
- Structural problems if water is allowed to build up over time
Efflorescence is a warning. Stopping it means protecting your basement—and your home’s value.
Step 1: Locate And Fix The Source Of Moisture
The most important step is to find where the water is coming from. If you skip this, any other solution will only be temporary.
Check Drainage Outside Your Home
Start outside. Most basement moisture starts with surface water. Look for these problems:
- Gutters or downspouts clogged or broken
- Downspouts ending too close to the foundation (should be at least 6 feet away)
- Sloping soil directing water toward the house (soil should slope away, 1 inch per foot for at least 6 feet)
- Concrete paths or patios sloping toward the foundation
Making small fixes outside can have a huge effect inside.
Inspect Basement Walls And Floor
Look for:
- Cracks in the floor or walls
- Damp spots or puddles after rain
- White marks that appear in a pattern, like along a crack or joint
Sometimes, leaks are obvious. Other times, you may need to tape a square of plastic (about 2×2 feet) to the floor for 24 hours. If moisture appears under the plastic, water is coming up from below (hydrostatic pressure). If it appears on top, it’s from the air (high humidity).
Don’t Ignore Plumbing
Leaky pipes, water heaters, or basement laundry can also add moisture. Check all plumbing for slow leaks or drips.
Step 2: Clean Away Existing Efflorescence
Before fixing the cause, remove the deposits so you can see if they return.
Best methods:
- Use a stiff brush or broom to sweep away dry powder.
- For stubborn spots, use a solution of white vinegar and water (1: 1 ratio). Scrub, then rinse with clean water.
- For large areas, a shop vacuum can help.
Don’t use bleach—it won’t remove salts and can worsen concrete issues.
After cleaning, wait a week. If new efflorescence appears, water is still moving through the floor.
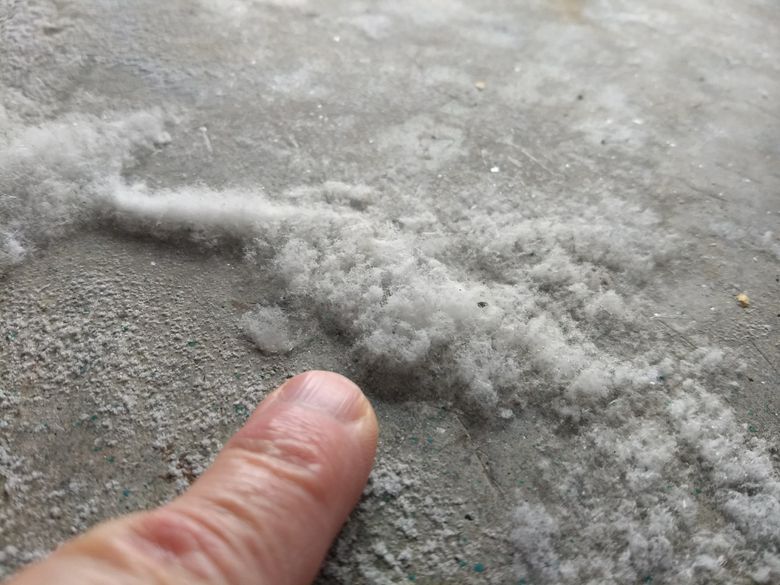
Credit: www.seattletimes.com
Step 3: Improve Surface Drainage And Grading
Good drainage is your first line of defense. Here’s how to improve it:
- Extend downspouts: Use plastic or metal extensions to move water at least 6–10 feet from the house.
- Clean gutters: Remove leaves and debris so water doesn’t overflow.
- Reshape soil: Use a shovel and topsoil to create a gentle slope away from the foundation.
Compare the effectiveness of common drainage improvements:
| Improvement | Average Cost | Effectiveness (1–5) | DIY Difficulty |
|---|---|---|---|
| Downspout extensions | $10–$30 each | 5 | Easy |
| Gutter cleaning | $0–$150 | 4 | Easy |
| Resloping soil | $100–$500 | 5 | Moderate |
| French drain installation | $1,000–$3,000 | 5 | Hard |
Even simple, low-cost steps can make a dramatic difference in reducing basement moisture.
Step 4: Seal Cracks And Joints In The Basement Floor
Cracks are a main path for water. Sealing them is essential.
- Use a hydraulic cement or concrete crack sealer (sold at hardware stores).
- Clean out all loose material, then apply the sealer according to instructions.
- For wide cracks, undercut the edges slightly with a chisel so the patch locks in.
Hydraulic cement expands as it dries, blocking water even under pressure.
Tip: Don’t use silicone caulk on cracks in the floor—it’s not strong enough for moving water.
Step 5: Apply A Waterproofing Sealer To The Floor
Once the floor is clean and cracks are sealed, consider a waterproofing sealer. These products block moisture from entering the surface.
Types of sealers:
- Penetrating sealers: Soak into the concrete and block water from within. Good for long-term protection.
- Surface coatings: Form a layer on top of the concrete. Fast, but can peel if water pressure is high.
Comparison of popular waterproofing sealer types:
| Type | Longevity | Best Use | Downside |
|---|---|---|---|
| Penetrating silicate | 10–20 years | Basement floors/walls | Needs bare concrete |
| Acrylic surface sealer | 2–5 years | Low-moisture areas | Can peel |
| Epoxy/urethane | 10+ years | Heavily used floors | Expensive |
Important: Sealers work best on clean, dry, unpainted concrete. If your floor is always wet, sealing alone will not solve the problem.
Step 6: Control Humidity Inside The Basement
Even with good drainage, basements can stay damp if the air is too humid. This can add to efflorescence and mold risk.
Effective ways to control humidity:
- Use a dehumidifier. Set it to 45–55% humidity.
- Keep basement windows closed during wet weather.
- Insulate cold water pipes to stop condensation.
- Vent clothes dryers and showers outside, not into the basement.
A good dehumidifier can remove 20–70 pints of water a day, making a big difference in comfort and safety.
Step 7: Install A Vapor Barrier (if Possible)
A vapor barrier is a sheet of heavy plastic placed under the concrete slab to stop water vapor moving up from the ground. Most newer homes have one, but older homes may not.
If you’re finishing a basement or replacing the floor, it’s wise to add a vapor barrier. For existing floors, you can install a surface vapor barrier (special coatings or plastic sheeting under new flooring).
- Use 6-mil or thicker polyethylene plastic.
- Overlap seams by 6–12 inches and tape well.
- Run the barrier up walls at least 4–6 inches.
This is best done during major renovations, but it’s a lasting solution.
Step 8: Consider A Sump Pump For Severe Water Problems
If you have frequent water under your basement floor (high groundwater), a sump pump may be needed. This device collects water from under the slab and pumps it outside, away from your foundation.
- Sump pumps require a pit (sump basin) in the lowest part of the basement.
- Water flows into the pit and is pumped out automatically.
A sump pump is the strongest defense for homes with chronic water problems, but it’s a bigger project to install.
Step 9: Avoid Common Mistakes When Treating Efflorescence
Many homeowners and even some contractors make these errors:
- Painting over efflorescence without fixing moisture. The paint bubbles and peels.
- Using household cleaners like bleach or soap. These don’t remove salts.
- Ignoring exterior drainage problems. Water always finds a way inside.
- Not sealing cracks and joints. Even small cracks can cause big problems.
- Skipping humidity control. Humid air alone can cause efflorescence on cool floors.
Real-world insight: If you only treat the surface, the problem will return—often worse than before.
Step 10: Monitor And Maintain Your Basement Floor
After repairs, it’s important to check your basement regularly. Efflorescence can return if new problems develop.
- Inspect the floor and walls every few months.
- Watch for new cracks, white stains, or damp spots after heavy rain.
- Keep gutters and drains clear.
- Reapply sealer as recommended (usually every 2–5 years for surface products).
Non-obvious tip: Sometimes, efflorescence is much worse in spring or after snow melts. Checking during these times gives you the best view of your basement’s health.
When To Call A Professional
If you’ve tried the above steps but still see persistent efflorescence or water, it may be time for professional help. Signs you need an expert:
- Standing water after rain
- Large cracks (wider than 1/4 inch)
- Efflorescence returning quickly after cleaning and sealing
- Musty smells or visible mold
Waterproofing contractors can assess the issue, recommend advanced solutions (like interior drain systems), and provide warranties on their work.
The Cost Of Stopping Efflorescence
Costs can vary widely depending on the size of your basement and the severity of the problem.
Typical costs:
- DIY cleaning and sealer: $50–$250
- Crack repair: $20–$100 per crack
- Gutter/downspout improvement: $30–$300
- Professional waterproofing: $2,000–$10,000+
- Sump pump installation: $1,000–$3,000
Most homeowners can solve minor efflorescence for a few hundred dollars. Major water problems may require bigger investments.
Real-life Example: Stopping Efflorescence In An Old Basement
Consider a 1960s home with frequent white patches on the floor after rain. Here’s how the homeowner stopped efflorescence for good:
- Extended downspouts 8 feet from the house.
- Dug out and re-sloped soil around the foundation.
- Cleaned all efflorescence with vinegar and water.
- Sealed cracks with hydraulic cement.
- Applied a penetrating silicate sealer to the bare concrete.
- Installed a basement dehumidifier.
- Checked the floor monthly for new stains.
Result: After two rainy seasons, no new efflorescence appeared. The basement stayed dry and comfortable, with no musty smell.
Can You Prevent Efflorescence Forever?
With the right steps, you can greatly reduce the risk of efflorescence. But because concrete is porous and weather changes, it’s important to stay alert. Ongoing maintenance—like checking drainage and keeping humidity low—makes a huge difference.
Expert tip: The best defense is a combination of exterior drainage, crack repair, and humidity control. Skipping any part increases the chance of problems returning.
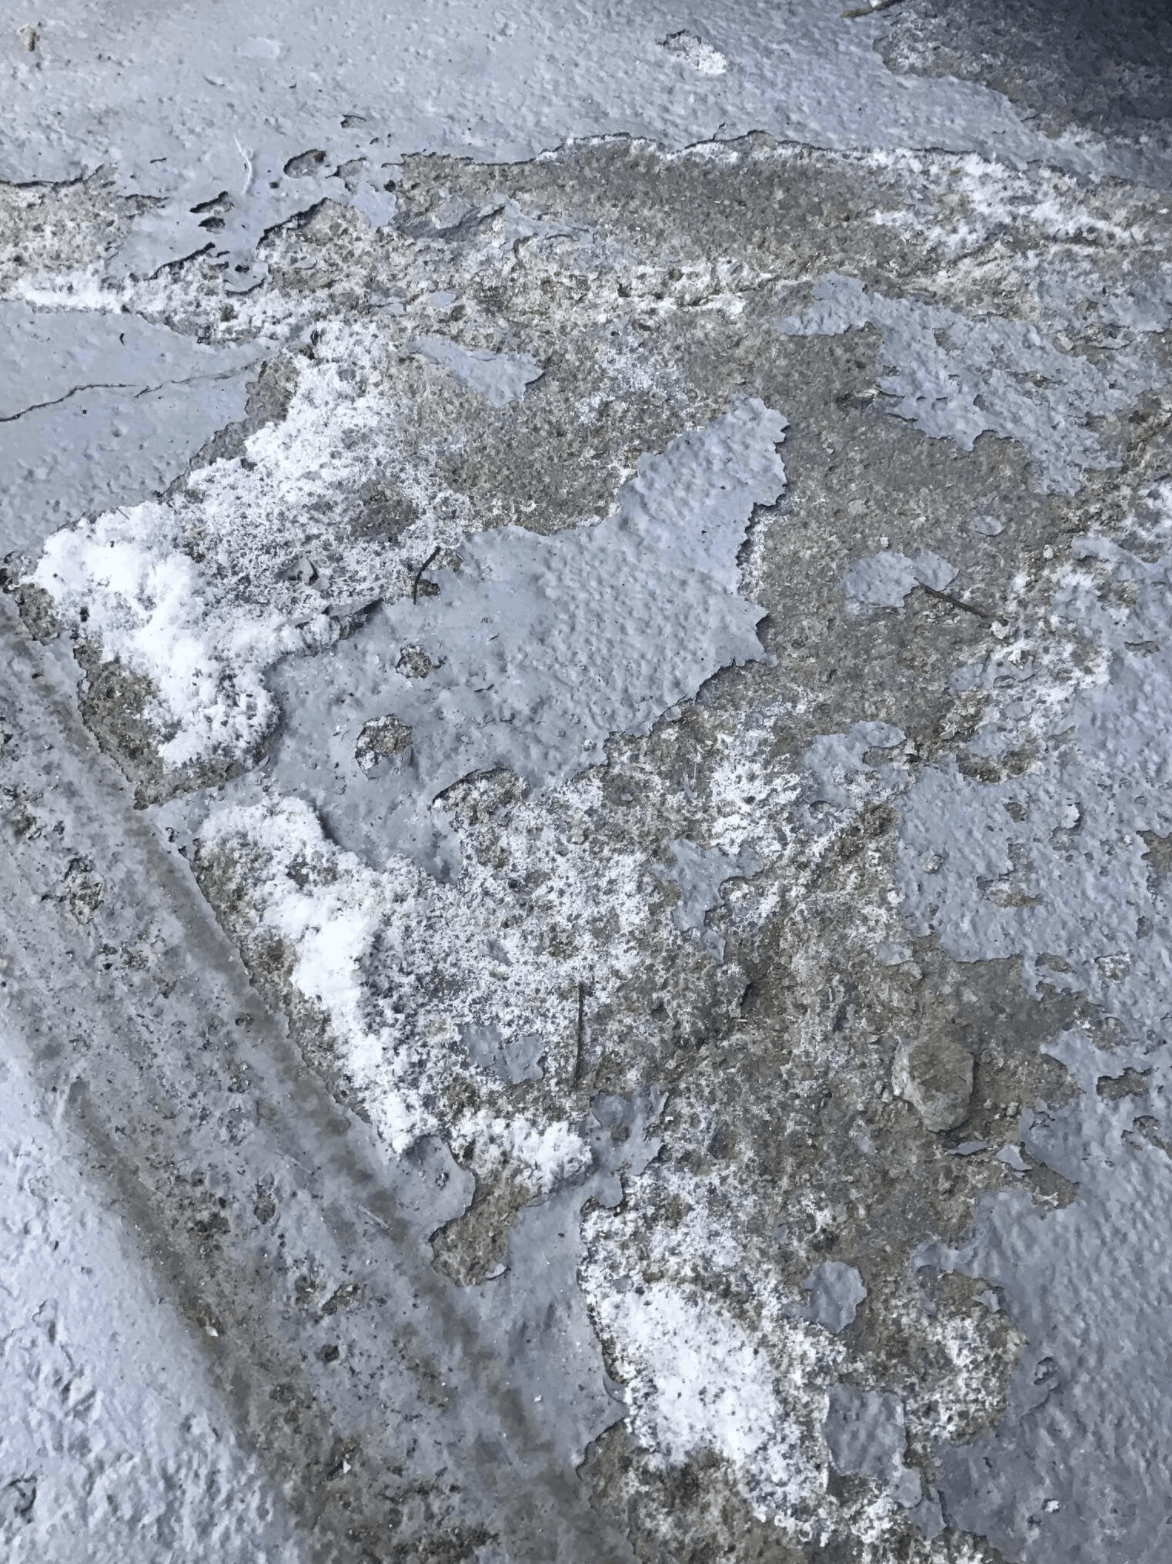
Credit: www.bprotek.com
Advanced Solutions: Interior Drain Systems And French Drains
For homes with chronic water under the slab, more advanced solutions may be needed.
- Interior drain systems: A perforated pipe is installed inside the basement, along the foundation, to collect water and send it to a sump pump.
- French drains: A gravel-filled trench outside the house redirects water away.
Comparison of advanced water management systems:
| System | Best For | Average Cost | Pros | Cons |
|---|---|---|---|---|
| Interior drain system | High water tables, older homes | $5,000–$10,000 | Works from inside, effective | Invasive, costly |
| French drain | Surface water near foundation | $1,500–$5,000 | Long-lasting, outside installation | Requires yard excavation |
These solutions are usually installed by professionals and come with warranties.
Essential Maintenance Tips To Keep Efflorescence Away
- Check gutters and downspouts twice a year—spring and fall.
- Inspect basement floors and walls every few months.
- Keep soil sloped away from the house.
- Clean up water spills quickly and fix leaks right away.
- Run a dehumidifier during humid months.
Non-obvious insight: Even small changes—like moving a flower bed away from the foundation—can help keep your basement dry.
Frequently Asked Questions
What Is The Difference Between Efflorescence And Mold On A Basement Floor?
Efflorescence is a powdery, white mineral deposit left by water. It wipes off easily and has no smell. Mold is a living organism, often black or green, with a musty odor. Mold feels fuzzy or slimy and does not brush away easily. Mold can cause health problems, while efflorescence is mainly a sign of water movement.
Will Painting My Basement Floor Stop Efflorescence?
No, painting over efflorescence is not a solution. The paint will not stop moisture moving through the concrete. In fact, paint can bubble, peel, or discolor when salts and water build up underneath. Always solve the water problem first, then paint if you wish.
Can Efflorescence Damage My Concrete Floor?
Efflorescence does not harm concrete itself, but it can damage paints, tiles, or other floor coverings. It also signals that moisture is present, which can lead to bigger problems like mold or structural damage over time.
Is It Safe To Clean Efflorescence Myself?
Yes, cleaning efflorescence is safe for most people. Use a stiff brush or a vinegar-water solution. Wear gloves and a dust mask if you have sensitive skin or allergies. Avoid using bleach or harsh chemicals, as these are not effective.
Where Can I Learn More About Basement Waterproofing Methods?
For more in-depth information and best practices, you can visit the Wikipedia Basement Waterproofing page. This resource covers many methods and explains why certain approaches work better in different situations.
Efflorescence on your basement floor is not just a cosmetic issue—it’s a message from your home. By understanding the causes, addressing moisture at its source, and following proven solutions, you can keep your basement dry, healthy, and inviting for years to come.
Regular checks and maintenance are your best tools in winning the battle against unwanted white stains.