
Sealing a sliding barn door can make a huge difference in your home’s comfort, privacy, and even energy bills. These doors are loved for their rustic look and space-saving qualities, but they often let in unwanted drafts, dust, noise, and light.
If you’ve ever sat in a room with a sliding barn door and felt a cold breeze or heard every sound from the next room, you know exactly why sealing matters.
Many people install barn doors for style, but quickly realize they don’t block air, smells, or sound very well. This guide will walk you through everything you need to know to seal a sliding barn door effectively. You’ll learn why sealing is important, what materials to use, how to do the job step by step, and how to avoid common mistakes. Whether you want to cut energy costs, boost privacy, or just keep out bugs and dust, this complete guide will help you get it right.
Why Sealing A Sliding Barn Door Matters
Most barn doors hang a little away from the wall, so there’s a gap around the edges. This gap might look small, but it can cause big problems:
- Air leaks: Cold or hot air moves easily through these gaps, making your heating or cooling work harder.
- Noise: Sound passes right through, so conversations and TV noise travel easily.
- Light: Gaps can let in light, which is annoying in bedrooms or offices.
- Smells and dust: Odors and dust can pass through, reducing indoor air quality.
- Bugs: Small insects can use the gaps to get inside.
A well-sealed barn door can solve these problems. According to the U. S. Department of Energy, sealing air leaks around doors and windows can cut energy costs by up to 20%. For people living in noisy or dusty areas, sealing also improves comfort and cleanliness.
Understanding Sliding Barn Door Gaps
Before you start sealing, it’s important to know where the gaps are:
Common Gap Locations
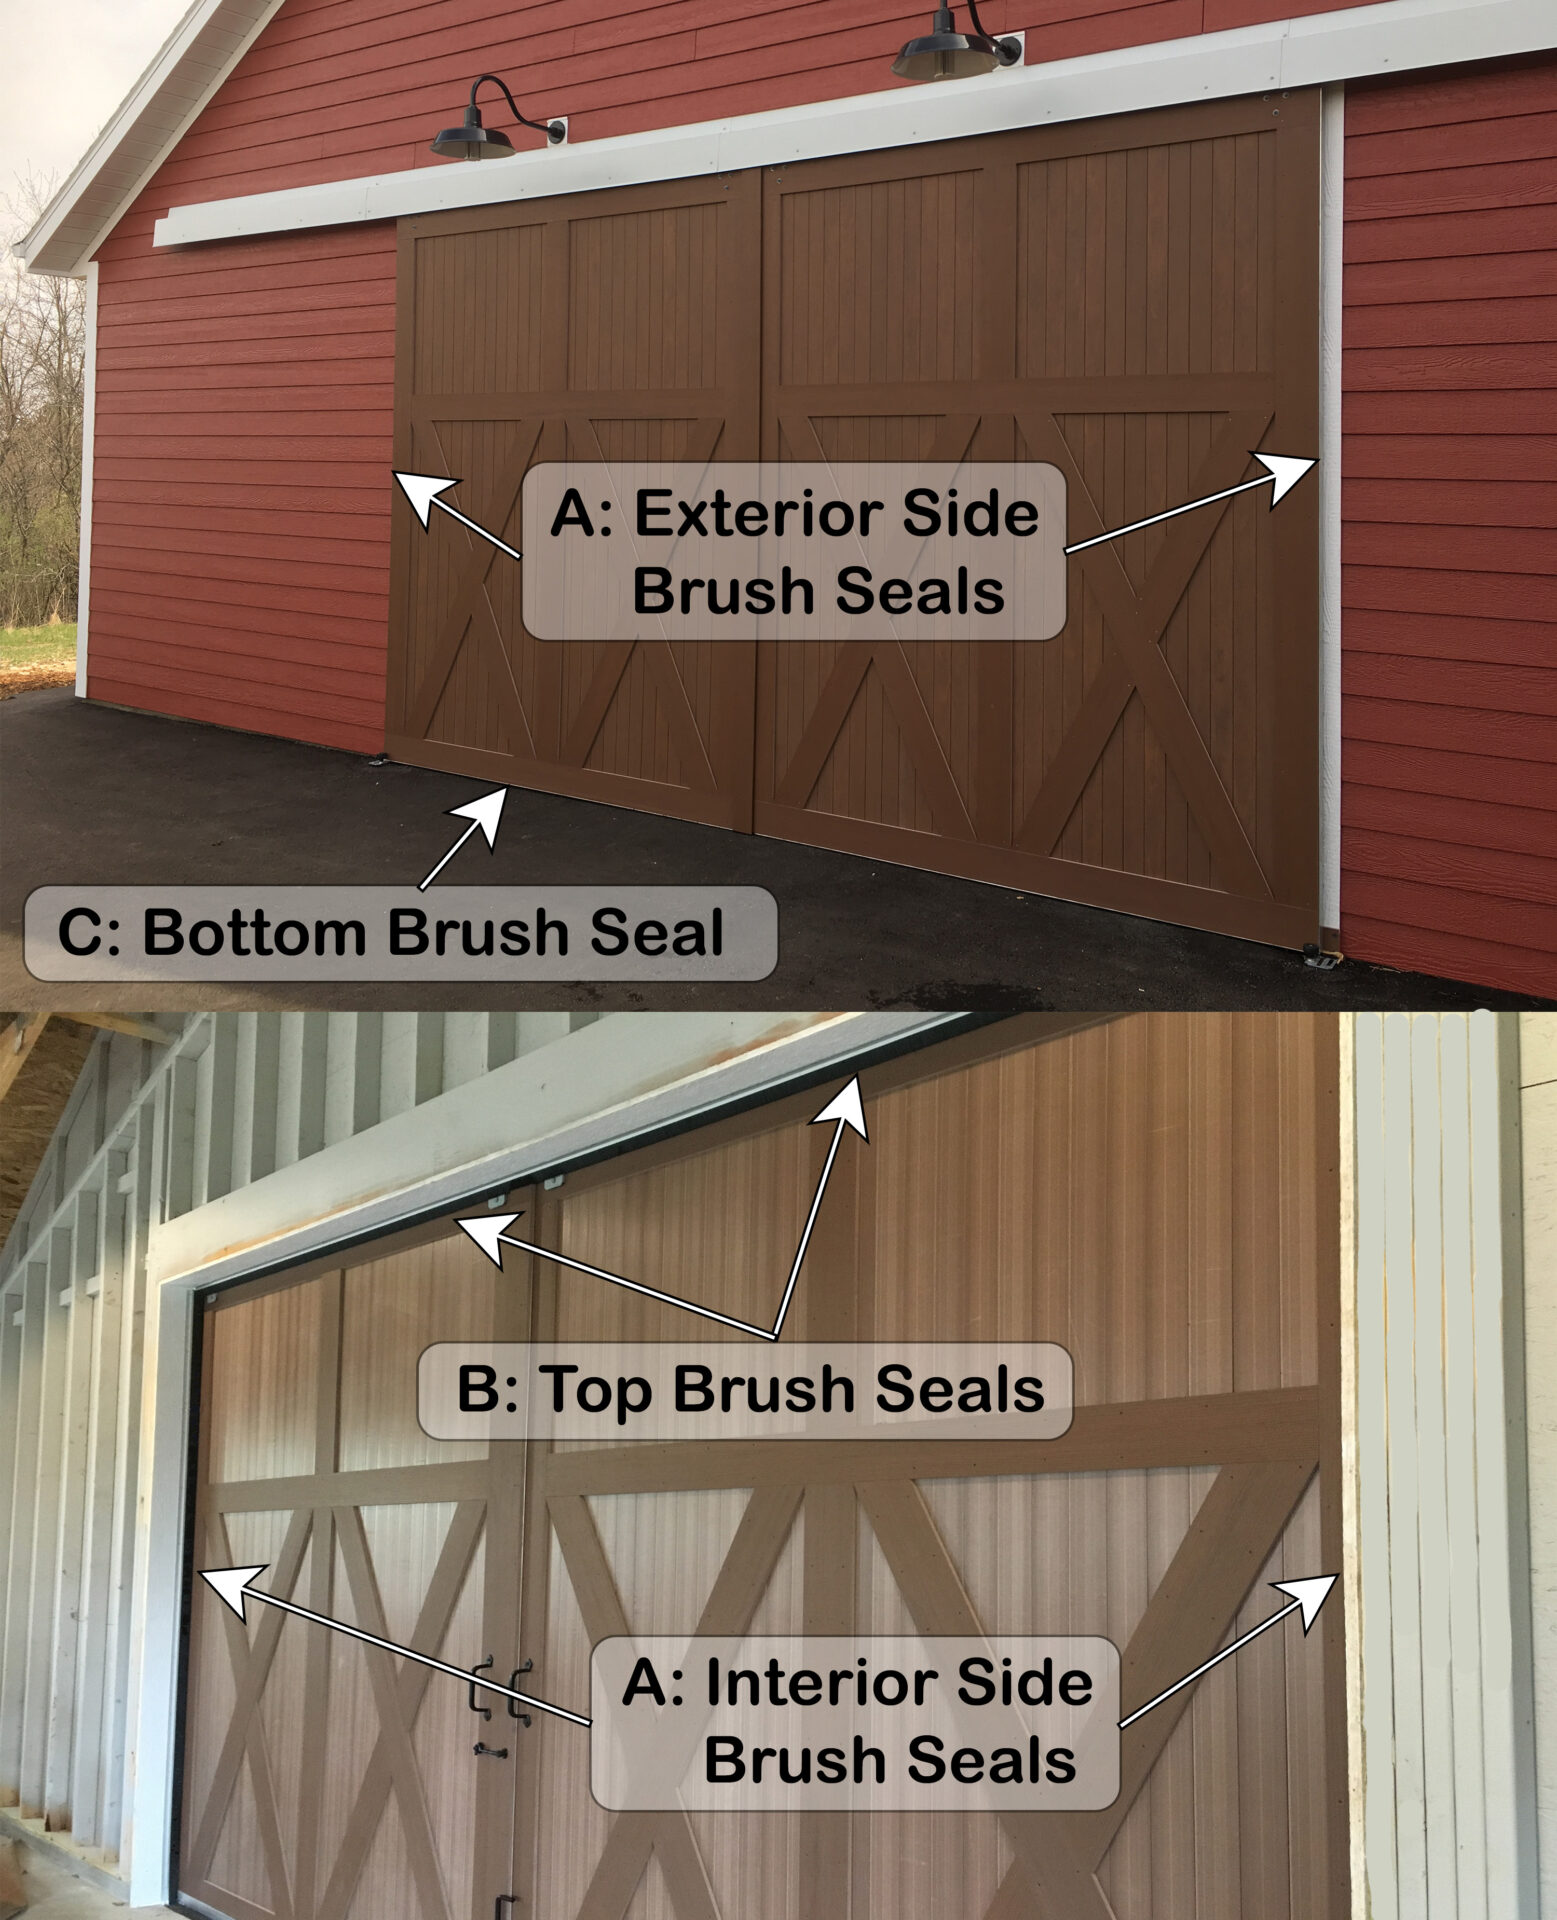
- Side gaps: These run the full height of the door, between the door and the wall.
- Top gap: Where the door hangs from the track, above the door panel.
- Bottom gap: Between the floor and the bottom of the door.
- Overlapping gap: If your door overlaps the wall, there may still be a small gap.
Measuring Gaps
Use a tape measure to check the width of the gaps. Measure at several points, as old walls or doors may not be perfectly straight. Most gaps are between 1/8 inch to 1 inch wide.
Pro tip: Shine a flashlight from one side of the door. If you see light on the other side, there’s a gap to seal.
Choosing The Right Sealing Materials
Not all weatherstripping and seals work for sliding barn doors. Some are too thick or stiff, and may block the door from moving. Here’s what to look for:
Top Sealing Options
- Adhesive foam weatherstripping: Flexible and easy to install. Good for narrow gaps.
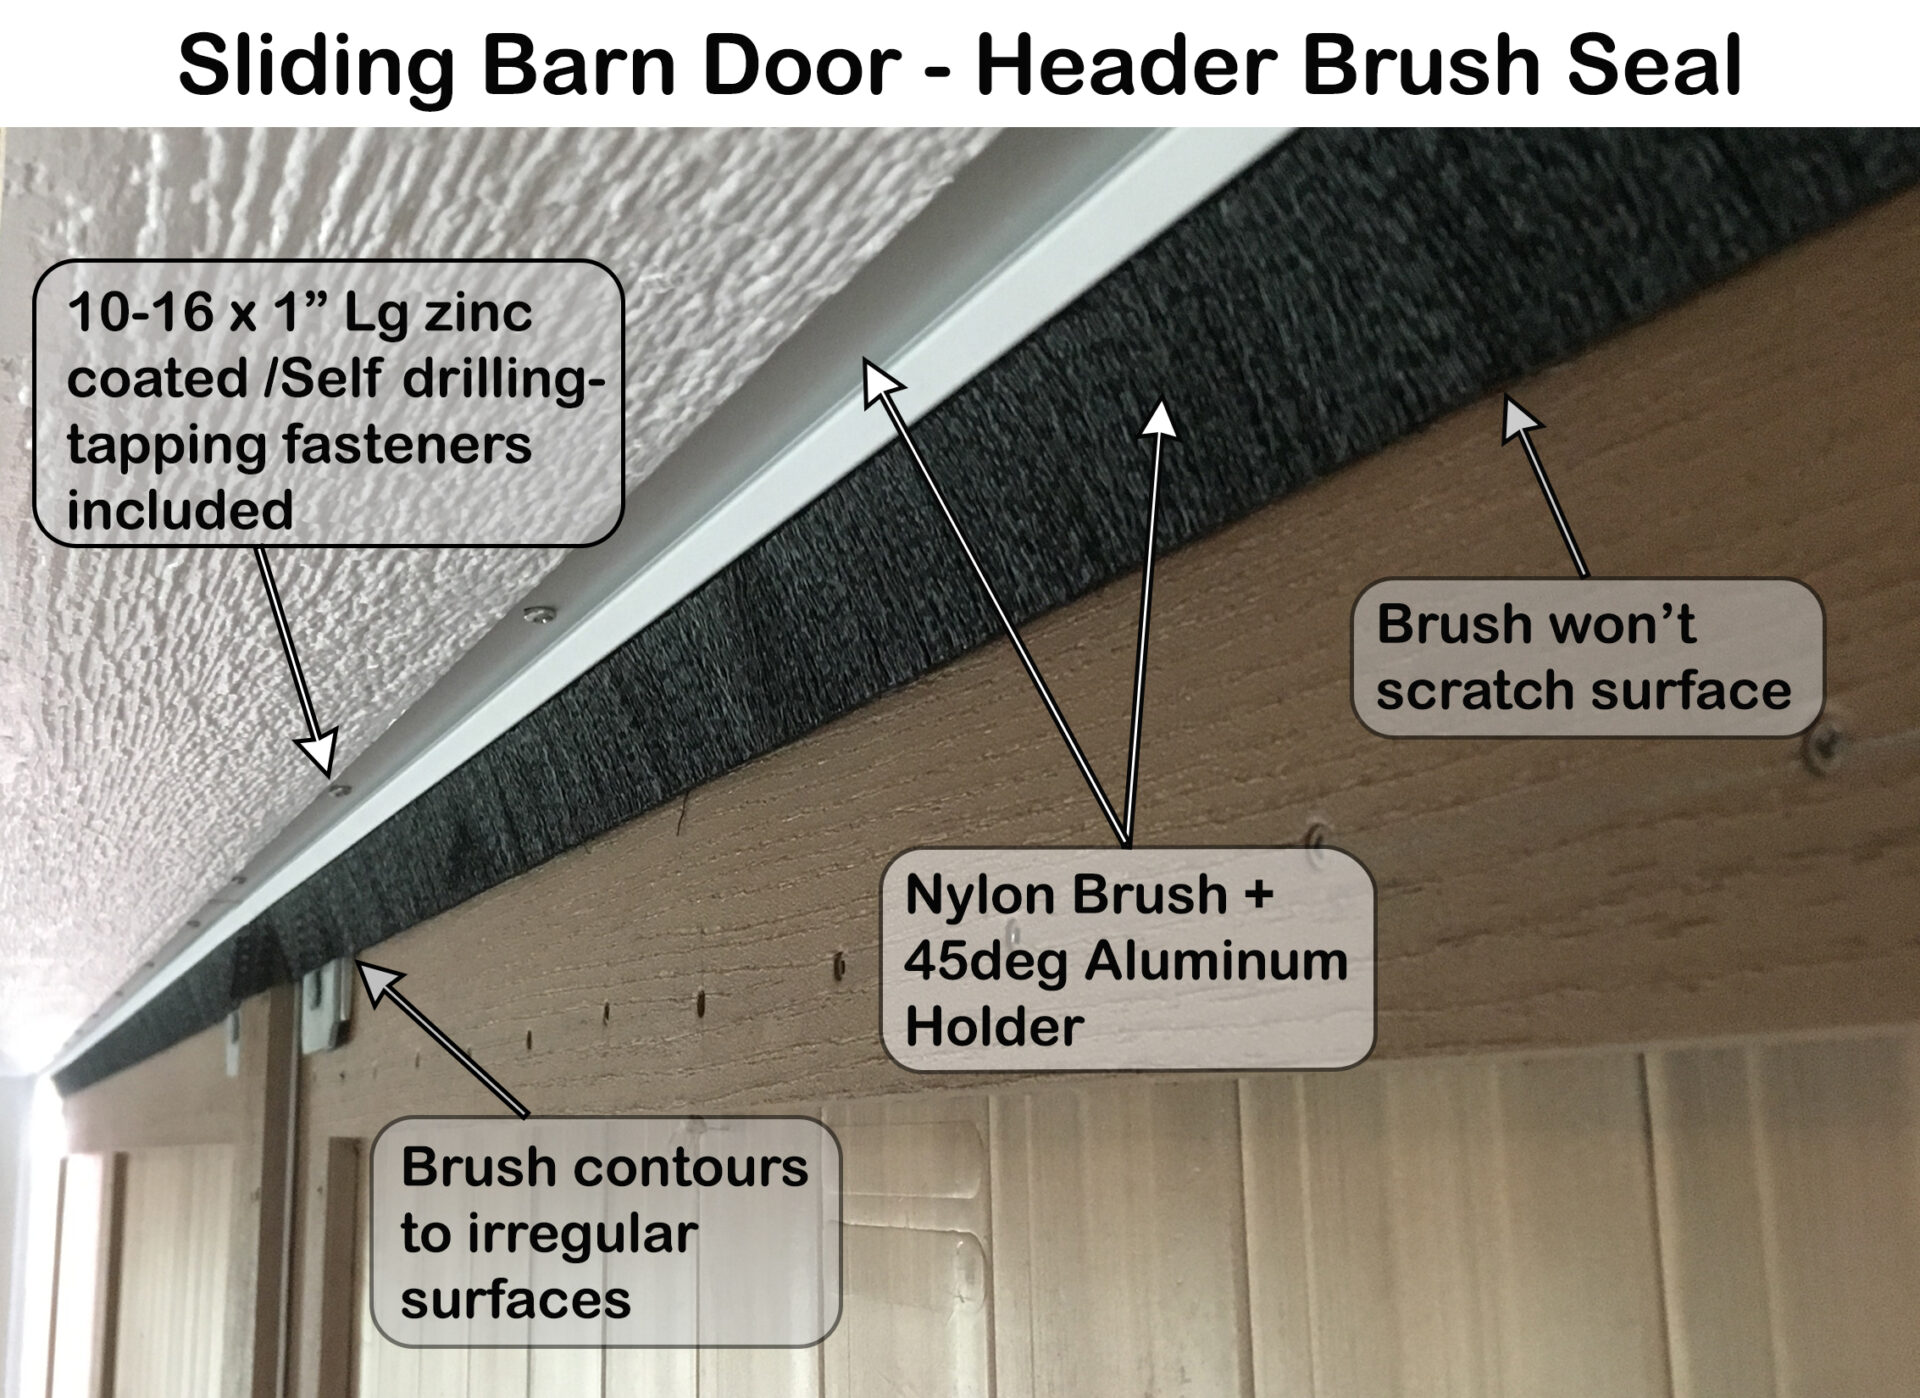
- Brush weather seal: Has small bristles that flex as the door moves. Great for uneven gaps and noise blocking.
Side Sealing Options
- Self-adhesive foam tape: Comes in different widths and thicknesses. Choose closed-cell foam for better durability.
- Silicone door seals: Flexible and long-lasting. They keep out both drafts and bugs.
- Magnetic strip: Works if the door and wall are both metal (rare for barn doors).
Bottom Sealing Options
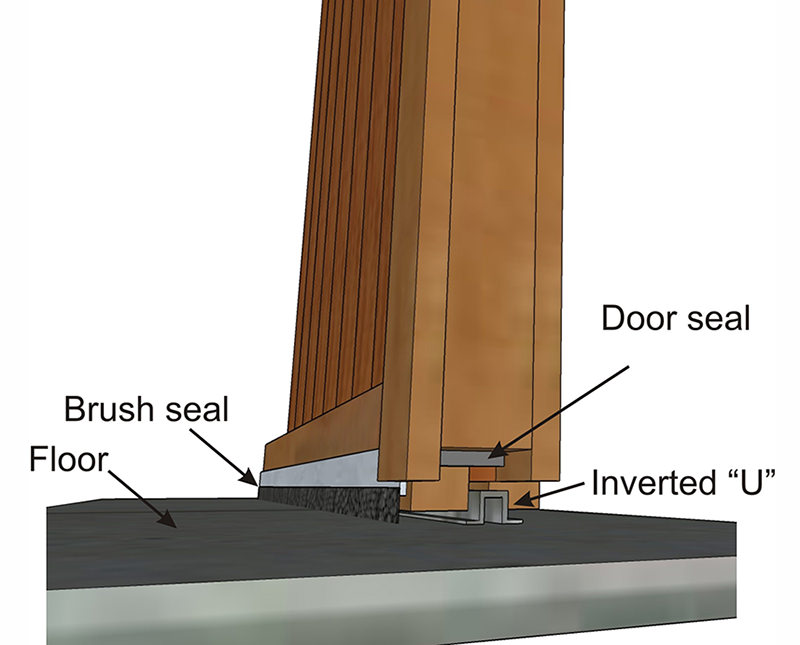
- Door sweeps: Attach to the bottom of the door. Choose brush or flexible rubber types.
- U-shaped door shoes: Slide onto the bottom edge if the door is thick enough.
Overlap Sealing
- Edge seals: Some barn doors have a small lip that overlaps the wall. Apply foam or a thin brush seal to this edge.
Specialized Solutions
- Acoustic door seals: For soundproofing, use high-density rubber or silicone seals.
- Light-blocking strips: Black foam or rubber strips designed to block light.
Here’s a quick comparison of popular sealing materials:
| Material | Best For | Durability | Cost |
|---|---|---|---|
| Adhesive Foam | Air, dust, light | 1-2 years | Low |
| Brush Seal | Noise, bugs, air | 3-5 years | Medium |
| Silicone Strip | Noise, drafts, bugs | 5+ years | Medium |
| Door Sweep | Bottom gap, drafts | 3-5 years | Medium |
Non-obvious tip: Some weatherstripping can cause the door to stick if it’s too thick. Always test before final installation.
What Tools And Supplies You’ll Need
Gathering the right tools will make the job much easier and faster. Here’s a checklist:
- Measuring tape
- Scissors or utility knife
- Screwdriver or drill (for door sweeps or hard seals)
- Cleaning supplies (cloth, mild cleaner)
- Pencil or marker
- Weatherstripping or seal kit (as chosen above)
- Step stool or ladder (if your door is tall)
- Level (for door sweep installation)
Pro insight: Many people forget to clean the door and wall before adding seals. Dust and dirt can prevent adhesive from sticking, so wipe surfaces thoroughly.
Credit: www.hobbyfarms.com
Step-by-step Guide To Sealing A Sliding Barn Door
Sealing a barn door isn’t difficult, but it does require careful work. Follow these steps for the best results.
1. Clean All Surfaces
Start by cleaning the edges of the door and the wall where you’ll install seals. Use a mild cleaner and make sure everything is dry before you continue. This helps the adhesive stick better and last longer.
2. Measure The Gaps
Use your measuring tape to find the exact length and width of each gap—top, sides, and bottom. Write down your measurements so you don’t forget.
3. Choose Your Sealing Method
Decide which type of seal you’ll use for each area. For example, you might use foam tape for the sides and a brush sweep for the bottom.
Example: If your bottom gap is 3/8 inch, choose a door sweep that covers at least that much.
4. Cut Sealing Materials To Size
Cut foam, brush, or rubber strips to fit the exact length of your door’s edges. Lay them out before removing adhesive backing or drilling.
5. Attach Side Seals
Peel the adhesive backing and press the foam or brush strip firmly along the side edge of the door or wall (whichever the door slides against). Start from the top and work down, pressing as you go.
Tip: For best results, attach the seal to the stationary surface (usually the wall), not the moving door, unless your door has a wide edge.
6. Attach Top Seal
If there’s a gap above the door, install a foam or brush strip along the top edge. Make sure it doesn’t interfere with the door’s movement. Test by sliding the door open and closed.
7. Install Bottom Seal
For a door sweep, hold it against the bottom of the door and mark screw positions. Drill pilot holes, then screw the sweep in place. If using adhesive, press firmly and hold for 30 seconds.
If you prefer a brush sweep, make sure the bristles just touch the floor—not so tight that the door drags.
8. Seal Overlapping Gaps
If your door overlaps the wall, add a thin foam or brush strip to the edge to block light and sound. For large overlaps, you may need a thicker seal.
9. Test The Door
Slide the door back and forth several times. Make sure the seals don’t catch or cause too much friction. Adjust as needed.
10. Inspect And Adjust
Check all sealed areas for gaps. If you see light or feel air, add more seal or adjust the strips. Some areas may need a double layer if the gap is wide.
Hidden pitfall: If the seal is too thick, the door may not close fully or may pop off its track. Always choose the thinnest seal that blocks the gap.
Advanced Sealing Methods
For those who want maximum privacy, energy savings, or soundproofing, consider these upgrades:
Double Or “shadow” Doors
Install a second sliding door on the other side of the opening. This creates an air gap, which is excellent for blocking sound and drafts.
Acoustic Seals
Use high-density rubber or silicone strips, often sold as “acoustic door seals. ” These are more expensive but are used in recording studios and offices for serious noise blocking.
Door Jamb Kits
Some companies sell barn door sealing kits that include pre-measured strips for all sides. These are more expensive but save time and guesswork.
Floor Guides With Seals
Some floor guides (which keep the door from swinging) now include a built-in seal. These block both dust and drafts at the bottom edge.
| Solution | Best For | Estimated Cost |
|---|---|---|
| Standard Seals | Light/air blocking | $10–$30 |
| Acoustic Seals | Soundproofing | $40–$100 |
| Double Doors | Maximum privacy | $200–$500 |
| Jamb Kits | All-in-one solution | $50–$120 |
Expert note: Most people overestimate how much a single barn door can block sound. For best results, combine good sealing with soft furnishings (carpets, curtains) in the room.
Sealing For Different Needs
For Bedrooms
Choose seals that block both sound and light. Use black foam or silicone for side and top gaps, and a brush sweep at the bottom. Check for privacy by turning on a light in the next room and looking for leaks.
For Bathrooms
Focus on privacy and moisture. Use closed-cell foam seals, which resist water and won’t mold. Consider an overlap seal to reduce sound and odors.
For Offices
Noise is often the biggest problem. Use acoustic brush seals and a silicone sweep. Add a second door or heavy curtain if you need more privacy.
For Exterior Barn Doors
If your sliding door leads outside, use weatherproof silicone or rubber seals. These last longer and resist rain, wind, and sun. Seal all four sides for best results.
Bonus tip: For exterior doors, regularly check seals for cracks or gaps, especially after storms or extreme heat.
Common Mistakes And How To Avoid Them
Even a small mistake can ruin a sealing job. Here are errors to watch for:
- Using seals that are too thick: This can stop the door from moving or cause it to pop off the track.
- Not cleaning surfaces: Dust and grease stop adhesive from sticking.
- Ignoring the bottom gap: Many people forget the floor gap, which is the biggest source of drafts and bugs.
- Over-tightening screws: This can bend the door sweep, making it less effective.
- Not checking for full closure: Always test the door after sealing. It should slide smoothly and sit flush.
- Using indoor seals outside: Only use weatherproof materials for exterior doors.
- Underestimating noise leaks: Sound moves through even tiny gaps. For real soundproofing, use acoustic seals and add soft materials in the room.
Non-obvious insight: Some barn doors warp over time, making gaps larger or smaller. Check your seals every few months and adjust as needed.
Credit: jacorinc.com
Maintenance Tips For Lasting Results
- Inspect seals every six months for wear, cracks, or peeling.
- Clean seals gently with a damp cloth to remove dust and dirt.
- Replace foam seals every 1–2 years, or when they lose their spring.
- Check for mold on bathroom or exterior seals. Replace at the first sign.
- Lubricate the door track if the door drags after adding seals (use silicone spray, not oil).
- Tighten screws on sweeps or guides as needed.
Helpful advice: Keep extra seal material on hand. Small repairs are easier if you have matching supplies ready.
Cost And Time Estimates
Sealing a sliding barn door is a budget-friendly project for most people.
- Material costs: $10–$100, depending on seal type and door size.
- Tools: Most people have what they need at home.
- Time required: 1–2 hours for a standard door.
If you hire a handyman, labor may cost $50–$150 extra.
Real-world example: Sarah in Texas sealed her 36-inch barn door with silicone strips and a brush sweep for under $40. She noticed her bedroom was quieter and her air conditioning ran less often.
When To Call A Professional
Most sealing jobs are DIY-friendly, but call a pro if:
- The door is very heavy or extra tall
- The gap is over 1 inch wide (may need custom trim)
- You want full soundproofing for music or work studios
- The door is warped or damaged
A professional can recommend custom seals or even install a second door for maximum effect.
Environmental And Health Benefits
Sealing barn doors isn’t just about comfort—it’s good for your wallet and the planet:
- Lower energy use: Less heating and cooling means lower bills and less pollution.
- Better air quality: Seals keep out dust, pollen, and bugs.
- Less noise pollution: A quieter home reduces stress and helps with sleep.
- Reduced allergens: For allergy sufferers, blocking outside air matters a lot.
Did you know? According to the EPA, indoor air can be up to five times more polluted than outdoor air, especially if doors and windows aren’t sealed well.
Stylish Solutions: Keeping Looks And Function
Many worry that sealing a barn door will ruin its look. The good news: modern weatherstripping is slim and comes in many colors (white, black, clear). Place strips on the side facing the wall, so they’re nearly invisible.
Creative tip: For a rustic look, use dark brush or rubber seals that blend with the door’s color. Some companies sell decorative trim with built-in seals.
You can also add a matching wood trim on the wall side to hide the seal entirely.
Barn Door Sealing: Quick Comparison
Here’s a summary of sealing methods and what they’re best for:
| Method | Blocks Air | Blocks Sound | Blocks Light | Best For |
|---|---|---|---|---|
| Foam Tape | Yes | Some | Yes | Bedrooms, offices |
| Brush Seal | Yes | Yes | Some | Living rooms, studios |
| Silicone Strip | Yes | Yes | Yes | Bathrooms, exterior doors |
| Door Sweep | Yes | Some | Yes | All doors (bottom gap) |
Credit: jacorinc.com
Frequently Asked Questions
How Do I Know If My Barn Door Needs Sealing?
If you feel drafts, hear noise from outside the room, see light coming through gaps, or notice dust collecting near the door, you probably need to seal it. Try the flashlight test: shine a light from one side of the closed door and check for leaks on the other side.
Can Sealing A Barn Door Make It Soundproof?
Sealing a barn door will reduce noise, but it won’t make the room fully soundproof. For best results, use acoustic seals and consider adding a second door or heavy curtain. Remember, even small gaps let sound through.
What Seal Works Best For Large Gaps?
For gaps over 1/2 inch, use a thick silicone or rubber seal. If the gap is more than 1 inch, you may need to add wood trim to the wall or door before sealing. Always measure carefully and test before permanent installation.
Will Sealing The Door Make It Hard To Slide?
If you use seals that are too thick, the door may stick. Choose slim, flexible weatherstripping and test the door after installing each piece. If it drags, try a thinner seal or adjust the door track.
Is There A Fire Safety Risk With Sealing Barn Doors?
No, weatherstripping and seals used for doors are made to meet safety standards. Just make sure the door can open easily in an emergency. For exterior barn doors, only use materials rated for outdoor and fire safety.
If you want to see more about weatherstripping and sealing best practices, visit the U.S. Department of Energy’s air sealing guide.
Sealing your sliding barn door is a smart upgrade that pays off with more comfort, lower bills, and a quieter, cleaner home. With the right materials and a careful approach, you’ll enjoy the look of your barn door—without the unwanted drafts, noise, or light.
Take your time, follow these steps, and your barn door will work as well as it looks.