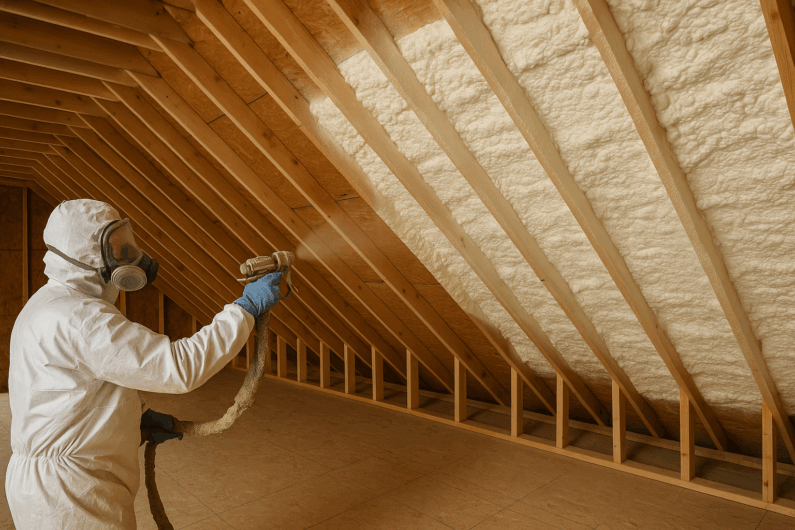
Spray foam insulation has changed the way people insulate homes and buildings. No longer is it only for professionals or large construction projects. Today, many homeowners and DIY enthusiasts are exploring how to spray foam ceiling spaces themselves. If done right, spray foam provides excellent energy savings, reduces noise, and even helps prevent mold.
But the process involves more than just spraying a can. It requires planning, the right tools, safety steps, and attention to detail. This guide will show you every step to spray foam a ceiling, share tips that most beginners miss, and help you avoid costly mistakes.
Why Spray Foam For Ceilings?
Spray foam is not just another insulation option. It offers a unique set of advantages, especially for ceilings. Unlike fiberglass or cellulose, spray foam expands to fill every gap, crack, and hole. This means better air sealing, which translates to lower energy bills and consistent indoor temperatures. It also acts as a sound barrier, making rooms quieter. Another benefit is its resistance to water and mold, which is crucial in areas prone to leaks or humidity.
There are two main types: open-cell and closed-cell spray foam. Open-cell foam is lighter, softer, and less expensive, but not as strong against moisture. Closed-cell foam is denser, more rigid, and provides a vapor barrier, but costs more. Your choice depends on climate, budget, and ceiling type.
Planning The Project
Before buying spray foam or picking up a sprayer, you need a clear plan. This is where most DIYers go wrong—they rush, skip prep, or buy the wrong materials.
Assessing Your Ceiling
Start by inspecting your ceiling. Look for:
- Gaps, holes, or cracks where air leaks might occur
- Signs of moisture or mold
- Existing insulation that needs to be removed
- Electrical wiring, lights, or fixtures that need protection
Measure the area you want to insulate. Multiply length by width to get the square footage. Add about 10% extra for overlaps and mistakes.
Choosing The Right Spray Foam
Not all spray foam is created equal. Here’s a simple comparison:
| Type | R-Value per Inch | Water Resistance | Cost per Board Foot | Best For |
|---|---|---|---|---|
| Open-Cell | ~3.5 | Low | $0.40–$0.65 | Interior ceilings, soundproofing |
| Closed-Cell | ~6.5 | High | $1.00–$1.50 | Attics, moisture-prone areas |
Open-cell foam is great if you want to fill larger spaces on a budget and don’t have moisture concerns. Closed-cell is ideal if you need a higher R-value or a vapor barrier.
Estimating Quantity
Most spray foam kits specify coverage in board feet (1 sq ft at 1 inch thick). For example, if your ceiling is 500 sq ft and you want 2 inches of foam:
500 Sq Ft X 2 Inches = 1,000 Board Feet
Always buy a bit more than you think you’ll need.
Tools And Materials
Gather everything before you start. Here’s what you’ll need:
- Spray foam kit (choose size based on your calculation)
- Protective clothing (coveralls, gloves, boots)
- Full-face respirator or mask with organic vapor filters
- Safety goggles (if not using a full-face mask)
- Drop cloths or plastic sheeting
- Painter’s tape
- Utility knife
- Ruler or measuring tape
- Ladder or scaffolding (for high ceilings)
- Trash bags (for old insulation and debris)
Preparing The Ceiling
A well-prepped workspace leads to a smoother, safer spray foam job. Many people skip steps here, but it can save hours and avoid big mistakes.
Cleaning And Drying
Make sure your ceiling is dry and clean. Remove dust, cobwebs, and old insulation. If you see any signs of mold or moisture, fix these issues before adding spray foam. Moisture trapped under foam can cause rot and health problems.
Protecting Surroundings
Cover floors, walls, and anything you don’t want foam on with drop cloths or plastic sheeting. Use painter’s tape to secure plastic around lights, fans, or vents. Spray foam is sticky and almost impossible to remove once dried.
Sealing Gaps
Use caulk or foam sealant to close large holes or cracks. Spray foam can expand, but very large gaps might need extra support. Double-check for air leaks around pipes, wires, or joints.
Turning Off Power
If you have recessed lighting or electrical boxes in the ceiling, turn off the power at the breaker. Cover these fixtures to prevent foam from getting inside. Foam can overheat some lights, creating a fire risk.
Safety First: Protecting Yourself
Spray foam contains chemicals that can irritate skin, eyes, and lungs. Proper safety is not optional.
Personal Protective Equipment (ppe)
Always wear:
- Disposable coveralls: Protects skin and clothing
- Nitrile gloves: Keeps chemicals off your hands
- Boot covers: Prevents tracking foam around
- Full-face respirator: Filters out toxic fumes
The chemicals in spray foam are most dangerous during application and for a few hours after. Ventilate the area as much as possible. If you’re working in a small or sealed room, use fans to blow air out of windows or doors.
Safe Handling Tips
- Do not eat, drink, or smoke while spraying foam
- Wash hands and face after finishing
- If foam gets on your skin, wipe off immediately with a dry cloth, then wash with soap and water
- If you feel dizzy or short of breath, leave the area and get fresh air
Most beginners forget that spray foam fumes can travel far. Always keep children and pets away until the foam has cured and the area has aired out (usually 24 hours).
Credit: thegreencocoon.com
Step-by-step: How To Spray Foam A Ceiling
Now comes the main event. Spraying foam is not complicated, but it requires focus and patience.
1. Read All Instructions
Every spray foam kit is different. Read the manufacturer’s manual from start to finish. Some kits require you to shake the tanks or pre-warm the chemicals.
2. Prepare The Spray Foam Kit
Most kits have two tanks (A and B). These chemicals mix at the spray gun tip. Some kits need the tanks to be at a certain temperature (usually 70°F–80°F) for the best results. Cold chemicals do not mix well and may clog the gun.
3. Test The Spray Pattern
Before spraying your ceiling, test the spray on a piece of cardboard or scrap wood. Adjust your speed and distance to get a steady, even layer. This helps avoid blobs or empty spots.
4. Start Spraying
Hold the spray gun about 18–24 inches from the surface. Move in smooth, steady passes. Aim for a layer about 1 inch thick per pass. Foam expands quickly—if you spray too much, it can fall or drip.
Spray in overlapping rows, like mowing a lawn. If you want a thicker layer, let the first coat cure, then add a second coat.
5. Monitor Expansion
Spray foam can expand up to 30–60 times its liquid size. Watch for overfilling or bulges. If foam expands past the joists or the surface, let it cure, then trim with a utility knife.
6. Avoid Common Mistakes
- Do not spray too thick in one pass. Thick foam can trap heat and cure poorly.
- Do not spray over wet surfaces.
- Do not stop mid-pass and restart in the same spot—this can cause uneven bumps.
7. Check For Missed Spots
After the foam has expanded and cured (usually 1–2 hours), inspect your work. Fill any missed spots or thin areas with another light pass.
8. Clean Up
Carefully peel off drop cloths and tape. Trim any excess foam that sticks past joists or looks messy. Dispose of used tanks and materials according to local hazardous waste rules.
Dealing With Obstacles And Special Situations
Spray foam works great for open, flat ceilings. But real homes often have beams, wires, or odd shapes.
Around Electrical Wires And Fixtures
Spray foam is safe for most modern wiring, but avoid covering junction boxes or light fixtures directly. Mark these spots with tape before spraying so you can avoid them. For recessed lights, use a foam-safe cover or metal box to keep insulation away.
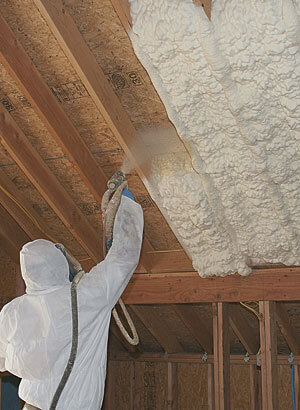
Sloped Or Vaulted Ceilings
Spray foam is ideal for sloped ceilings because it sticks well and fills gaps. Work from the lowest point upward. Gravity will help the foam settle and expand evenly.
Exposed Beams
If you want to keep wooden beams exposed for style, use painter’s tape or cardboard to shield them. Remove covers right after spraying, before foam cures completely, for a clean edge.
Small Spaces Or Tight Joists
Use short bursts of spray and a slow, steady hand. Don’t force the gun into tight spaces; instead, use the tip to direct foam where needed.
Credit: www.buildingenergyvt.com
Open-cell Vs. Closed-cell Spray Foam In Ceilings
Choosing the right type of spray foam is one of the most important decisions. Here’s a deeper look at how each performs in ceilings:
| Feature | Open-Cell | Closed-Cell |
|---|---|---|
| R-Value (per inch) | 3.5–3.7 | 6.0–7.0 |
| Air Seal | Excellent | Excellent |
| Water Barrier | Poor | Good |
| Soundproofing | Very Good | Good |
| Flexibility | Flexible | Rigid |
| Cost | Lower | Higher |
| Best Use | Interior ceilings, conditioned spaces | Unvented attics, moisture-prone ceilings |
Tip most beginners miss: Closed-cell foam adds structural strength to your ceiling or roof deck. If you’re in a hurricane- or tornado-prone area, this can be a huge bonus.
Curing And Post-application Steps
Spray foam needs time to fully cure and reach its final strength.
Curing Time
- Most spray foams cure to the touch in 1–2 hours
- Full curing can take 24 hours or more, depending on temperature and humidity
Keep the area ventilated during this time. Do not allow anyone to enter the space without PPE until the curing is complete.
Trimming And Finishing
Use a utility knife or saw to trim any foam that sticks out past joists or the ceiling line. Be careful not to cut too deep and expose gaps.
If you plan to drywall or finish over the foam, wait until it is completely cured. Some building codes require a thermal barrier (like drywall) over spray foam for fire safety.
Inspecting Your Work
Double-check for:
- Even coverage
- No exposed ceiling or gaps
- No foam covering vents, fixtures, or wiring boxes
If you find thin spots, spray a little more foam and let it cure.
Cleaning Up
Spray foam is difficult to clean once cured. Dispose of all used materials safely. If foam got on something by accident, let it dry, then scrape or sand it off.
Common Mistakes And How To Avoid Them
Many first-time users make similar mistakes. Here’s how to avoid them:
- Spraying Too Thick: Apply in thin layers. Thick foam can crack or cure poorly.
- Not Wearing PPE: Even short exposure to fumes can irritate eyes and lungs.
- Skipping Prep: Rushing prep leads to foam in the wrong places or missed spots.
- Not Checking Temperature: Cold chemicals clog guns and don’t expand well.
- Ignoring Moisture Problems: Spray foam traps moisture. Fix leaks first.
- Overfilling Gaps: Foam expands a lot. Start with less, add more if needed.
- Using the Wrong Type of Foam: Closed-cell for moisture, open-cell for sound.
Advanced tip: If you’re insulating a ceiling with HVAC ducts, use closed-cell foam to prevent condensation and energy loss.
Cost Considerations
Spray foam is not cheap, but the savings add up over time. The average cost to spray foam a ceiling is $1. 00–$3. 00 per square foot (materials only). Professional installation can double that cost.
Example: For a 1,000 sq ft ceiling, expect to pay:
- DIY: $1,000–$3,000
- Professional: $2,000–$6,000
If your home is older or has unique needs (like cathedral ceilings), costs may be higher.
Hidden costs: Don’t forget disposal fees for old insulation, waste collection, and PPE. Sometimes, local codes require inspections or fire barriers, which add to the price.
Building Codes And Safety Regulations
Before starting, check your local building codes. Many areas require:
- A thermal barrier (like 1/2-inch drywall) over spray foam in living spaces
- Special foam types for fire resistance
- Inspections for new insulation
Some insurance policies require proof that foam insulation meets safety standards. Failing to follow codes can lead to fines or insurance issues.
When To Hire A Professional
Some ceiling spray foam jobs are best left to professionals:
- Very high or hard-to-reach ceilings
- Ceilings with lots of wiring, plumbing, or HVAC
- Large or commercial spaces
- If you’re sensitive to chemicals or have health concerns
Professionals have better equipment, more powerful sprayers, and experience with tricky spots. They can also handle disposal and code compliance.
Environmental Impact And Health
Many people ask if spray foam is safe and eco-friendly. Most spray foams use chemicals that can give off fumes (called VOCs) during application. After curing, high-quality foams are stable and safe.
Non-obvious insight: Some newer spray foams use water as a blowing agent, which is better for the environment than older foams that used HFCs.
If you want the greenest option, look for low-VOC, water-blown spray foams. Always ventilate well and wait until the foam is cured before using the room.
For more on the environmental aspects of spray foam, check out this Wikipedia article.
Maintenance And Longevity
Spray foam, when properly installed, can last 30 years or more. It does not settle or sag like fiberglass. Still, a few maintenance tips will help:
- Check for water leaks or roof damage yearly. Moisture can degrade foam.
- Inspect for cracks or gaps, especially after severe weather.
- Do not poke, puncture, or cut into foam unless necessary.
If you notice discoloration or a musty smell, investigate for hidden leaks. Damaged foam should be removed and replaced.
Real-world Example: Attic Ceiling Spray Foam
Sarah, a homeowner in Illinois, insulated her 700 sq ft attic ceiling with closed-cell spray foam. She spent $2,100 on materials and did the work herself over a weekend.
Results: Her energy bills dropped by 30% in the first winter. The upstairs bedrooms stayed warmer, and ice dams on the roof stopped forming. Sarah’s only regret was not buying a larger foam kit—she ran short and had to order more, delaying the project.
Lesson: Always buy extra foam, and plan for more time than you think you’ll need.
Frequently Asked Questions
What Is The Difference Between Open-cell And Closed-cell Spray Foam For Ceilings?
Open-cell spray foam is softer, less expensive, and expands more, which is great for filling large gaps and providing soundproofing. Closed-cell spray foam is denser, more rigid, and creates a moisture barrier, making it ideal for ceilings exposed to possible leaks or high humidity. Closed-cell foam also offers a higher R-value per inch, which means better insulation in thinner layers.
Can I Spray Foam Over Old Insulation?
It’s not recommended to spray foam directly over old insulation like fiberglass or cellulose. Old insulation can trap moisture, dust, and mold, which would be sealed in by the foam. Always remove any existing insulation, clean the area, and make sure it is dry before applying spray foam.
How Thick Should Spray Foam Insulation Be On A Ceiling?
The recommended thickness depends on your climate and the type of foam. For most homes, open-cell foam is applied at 6 to 10 inches, while closed-cell foam is effective at 2 to 4 inches. Always check local building codes for minimum R-value requirements in your area.
Is Spray Foam Safe For Homes With Children And Pets?
Once cured (usually after 24 hours), high-quality spray foam is considered safe and stable. During application and curing, keep children and pets far away due to the strong fumes and chemicals. Make sure the area is well ventilated and only re-enter after the recommended time.
How Do I Dispose Of Leftover Spray Foam And Empty Tanks?
Do not throw spray foam chemicals or tanks in regular trash. Check local hazardous waste disposal regulations. Many spray foam kits include instructions for safe disposal. Some local waste centers accept empty tanks and cured foam as construction waste, but always follow local guidelines for safety.
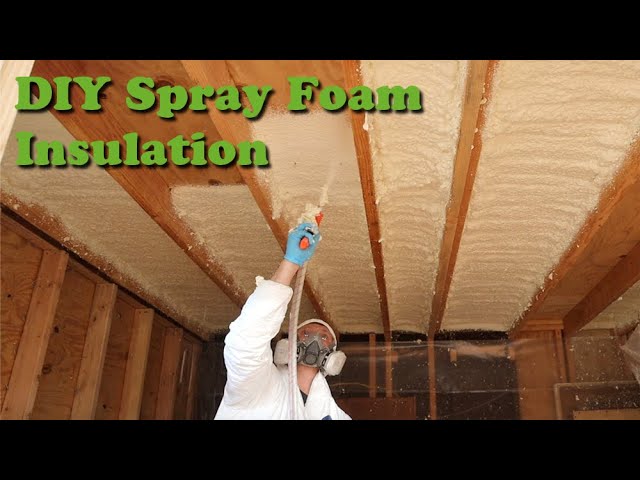
Credit: www.youtube.com
Bringing It All Together
Learning how to spray foam a ceiling can seem intimidating, but with the right planning, tools, and careful attention to detail, it’s a project most handy homeowners can tackle. The key is preparation—measuring carefully, choosing the correct foam type, wearing proper safety gear, and taking your time with each step.
Remember, spray foam is an investment that pays off in comfort, energy savings, and even sound reduction. By following the guidance in this article, you’ll avoid common pitfalls, work safely, and achieve professional-quality results. Don’t skip safety steps, and always check building codes before you start.
With patience and care, your next spray foam ceiling project will be a lasting success.