Setting a Dometic thermostat can seem tricky at first. With a few steps, you can easily manage it.
Are you struggling to set your Dometic thermostat? Proper thermostat settings ensure comfort in your RV or camper. Whether you’re new to RV life or just need a refresher, this guide will help you. We’ll break down each step clearly.
Say goodbye to confusion and hello to a comfortable living space. With our tips, you’ll be a pro in no time. Let’s get started on making your RV as cozy as possible.
Credit: www.youtube.com
Introduction To Dometic Thermostat
Understanding how to set your Dometic thermostat can keep your space comfortable. The Dometic thermostat is user-friendly and efficient. It helps you control the temperature with ease. This guide will help you understand its benefits and settings.
Why Choose Dometic Thermostat?
Dometic thermostats are reliable and easy to use. They offer precise temperature control. Many users find them durable. The design is sleek and modern. It fits well in any setting. The thermostat also has clear display options. This ensures you can read it easily.
Benefits Of Proper Thermostat Settings
Setting your thermostat correctly saves energy. It keeps your room at a comfortable temperature. This can lead to lower energy bills. Proper settings also extend the life of your heating and cooling systems. It reduces wear and tear on the equipment. This means fewer repairs and less maintenance.
Correct settings also improve air quality. This is because your system runs more efficiently. It filters air better. So, you breathe cleaner air.
Getting Started
Setting up your Dometic thermostat can seem daunting at first. But with the right guidance, you’ll have it working in no time. This guide will walk you through the initial steps. Let’s start with unpacking and gathering the necessary tools.
Unpacking Your Dometic Thermostat
First, open the box and take out the thermostat. Ensure all components are present. Here’s a quick checklist:
- Thermostat unit
- Wall mount plate
- Instruction manual
- Wiring harness
- Batteries (if included)
Check everything is undamaged. If any part is missing or broken, contact customer support.
Necessary Tools And Materials
Before installing, gather the following tools and materials:
| Tool | Purpose |
|---|---|
| Phillips screwdriver | For mounting the thermostat |
| Flathead screwdriver | For wiring connections |
| Drill | For creating mounting holes |
| Wire strippers | To prepare wires for connection |
| Level | To ensure the thermostat is straight |
Having these tools ready will make the installation smoother. Now, you are prepared to set up your Dometic thermostat efficiently.
Installation Process
Setting up your Dometic thermostat involves several steps. The installation process ensures your thermostat works efficiently. Follow this guide for a smooth installation experience.
Mounting The Thermostat
First, find a suitable location for your thermostat. It should be away from direct sunlight and drafts. This ensures accurate temperature readings.
Use a level to ensure the thermostat is straight. Mark the mounting holes with a pencil. Drill holes at the marked spots. Insert wall anchors if needed. Attach the thermostat base to the wall using screws.
Secure the base firmly. Make sure it does not move. Proper mounting is crucial for optimal performance.
Connecting The Wires
Before connecting the wires, turn off the power supply. This prevents any electrical hazards.
Carefully remove the cover of the thermostat. Identify the terminals on the base. Each terminal is labeled. Refer to the wiring diagram in the manual. Connect the corresponding wires to the terminals.
Use a small screwdriver to secure the wires. Ensure each wire is tightly connected. Loose connections can cause malfunctions.
Once all wires are connected, place the cover back on. Turn the power back on. Check if the thermostat powers up correctly. If it does, your installation is successful.
Here is a simple table for quick reference:
| Step | Description |
|---|---|
| 1 | Find a suitable location |
| 2 | Mark and drill holes |
| 3 | Attach the thermostat base |
| 4 | Turn off the power supply |
| 5 | Connect the wires |
| 6 | Secure wires and attach the cover |
| 7 | Turn on the power |
Credit: www.airgear.store
Powering Up
Powering up your Dometic thermostat is a simple process. This section will guide you through the initial steps to get your thermostat up and running. Follow these instructions to ensure your thermostat is powered up correctly and ready for use.
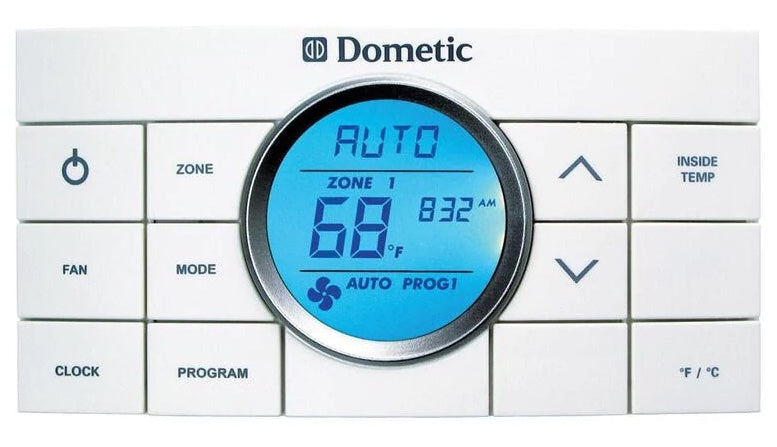
Turning On The Thermostat
To begin, locate the power button on your Dometic thermostat. The power button is usually on the front or side of the unit. Press and hold the power button for a few seconds. The display screen should light up, indicating the thermostat is now on.
If the screen does not light up, check the power source. Ensure the thermostat is properly connected to a power supply. If necessary, refer to the user manual for troubleshooting tips.
Initial Configuration
Once the thermostat is powered on, it’s time for the initial configuration. Follow these steps to set up your thermostat:
- Press the Menu button to access the settings.
- Navigate to the Setup option using the arrow buttons.
- Select Setup and follow the on-screen instructions to configure your preferences.
- Set the current date and time. This ensures accurate scheduling.
- Choose your preferred temperature units (Celsius or Fahrenheit).
After completing the initial configuration, your thermostat is ready for use. You can now set your desired temperature and enjoy a comfortable environment.
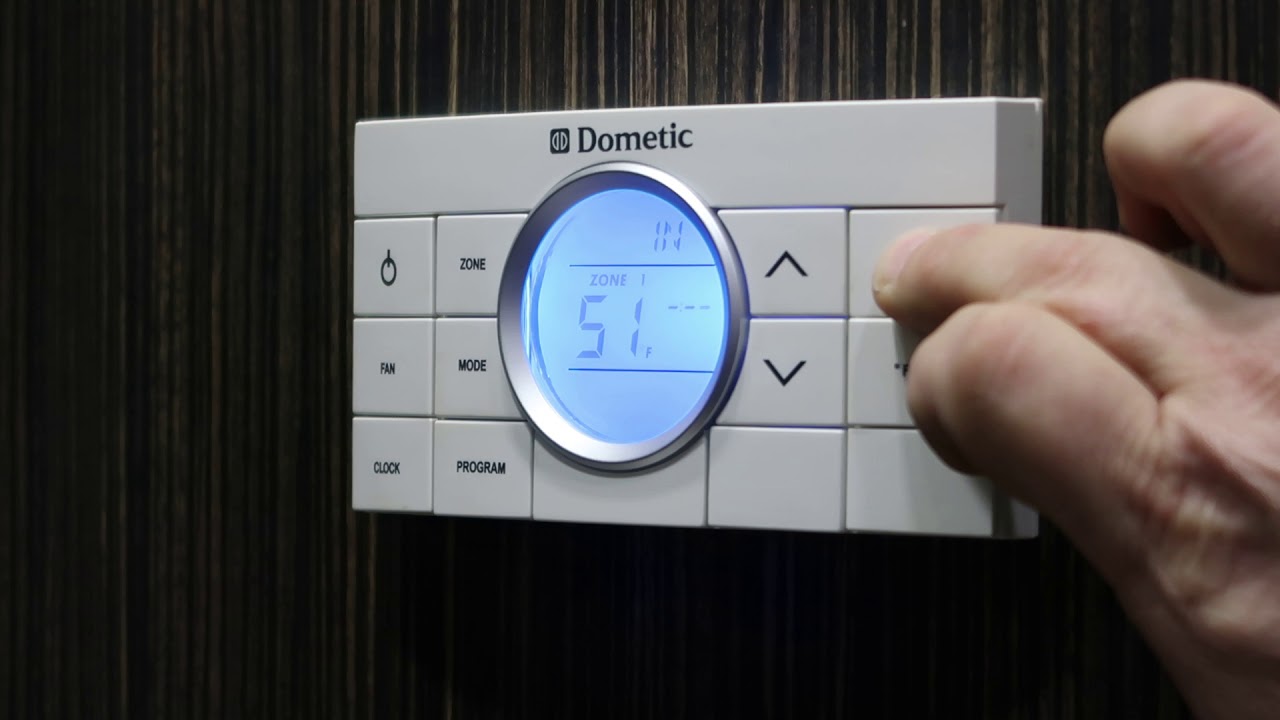
Setting Temperature Preferences
Setting your Dometic thermostat to the right temperature ensures comfort. You can adjust both heating and cooling settings easily. This section will guide you through the steps.
Adjusting Heating Settings
To set the heating preferences, start by pressing the mode button. Select the heating option from the menu. Use the up and down buttons to adjust the desired temperature. Confirm your setting by pressing the mode button again. The thermostat will now maintain this temperature.
Adjusting Cooling Settings
For cooling preferences, press the mode button and choose the cooling option. Adjust the temperature using the up and down buttons. Once you reach your desired cooling temperature, press the mode button to confirm. The thermostat will maintain the set temperature.

Credit: thermostat.guide
Advanced Settings
Understanding the advanced settings of your Dometic thermostat can help you get the most out of your system. These settings allow for better customization and control, ensuring your living space is always comfortable. Let’s dive into the key aspects of these advanced settings.
Programming Schedule
One of the most useful features is the ability to program a schedule. This allows you to set different temperatures for different times of the day. You can create a schedule for weekdays and another for weekends.
Here’s a simple way to set it:
- Press the “Menu” button.
- Select “Schedule” from the menu.
- Choose “Weekdays” or “Weekends”.
- Set the desired temperature for each time slot.
- Save your settings by pressing “OK”.
By following these steps, you can ensure your home is always at the perfect temperature.
Using Additional Features
The Dometic thermostat comes with several additional features that enhance your comfort. These include fan speed settings, humidity control, and more.
Here’s a brief overview:
| Feature | Description |
|---|---|
| Fan Speed | Adjust the fan speed to low, medium, or high. |
| Humidity Control | Set the desired humidity level for your space. |
| Energy Saving Mode | Automatically adjusts settings to save energy. |
To access these features:
- Press the “Menu” button.
- Select “Settings”.
- Choose the feature you want to adjust.
- Make your desired changes.
- Press “Save” to apply the changes.
These features offer greater control over your environment, making your space more comfortable and energy-efficient.
Troubleshooting Common Issues
Setting a Dometic thermostat can sometimes be tricky. Especially if you encounter issues. Proper troubleshooting can save you time and frustration. Below, we address some common problems and how to resolve them.
Addressing Error Codes
When your Dometic thermostat displays an error code, it indicates a specific issue. Here are some common error codes and their solutions:
| Error Code | Description | Solution |
|---|---|---|
| E1 | Communication failure | Check the connection between the thermostat and control board. |
| E2 | Sensor failure | Inspect and possibly replace the temperature sensor. |
| E3 | High/low voltage | Ensure the power supply is stable and within the correct range. |
When To Seek Professional Help
Sometimes, troubleshooting on your own might not solve the issue. Here are scenarios where you should seek professional help:
- Persistent error codes: If error codes reappear after troubleshooting.
- Wiring issues: If you suspect a problem with the thermostat wiring.
- Unusual sounds: If your HVAC system makes strange noises.
Professional technicians have the tools and expertise to diagnose complex issues. Don’t hesitate to call for help if you’re unsure.
Maintaining Your Thermostat
Maintaining your Dometic thermostat is essential for its longevity and efficiency. Regular care ensures it functions correctly, saving you money and keeping your space comfortable. Here are some tips to maintain your thermostat.
Cleaning And Care
Dust and debris can affect your thermostat’s performance. Clean it regularly to keep it in top condition. Follow these steps:
- Turn off the thermostat before cleaning.
- Use a soft, dry cloth to wipe the surface.
- For stubborn dirt, slightly dampen the cloth with water.
- Avoid using harsh chemicals or abrasive materials.
- Check the vents and ensure they are clear of obstructions.
By keeping the thermostat clean, you can avoid malfunctions and ensure accurate readings.
Software Updates
Many modern thermostats, including Dometic models, feature software that may require updates. These updates can improve performance and add new features. Here’s how to manage software updates:
- Check the manufacturer’s website for available updates.
- Download the update file to a USB drive or other storage device.
- Follow the instructions provided by the manufacturer to install the update.
- Restart the thermostat after the update is complete.
Regular updates ensure your thermostat runs smoothly and benefits from the latest improvements.
Frequently Asked Questions
How Do I Set My Dometic Thermostat?
To set your Dometic thermostat, press the mode button to select the desired setting. Adjust temperature using the up/down arrows.
What Are The Different Modes On Dometic Thermostat?
Dometic thermostats typically have modes like Cool, Heat, Fan, and Auto. Each mode controls temperature differently.
How Do I Switch Between Fahrenheit And Celsius?
Press and hold the up and down arrows simultaneously for a few seconds. This toggles between Fahrenheit and Celsius.
Why Is My Dometic Thermostat Not Working?
Check power supply and connections. Ensure the thermostat is set to the correct mode. Replace batteries if needed.
How Do I Reset My Dometic Thermostat?
Turn off the thermostat, disconnect power for a few minutes, then reconnect. This often resolves minor issues.
Conclusion
Setting your Dometic thermostat can be easy with these steps. Follow the guide to enjoy comfortable temperatures in your space. Adjusting settings correctly ensures efficient energy use. Double-check your manual for model-specific details. Regular maintenance keeps the system running smoothly.
With practice, you’ll handle the thermostat confidently. Stay comfortable and keep your energy bills in check. Happy adjusting!