When you step on your floor and notice a soft spot or sagging, you might worry about what’s happening underneath. In homes with a crawl space, rotted floor joists are a common and serious issue. These beams support the floor above, and when they weaken, your house can feel unsafe. Replacing a rotted floor joist in a crawl space is not a small job, but with the right plan, tools, and safety steps, it’s possible for a determined homeowner or a professional. This guide will walk you through every part of the process, using clear language, practical tips, and expert insights to help you restore your home’s strength.
Understanding Rotted Floor Joists
Before you start ripping out beams, it’s important to understand why floor joists rot and what signs to look for. Floor joists are horizontal supports that rest under your floor. In crawl spaces, they’re exposed to ground moisture, leaks, and poor ventilation. Over time, moisture leads to wood rot, which destroys the joist’s ability to support weight.
Common signs of rotted joists:
- Floors feel bouncy or sagging
- Cracks or uneven floors above the crawl space
- Musty smells from below the house
- Visible mold or wood that looks soft or crumbly
Some homeowners miss early signs, thinking it’s just an old house settling. But waiting too long can let the problem spread. If you see these signs, inspect your crawl space as soon as possible.
Why Joists Rot In Crawl Spaces
Rotted floor joists don’t happen overnight. Most cases are caused by one or more of these factors:
- High humidity: Poor ventilation lets moisture build up, soaking wood over time.
- Plumbing leaks: Water from broken pipes or drains can drip directly onto joists.
- Poor drainage: Rainwater or groundwater seeping into the crawl space keeps wood wet.
- Lack of vapor barrier: Without plastic sheeting on the ground, moisture rises and attacks wood.
A study by the U.S. Department of Housing found that homes without crawl space vapor barriers had up to 30% higher wood moisture content, making rot much more likely. Ignoring these issues after repair can mean the rot returns.
Credit: www.baycrawlspace.com
Assessing The Damage
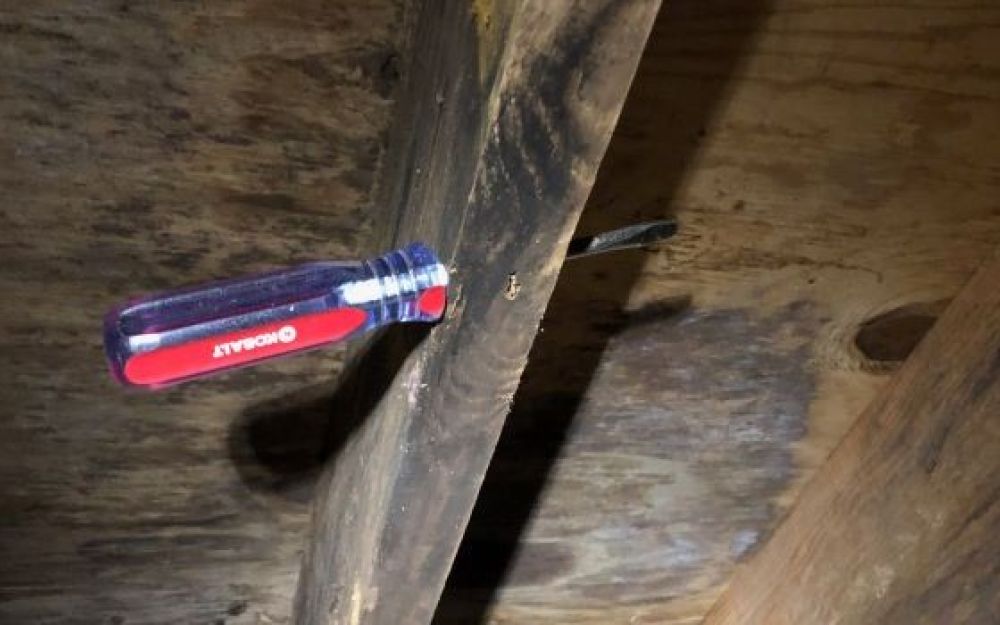
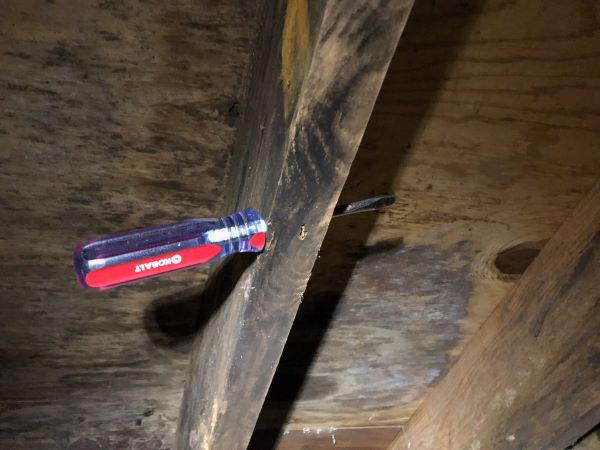
Before replacing a joist, you need to know how bad the problem is. Not all rot means every joist must go. Careful inspection helps you decide if you need repair or full replacement.
How to assess rotted joists:
- Use a screwdriver to poke the wood. If it sinks in easily or flakes apart, the joist is likely too far gone.
- Check both ends of the joist, where it sits on the foundation. These areas rot first.
- Look for mold, dark stains, or water lines.
- Tap the joist with a hammer. Healthy wood sounds solid; rotten wood sounds hollow.
Pro tip: Sometimes, only a short section of joist is rotted. In this case, you might be able to reinforce (sister) the joist instead of total replacement. But if over half the joist is rotten, or it’s cracked, full replacement is safest.
Tools And Materials Needed
Being prepared saves time and keeps you safe. Here’s what you’ll need to replace a rotted floor joist in a crawl space:
Tools:
- Circular saw or reciprocating saw
- Pry bar and hammer
- Cordless drill and screws/bolts
- Floor jack or bottle jack (for lifting)
- Flashlight or headlamp
- Measuring tape
- Level
- Safety glasses, gloves, and dust mask
Materials:
- Pressure-treated lumber (same size as old joist, often 2×8 or 2×10)
- Metal joist hangers or support brackets
- Construction adhesive
- Shims or wood blocks
- Vapor barrier plastic (if none is present)
- Galvanized nails or structural screws
Don’t overlook: Some people try to save money by using regular wood. But only pressure-treated lumber resists rot and termites in a crawl space. Skipping this step is a common, costly mistake.
Preparing The Crawl Space
This part is not glamorous, but it’s vital. Good prep work makes the repair smoother and safer.
- Turn off power and water: If plumbing or wires are nearby, shut off power and water to avoid accidents.
- Clear out debris: Remove insulation, trash, or old wood from the area.
- Dry the area: Use a fan or dehumidifier if the crawl space is damp. Rot repair only works on dry wood.
- Check for pests: Look for termites, ants, or rodents that may have caused or worsened the damage.
- Plan your path: Crawl spaces are tight. Make sure you can move tools and new lumber in and out.
Non-obvious tip: Bring all tools and hardware into the crawl space before you begin. Crawling in and out multiple times wastes time and energy.
Safety Precautions
Working in a crawl space is physically tough and sometimes dangerous. Protect yourself by following these safety rules:
- Wear a dust mask: Mold and wood dust are common.
- Gloves and eye protection: Prevent cuts and splinters.
- Proper clothing: Long sleeves and pants keep bugs and irritants away.
- Watch for asbestos/lead: Old homes may have dangerous materials. If you see suspicious insulation or paint, stop and call a pro.
- Work with a partner: If you get stuck or injured, you’ll need help.
Experience-based insight: Most injuries in crawl spaces happen not from tools, but from slips, head bumps, or breathing bad air. Take breaks and keep your phone nearby.
Steps To Replace A Rotted Floor Joist In Crawl Space
Now you’re ready for the main event. Here’s a clear, step-by-step guide for replacing a rotted floor joist.
1. Support The Floor
Before removing a joist, you must support the floor above. This prevents sagging or collapse.
- Place a temporary beam (like a 4×4) under the floor, parallel to the joist.
- Use a floor jack or bottle jack to gently lift the beam until the floor is level.
- Don’t over-lift; raise slowly over an hour if needed.
Critical tip: Supporting the floor is not optional. Skipping this step can crack drywall, break tiles, or even collapse part of the floor.
2. Remove The Damaged Joist
- Use a saw to cut the rotted joist into manageable pieces.
- Pry out the old wood, being careful not to damage nearby wires or pipes.
- Remove nails, screws, or metal hangers from both ends.
Pro insight: If only part of the joist is rotted, cut it back to solid wood. You may be able to sister a new joist alongside the old one.
3. Inspect The Supporting Structure
Check the sill plate (wood on top of foundation) and beam/pier the joist rests on. If these are also rotted, you’ll need to repair or replace them before installing a new joist. Otherwise, your new joist may fail quickly.
4. Cut And Prepare The New Joist
- Measure the old joist length and cut a new pressure-treated one to match.
- Test fit the new joist in the space before final installation.
- If using joist hangers, attach them to the sill plate or main beam.
5. Install The New Joist
- Slide the new joist into place, resting on the sill plate and main beam.
- Secure both ends with joist hangers and galvanized nails or structural screws.
- For extra strength, apply construction adhesive where the joist meets the supports.
Non-obvious insight: Use a level to ensure the new joist is flat. An uneven joist can make your floor wavy.
6. Remove Temporary Support
Once the new joist is solidly in place, carefully lower and remove the temporary beam and jack. The floor above should now rest on the new joist.
7. Reinforce As Needed
If the floor is wide or carries heavy loads, sister an additional joist alongside the new one for added strength. Attach with bolts or screws every 16–24 inches.
8. Restore Insulation And Vapor Barrier
Replace any insulation you removed. Install a new vapor barrier (6-mil plastic) on the crawl space floor to prevent future moisture.
9. Clean Up And Check Your Work
- Remove old wood, nails, and debris from the crawl space.
- Double-check all fasteners and make sure nothing is loose.
- Test the floor above for movement—there should be none.
Practical tip: Take photos of your work. If you sell your house, proof of professional repairs can increase value.
When To Call A Professional
Replacing a floor joist is tough, dirty work. While many handy homeowners can do it, certain cases require a pro:
- Multiple joists are rotted
- Foundation or sill plate damage is found
- The crawl space is too tight or unsafe to access
- You’re not confident in your carpentry skills
A structural engineer can also help if you’re unsure about the best repair method. Spending a bit more for safety is always wise.
Credit: www.baycrawlspace.com
Sistering Joists: An Alternative To Full Replacement
Not every rotted joist must be removed. If the rot is limited, you can sometimes sister (reinforce) the old joist instead. This means attaching a new joist alongside the old one, sharing the load.
Advantages of sistering:
- Faster and less invasive
- Less risk of damaging other parts
- Can often be done with less lifting
Limitations:
- The old joist must be mostly solid
- Doesn’t solve the problem if rot is widespread
Here’s a comparison of sistering vs full joist replacement:
| Method | Best For | Cost | Longevity |
|---|---|---|---|
| Sistering | Minor/partial rot | Lower | Good if done right |
| Full Replacement | Severe or widespread rot | Higher | Best/safest |
If you’re unsure, consult a pro before deciding.
Preventing Future Joist Rot
Once you’ve fixed the floor, keeping it dry is critical. Here’s how to prevent future rot:
- Install a vapor barrier: Cover the crawl space ground with thick plastic.
- Improve ventilation: Open vents or install a dehumidifier.
- Fix leaks: Repair plumbing or drainage problems promptly.
- Gutter maintenance: Make sure water drains away from your home.
- Regular inspections: Check your crawl space yearly for signs of trouble.
Statistic: According to the International Association of Certified Home Inspectors, homes with proper vapor barriers and drainage have 70% fewer crawl space moisture issues.
Costs And Time Involved
Replacing a single floor joist can take 4–8 hours for an experienced DIYer, or 1–2 days for a full repair. Hiring a contractor can cost between $1,500 and $4,000 per joist, depending on access and local rates.
Here’s an estimated breakdown:
| Item | DIY Cost | Pro Cost |
|---|---|---|
| Lumber and hardware | $80–$200 | Included |
| Jacks, tools (rental) | $50–$150 | Included |
| Labor | None | $1,200–$3,500 |
| Total per joist | $130–$350 | $1,500–$4,000 |
Remember, if you find more rot as you work, costs can rise. Always budget a bit extra.
Common Mistakes To Avoid
Even good DIYers make errors with floor joist repairs. Watch out for these:
- Using non-treated wood in a crawl space (it will rot again)
- Failing to support the floor before removing the joist
- Not fixing the source of moisture
- Installing the new joist unevenly
- Ignoring minor rot on beams or sill plates
- Sealing the crawl space before it’s fully dry
Expert tip: The most expensive mistake is covering up the problem without fixing the cause. Always solve moisture issues first.

Credit: foundationprosfl.com
Signs You Need To Replace (not Just Repair) A Joist
Sometimes, patching or sistering isn’t enough. Replace the joist if you see:
- Deep cracks or splits along the length
- Wood is soft for more than 1/3 of its length
- Significant mold or insect damage
- The joist is sagging even after temporary support
If in doubt, always choose safety. Floors can be rebuilt, but your family’s well-being is priceless.
Real-world Example
Let’s walk through a real-life scenario. Joe, a homeowner in Georgia, noticed his kitchen floor sagging. He found that a leaking pipe had soaked his crawl space for months, rotting two joists. He supported the floor with jacks, cut away the damaged wood, and installed new pressure-treated joists and hangers.
He also laid a vapor barrier and fixed the leak.
After two weekends of work and $600 in materials, his floor is solid, and the problem hasn’t returned. Joe’s key lesson: “Don’t just fix the wood—fix the water problem too.”
Comparing Diy Vs Hiring A Professional
Some people love a hands-on project. Others want peace of mind. Here’s how DIY and hiring a pro compare:
| Factor | DIY | Professional |
|---|---|---|
| Cost | Lower | Higher |
| Time | 1–2 days per joist | Faster (with crew) |
| Skill needed | Moderate to High | Expert |
| Warranty | None | Often included |
| Safety | Depends on you | Professional standards |
If you feel unsure at any step, hiring a pro is wise. For more detailed guidance, the Family Handyman offers practical tips and visuals.
Frequently Asked Questions
How Do I Know If My Floor Joist Is Rotted?
Common signs include sagging floors, musty smells, visible mold, or wood that feels soft or crumbles when pressed with a screwdriver. If you’re unsure, inspect your crawl space or call a pro for advice.
Can I Replace A Rotted Floor Joist Myself?
Yes, if you have basic carpentry skills, the right tools, and can work safely in a crawl space. However, if there’s extensive damage or you’re unsure, hiring a professional is safest.
What Type Of Wood Should I Use For New Joists?
Always use pressure-treated lumber for crawl spaces. It resists moisture, rot, and termites. Standard lumber will not last in damp conditions.
How Can I Prevent Joist Rot In The Future?
Install a vapor barrier, fix leaks quickly, keep gutters clear, and check the crawl space every year. Good ventilation and prompt repairs are key.
Is It Better To Sister Or Replace A Rotted Joist?
Sistering works for minor, localized damage where most of the joist is solid. For severe or widespread rot, full replacement is safer and longer-lasting.
Replacing a rotted floor joist in a crawl space is a tough but doable job with the right planning and care. Whether you do it yourself or hire a pro, fixing both the wood and the moisture problem ensures your home stays safe and strong for years to come.