A damaged or pitted concrete garage floor can be more than just an eyesore. Over time, small pits, holes, and craters become larger, catch dirt, collect water, and can even damage your car tires. Many homeowners worry that fixing these problems is expensive or needs professional help. The good news is, you can often repair a pitted garage floor yourself and restore its strength and appearance—if you know the right steps.
Whether you want to fix small pits, or your entire garage floor looks like the surface of the moon, you’re in the right place. This guide will walk you through the causes, preparation, repair methods, and important tips for long-lasting results.
By the end, you’ll have the confidence and knowledge to tackle your concrete garage floor repair with professional results.
What Causes Pitted Concrete Garage Floors?
To fix a problem well, it helps to know how it started. Pitting happens when small pieces of concrete break away, leaving shallow holes. Here are the main reasons why this happens in garages:
- Freeze and thaw cycles: Water seeps into the concrete, freezes, expands, and breaks the surface apart. This is common in places with cold winters.
- Poor installation: If the original concrete mix was weak or not finished properly, it will pit and crumble faster.
- Deicing salts: Road salt from car tires eats into the concrete, especially during winter.
- Heavy loads: Repeatedly parking heavy vehicles or using heavy tools can cause stress cracks and pits.
- Age and wear: Over time, even good concrete can break down, especially if not sealed.
Many people are surprised to learn that moisture is a silent enemy. Even if your garage looks dry, vapor from the ground can rise up and cause damage. That’s why surface repairs alone sometimes fail—if moisture isn’t managed, pits come back.
How To Assess The Damage
Before you start, check how bad the pitting is. This helps you choose the right repair method and materials.
Basic Steps To Evaluate
- Clean the Floor: Sweep and wash the area to see the real extent of the damage.
- Check Pit Depth: Use a small screwdriver or key to test how deep the pits are. Most garage pitting is less than 1/4 inch deep, but some holes are much deeper.
- Look for Cracks: Are there cracks connecting the pits? If so, you’ll need to repair those as well.
- Test for Moisture: Tape a piece of plastic (about 2×2 feet) flat onto the floor. Leave it overnight. If water forms underneath, you have a moisture problem.
How To Decide On A Repair Approach
- Light Pitting (less than 1/4 inch deep): Surface patching or resurfacing is enough.
- Moderate Pitting (1/4 to 1/2 inch deep): Use a thicker repair mortar.
- Severe Pitting (deeper than 1/2 inch or widespread): May need professional help or a new top layer.
Most garages have light to moderate pitting. But if you’re unsure, take photos and ask at your local hardware store or consult a concrete pro.
Tools And Materials You’ll Need
Having the right tools makes repair easier and gives better results. Here’s what you’ll need for most garage floor pitting repairs:
- Wire brush or stiff broom
- Pressure washer (optional, but very useful for deep cleaning)
- Chisel and hammer (for breaking loose concrete)
- Shop vacuum for dust and debris
- Concrete patching compound or repair mortar
- Mixing bucket and trowel
- Finishing trowel or float
- Protective gloves and goggles
- Primer or bonding agent (check product instructions)
- Floor grinder or concrete sander (for large areas)
- Paint roller or brush (for sealers or coatings)
- Epoxy coating or concrete sealer (optional, but recommended)
For large repairs, renting a concrete grinder or using a powered mixing tool can save you hours of work.
Concrete Repair Products: Quick Comparison
Different products work best for different types of pits. Here’s a simple comparison:
| Product Type | Best For | Drying Time | Typical Cost (per sq ft) |
|---|---|---|---|
| Concrete Patch | Small pits, cracks | 2-4 hours | $0.30–$0.80 |
| Resurfacer | Large areas, shallow pits | 6-8 hours | $0.50–$1.20 |
| Epoxy Mortar | Deep pits, high-traffic zones | 4-6 hours | $1.00–$2.50 |
Check the product label for indoor/outdoor use and make sure it’s suitable for garage floors.
Preparing The Floor For Repair
Proper preparation is the key to a long-lasting repair. Skipping this step is the top reason for failed fixes.
Cleaning And Degreasing
Garage floors collect oil and grease, which stop new concrete from sticking. Here’s how to prepare:
- Sweep or vacuum all loose dirt and debris.
- Degrease: Use a concrete degreaser or a mix of hot water and dish soap. Scrub oily spots with a stiff brush.
- Rinse: Wash the floor with clean water. A pressure washer is best, but a hose and broom work for small areas.
- Dry: Let the floor dry completely. Concrete absorbs water, so wait at least 24 hours if you washed heavily.
Removing Loose Concrete
Use a hammer and chisel to knock away any loose or crumbling concrete around the pits. Go slightly past the edges of the pits, so you’re working with solid material. A wire brush helps remove small particles.
Surface Roughening
If you’re repairing a larger area, roughen the surface with a concrete grinder or sander. This helps new materials bond better. For small pits, scratching the area with the chisel or a wire brush is enough.
Priming The Area
Some repair compounds need a bonding primer. This helps the repair stick and prevents future pitting. Follow the instructions on your product.
Pro tip: If you skip priming, even good patching material can pop out after a few months, especially in garages with temperature swings.

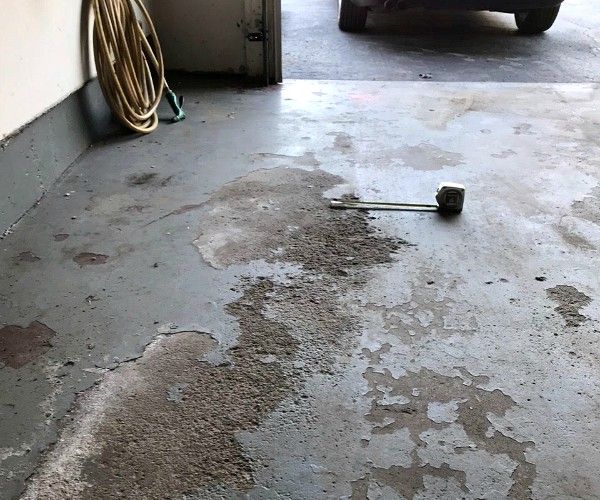
Credit: armorgarage.com
Step-by-step Repair Methods
You’re ready to start fixing those pits. The right method depends on the size and depth of the damage.
Repairing Small Pits And Craters
Most homeowners face small, shallow pits. Here’s the process:
- Mix the patching compound following package instructions. Use only as much as you can apply in 15-20 minutes.
- Fill each pit with the compound using a trowel. Press it in firmly to remove air pockets.
- Smooth the surface with a finishing trowel or float. Slightly feather the edges to blend with the old concrete.
- Let it cure as the product label says. Keep the area dry and avoid walking on it during this time.
For best results, don’t try to fill very deep pits all at once. Fill in layers, letting each layer dry before adding more.
Repairing Moderate To Large Pits
Deeper pits need a stronger material, like epoxy mortar or special concrete repair mortar.
- Undercut the edges with a chisel so the patch has a “key” to hold onto. The sides of the pit should be slightly wider at the bottom than at the top.
- Apply bonding agent if needed.
- Mix the repair mortar to a thick, peanut butter-like consistency.
- Trowel the mortar into the pit. Pack it tightly.
- Level the surface with a float. For large holes, use a straight piece of wood as a screed to keep it flat.
- Cure as recommended—usually at least 24 hours for full strength.
Resurfacing For Widespread Pitting
If your floor has hundreds of small pits or a rough, flaky surface, resurfacing is the best fix.
- Prepare the floor as above: Clean, degrease, and roughen.
- Mix the resurfacer in a large bucket. This material is more fluid than patching compound.
- Pour onto the floor and spread with a squeegee or long-handled trowel.
- Work in small sections so the material doesn’t dry before you spread it.
- Feather the edges into undamaged concrete.
- Let it cure—no driving or walking on it until dry (usually 24-48 hours).
Resurfacing covers all the old pits with a new, thin layer (usually 1/8 inch to 1/4 inch thick).
Common Pitfalls During Repair
Even experienced DIYers can make mistakes. Here are two insights most beginners miss:
- Temperature matters: Never repair concrete below 50°F or above 90°F. Extreme temperatures cause weak bonds.
- Moisture ruins repairs: If you see new moisture stains or water after cleaning, wait until the floor is fully dry before patching.
Finishing Touches: Sealing And Coating
Once your patches are cured, protect your hard work. Garages are tough environments, so sealing is smart.
Why Seal Or Coat Your Garage Floor?
- Blocks water and salt from entering the concrete
- Makes cleaning oil and dirt much easier
- Reduces future pitting and cracking
- Improves the look of your garage
Types Of Sealers And Coatings
Here’s a comparison of common options:
| Type | Protection Level | Appearance | Durability | Cost (per sq ft) |
|---|---|---|---|---|
| Penetrating Sealer | Good against moisture | Invisible, matte | 5-10 years | $0.20–$0.50 |
| Acrylic Sealer | Basic protection | Satin to glossy | 1-3 years | $0.15–$0.30 |
| Epoxy Coating | Excellent | Glossy, many colors | 5-10 years | $0.75–$2.00 |
| Polyurethane | Very high | Glossy, very durable | 7-12 years | $1.00–$3.00 |
Epoxy and polyurethane are the toughest for garage use. Choose based on your budget and how much use your garage gets.
How To Apply A Sealer Or Epoxy
- Wait for repairs to fully cure.
- Clean the floor again. Any dust or oil will stop the sealer from sticking.
- Apply the sealer or coating with a roller or brush. Work in small sections.
- Let dry as recommended—most epoxies need 24-48 hours before driving on them.
Pro tip: Most failures happen when the floor isn’t clean or dry. Don’t rush this step!
Credit: allgaragefloors.com
Preventing Future Pitting
Now that your garage floor is smooth, keep it that way. Prevention is easier than more repairs.
- Seal the floor every few years (or as the product recommends).
- Clean spills quickly, especially oil and gasoline.
- Avoid deicing salts in winter. Brush off snow and ice before parking.
- Use rubber mats under tires or where you park heavy vehicles.
- Check for new cracks or pits every spring and fall. Fix small problems early.
Small habits make a big difference over years. Most homeowners ignore their garage floor until it’s badly damaged—don’t make that mistake.
When To Call A Professional
DIY repairs work for most pitted floors, but sometimes you need expert help. Call a pro if:
- Pitting is very deep (more than 1 inch)
- The floor moves or has large cracks
- Moisture keeps coming back even after repairs
- You want a decorative finish like colored epoxy with chips
A professional has the tools to resurface or even pour a new top layer if needed. This costs more, but may save money if your floor is badly damaged.
Cost Of Repairing A Pitted Garage Floor
Budget is important for most homeowners. Here’s what you can expect:
- Small DIY repair (patching): $30–$75 for materials (covers up to 100 sq ft)
- Resurfacing a one-car garage: $100–$300 for materials
- Professional resurfacing: $3–$6 per sq ft
- Full replacement: $6–$10 per sq ft
Doing it yourself saves money, especially on small to medium jobs. But don’t cut corners on good patching material or sealers—cheap products often fail in 1-2 years.
Two Overlooked Details For Lasting Results
Many guides forget these two important points:
- Check your garage slope: If water pools near pits, you may need to adjust the floor slope for drainage. Standing water makes pits come back.
- Control humidity: Use a dehumidifier or improve ventilation if your garage is damp. High humidity speeds up pitting and mold.
These steps can add years to your repair.
Example Repair Timeline
To help with planning, here’s a sample schedule for fixing a two-car garage floor:
- Day 1: Clean, degrease, dry floor (allow overnight to dry)
- Day 2: Remove loose concrete, roughen surface, apply primer
- Day 3: Patch pits, let dry (cover with plastic if needed)
- Day 4: Sand/level patches, clean dust
- Day 5: Apply sealer or epoxy, allow to cure
Weather and drying times may change your schedule, but most jobs are done in under a week.
Safety Tips For Concrete Repair
Working with concrete isn’t risky if you take basic precautions:
- Wear gloves—concrete can irritate your skin.
- Use eye protection when chipping or mixing.
- Ventilate the garage when using chemicals or epoxies.
- Clean up spills quickly—wet concrete is slippery.
If you’re using power tools, read the instructions and keep children and pets away.

Credit: www.familyhandyman.com
Frequently Asked Questions
How Long Do Garage Floor Repairs Last?
A well-done repair with good materials should last 5-10 years. Sealing the floor and keeping it dry will help your repairs last even longer.
Is It Better To Patch Or Resurface A Pitted Garage Floor?
Patching is good for small, shallow pits. If more than 25% of your floor is pitted, resurfacing gives better, longer-lasting results and a smoother finish.
Can I Use Regular Concrete Mix For Repairs?
It’s better to use a special repair compound. Regular concrete doesn’t stick well to old concrete and may crack or pop out. Repair mortars and epoxies are made to bond tightly.
How Soon Can I Drive On A Repaired Garage Floor?
Wait at least 24-48 hours after patching or resurfacing. For epoxy coatings, follow the manufacturer’s directions—some need up to 72 hours before heavy use.
Where Can I Find More Information On Concrete Floor Maintenance?
The American Concrete Institute offers detailed guides and research for both homeowners and professionals. For more, visit American Concrete Institute.
A pitted garage floor doesn’t have to be permanent. With the right steps, materials, and a little patience, you can make your garage look and perform like new. The effort you invest now will protect your home and make daily life a little smoother for years to come.