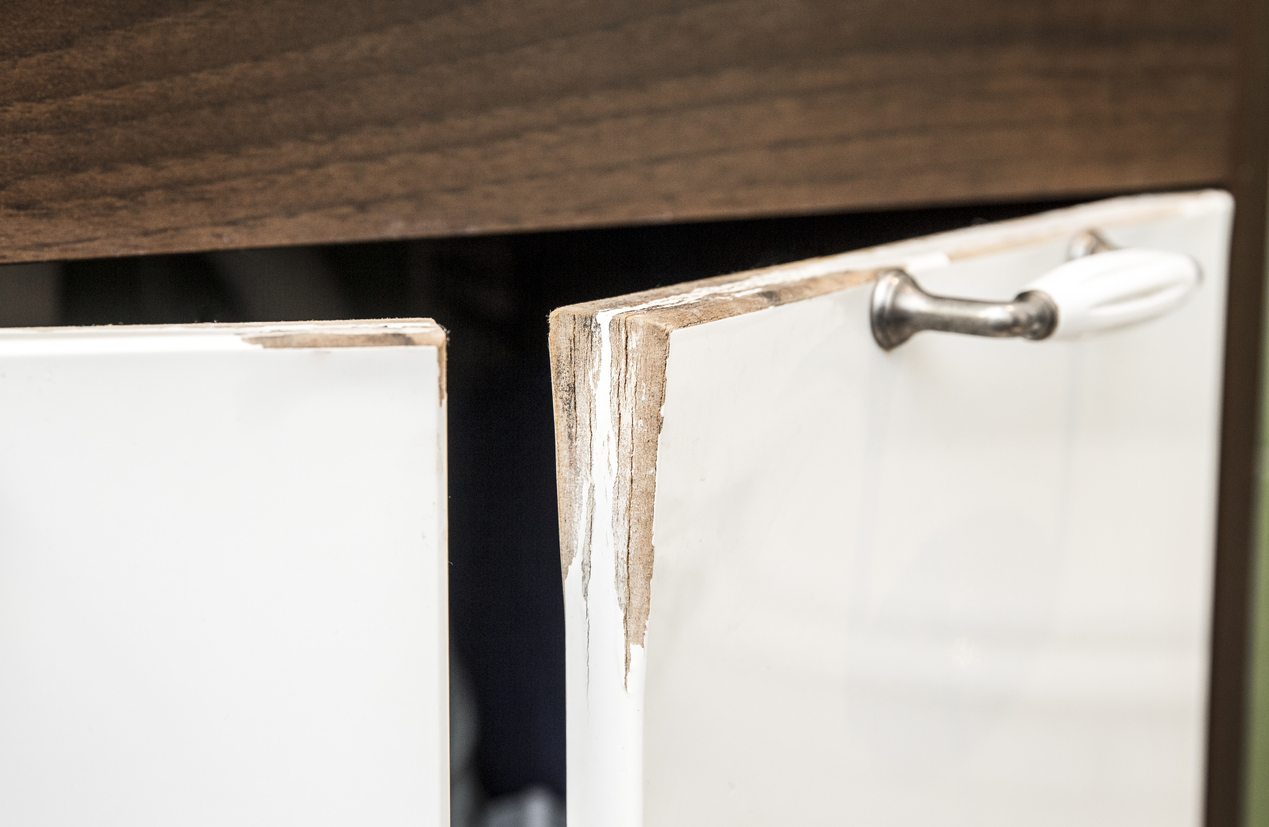
If you have particle board cabinets at home, you may notice the thin top layer—called veneer—starts to peel, bubble, or chip over time. This is a common problem, especially in kitchens and bathrooms where moisture, heat, and constant use can break down the adhesive. While peeling veneer can make cabinets look old and neglected, you don’t have to replace the whole cabinet. You can repair the damage with some patience and basic tools, bringing your cabinets back to life and saving money.
In this guide, you’ll learn how to repair peeling veneer on particle board cabinets, step by step. We’ll look at why veneer peels, the tools and materials you’ll need, how to fix different types of damage, and how to prevent the problem from happening again.
If you want your cabinets to look neat and last longer, you’re in the right place.
Why Veneer Peels From Particle Board Cabinets
Before learning the repair process, it’s important to know why veneer peels in the first place. Veneer is a thin layer of wood or laminate glued onto a base, such as particle board. Particle board is made from wood chips and resin, pressed together to create an affordable, flat surface.
The main causes of peeling veneer are:
- Moisture: Water can seep into small cracks, softening the glue and causing the veneer to lift.
- Heat and Humidity: Kitchens and bathrooms often have fluctuating temperatures and humidity, which can cause the veneer to expand and contract, loosening the bond.
- Physical Damage: Scratches, bumps, and repeated use can break the edge seal, starting the peeling process.
- Age and Wear: Over time, glues dry out and lose their strength, especially if the cabinets are old.
- Poor Quality Adhesive: Some cabinets use low-grade glue that doesn’t last as long.
Knowing the cause helps you make repairs that last. For example, if you fix the veneer but don’t stop moisture problems, the repair won’t hold.
Tools And Materials Needed
To repair peeling veneer, gather the right tools and supplies. Here are the essentials:
- Wood glue (preferably waterproof or carpenter’s glue)
- Utility knife or sharp craft knife
- Putty knife
- Clamps or heavy books
- Sandpaper (120, 180, and 220 grit)
- Wood filler or putty (for missing veneer areas)
- Painter’s tape
- Clean cloths
- Small paintbrush
- Screwdriver (for removing hardware)
- Contact cement (optional for large areas)
- Replacement veneer (if the old piece is missing)
- Masking tape
- Ruler or measuring tape
- Protective gloves
Optional but useful:
- Hair dryer or heat gun (for softening old glue)
- Mineral spirits (for cleaning surfaces)
- Finish (varnish, polyurethane, or paint, if you plan to refinish)
Having everything ready saves time and helps you get a smooth result.

Credit: www.reddit.com
Assessing The Damage
Not all veneer damage is the same. Some problems are small and easy to fix, while others need more work. Start by examining your cabinet:
- Is the veneer just lifting at the edge, or is a large section peeling?
- Is the veneer chipped or missing?
- Is the particle board underneath swollen or damaged?
- Are there bubbles under the veneer?
Here’s a quick guide to common problems:
| Type of Damage | Repair Needed | Difficulty Level |
|---|---|---|
| Edge Lifting | Glue and clamp | Easy |
| Large Area Peeling | Reglue or replace veneer | Medium |
| Missing Veneer | Patch and fill | Medium to Hard |
| Bubbles | Inject glue and clamp | Medium |
| Swollen Particle Board | Replace section | Hard |
Understanding the type of damage lets you choose the right method and tools for the job.
Preparing The Cabinet For Repair
Preparation is key to a good repair. Follow these steps before you start gluing or filling:
- Remove cabinet doors and hardware: Take off handles, knobs, and hinges if possible. This makes it easier to work on a flat surface.
- Clean the surface: Wipe the area with a damp cloth to remove dust, grease, or old glue. For sticky residue, use mineral spirits.
- Dry the area: Let everything dry completely. Moisture will prevent the glue from holding.
- Protect nearby surfaces: Use painter’s tape to cover areas you don’t want to get glue or filler on.
- Check for loose veneer: Carefully lift the peeling area with a putty knife. Don’t force it—only lift what is already loose.
If you skip cleaning or let dirt stay under the repair, the glue won’t bond well. Taking time now saves you frustration later.
Credit: www.handhillscabinets.com
Repairing Lifting Or Peeling Veneer
If the veneer is lifting but not broken or missing, you can usually fix it with glue and pressure. Here’s how:
- Gently lift the veneer: Use a utility knife or putty knife to raise the loose section. Be careful not to crack or split the piece.
- Clean under the veneer: Remove any old, dry glue with sandpaper or a scraper. Wipe away dust.
- Apply wood glue: Squeeze a small amount of glue under the veneer. A small paintbrush or toothpick helps reach deep spots.
- Spread the glue evenly: Press the veneer down to spread the glue under the whole area.
- Clamp or weight: Cover the repair with wax paper or plastic wrap, then clamp it tightly or place heavy books on top. Leave for at least 8 hours.
- Remove excess glue: Wipe away glue that squeezes out with a damp cloth before it dries.
- Sand the edges: Once dry, lightly sand the seam for a smooth finish.
Pro tip: For small edge lifts, masking tape can act as a clamp. For larger sections, use several clamps for even pressure.
Fixing Bubbles Under Veneer
Bubbles form when air gets trapped or glue fails beneath the veneer. They look bad but are usually easy to fix.
- Puncture the bubble: Use a sharp utility knife or needle to make a small slit in the center of the bubble.
- Inject glue: Squeeze wood glue or contact cement into the hole. A syringe or toothpick works well.
- Press down: Smooth the bubble flat with your hand or a roller.
- Clamp or weight: Place wax paper on top, then clamp or weigh the area for several hours.
- Clean up: Remove any glue that leaks out.
Non-obvious insight: Bubbles often come back if you don’t use enough glue or pressure. Make sure to clamp tightly and let the glue dry overnight.
Repairing Chipped Or Missing Veneer
If a piece of veneer is missing, you need to patch the area so it looks neat and lasts.
Using Wood Filler
For small chips or corners:
- Clean the area: Sand the edges smooth.
- Apply wood filler: Use a putty knife to fill the missing spot. Overfill slightly.
- Let it dry: Follow the drying time on the package.
- Sand flush: Sand the repair until it’s level with the surrounding veneer.
- Prime and paint: For painted cabinets, touch up with matching paint. For wood finish, stain the filler if possible.
Replacing Veneer
For large missing sections:
- Cut a new piece of veneer: Use a ruler and utility knife to match the size of the missing area.
- Test fit: Make sure the patch fits perfectly with no gaps.
- Apply contact cement: Spread glue on both the patch and the particle board. Wait a few minutes for it to become tacky.
- Press the patch in place: Align the grain if possible.
- Clamp or weight: Press firmly for a strong bond.
- Sand and finish: Once dry, sand the edges. Stain or paint to match.
Real-life tip: Veneer sheets are sold at hardware stores or online. You can often find matching patterns for common cabinets.
Repairing Swollen Or Damaged Particle Board
If moisture has made the particle board underneath swell, the surface may feel soft or spongy. This is harder to repair, but not impossible.
- Remove damaged veneer: Cut away the loose veneer with a utility knife.
- Dry the area: Use a hair dryer or let it air dry for several days.
- Sand down swelling: Use coarse sandpaper to level the swollen part. Don’t sand too much; you don’t want a hole.
- Rebuild surface: If needed, apply wood filler in thin layers, letting each layer dry before adding more.
- Sand smooth: Once the surface is hard and flat, sand with finer grit.
- Add new veneer: Glue a new piece of veneer as described above.
Non-obvious insight: If the swelling is deep or the board is crumbling, replacement is safer. Trying to repair severely damaged board can lead to future problems.
Finishing Touches: Sanding, Painting, Or Staining
After repairing, you want the fix to blend in with the rest of the cabinet. Here’s how:
- Sanding: Always sand the repaired area lightly with 180 or 220 grit sandpaper. This smooths out glue lines and filler.
- Priming: If you plan to paint, use a primer to seal the repair and help the paint stick.
- Painting: Choose a high-quality cabinet paint. Apply thin, even coats.
- Staining: For wood veneer, match the stain color. Test on a scrap piece first.
- Sealing: Use a protective finish like polyurethane, especially in kitchens and bathrooms.
A neat finish makes the repair invisible and protects it from future damage.
Preventing Veneer Peeling In The Future
Once you’ve fixed your cabinets, it’s smart to keep them looking good. Here are ways to prevent peeling:
- Avoid moisture: Wipe spills immediately and fix leaks under sinks.
- Use gentle cleaners: Strong chemicals can break down glue and finish.
- Control humidity: Use an exhaust fan when cooking or showering.
- Protect edges: Don’t let water sit on cabinet edges, and use bumpers to soften door impacts.
- Check hardware: Loose handles and hinges can tear veneer—tighten screws as needed.
- Refinish regularly: Every few years, add a new coat of finish to protect the surface.
Bonus tip: Small felt pads on cabinet doors can prevent chipping at corners.
When To Replace Instead Of Repair
Sometimes, repair isn’t enough. If you notice any of these signs, replacement is a better choice:
- Large areas of swollen, crumbling particle board
- Multiple patches of missing veneer
- Cabinets feel weak or soft all over
- Mold or heavy water damage is present
In these cases, new doors or cabinets will last longer and look better. But for most small and medium problems, repair is a smart and affordable choice.
Common Mistakes To Avoid
Even simple repairs can go wrong if you miss these details:
- Not cleaning surfaces: Dirt and grease stop glue from sticking.
- Using too much glue: Excess glue can leave a mess and make the veneer uneven.
- Skipping clamps: Without pressure, glue can’t bond strongly.
- Rushing the drying time: Let glue and filler cure fully for a lasting repair.
- Choosing the wrong filler: Use wood filler for wood veneer, not wall spackle.
- Ignoring the cause: If you don’t fix moisture or impact problems, peeling will return.
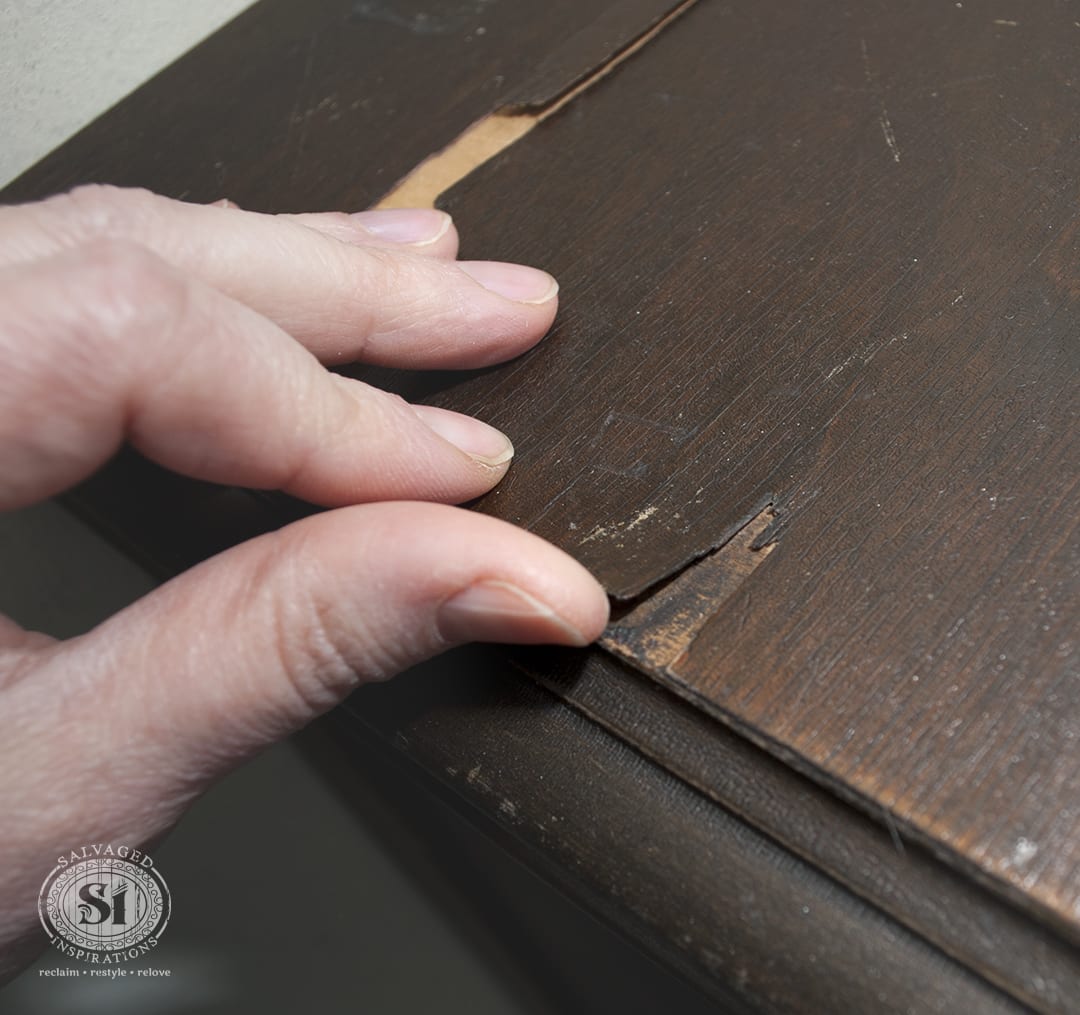
Credit: salvagedinspirations.com
Cost Comparison: Repair Vs. Replacement
Here’s a quick look at the cost difference between repairing veneer and replacing cabinets:
| Option | DIY Cost (Approx.) | Pro Replacement Cost |
|---|---|---|
| Repair Peeling Veneer | $20–$60 (supplies only) | $120–$300 (labor) |
| Replace Cabinet Door | $50–$150 (per door) | $250–$500 (installed) |
| Replace Whole Cabinet | $150–$600 (materials) | $500–$2000 (installed) |
Repairing veneer is usually the cheapest and fastest way to upgrade your cabinets, especially if you do the work yourself.
Step-by-step Summary: Repairing Peeling Veneer
Here’s a quick summary for easy reference:
- Remove doors and hardware
- Clean and dry the surface
- Assess the type of damage
- For lifting veneer: Apply glue and clamp
- For bubbles: Inject glue, press flat, and clamp
- For missing veneer: Patch with wood filler or new veneer
- For swollen particle board: Dry, sand, rebuild, and cover
- Sand, paint, or stain to match
- Reinstall hardware and doors
Following these steps carefully gives you the best results.
Real-world Examples
Let’s look at a couple of real-life examples:
Example 1: A kitchen cabinet near the sink had peeling veneer at the bottom edge. After removing the door and cleaning the area, the homeowner lifted the loose veneer, applied wood glue, and used masking tape as a clamp overnight. The repair held up for several years.
Example 2: A bathroom vanity had a large bubble in the center. The owner punctured the bubble, injected glue with a syringe, and clamped it with a heavy book. After sanding and painting, the repair was invisible.
These examples show that most people can do the repair themselves with simple tools.
Useful Tips For A Professional Finish
- Always test glue and filler on a small, hidden area first.
- Match the veneer grain when patching for a better look.
- Use a soft cloth for final cleaning to avoid scratches.
- Label doors and hardware when removing them to make reassembly easier.
- If you plan to repaint, consider a cabinet paint kit for best results.
Alternative Methods For Repair
For those who want a quick fix or don’t have matching veneer, consider:
- Vinyl repair tape: Good for small chips, comes in wood patterns.
- Peel-and-stick veneer sheets: Covers larger damaged areas with a new surface.
- Painted finish: If the look doesn’t match, painting all doors gives a fresh, uniform appearance.
While not as durable as real veneer, these methods can extend the life of your cabinets until you’re ready for a full replacement.
Where To Find Replacement Veneer
Replacement veneer is available at most hardware stores and online. Look for these options:
- Pre-glued wood veneer (easy to iron on)
- Unfinished veneer sheets (glue-on)
- Peel-and-stick laminate
Choose a thickness that matches your cabinet and a wood pattern that blends well. If you’re unsure, bring a small piece of your old veneer for matching.
Environmental Impact Of Repair Vs. Replacement
Repairing cabinets is not only cheaper, but it’s also better for the environment. By fixing what you have, you:
- Reduce landfill waste
- Save the energy used in making and transporting new cabinets
- Use fewer raw materials
Even small repairs can make a difference over time.
For more on how particle board is made and why it’s used in furniture, see this Wikipedia page on Particle Board.
Frequently Asked Questions
How Do I Know If My Particle Board Cabinets Are Worth Repairing?
If the particle board is solid and only the veneer is peeling, repair is usually worth it. If the board is soft, swollen, or has mold, replacement may be better.
What Type Of Glue Works Best For Veneer Repair?
Carpenter’s wood glue or waterproof PVA glue is best. For large patches, contact cement provides a strong bond. Avoid regular white glue—it’s not water-resistant.
Can I Paint Over Repaired Veneer?
Yes. Once the repair is sanded smooth, use a primer and then a high-quality cabinet paint. This gives a uniform finish and hides patches.
How Long Does A Veneer Repair Last?
A good repair can last 5–10 years or more, especially if you control moisture and use the right glue. The key is good preparation and drying time.
Is It Possible To Repair Veneer Without Removing The Cabinet Doors?
For small edge repairs, yes. But for best results, remove the doors. It makes cleaning, gluing, and clamping much easier and helps you avoid drips or messes.
Peeling veneer can make your cabinets look old, but with the right approach, you can repair them yourself. Careful preparation, the right materials, and a little patience can save you hundreds of dollars and give your kitchen or bathroom a fresh new look.
The process is simple, and the results are rewarding—a practical, eco-friendly way to keep your home beautiful.