Leveling a crawl space floor can transform the health and value of your home. Many homeowners ignore this area, thinking it’s out of sight, out of mind. But an uneven crawl space floor can lead to serious problems—moisture, pests, or even foundation issues.
If you want to create a safer, drier, and more stable home, it’s essential to understand how to level your crawl space floor properly.
This guide is for homeowners, DIY enthusiasts, or anyone curious about improving their crawl space. You’ll learn why leveling matters, which methods work best, and how to avoid common mistakes. You’ll also find step-by-step instructions, expert tips, and answers to common questions.
By the end, you’ll have all the knowledge you need to tackle this project with confidence.
Why Leveling A Crawl Space Floor Matters
Many people underestimate the importance of a level crawl space floor. But even a small slope or bump can cause big problems over time. First, moisture collects in low spots, making your home vulnerable to mold, wood rot, and bad odors. Second, pests like rodents and insects find it easier to enter if the floor is uneven.
A level floor also makes it easier to install vapor barriers or insulation. If you ever need to make repairs or upgrades (like plumbing or wiring), a flat surface gives you safer, easier access. Finally, buyers and home inspectors look at crawl spaces closely when you sell your house. A well-maintained crawl space can increase resale value and show that you care for your property.
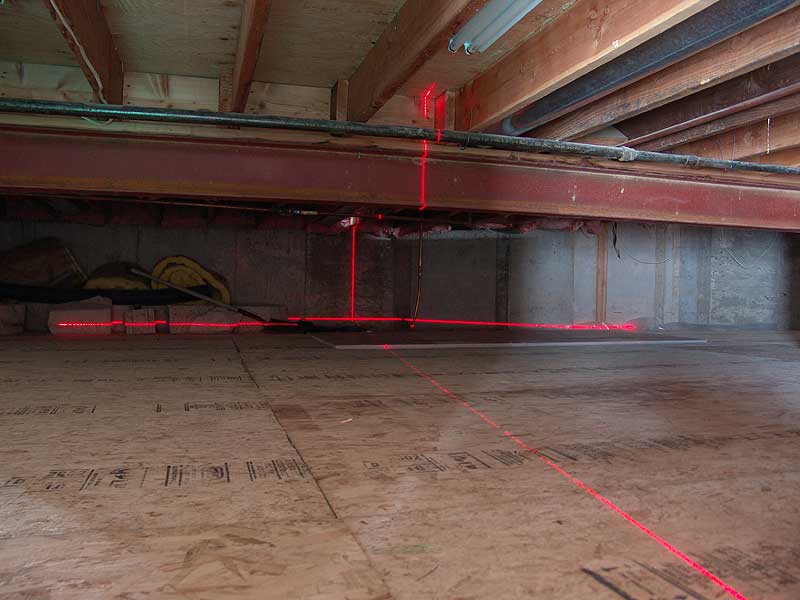
Assessing Your Crawl Space Floor
Before you start working, you need a clear understanding of the current condition. Not all crawl spaces are the same. Some have dirt floors, others have gravel, and a few might even have concrete. The best leveling approach depends on what you find.
Steps To Assess The Floor
- Access the Crawl Space: Wear protective clothing, a mask, and gloves. Bring a strong flashlight and a camera or notebook.
- Check for Standing Water: Look for puddles or damp areas. Water means you may have drainage problems to address first.
- Identify High and Low Spots: Use a long straight edge or a laser level to spot uneven areas.
- Look for Mold or Wood Rot: Inspect beams, joists, and the floor itself. Mold and rot signal moisture issues.
- Inspect for Pests: Check for droppings, nests, or gnawed wood.
- Test Soil Hardness: Is the dirt soft, sandy, or clay-like? This affects the leveling method.
- Note Access Points: Measure the crawl space opening and check for obstacles like pipes or ducts.
Recording Your Findings
Take notes and photos of problem areas. Record the floor height at several points. Mark areas that are especially low or soft. This information will help you plan materials and work steps.

Credit: www.youtube.com
Choosing The Right Leveling Method
Not every crawl space needs the same solution. The method you choose depends on your floor type, moisture level, budget, and your long-term plans for the space.
Here’s a comparison of the most common leveling methods:
| Method | Best For | Pros | Cons |
|---|---|---|---|
| Dirt Fill | Minor low spots, dry spaces | Cheap, easy DIY | Not for wet areas, may settle over time |
| Gravel Fill | Wet or muddy floors | Good drainage, resists pests | Heavier, more expensive |
| Concrete Slab | Permanent solution, high-value homes | Durable, easy to clean | Expensive, needs pro installation |
| Foam Leveling | Minor unevenness, small spaces | Lightweight, quick | Not for structural issues, costly materials |
Non-obvious insight: Many beginners think adding more dirt is always the answer. But if you have moisture problems, dirt can turn into mud and make things worse. It’s important to solve drainage and moisture issues before you start leveling.
Preparing The Crawl Space For Leveling
Preparation is half the battle. Skipping this step can ruin your results, cause new problems, or make the work unsafe.
Steps To Prepare
- Remove Debris: Old wood, insulation, garbage, and rocks must go. These can hide problems and get in the way.
- Fix Drainage Issues: If you see standing water, consider installing a French drain or sump pump. Sloping the ground toward vents or drains helps water escape.
- Address Mold and Pests: Clean up any mold with a safe cleaner. Remove pest nests and seal entry points.
- Check for Structural Problems: If you see sagging beams or joists, have a professional assess them before continuing.
- Protect Utilities: Identify and clearly mark pipes, wires, and ducts. You don’t want to damage them while working.
- Ventilate the Space: Open vents or use a fan to keep air moving. This reduces moisture and keeps you safer.
- Plan Your Access: Make sure you can bring in tools and materials without getting stuck.
Example Preparation Timeline
Most crawl space prep takes 1-2 days for a typical 1,000 sq. Ft. home, assuming no severe water or pest issues.
Tools And Materials Needed
You don’t need expensive or fancy tools, but a few essentials will make the job easier and safer.
Basic Tools
- Shovel (pointed and flat)
- Wheelbarrow or buckets
- Rake (steel for dirt/gravel)
- Level (4-foot or laser)
- Tape measure
- Heavy-duty gloves and mask
- Headlamp or work lights
- Plastic sheeting (for vapor barrier)
- Utility knife or scissors
Materials By Method
- For dirt fill: Clean fill dirt (not topsoil), possibly clay if you need stability
- For gravel fill: Washed gravel or crushed stone, usually ¾ inch size
- For concrete: Ready-mix concrete, forms, rebar or mesh, water
- For foam: Polyurethane foam kits (rare for large DIY jobs)
Pro tip: Many beginners forget to calculate how much fill material they need. Measure the area and average depth to avoid buying too little (or far too much). For example, a 10’ x 10’ area, filled 4 inches deep, needs about 1.2 cubic yards of material.
Step-by-step Guide To Leveling A Crawl Space Floor
This section breaks down the process for the most common leveling methods. Choose the one that fits your crawl space best. Some spaces may even combine methods (like gravel plus a vapor barrier).
Leveling With Dirt
This is the most common DIY method for dry, moderately uneven crawl spaces.
- Mark Low Spots: Use a laser level or string line stretched across the floor. Mark the lowest areas with stakes or flags.
- Add Fill Dirt: Use a shovel and wheelbarrow to bring in fill dirt. Spread in 2-3 inch layers.
- Compact Each Layer: Use a hand tamper or just walk over each layer to press it down. This prevents future settling.
- Check Slope: The floor should slope gently toward vents or a drain (about 1/8 inch per foot is common).
- Repeat: Add more layers as needed, compacting each time.
- Final Level Check: Use your level to check the whole floor. Fill any last low spots.
Practical insight: Don’t use garden topsoil—it breaks down and attracts pests. Use clean, compactable fill dirt.
Leveling With Gravel
Gravel works best for crawl spaces with moisture or drainage issues.
- Prepare the Base: Remove loose soil or organic matter.
- Lay Landscape Fabric (optional): This keeps gravel from mixing with soil.
- Add Gravel: Pour in washed gravel, 3-6 inches deep.
- Rake Smooth: Use a steel rake to spread evenly.
- Compact: Walk over the gravel or use a tamper.
- Check Slope: Like dirt, slope gently toward drains or low points.
Non-obvious insight: Washed gravel is better than crushed stone for drainage. Crushed stone packs tighter and may block water flow.
Leveling With Concrete
This is a permanent solution. It’s best for high-value homes or where you plan to use the crawl space often.
- Form the Area: Build simple wood forms if needed to contain concrete.
- Add Vapor Barrier: Lay down thick plastic sheeting before pouring.
- Set Rebar or Mesh: This adds strength.
- Mix and Pour Concrete: Mix small batches outside and bring them in with buckets or a pump.
- Level Concrete: Use a screed board to pull the concrete level.
- Smooth Surface: Float and trowel for a smooth finish.
- Cure Properly: Allow at least 3 days to set before walking on it.
Pro tip: Pouring concrete in a crawl space is tough work and usually needs at least two people.
Leveling With Foam
Rare for DIY, but some professionals use expanding foam for minor leveling.
- Drill Small Holes: At low spots in the floor.
- Inject Foam: With a special kit, foam expands and lifts the floor.
- Trim Excess: After it hardens, cut off any extra foam.
Practical insight: Foam can lift concrete or wood, but won’t work on loose soil or major problems.
Addressing Water And Moisture Control
Leveling the floor is only part of the solution. Moisture control is critical for crawl space health.
Vapor Barriers
Install 6-mil or thicker plastic sheeting over the leveled floor. Overlap seams by at least 12 inches and tape with waterproof tape. Run the barrier up the walls a few inches and secure it.
Drainage Solutions
- French drains: Installed inside or outside to move water away.
- Sump pumps: Remove water that collects in low areas.
- Gutters and grading: Make sure your yard slopes away from the house.
Dehumidifiers
For humid climates, a crawl space dehumidifier helps keep moisture under control.
Expert tip: Even after leveling, check your crawl space every few months for new moisture.
Insulating And Sealing The Crawl Space Floor
After leveling, many homeowners add insulation or seal the space for energy savings.
Insulation Options
- Rigid foam boards: Placed on the walls, not the floor, to avoid trapping moisture.
- Spray foam: Used in hard-to-reach areas.
- Fiberglass batts: Less common, must be above a vapor barrier.
Sealing
Seal vents and cracks with foam sealant or caulk. This keeps out pests and humid air.
Caution: Never seal a crawl space without proper moisture control, or you’ll trap water and cause more problems.
Costs And Budgeting
Leveling a crawl space floor varies widely in cost. Here’s a rough guide for a 1,000 sq. ft. crawl space:
| Method | DIY Cost Range | Pro Cost Range |
|---|---|---|
| Dirt Fill | $200–$500 | $800–$1,500 |
| Gravel Fill | $600–$1,200 | $1,500–$3,000 |
| Concrete Slab | $2,500–$4,000 | $5,000–$10,000 |
| Foam Leveling | Not practical DIY | $2,000–$4,000 |
Insider tip: Many people forget to include the cost of removing debris or fixing drainage. Always budget an extra 10–20% for surprises.
Safety Tips And Precautions
Crawl spaces can be dangerous. Always put safety first.
- Wear Protective Gear: Gloves, mask, and goggles protect from dust, mold, or sharp debris.
- Watch for Animals: Snakes, rodents, or insects may hide in crawl spaces.
- Check Air Quality: Use a portable air monitor if you’re worried about mold or gas.
- Work with a Partner: If possible, have someone nearby in case you need help.
- Mind Electrical Lines: Never dig or move soil near wires without turning off power.
- Keep Tools Organized: It’s easy to trip in tight spaces.
Expert warning: If you ever smell gas, see standing water, or notice sagging beams, stop and call a professional.

Credit: www.basementsystems.com
Common Mistakes To Avoid
Even experienced DIYers can make errors. Here are common crawl space leveling mistakes:
- Skipping moisture control: Leveling without solving water problems just leads to new damage.
- Using wrong fill material: Topsoil or organic material can rot and attract pests.
- Not compacting fill: Loose dirt will settle and create new low spots.
- Ignoring the slope: Level does not always mean flat—some slope is needed for drainage.
- Forgetting about access: Don’t block important pipes or crawl space doors.
- Sealing too soon: Wait until the space is fully dry before adding insulation or vapor barriers.
When To Call A Professional
Some crawl space jobs are best left to pros, especially if you find:
- Major water problems: Standing water or flooding
- Structural issues: Sagging joists, cracked foundations
- Severe mold: Large, black patches or strong odors
- Hazardous materials: Asbestos insulation, animal waste
A professional can also help if you’re unsure about the best method, or if you want a long-term warranty. For more on crawl space standards, you can check the EPA’s guide to crawl spaces and mold.
Credit: www.komar.org
Maintenance After Leveling
A leveled crawl space still needs care.
- Inspect Every 6 Months: Look for new low spots, moisture, or pests.
- Check Vapor Barriers: Tape any tears or loose edges.
- Monitor Humidity: Keep it below 60% to prevent mold.
- Clean Debris: Remove fallen insulation, leaves, or trash.
- Test Sump Pumps: Make sure drainage systems work during heavy rain.
Pro tip: Keeping a simple log of your inspections can help spot problems before they get serious.
Frequently Asked Questions
How Long Does It Take To Level A Crawl Space Floor?
Most DIY crawl space leveling projects take 2–5 days for a 1,000 sq. Ft. space, depending on the method and how much prep is needed. Gravel or dirt fill is faster, while concrete takes longer to set. Severe water or pest problems can add extra days.
Can I Level A Crawl Space Floor Myself, Or Do I Need A Professional?
If your crawl space is dry and the floor is only moderately uneven, most homeowners can do the job with the right tools and safety steps. If you find standing water, mold, or sagging beams, hire a professional to avoid bigger problems.
What Is The Best Material To Use For Leveling?
Gravel is best for wet crawl spaces because it drains well and resists pests. Clean fill dirt works for dry spaces with minor unevenness. Concrete is the most durable but costs more and is harder to install. Never use topsoil or organic material.
Does Leveling The Crawl Space Floor Stop Moisture Problems?
Leveling helps, but it’s not a complete solution. You also need a vapor barrier, good drainage, and sometimes a dehumidifier. The floor should slope gently toward a drain or sump pump if possible.
How Much Does It Cost To Level A Crawl Space Floor?
Costs vary. A DIY dirt fill project may cost $200–$500. Gravel fill is $600–$1,200. Concrete can be $2,500 and up. Professionals charge more, especially for drainage work or structural repairs.
Leveling your crawl space floor is an investment in your home’s safety, health, and value. With the right preparation, tools, and know-how, it’s a project you can tackle with confidence. Regular maintenance will keep your crawl space—and your whole house—in top shape for years to come.