Maintaining the beauty of engineered wood floors is a goal for many homeowners. These floors look stunning, feel comfortable, and add warmth to a home. But over time, you might notice your floors have lost their shine or feel sticky. This often happens because of wax buildup. Cleaning up wax on engineered wood is not simple, and using the wrong method can damage the floor’s finish. If you want to restore your floor’s look and keep it in good shape, it’s important to know exactly how to remove wax buildup safely and effectively.
Engineered wood flooring brings many advantages, but it also requires special care. Unlike tile or solid hardwood, you can’t just scrub away problems. Wax buildup can hide the natural beauty of the floor and make cleaning more difficult. If left untreated, it can even shorten the life of your flooring.
That’s why knowing how to correctly identify and remove wax buildup is a key skill for any homeowner with engineered wood.
Understanding Wax Buildup On Engineered Wood Floors
Engineered wood flooring is designed with a real wood top layer and several layers of plywood beneath. This makes it more stable than solid hardwood, but also means it has unique cleaning needs. Wax is sometimes used to give these floors extra shine or protection. However, using the wrong product or applying too much wax can create a thick, cloudy layer. This buildup can trap dirt, make the floor slippery, and block the natural beauty of the wood.
Many people don’t realize that most modern engineered wood floors already have a protective finish, like polyurethane, that doesn’t need wax. In fact, adding wax to these surfaces can cause more problems than it solves. Before you start cleaning, it helps to know what type of finish your floor has and if wax removal is necessary.
If you’re not sure about your floor’s finish, check the installation paperwork or contact the manufacturer. Some floors may have a matte or satin finish, which is designed to look natural and should never be waxed. Applying wax to these surfaces can change their appearance and make the floor look uneven.
In some cases, excessive wax can even make the floor dangerous, especially in homes with children or elderly people who might slip.
Why Wax Buildup Happens
Wax buildup typically occurs for a few reasons:
- Using wax products on pre-finished floors: Most modern engineered wood floors don’t need extra wax, but some people still use it.
- Repeated applications: Applying layer after layer of wax without proper cleaning between uses.
- Wrong cleaning products: Some cleaners contain wax or oils that leave a residue.
Understanding these causes helps you avoid the same mistakes in the future.
Another common reason for wax buildup is using “all-in-one” cleaning or polishing products. Many of these contain hidden waxes or oils that slowly build up with each use. Over time, you may not notice the buildup until the floor looks dull or feels sticky.
People sometimes think more wax will add shine, but it usually makes the problem worse. Also, older homes sometimes have a tradition of waxing wood, so new owners continue the habit without realizing engineered wood is different.
How To Identify Wax Buildup
Before you try to remove wax, make sure that’s what you’re dealing with. Wax buildup usually looks dull, cloudy, or streaky. Sometimes, the floor feels sticky or slippery. Here’s a simple test:
- Damp cloth test: Dampen a white cloth with warm water and rub a small area of the floor.
- If the cloth picks up a yellow or gray film, it’s likely wax.
- If the area looks cleaner and shinier, you probably have wax buildup.
This test helps you confirm the problem before starting any cleaning process.
You may also notice that the floor attracts more dust, or that footprints and smudges are hard to remove. These are signs that something is sitting on top of the finish, not part of the wood itself. If you’re still not sure, try gently scratching the surface with your fingernail in an inconspicuous area.
If a waxy layer comes up, you have your answer.
Essential Tools And Materials
To remove wax buildup, you need the right tools and materials. Using harsh chemicals or the wrong equipment can scratch or ruin engineered wood.
Here’s what you need:
- Microfiber mop or cloths: Gentle and effective for wood surfaces.
- Plastic scraper: For thick wax layers.
- Bucket with warm water: For rinsing.
- PH-neutral wood floor cleaner: Safe for engineered wood.
- White vinegar (optional): For stubborn spots.
- Rubbing alcohol or mineral spirits: Breaks down wax without damaging finish.
- Gloves: To protect your hands.
- Vacuum with soft brush attachment: Removes dust and debris.
Never use abrasive pads, steel wool, or ammonia-based cleaners. These can scratch or dull the finish.
It’s also smart to have plenty of clean towels and a well-ventilated space, especially when using mineral spirits. Even though these products are safe for many finishes, good airflow helps remove fumes and speeds up drying. If you have allergies or sensitive skin, a mask and goggles are helpful for extra protection.

Credit: www.reddit.com
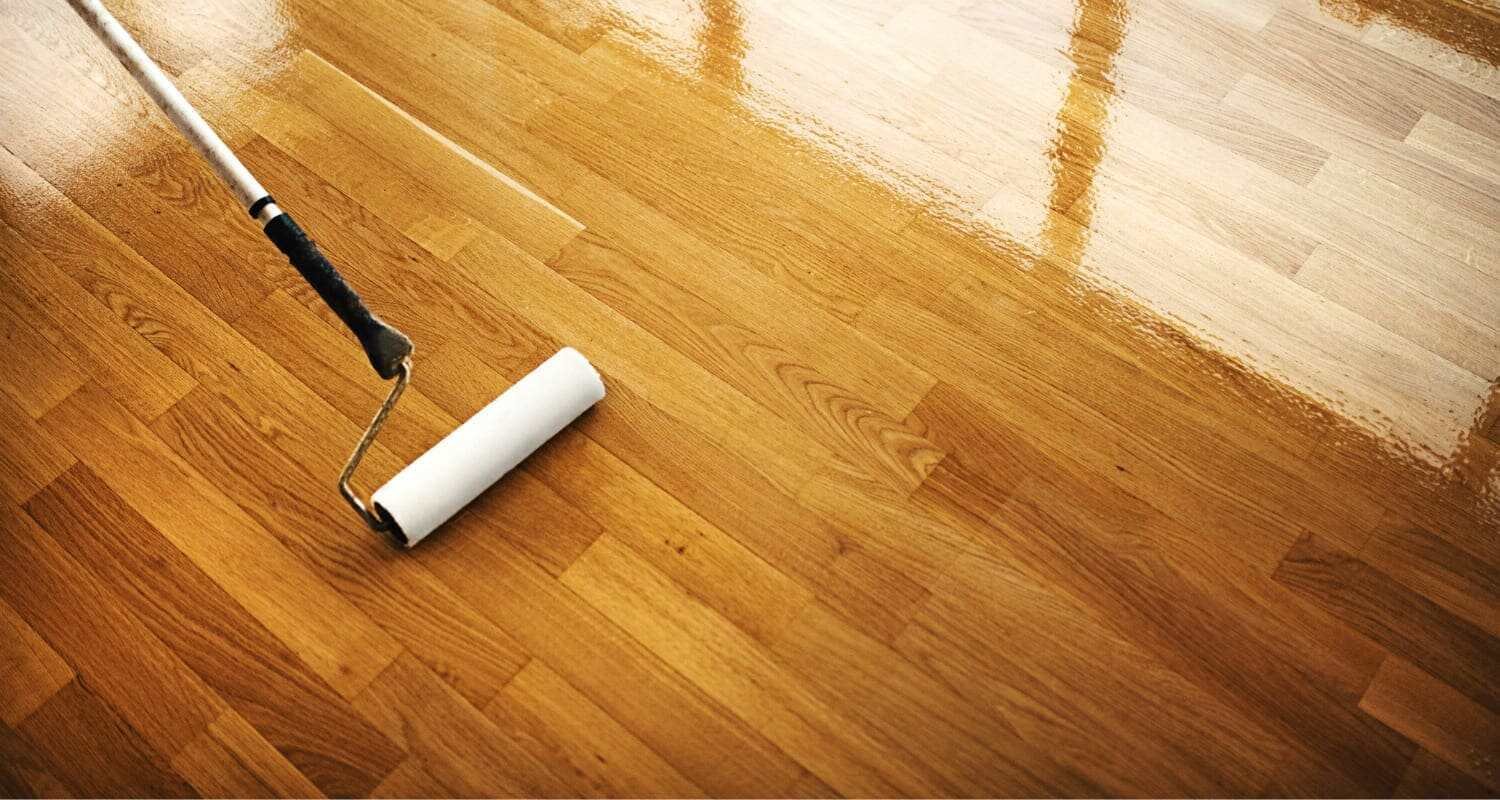
Step-by-step Guide: Removing Wax Buildup
Taking your time is key. Rushing can cause permanent damage. Follow these steps for safe, effective wax removal.
1. Prepare The Floor
Start by removing all furniture and rugs from the area. Vacuum or sweep to get rid of dust and grit that can scratch the floor during cleaning.
Don’t skip this step. Even small particles can leave scratches when combined with rubbing or cleaning. If you have pets, make sure to get hair and dander out of corners. This makes the cleaning process smoother and reduces the risk of dragging dirt across the floor.
2. Test In An Inconspicuous Area
Choose a small, hidden spot (like behind furniture) to test your cleaning solution. Apply a little cleaner or rubbing alcohol, wait a few minutes, and check for discoloration or damage.
This step is especially important for older floors or floors with unknown finishes. Sometimes, even gentle cleaners can react differently depending on the type of finish or past treatments. If you see any change in color or texture, stop and try a different solution.
3. Loosen The Wax
Dampen a microfiber cloth with your chosen cleaner or a mixture of warm water and a few drops of pH-neutral wood floor cleaner. Lightly rub the waxy area in small circles. If the wax is thick, you may need to repeat this process several times.
Don’t be tempted to soak the floor. Too much water can seep into the seams and cause swelling or warping. Work slowly and check your cloth often—if it turns yellow or gray, you’re removing wax. Switch to a clean cloth regularly to avoid spreading wax residue back onto the floor.
4. Use Rubbing Alcohol Or Mineral Spirits
For stubborn buildup, apply a small amount of rubbing alcohol or mineral spirits to a cloth. Gently rub the waxed area, working in the direction of the wood grain. Don’t soak the floor—too much liquid can harm engineered wood.
Always wear gloves for this step, as rubbing alcohol and mineral spirits can dry out your skin. Use only enough product to dampen the cloth, not saturate it. Rubbing gently is more effective than pressing hard—let the cleaner do the work.
If you notice the finish starting to dull or turn cloudy, stop immediately.
5. Scrape Off Excess Wax
If there are thick patches of wax, carefully use a plastic scraper. Hold it at a shallow angle and gently lift the wax, taking care not to gouge the surface.
Plastic is safer than metal. If you feel resistance, stop and add more cleaner to loosen the wax. Never try to force wax off, as this can leave permanent marks or even remove the top layer of wood.
6. Wipe Clean And Rinse
After removing the wax, wipe the area with a clean, damp cloth to remove any residue. Change the water often to avoid spreading wax or dirt.
You may need to repeat rinsing two or three times, especially if you’re cleaning a large area. This helps remove all traces of wax remover, which can leave its own residue if left behind.
7. Dry The Floor
Use a dry microfiber cloth to remove moisture. Engineered wood should not stay wet for long periods.
If you have a fan or can open windows, use them to speed up drying. Inspect the floor in daylight to make sure no wax or streaks remain. If you see hazy spots, repeat the cleaning on those areas.
Comparing Wax Removal Methods
Not all methods work equally well or are safe for engineered wood. Here’s a quick comparison:
| Method | Effectiveness | Risk to Floor | Best Use |
|---|---|---|---|
| Rubbing alcohol | High | Low (if used sparingly) | Small areas, stubborn spots |
| Mineral spirits | High | Medium (test first) | Thick buildup |
| Vinegar & water | Medium | Low | Light residue |
| Commercial wax remover | Varies | Medium to High | Professional use |
In many cases, using a combination of methods produces the best results. For example, start with vinegar and water for a first pass, then use rubbing alcohol on the most stubborn spots. Always remember to ventilate the area and never mix different chemicals at the same time.
Dealing With Stubborn Wax Buildup
Sometimes, a single cleaning isn’t enough. Here’s what you can do:
- Repeat the cleaning process, but let the cleaner sit for 2-3 minutes before wiping.
- For corners and grooves, use a soft-bristled toothbrush.
- If wax remains, try mineral spirits, but be sure to ventilate the room well.
If the wax still won’t budge after several attempts, it may be time to call a flooring professional.
Patience makes a big difference here. Some waxes are designed to last, so they resist removal. Don’t rush or use sharp objects. Instead, focus on repeated gentle passes. For large buildup, you may see progress in patches—finish one small section before moving on.
After the wax is gone, clean the entire area to ensure no residue remains.
What To Do After Removing Wax
Once all wax is gone, your floor may look dull or uneven. Don’t rush to add more products. Instead:
- Clean the entire floor with a pH-neutral cleaner.
- Let the floor dry completely.
- If needed, use a manufacturer-approved polish designed for engineered wood—not wax.
This will restore shine without causing future buildup.
Sometimes, the floor needs to “rest” after wax removal. Give it a day or two before moving furniture back or washing again. This helps the finish recover and ensures any remaining cleaner evaporates. If you want to add shine, always check with your flooring brand for recommended products.
Using the wrong polish can repeat the wax buildup problem.
Preventing Wax Buildup In The Future
Prevention is always easier than removal. Here are simple habits to keep your engineered wood floors wax-free:
- Avoid wax-based cleaners and polishes unless the manufacturer recommends them.
- Sweep or vacuum regularly to keep dirt from scratching the finish.
- Clean spills immediately to prevent stains and damage.
- Use only pH-neutral wood floor cleaners for regular maintenance.
- Place mats at entrances to trap grit and moisture.
Following these steps will protect your floor’s finish and beauty for years.
As an extra tip, check your cleaning products’ labels. If you see words like “shine,” “polish,” or “restore,” read the ingredients to make sure no wax or oil is included. Educate family members or cleaning staff about the right products, so mistakes don’t happen out of habit.
Common Mistakes To Avoid
Many people unknowingly damage their engineered wood floors during wax removal. Here are the most common mistakes:
- Using too much water: Excess moisture can cause warping.
- Scrubbing with abrasive pads: This scratches the finish.
- Skipping the test spot: Always check cleaners in a hidden area.
- Applying new wax or polish too soon: Wait until the floor is fully clean and dry.
- Mixing different cleaners: This can create harmful chemical reactions.
Avoiding these mistakes protects your floor and saves you time and money.
Another mistake is using “home remedies” found online, like ammonia, bleach, or baking soda. While these might work for other surfaces, they can permanently damage engineered wood. Always stick to gentle, proven methods.
Credit: villagiowoodfloors.com
When To Call A Professional
If your floor is very old, expensive, or has a unique finish, it might be safer to hire a flooring professional. Professionals have tools and knowledge to remove wax without causing damage. Also, if you notice deep stains, discoloration, or damage after cleaning, get expert help before things get worse.
Floors with deep grooves, bevels, or textured surfaces are especially tricky to clean. If you’re not confident, it’s better to ask a pro rather than risk an expensive repair.
Real-world Example: Wax Buildup Gone Wrong
Let’s look at a true story. A homeowner in Ohio tried to restore their engineered wood floor’s shine with a store-bought wax polish. Over several months, the floor became sticky and dull. Regular mopping only made it worse. When they tried to scrub it off with a steel wool pad, the surface became scratched and uneven.
The fix: A professional used a specialized wax remover and a gentle buffer to clean the floor, then applied a compatible polish. The homeowner learned to always check the manufacturer’s recommendations and to avoid wax in the future.
This example shows that sometimes good intentions can backfire. The homeowner thought they were caring for their floor, but instead created more work and expense. It’s a reminder to always research before adding new products to your cleaning routine.
How Engineered Wood Differs From Solid Wood
It’s important to know that engineered wood is not the same as solid hardwood. Engineered wood has a thinner real wood layer over plywood, so it’s more sensitive to water and harsh chemicals. Solid wood can sometimes be sanded and refinished, but engineered wood has limits. Always use gentler methods on engineered floors.
Here’s a simple comparison:
| Feature | Engineered Wood | Solid Hardwood |
|---|---|---|
| Surface Layer | Thin real wood | Thick solid wood |
| Moisture Resistance | Higher | Lower |
| Wax Compatibility | Low | Medium |
| Refinishing | Limited | Can be sanded multiple times |
One insight: if you’re used to caring for solid hardwood, you may need to adjust your methods for engineered wood. What works for solid boards can harm engineered floors.
Non-obvious Insights Most Beginners Miss
- Wax can trap dirt: When wax builds up, it actually holds on to dust and grit, making cleaning harder, not easier.
- Not all floors can be waxed: Many engineered wood floors come with a factory finish that should never be waxed. Always check your floor’s documentation.
- Water is the enemy: Even though engineered wood is more stable than solid hardwood, standing water or soaking can ruin it—especially at the seams.
Another insight: Many cleaning products say they are “safe for wood,” but that doesn’t always include engineered wood. Always look for “safe for engineered wood” or check with the manufacturer if unsure.
Key Do’s And Don’ts For Wax Removal
Do:
- Use soft cloths and gentle cleaners.
- Work in small sections.
- Test cleaning products first.
Don’t:
- Use steam mops or wet mops.
- Apply more wax to cover up dull spots.
- Ignore manufacturer guidelines.
A less obvious “do”: Write down the products you use and keep them with your floor’s paperwork. This helps you or future owners avoid repeating mistakes.
Understanding Floor Finish Types
It’s worth noting that the finish on your engineered wood floor matters. Common finishes include:
- Polyurethane: Most common, doesn’t need waxing.
- Acrylic: Also does not need wax.
- Oil-based: Sometimes benefits from specific care products, but not traditional wax.
If you’re unsure, check your floor’s paperwork or contact the manufacturer.
Knowing your finish helps you choose the right cleaner, polish, and method for removing wax. For example, oil-based finishes sometimes need special care, but rarely ever traditional wax. Using the wrong product can lead to peeling or a sticky surface.
How Long Does Wax Removal Take?
Removing wax buildup can be time-consuming, especially for large areas or thick buildup. On average:
- Small rooms (up to 150 sq ft): 1–2 hours
- Medium rooms (150–300 sq ft): 2–4 hours
- Large rooms (over 300 sq ft): 4–8 hours or more
These estimates include drying time. Trying to rush can lead to mistakes and damage.
If you’re planning to clean a whole house, consider breaking the work into sections over several days. This reduces fatigue and gives you time to spot-test and adjust your method as needed.
Safe Alternatives To Wax
If you want your engineered wood floor to shine, look for floor polishes designed for your specific floor finish. Most modern products are water-based and safe for engineered wood, unlike traditional waxes. Always confirm compatibility before applying.
You can also use a dry microfiber mop to boost shine between cleanings. Avoid using oily sprays or products that promise a “wet look”—these usually contain ingredients that cause buildup.
Environmental Impact Of Floor Care Products
Some wax removers and cleaners contain chemicals that aren’t great for the environment. If you want an eco-friendly solution, stick with:
- White vinegar and water (for light residue)
- Plant-based wood floor cleaners (check the label)
- Microfiber mops (reduce need for chemicals)
These options are safer for your family, pets, and the planet. For more on safe cleaning, see the EPA’s Safer Choice program.
Also, avoid dumping used cleaning water or chemical products down outdoor drains. Dispose of them according to your local waste rules to protect water sources.
Troubleshooting After Wax Removal
Sometimes, after removing wax, you may notice:
- Streaks or haze: Buff the area with a dry microfiber cloth.
- Sticky spots: Re-clean with a bit of rubbing alcohol.
- Dullness: Use a compatible polish, not wax.
If problems persist, consult a flooring expert.
Another tip: If the floor still looks uneven after all cleaning steps, it may be a sign of underlying finish damage or trapped moisture. In these cases, waiting a few days and monitoring changes can help you decide if you need professional help.

Credit: www.youtube.com
Frequently Asked Questions
What Is The Safest Way To Remove Wax From Engineered Wood Floors?
The safest method is to use a microfiber cloth dampened with a pH-neutral wood floor cleaner or rubbing alcohol. Always test in a small area first and avoid soaking the floor.
Can I Use Vinegar To Remove Wax From My Floor?
Vinegar can help with light wax residue, but it’s less effective on thick buildup. Never use undiluted vinegar, as it can dull the finish. Mix with water and use sparingly.
Will Removing Wax Damage My Engineered Wood Floor?
If you use gentle methods and avoid excessive water or harsh chemicals, you should not damage your floor. Always test products in a hidden spot first.
How Can I Keep My Engineered Wood Floor Shiny Without Using Wax?
Regular cleaning with a pH-neutral cleaner and occasional use of a manufacturer-approved polish will keep your floor shiny. Avoid wax-based products.
What Should I Do If I See White Spots After Cleaning?
White spots can happen if water sits on the floor or from cleaning product residue. Buff with a dry cloth or re-clean with a little rubbing alcohol to remove the spots.
Caring for engineered wood floors takes a little knowledge and the right tools. Removing wax buildup is possible without damaging your beautiful floors—as long as you work carefully and avoid common pitfalls. With these tips, your engineered wood floors will stay clean, shiny, and welcoming for years to come.