Basements are often the noisiest spaces in a home. The sounds of footsteps, voices, televisions, or machines from above can echo through thin basement ceilings, making the basement less comfortable. Whether you want to turn your basement into a home theater, office, guest room, or play area, reducing noise is essential for privacy and enjoyment.
Many people think soundproofing is complicated or expensive, but there are effective solutions for every budget and skill level. This guide offers practical steps, tips, and expert knowledge to help you reduce noise in your basement ceiling and create a quieter, more peaceful space.
Understanding Noise Transmission In Basement Ceilings
Before you start, it’s important to know how noise moves through a basement ceiling. Noise travels in two main ways: airborne sound and impact sound.
- Airborne sound comes from voices, music, or TV. It passes through the air and materials.
- Impact sound is caused by footsteps, dropping objects, or moving furniture. It travels as vibrations through the structure.
Most basement ceilings are made of wood joists with drywall or exposed beams. These materials do not block sound well. Gaps, holes, and vents make it easier for noise to pass through. To reduce noise, you must address both airborne and impact sounds.
A good approach combines different methods for the best results.
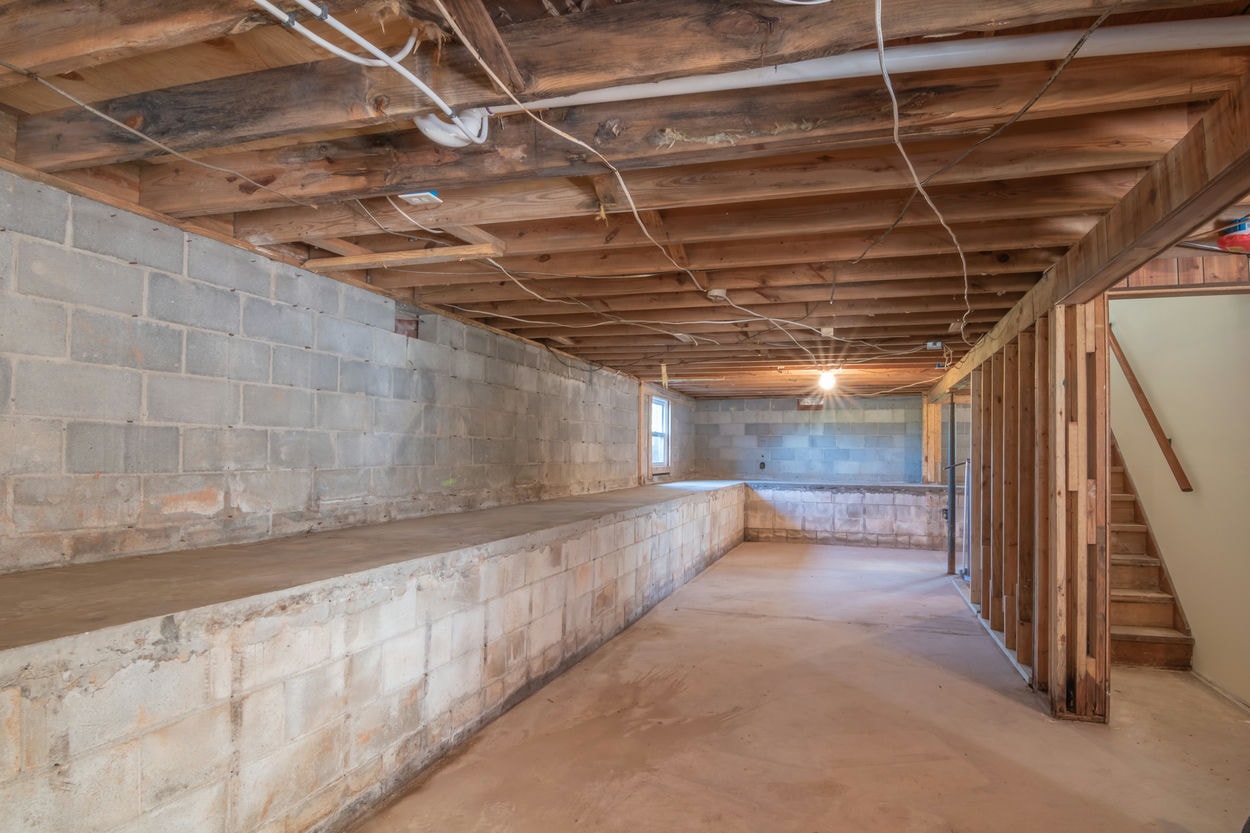
Assessing Your Basement Ceiling
The first step is to inspect your basement ceiling. Look for:
- Exposed joists: Open ceilings make it easy for sound to travel.
- Drywall ceilings: These offer some protection but are not soundproof.
- Gaps and holes: Spaces around pipes, wires, or vents leak sound.
- HVAC ducts: Metal ducts can carry noise from room to room.
Write down the ceiling type, any open areas, and where the most noise comes from. This will help you choose the best solutions.

Credit: www.youtube.com
Key Principles Of Soundproofing
To reduce noise in your basement ceiling, use the four main principles of soundproofing:
- Adding mass: Heavy materials block sound.
- Damping vibrations: Special materials absorb vibration energy.
- Decoupling: Creating separate layers or spaces to stop vibrations.
- Sealing gaps: Stopping sound leaks through holes and cracks.
Using several of these together gives the best results.
Step-by-step Methods To Reduce Noise In Basement Ceilings
1. Seal Gaps And Cracks
Small openings in the ceiling let a lot of noise pass through. Sealing these is a simple, low-cost way to reduce sound.
- Use acoustic caulk or silicone sealant on gaps around pipes, electrical wires, and ductwork.
- Seal the edges where the ceiling meets the walls.
- Add weatherstripping to doors leading upstairs.
This step is often missed, but it makes a big difference, especially with other soundproofing methods.
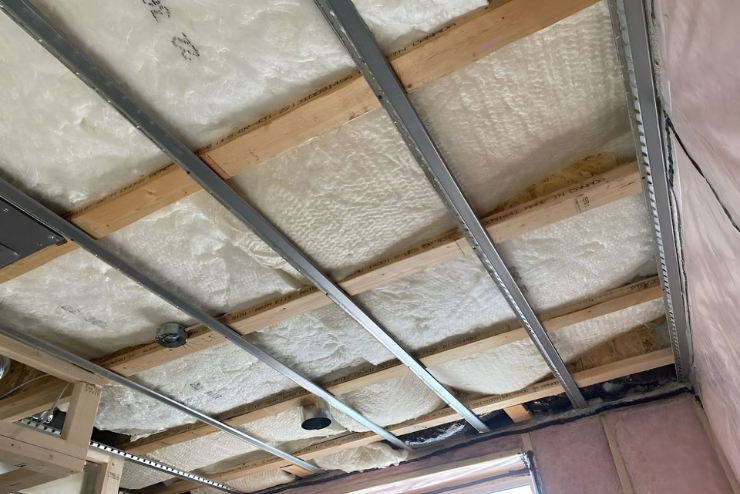
2. Add Acoustic Insulation Between Joists
Insulation is one of the most effective ways to block sound. Fiberglass and mineral wool batts are popular because they are easy to install and affordable.
- Cut the batts to fit tightly between joists.
- Fill every space, including small corners.
- Mineral wool is denser and blocks more sound than fiberglass.
For best results, use insulation with a Sound Transmission Class (STC) rating of 45 or higher. The higher the STC, the better it blocks sound.
3. Install Resilient Channels
Resilient channels are thin metal strips that attach to the joists before adding drywall. They create a small air gap, separating the drywall from the joists. This makes it harder for sound vibrations to travel.
- Fasten the channels perpendicular to the joists.
- Attach new drywall to the channels, not the joists.
- Avoid screwing the drywall directly into the wood, or you lose the benefit.
This method is especially useful for impact sounds.
4. Upgrade To Soundproof Drywall
Regular drywall is thin and not designed for noise control. Soundproof drywall is heavier and has special layers to block sound.
- Brands like QuietRock and CertainTeed SilentFX offer drywall with higher STC ratings.
- Replace or add a second layer of drywall for better results.
- Seal all seams and edges with acoustic caulk.
Here’s a comparison between regular and soundproof drywall:
| Type | STC Rating | Thickness | Cost (per sq ft) |
|---|---|---|---|
| Standard Drywall | 30-34 | 1/2″ | $0.40-$0.60 |
| Soundproof Drywall | 50-60 | 5/8″ | $1.20-$2.00 |
Soundproof drywall costs more but delivers much better noise reduction.
5. Add A Second Layer Of Drywall With Damping Compound
If replacing drywall is not possible, you can add a second layer on top of the existing ceiling. Place a damping compound like Green Glue between the layers.
- The damping compound absorbs vibrations and turns them into heat.
- Use at least 1/2″ drywall for the second layer.
- Stagger the seams to avoid direct sound paths.
This combination can improve the STC by 10-15 points.
6. Install Acoustic Panels Or Tiles
Acoustic panels and ceiling tiles absorb sound, reducing echoes and noise reflection. They are often used in home theaters or studios.
- Choose panels with a Noise Reduction Coefficient (NRC) of 0.7 or higher.
- Install panels across the entire ceiling for best results.
- Decorative acoustic tiles are available for a finished look.
Panels mainly help with airborne noise and echo, not impact noise.
7. Use Mass Loaded Vinyl (mlv)
Mass Loaded Vinyl (MLV) is a heavy, flexible material that blocks noise. It can be hung between the joists or attached to the ceiling.
- MLV is usually 1/8″ thick and weighs 1 pound per square foot.
- Seal edges and seams with tape or caulk.
- Cover with drywall or panels for a clean finish.
Here’s how MLV compares with other options:
| Material | STC Rating | Approx. Cost (per sq ft) | Best For |
|---|---|---|---|
| Fiberglass Insulation | 35-39 | $0.50-$1.00 | Airborne Noise |
| MLV | 26-33 (per layer) | $2.00-$3.00 | Blocking All Noise |
| Acoustic Panels | Not rated (NRC .7+) | $2.00-$4.00 | Echo Reduction |
MLV is expensive but very effective, especially for serious soundproofing.
8. Decouple The Ceiling With A Suspended System
Suspended (drop) ceilings use a grid system to hang tiles below the existing ceiling. This creates an air gap that helps stop sound.
- Choose dense acoustic tiles designed for soundproofing.
- The larger the gap, the better the noise reduction.
- Add insulation above the tiles for extra effect.
This solution can lower the ceiling height, but it’s effective for both types of noise.
9. Soundproof Floor Above The Basement
Stopping noise at the source is often easier than blocking it below. If you can access the floor above, consider these steps:
- Add carpet and padding to absorb footsteps.
- Use underlayment with high impact insulation (IIC rating).
- Avoid hard flooring like tile or hardwood in high-traffic areas.
These changes can greatly reduce impact noise before it reaches the basement.
10. Address Hvac And Duct Noise
HVAC systems often carry noise from room to room. To reduce this:
- Wrap metal ducts with acoustic duct wrap.
- Seal leaks in the ductwork.
- Install flexible duct connectors to reduce vibration.
These steps are often missed but can solve many noise problems.
11. Use Door Sweeps And Solid Core Doors
If your basement has doors that open to upstairs, upgrade them for better sound control.
- Replace hollow core doors with solid core doors.
- Add door sweeps and weatherstripping to block gaps.
- Close doors when the basement is in use.
A solid core door can reduce sound transmission by up to 10 decibels.
12. Address Windows And Vents
Small windows or vents let sound leak in and out.
- Use acoustic window inserts to add mass and seal leaks.
- Install vent silencers or baffles to block noise but allow airflow.
- Add thick curtains for extra absorption.
One non-obvious tip: cover window wells with heavy foam covers to block outside noise.
13. Cover Exposed Pipes And Wires
Exposed pipes and wires often act as sound highways, carrying vibration and noise.
- Wrap pipes with pipe insulation or foam wrap.
- Use acoustic putty pads for electrical boxes.
- Secure loose pipes and wires to stop rattling.
Most people ignore pipes and wires, but they can make a big difference.
14. Build A Room-within-a-room
For ultimate soundproofing, build a room-within-a-room in your basement.
- Frame new walls and ceilings, leaving a gap from the old ones.
- Fill gaps with insulation and use double drywall with damping compound.
- Decouple the new ceiling with resilient channels.
This is expensive and complex but is used in professional studios and theaters.
15. Acoustic Treatment For Finished Basements
If your basement is already finished, you can still improve sound control without major construction.
- Add thick area rugs and soft furniture to absorb sound.
- Hang acoustic art panels on the ceiling or walls.
- Use bookcases or filled cabinets against walls to block noise.
These steps are easy, affordable, and improve comfort.
Common Mistakes To Avoid
Many people make the same mistakes when trying to reduce noise in a basement ceiling:
- Using only soft materials (like foam panels) and expecting full soundproofing. These only absorb some sound, not block it.
- Forgetting to seal gaps and holes, which lets noise leak through.
- Overlooking impact sound, which travels through the structure.
- Skipping professional help for complex problems, especially with HVAC or structural work.
Being aware of these mistakes saves money and delivers better results.
Professional Vs. Diy: When To Call An Expert
Some soundproofing projects are simple, but others require professional skills. Consider hiring an expert if:
- You want to build a room-within-a-room.
- The basement has water, mold, or electrical issues.
- The ceiling supports heavy loads or needs structural changes.
- You need guaranteed results for a home studio or business.
DIY is often enough for small projects, but professionals can ensure safety and performance for big jobs.
Credit: www.renoduck.com
Costs And Budgeting
Soundproofing a basement ceiling can cost anywhere from $100 for basic DIY improvements to $10,000+ for a full professional installation. Here’s a rough guide:
- Sealing gaps and adding insulation: $100–$500
- Resilient channels + drywall: $500–$1,500
- MLV + drywall: $1,000–$3,000
- Drop ceiling with acoustic tiles: $1,500–$4,000
- Room-within-a-room: $5,000–$15,000
Always budget for tools, caulk, screws, and safety gear. Small costs add up quickly.
Results: What To Expect
With the right steps, you can reduce noise in your basement ceiling by 20–50% or more. Combining insulation, mass, and sealing often brings the best results. Remember, no ceiling is 100% soundproof unless rebuilt completely, but most people are happy with the reduction.
Here’s a look at the improvement you might see:
| Method | Estimated Noise Reduction | Best For |
|---|---|---|
| Seal Gaps & Add Insulation | 10–20% | Budget DIY |
| Resilient Channels + Drywall | 25–35% | Remodel Projects |
| MLV + Second Drywall | 35–45% | Serious Soundproofing |
| Room-Within-a-Room | 50%+ | Professional Studios |
Credit: beesbuild.ca
Practical Tips For Success
- Plan your project before buying materials. Measure your ceiling and calculate what you need.
- Wear safety gear, including gloves and a mask, when working with insulation or drywall.
- Label pipes and wires before covering them for easy access later.
- Test your results after each step. Sometimes sealing gaps and adding insulation is enough.
- Ask for help if you are not comfortable with electrical or structural changes.
Non-obvious Insights
Many beginners believe soundproofing is only about thick walls or expensive products. In reality, sealing small gaps and adding layers with different materials often work better than one thick barrier. Also, remember that impact noise is much harder to stop than airborne noise, so focusing on the floor above can sometimes be the most efficient solution.
Another insight: soundproofing is not always about blocking all noise, but about creating a comfortable space for your needs. Sometimes, a combination of small changes gives you the quiet you want without large construction.
Frequently Asked Questions
How Much Does It Cost To Soundproof A Basement Ceiling?
The cost depends on the size of your basement, the methods you choose, and whether you hire a professional. Basic DIY projects can cost as little as $100–$500 for materials like insulation and caulk. Full soundproofing with MLV, resilient channels, and new drywall can reach $2,000–$5,000 or more.
Hiring a contractor for a room-within-a-room setup may cost $10,000+. Always plan your budget before starting.
Can I Soundproof A Finished Basement Ceiling Without Tearing It Down?
Yes, you can improve sound control in a finished ceiling. Add acoustic panels or tiles, seal visible gaps with acoustic caulk, and use thick rugs or carpets above the ceiling. If possible, add a second layer of drywall with damping compound.
These steps help without major demolition.
What Is The Best Insulation For Basement Ceiling Soundproofing?
Mineral wool is often the best choice because it is dense and resists both airborne and impact noise. Fiberglass works well for basic noise control and is cheaper. Use insulation with an STC rating of 45 or higher for the best results.
Will A Drop Ceiling Reduce Noise In My Basement?
A drop ceiling with dense acoustic tiles and insulation can reduce both airborne and some impact noise. The air gap and soft tiles absorb sound, but a drop ceiling is less effective than full drywall with resilient channels. Combine both for the best results.
Are There Building Codes Or Permits For Soundproofing A Ceiling?
Yes, some soundproofing projects may require building permits, especially if you are adding new walls, ceilings, or electrical work. Always check with your local building department before starting. For minor changes like insulation or panels, permits are usually not needed. For more information, see the CDC’s guide on noise and building safety.
Creating a quieter basement is possible with the right approach. By understanding the basics of noise transmission and choosing methods that fit your budget and skills, you can make your basement a comfortable, peaceful space for any activity. Take your time, follow the steps, and enjoy the results—a calmer, more enjoyable home environment.