Laying mosaic tiles on a floor can change an ordinary space into something striking and beautiful. Mosaic tiles come in many colors, shapes, and materials, allowing creative patterns and custom designs. If you want to add a unique touch to your kitchen, bathroom, or hallway, mosaic tiles can make a big difference.
However, many people feel unsure about installing them because the process looks complicated. The good news is, you don’t have to be a professional to lay mosaic tiles successfully. With careful preparation, the right tools, and some patience, you can achieve a smooth, long-lasting mosaic floor that looks fantastic.
This guide will walk you step by step through the entire process, from choosing your mosaic tiles to cleaning the finished floor. You will learn how to prepare your subfloor, cut and lay the tiles, apply grout, and handle common problems.
Whether you’re doing a small accent area or an entire room, you’ll find practical tips and clear explanations here. And you’ll discover a few tricks that most beginners miss—helping you avoid mistakes and save time. Ready to create your own mosaic masterpiece?
Let’s get started.
Understanding Mosaic Tiles
Before you begin, it’s important to understand what makes mosaic tiles different. Mosaic tiles are small pieces—usually less than 2 inches wide—made from materials like ceramic, glass, stone, or porcelain. They are often attached to mesh sheets, making them easier to lay and align. You can find mosaics in squares, hexagons, circles, and even custom shapes.
Mosaic tiles are popular for their versatility. They can create borders, patterns, and images that larger tiles cannot. Because mosaics have more grout lines, they provide extra grip, which is useful in wet areas like showers. However, the many small pieces mean you must be careful with spacing, adhesive, and cleaning.
Key insight: Beginners often forget that mosaic tiles need a flat, smooth surface because uneven spots will show through the small tiles. Also, the color of your grout will strongly affect the final look—light grout highlights the pattern, while dark grout blends the pieces together.
Tools And Materials You Will Need
Gathering the right tools and materials before you start will save you time and frustration. Here’s what you’ll need:
- Mosaic tile sheets or loose tiles (calculate at least 10% extra for cuts and errors)
- Tile adhesive (thinset mortar for most floors; use the type recommended for your tile and subfloor)
- Grout (choose sanded or unsanded based on your tile spacing and type)
- Notched trowel (1/4-inch for most mosaics)
- Tile spacers (1/16–1/8 inch, depending on your design)
- Rubber grout float
- Tile cutter or nippers
- Tape measure and pencil
- Level
- Bucket and sponge
- Knee pads (not essential, but highly recommended)
- Mixing paddle or stick
- Protective gloves
You might need a tile saw for glass or stone mosaics, especially if you have many straight cuts. A handheld nipper is handy for odd shapes.
Important tip: Always check the manufacturer’s instructions for your specific tiles and adhesives. Some glass mosaics need special adhesive or grout.
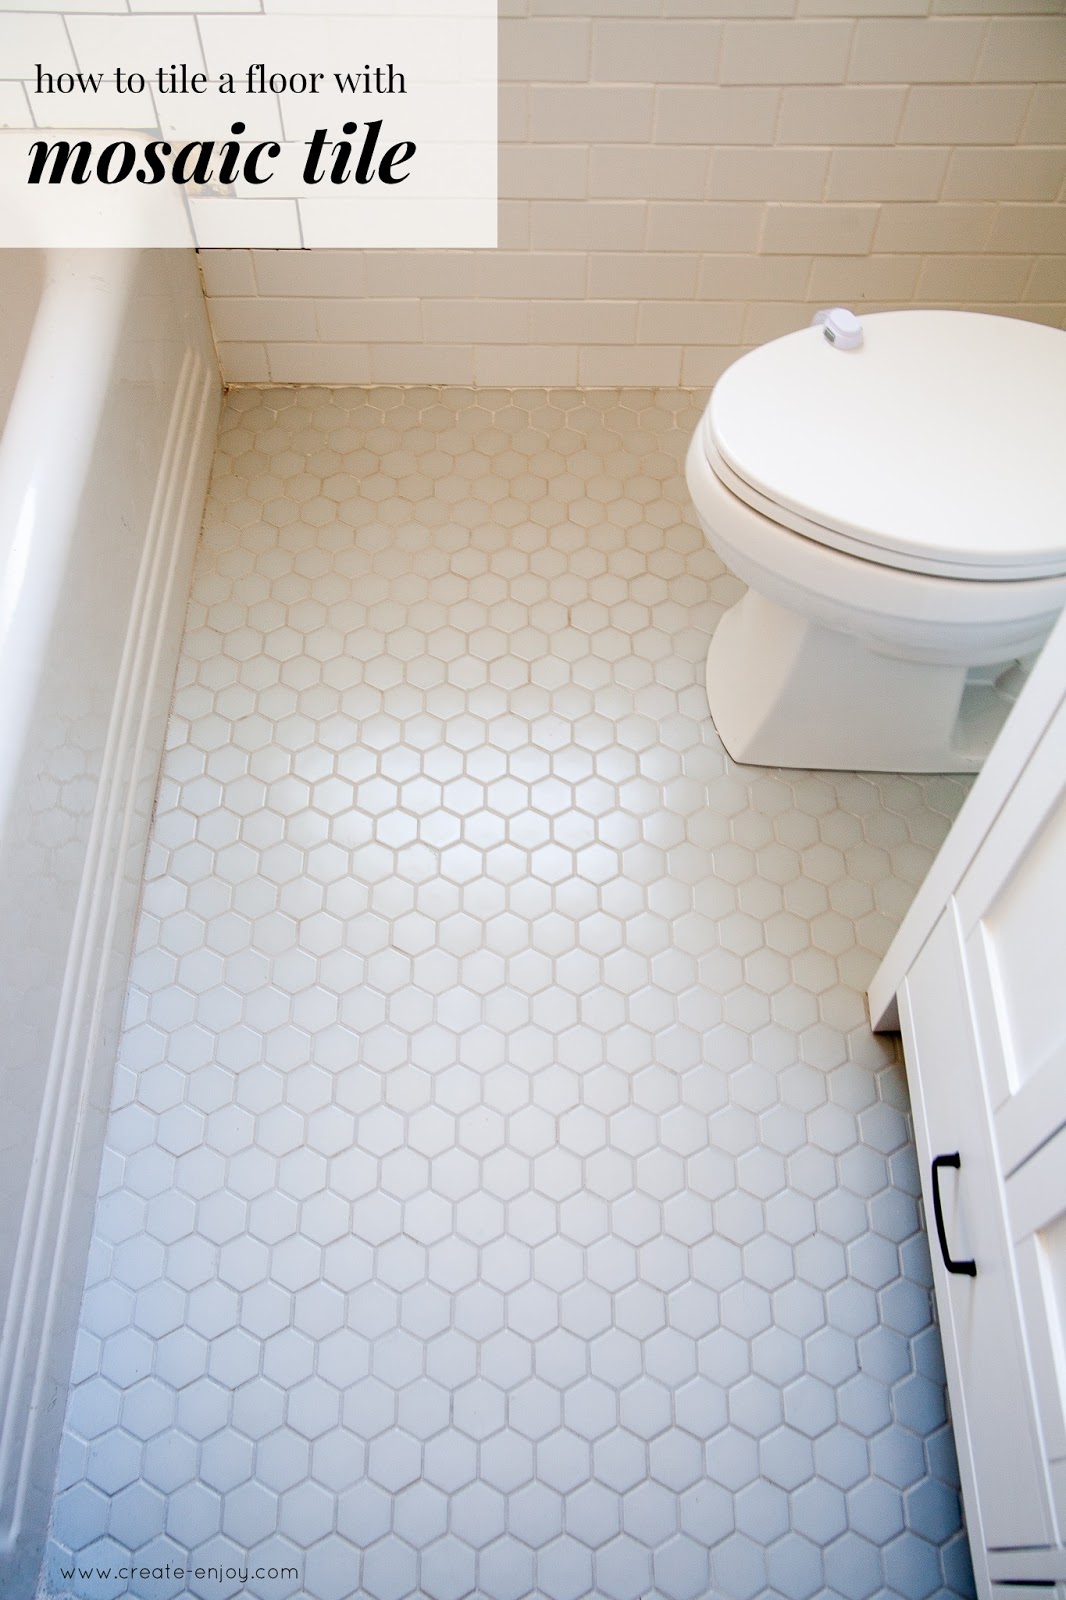
Credit: www.create-enjoy.com
Planning Your Layout
A good layout is key to a professional-looking mosaic floor. Don’t skip this step! Take time to measure, dry-fit, and adjust your plan before using any adhesive.
- Measure the floor area. Use a tape measure to find the length and width of your space. Multiply for the total square footage.
- Mark a reference line. Snap a chalk line or draw a pencil line through the center of the room. This helps you keep your mosaic sheets straight and symmetrical.
- Dry-lay the tiles. Place the sheets or loose tiles on the floor without adhesive. Check how the tiles fit near walls and corners. Adjust your starting point so you don’t end up with thin, awkward tile slivers at the edges.
- Plan around obstacles. If your floor has vents, drains, or other features, decide how to cut and place tiles around them. It’s better to have cut tiles along the edges, not in the middle of your design.
- Check sheet alignment. If you use mesh-backed sheets, make sure the joints between sheets are even and the tiles line up. Sometimes, you need to trim the mesh to keep the pattern consistent.
Non-obvious insight: It’s common to overlook how light will hit your mosaic floor. Place a few sheets and check at different times of day—glossy glass tiles can look very different under sunlight or artificial light.
Preparing The Subfloor
The foundation under your tiles is just as important as the tiles themselves. A poor subfloor will lead to cracked tiles, uneven grout, and a floor that doesn’t last.
Subfloor Types
Most mosaic floors are installed over one of these surfaces:
- Concrete (must be clean, dry, and free of cracks)
- Plywood (use a cement backer board over wood for best results)
- Old tile (can work if tiles are solid and roughened with sandpaper)
Never lay mosaic tiles directly on carpet, vinyl, or uneven wood.
Preparation Steps
- Clean the floor. Sweep and vacuum to remove dust, grease, and debris.
- Check for moisture. Concrete must be dry—tape a plastic sheet to the floor overnight. If water appears underneath, fix the moisture problem first.
- Repair damage. Fill cracks or holes with patching compound and let dry completely.
- Level the surface. Small mosaic tiles show every dip and bump. Use a long level to check the floor. If needed, use a self-leveling compound to smooth it out.
- Install backer board (if needed). For plywood, screw down cement board with thinset mortar underneath for stability. Stagger joints and tape seams with mesh tape.
Time-saving tip: Lay your mosaic sheets on the floor without adhesive, then step on them gently. If you feel any “wobble,” the subfloor needs more leveling.
:max_bytes(150000):strip_icc()/advice-on-installing-mosaic-tile-sheets-1822613-hero-170c46b1ce6d45e0be79bd608341ccac.jpg)
Credit: www.thespruce.com
Mixing And Applying Tile Adhesive
Tile adhesive (thinset mortar) holds your mosaics in place. The right type and technique prevent loose tiles and cracks.
Mixing Thinset
- Use a powder thinset for best results (pre-mixed can dry too quickly or be less strong).
- Pour thinset powder into a clean bucket, then add water according to package directions.
- Mix with a paddle or stick until smooth, like creamy peanut butter. Let it sit (“slake”) for 5–10 minutes, then stir again.
Tip: Only mix as much adhesive as you can use in 30 minutes—thinset dries fast.
Spreading Adhesive
- Spread adhesive in small sections (2–3 sq. Ft. at a time). This keeps it workable.
- Use the notched side of your trowel to create ridges in the thinset. Hold the trowel at a 45-degree angle.
- Flatten the ridges slightly for very thin mosaics, so the adhesive doesn’t squeeze up between the tiles.
Beginner mistake: Applying too much adhesive can make it ooze between the tiles and create a messy grout job later. Use just enough to hold the tiles—don’t overdo it.
Laying Mosaic Tiles
Now the creative part begins! Placing the mosaic tiles takes patience and care.
Setting Mosaic Sheets
- Press each sheet gently into the adhesive. Use your hands or a grout float to ensure even contact.
- Align sheets carefully. Make sure the joints between sheets line up and that the pattern stays consistent.
- Use tile spacers between sheets if needed to keep grout lines even.
- Tap down high spots with a rubber mallet or float so the tiles are level with each other.
- Check for adhesive squeeze-out. If thinset pushes up between the tiles, remove it with a small tool before it dries.
Setting Individual Tiles
If your pattern calls for single tiles or you need to fill gaps:
- Butter the back of each tile with a little adhesive.
- Press into place, lining up with the surrounding tiles.
- Check height and spacing. Adjust before the adhesive sets.
Pro tip: After placing several sheets, step back and look for crooked lines or misaligned patterns. It’s easier to fix mistakes now than after the adhesive dries.
Cutting Mosaic Tiles
Most mosaic sheets can be cut with scissors (for mesh) or a utility knife to fit edges. For the tiles themselves:
- Ceramic/porcelain: Use a tile cutter or nippers.
- Glass/stone: A wet saw gives cleaner cuts and avoids chipping.
Cut slowly and wear safety glasses. If a cut piece is too small, use tile nippers for better control.
Non-obvious insight: For sheets with many cuts, stick painter’s tape over the cutting line to keep tiles from shifting or cracking.
Letting Tiles Set
Once all the tiles are in place, let the adhesive cure before walking or grouting. Check the thinset package for recommended drying time—usually 24 hours.
- Avoid foot traffic and keep the area clean.
- Do not rush this step. Grouting too soon can ruin your work.
Grouting The Mosaic Floor
Grout fills the spaces between tiles and locks them in place. It also protects the edges from dirt and water.
Choosing Grout
- Sanded grout is for joints wider than 1/8 inch.
- Unsanded grout works for very narrow joints (1/16–1/8 inch), often seen with mosaics.
- Epoxy grout is stain-proof and strong but harder to use.
Pick a color that matches or contrasts with your tiles, depending on your design.
Mixing Grout
- Pour grout powder into a clean bucket.
- Add water slowly and mix until smooth—like toothpaste.
- Let stand for a few minutes, then remix.
Applying Grout
- Work in small areas. Spread grout with a rubber float at a 45-degree angle to the joints.
- Press grout into the gaps. Make sure every joint is filled.
- Remove excess grout by holding the float almost flat and scraping diagonally across the tiles.
- Wait 10–15 minutes. The grout will start to haze (dry) on the surface.
Cleaning Grout Haze
- Use a damp sponge to gently wipe away the haze. Rinse the sponge often.
- Do not use too much water, or you may wash out the grout from the joints.
- Let grout dry for 2–3 hours, then buff with a dry cloth to remove any remaining haze.
Expert tip: For glass mosaics, grout haze can be stubborn. Use a microfiber cloth for final polishing.
Sealing And Protecting The Floor
Most ceramic and porcelain mosaics don’t need sealing, but natural stone does. Sealing helps prevent stains and makes cleaning easier.
- Apply grout sealer after the grout is fully cured (usually 3 days).
- Use a small brush or applicator bottle. Wipe off extra sealer from the tile surfaces.
- Repeat if needed (check sealer instructions).
Important: Even if your tiles don’t need sealing, sealing the grout lines will help keep your floor looking new.
Cleaning Up And Final Touches
The last steps can make a big difference in the finished look.
- Remove all spacers.
- Vacuum or sweep to get rid of debris.
- Touch up grout lines if you see any gaps or holes.
- Replace baseboards or trim if you removed them earlier.
- Polish the tiles with a dry cloth for extra shine.
If you notice any loose tiles or grout cracks after drying, fix them right away to prevent further problems.
Common Mistakes And How To Avoid Them
Even careful DIYers can make mistakes. Here are some of the most common problems with mosaic tile floors—and how you can avoid them:
- Uneven surface: Not leveling the subfloor leads to bumpy tiles. Always check with a long level.
- Messy grout lines: Using too much adhesive or grout causes oozing between tiles. Apply adhesive thinly and clean excess before it dries.
- Misaligned patterns: Skipping layout planning can result in crooked lines. Dry-lay and adjust before starting.
- Wrong adhesive: Glass and stone need special thinset. Check product labels.
- Not waiting for curing: Walking or grouting too soon loosens tiles. Be patient.
- Ignoring expansion gaps: Leave a small gap at walls for floor movement—fill with flexible caulk.
Non-obvious insight: When using mosaic sheets, sometimes the mesh can show through clear tiles if the adhesive is too dark. Use white thinset for glass mosaics to prevent discoloration.
Comparing Mosaic Tiles: Materials And Uses
Choosing the right mosaic tile material is essential. Here’s a quick comparison to help you decide:
| Material | Best For | Pros | Cons |
|---|---|---|---|
| Ceramic | All floors, dry areas | Affordable, easy to cut | Less durable in wet areas |
| Glass | Accent borders, wet areas | Bright colors, waterproof | Can chip, shows adhesive |
| Stone | High-traffic, rustic look | Strong, unique texture | Needs sealing, heavier |
| Porcelain | Showers, kitchens | Very durable, water-resistant | Harder to cut |
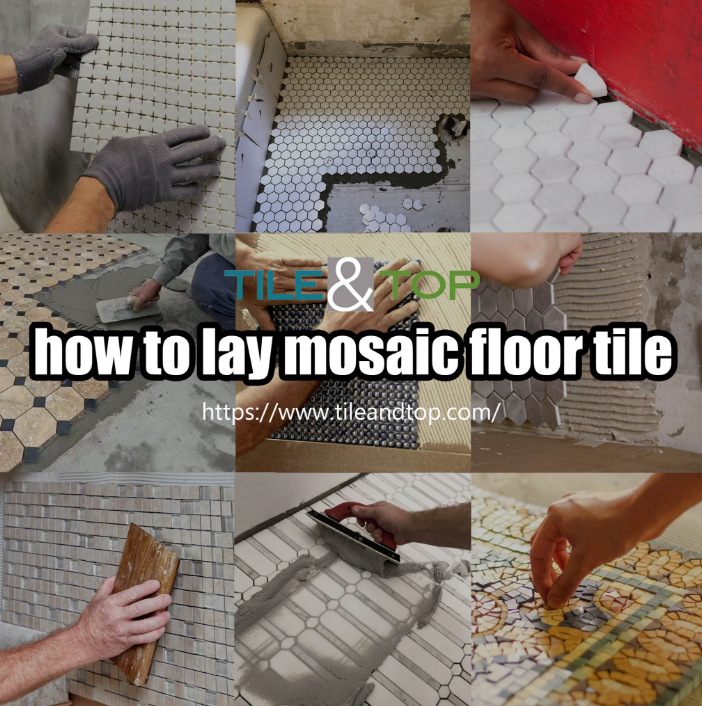
Credit: www.tileandtop.com
Cost Comparison: Diy Vs. Professional Installation
Wondering if you should do it yourself or hire a pro? Here’s a cost breakdown:
| Option | Material Cost (per sq. ft.) | Labor Cost (per sq. ft.) | Total (100 sq. ft.) |
|---|---|---|---|
| DIY | $6–$20 | $0 | $600–$2,000 |
| Professional | $6–$20 | $8–$15 | $1,400–$3,500 |
Note: Prices vary by region and tile type. DIY can save you money but takes more time and care.
Advanced Tips For A Stunning Mosaic Floor
If you want your mosaic floor to stand out, consider these advanced techniques:
- Mix tile sizes or materials for a custom look. For example, blend glass and stone for texture.
- Create a border or medallion using contrasting colors.
- Try herringbone or chevron patterns instead of basic grid layouts.
- Use accent tiles to highlight entryways or special areas.
- Install radiant heating under mosaics for warm bathroom floors.
Expert tip: Always order extra tiles from the same batch to ensure color consistency. Different batches can have slight color changes.
Maintenance And Long-term Care
Mosaic tile floors are easy to care for if you follow these simple steps:
- Sweep or vacuum regularly to remove grit that could scratch the tiles.
- Wipe up spills quickly to avoid grout stains.
- Use a pH-neutral cleaner—avoid harsh chemicals that can damage grout and tiles.
- Re-seal grout lines every 1–2 years if needed, especially for stone mosaics.
- Replace cracked tiles promptly to prevent water damage.
With good care, a mosaic tile floor can last 20 years or more.
When To Call A Professional
While most people can install mosaic tiles with patience and planning, you should consider a professional if:
- The subfloor is badly damaged or uneven.
- You want an intricate pattern or image.
- The project is very large (over 200 sq. Ft.).
- The area gets heavy traffic, like a commercial space.
A skilled installer can handle complex layouts and ensure a flawless finish.
For more details on tile installation standards, you can visit the Tile Council of North America.
Frequently Asked Questions
How Do I Cut Mosaic Tiles For Tricky Corners?
Use a combination of a tile nipper for small, curved cuts and a wet saw for straight lines. If your mosaic is on a mesh sheet, cut the mesh first, then trim individual tiles as needed. Always wear safety glasses and work slowly to avoid chipping.
Can I Lay Mosaic Tiles Over An Existing Tile Floor?
Yes, you can if the old tiles are solid, flat, and clean. Roughen the old tile surface with sandpaper, clean it well, and use a thinset mortar designed for tile-over-tile installation. Check that the extra height won’t affect doors or fixtures.
How Long Should I Wait Before Walking On My New Mosaic Floor?
Wait at least 24 hours after installing the tiles before walking on the floor. After grouting, avoid heavy traffic for another 24–48 hours. Always check the manufacturer’s instructions for drying and curing times.
What Is The Best Way To Prevent Grout From Staining?
Choose a high-quality, stain-resistant grout, and seal it well after installation. Wipe up spills right away, and use a pH-neutral cleaner for regular maintenance. In kitchens or entryways, re-seal grout lines every year for extra protection.
Do I Need To Use A Backer Board Under Mosaic Tiles?
You need a backer board if your subfloor is wood or uneven. Cement backer board gives a stable, moisture-resistant base for mosaics, especially in wet areas. Screw it down securely and tape the seams for best results.
Laying mosaic tiles on a floor is a rewarding project that adds style and value to your home. With careful planning, the right materials, and attention to detail, you can create a floor that lasts for years and showcases your personal style.
Take your time, follow each step, and enjoy the process—your beautiful mosaic floor will be worth the effort!