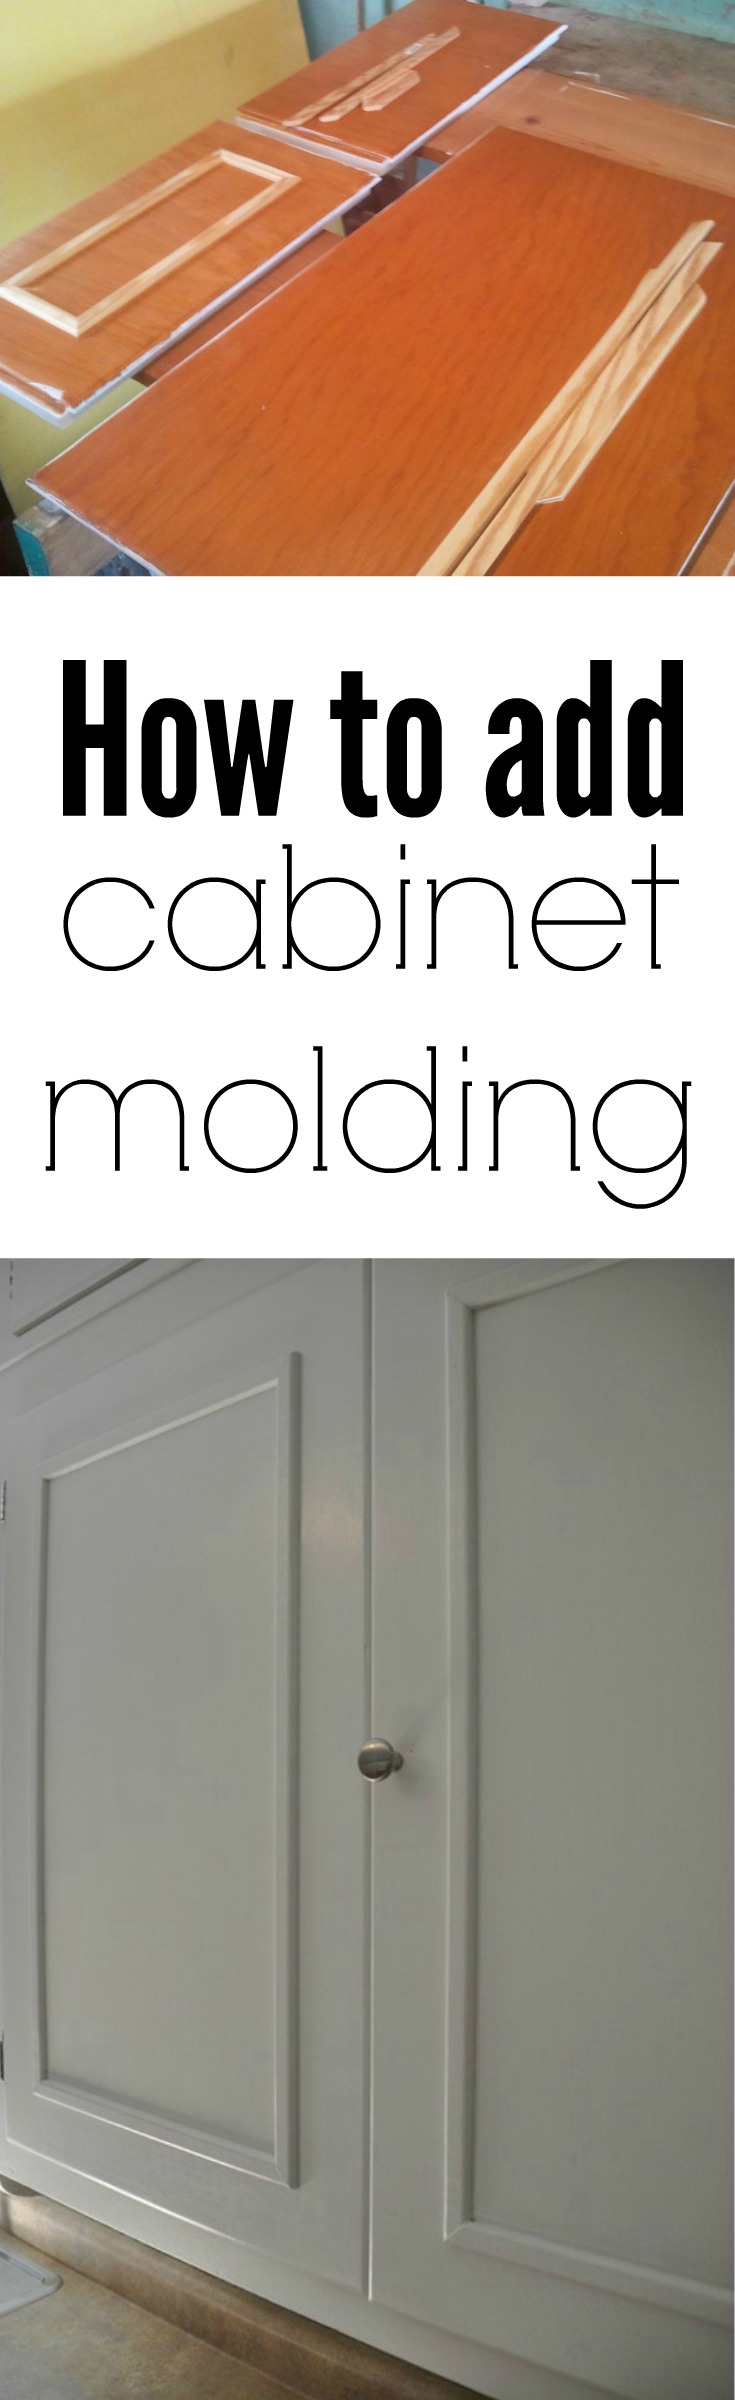
Transforming your cabinet doors with molding can turn simple furniture into something beautiful. Many homeowners want to upgrade their kitchens or bathrooms without spending thousands. Adding molding is a practical way to achieve a custom look. This project is not only cost-effective but also gives you creative control over the style and finish. Whether your cabinets are old or new, molding can add depth, character, and elegance. If you’re ready to learn how to put molding on cabinet doors, this guide will walk you through every step, from planning and choosing materials to installation and finishing touches.
Understanding Cabinet Door Molding
Before starting, it’s important to know what cabinet door molding is. Molding is decorative wood trim applied to the surface of doors. It can make flat doors look like expensive shaker or raised panel styles. There are many types, including bead, cove, quarter round, and more. Each brings a unique look. You can use molding on kitchen cabinets, bathroom vanities, or even storage units.
Adding molding is not just about looks. It can also hide small imperfections, help match doors to other furniture, and refresh old cabinets. This project is suitable for beginners and experienced DIY enthusiasts, but success depends on careful planning and attention to detail.
A less obvious benefit is that molding can help cover up slight warping or uneven edges on older cabinet doors, which are common in older homes. By choosing the right style and thickness, you can visually balance these imperfections and extend the life of your cabinets without needing a full replacement.
Planning Your Cabinet Molding Project
Proper planning is the foundation for a smooth cabinet molding project. Many people skip this step, but it’s crucial for professional results.
Choosing Your Molding Style
First, decide what style you want. Popular options include:
- Shaker style: Simple rectangular molding, clean and modern.
- Raised panel look: More complex, often using several layers of molding.
- Traditional: Uses ornate, detailed trims for a classic appearance.
- Contemporary: Sleek lines with minimal decoration.
Look at pictures online or in magazines for inspiration. Try to match your molding style with your room’s decor.
Another important detail: Don’t be afraid to blend styles for a unique look. For example, you might combine shaker frames with a small, decorative bead molding inside. Some homeowners even use leftover trim from other projects to create custom designs. The most important thing is that you feel happy with the look and it fits your space.
Measuring Cabinet Doors
Accurate measurements are essential. Use a tape measure to record the height and width of each door. Write these numbers down. If you’re working with several doors, label each one so you don’t get confused later.
Measure twice—one mistake can waste molding and ruin your design. Consider leaving a small gap (about 1/8 inch) around the edge of the door to prevent molding from interfering with hinges.
If your cabinets are in an older house, be aware that not all doors will be exactly the same size. Over time, wood can swell or shrink, so measure every door separately.
Calculating Materials
After measuring, calculate how much molding you need. Add up the perimeter of each door, then add 10% extra for mistakes or miscuts.
For example, a 20-inch by 30-inch door has a perimeter of 100 inches (2 x (20 + 30)). If you have five doors, multiply the perimeter by five and add extra. Buying a bit more than you need is wise.
It’s a smart idea to buy all your molding in one trip. Wood and MDF molding can have slight color or texture differences between batches, so buying together helps everything match.
Selecting Tools And Materials
You’ll need some basic tools and supplies for this project. Quality tools make the job easier and give better results.
Essential Tools
- Miter saw or miter box: For cutting molding at precise angles
- Measuring tape
- Pencil
- Wood glue
- Clamps
- Sandpaper (medium and fine grit)
- Caulk or wood filler
- Paintbrush or roller
- Nail gun or hammer and finishing nails
- Screwdriver (for removing doors)
Some optional tools include a square for making sure your cuts are perfectly straight, and a small level for checking if the molding sits evenly on the door. A utility knife can help clean up rough edges after cutting.
Materials
- Molding: Choose wood, MDF, or polystyrene. Wood is durable but more expensive. MDF is affordable and easy to paint.
- Primer and paint or stain
- Cabinet door cleaning supplies
Don’t forget safety gear: goggles, gloves, and a mask if you’re sanding or painting.
Comparing Molding Materials
Here’s a quick comparison of popular molding materials:
| Material | Cost | Durability | Paintability | Best For |
|---|---|---|---|---|
| Wood | High | Excellent | Very Good | Premium finishes |
| MDF | Medium | Good | Excellent | Painted cabinets |
| Polystyrene | Low | Fair | Good | Budget projects |
MDF is the most popular for painted cabinets. Wood is best if you want a natural or stained look. Polystyrene is lightweight and easy to work with, but can dent more easily, so it’s better for low-traffic areas.
Preparing Cabinet Doors
Preparation is often overlooked but makes a big difference. Clean, smooth doors help molding stick and give a better finish.
Removing Doors
Take the doors off the cabinets using a screwdriver. Label each door and hinge so you know where they go later.
Place the doors on a flat, clean surface. If you don’t have a workbench, use a table with a drop cloth.
For large kitchens, stack doors neatly and keep hardware in labeled bags or containers. This prevents losing small parts and makes reinstallation faster.
Cleaning And Sanding
Wipe the doors with a damp cloth to remove dust, grease, or old paint. If the doors are very dirty, use a mild cleaner.
Sand the surface lightly with medium-grit sandpaper. Focus on the areas where the molding will go. Then, use fine-grit sandpaper for a smooth finish.
Dust off the doors after sanding. If you skip this, paint and glue won’t stick well.
For sticky residue or stubborn grease, a mixture of water and a little dish soap works well. Rinse and dry the surface before sanding.
Repairing Damage
Check for dents, holes, or chips. Fill these with wood filler, let dry, and sand smooth. This step is important for older cabinets.
If you notice deeper cracks, use a high-quality wood filler and let it cure fully before sanding. Don’t try to rush this step—proper repairs help the new molding last longer.
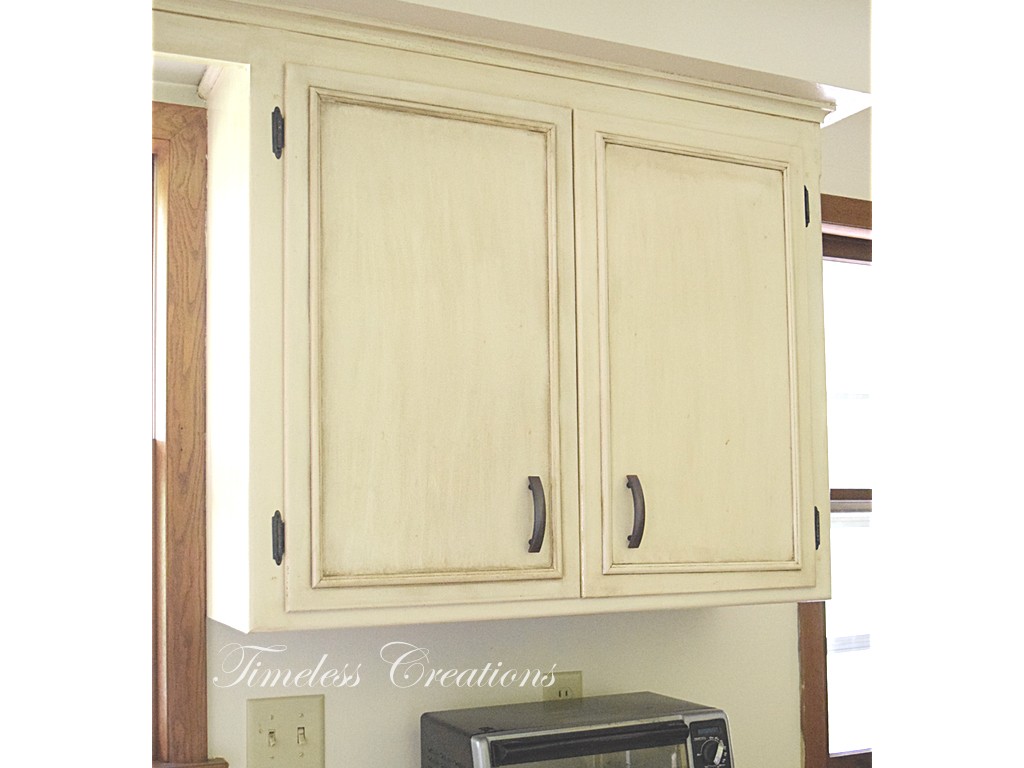
Credit: timelesscreationsmn.com
Cutting And Preparing Molding
Precision is key when cutting molding. Rushed or uneven cuts lead to gaps and weak joints.
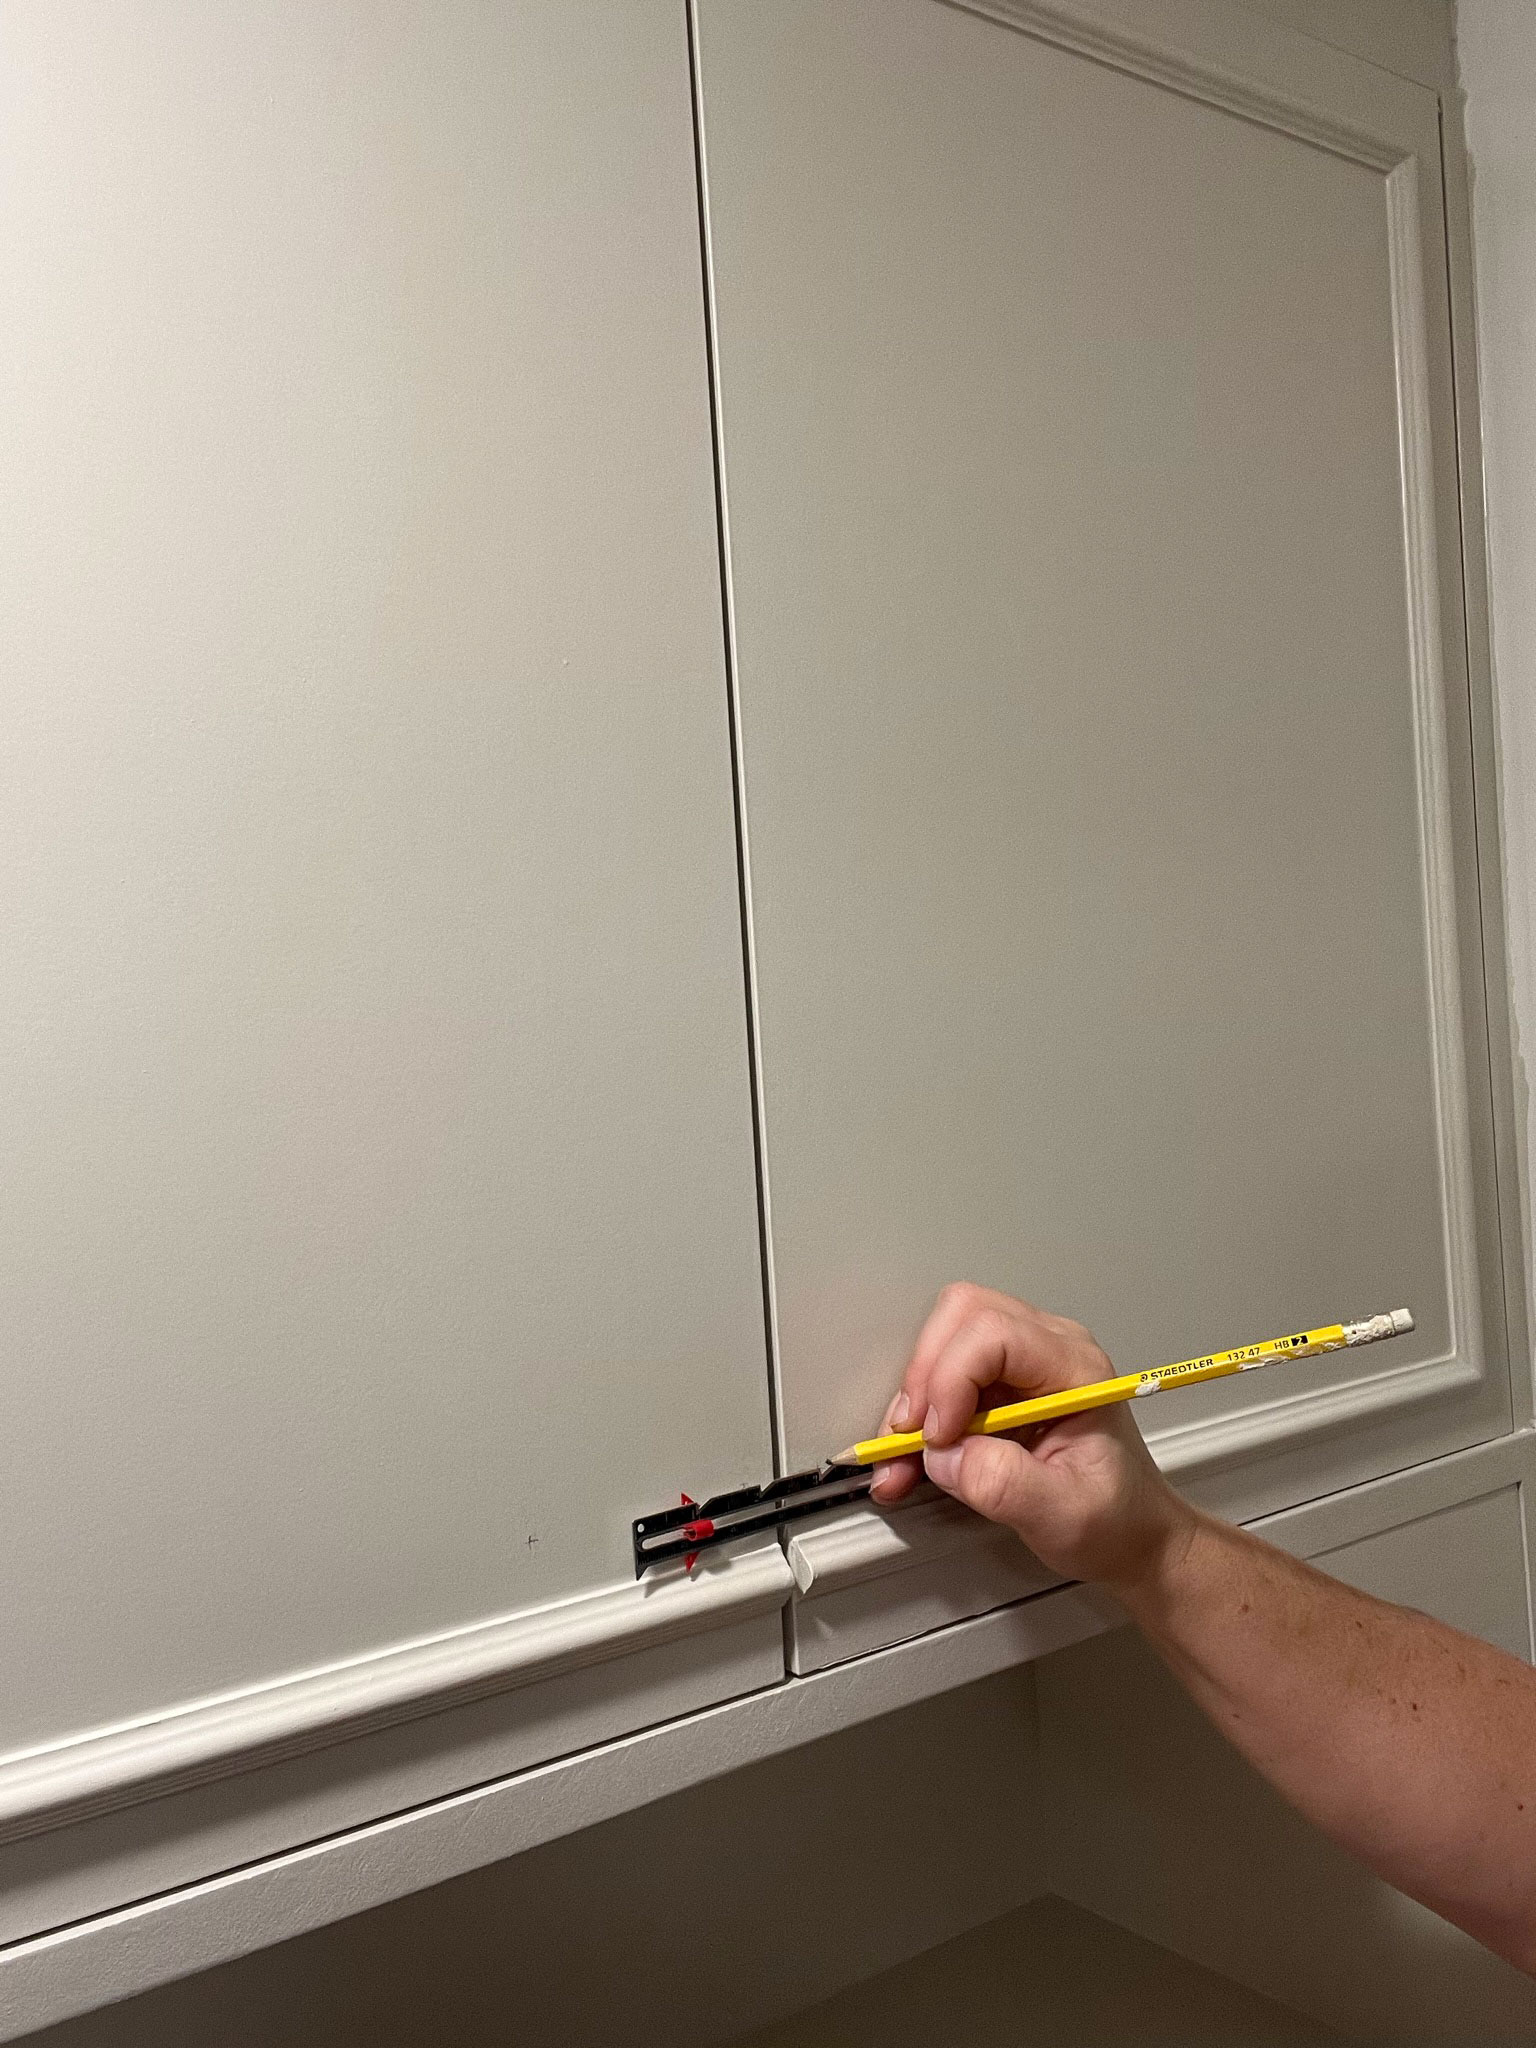
Measuring And Marking
Measure each side of the cabinet door where molding will go. Mark the molding pieces with a pencil.
It’s helpful to label your pieces, especially if you’re working with several doors at once. Use a small sticky note or write directly on the back of the molding.
Cutting Angles
Use a miter saw or miter box to cut molding at a 45-degree angle for corners. This creates a neat, professional look. If your molding is straight, just cut to length.
Always cut a bit longer than your measurement and test fit before finalizing the cut. Small adjustments can make a big difference.
A beginner mistake is to cut all four pieces for a door before checking the fit. Instead, cut and check each piece one at a time. This makes it easier to adjust for small differences in door size or shape.
Dry Fitting
Lay out the cut molding on the door without glue. Check that each piece fits tightly. Adjust as needed. This step catches mistakes before you attach anything.
During dry fitting, pay special attention to the corners. Even small gaps will stand out after painting, so get them as tight as possible now. If needed, sand or trim the ends for a perfect fit.
Attaching Molding To Cabinet Doors
Now it’s time to install the molding. This step requires patience and accuracy.
Gluing And Clamping
Apply wood glue to the back of each molding piece. Press it onto the door, lining up with your marks.
Use clamps to hold the molding in place while the glue dries. If you don’t have clamps, lay the door flat and use weights.
Let the glue set for at least 30 minutes. For MDF or polystyrene, use glue recommended by the manufacturer.
When working with heavier or wider moldings, consider using extra clamps at the corners to ensure the molding doesn’t shift as it dries. Remember to wipe away any glue that squeezes out before it dries, as dried glue can affect paint or stain absorption.
Nailing Molding
For extra strength, use finishing nails or a nail gun. Place nails at the ends and in the middle of each piece. Be careful not to split the molding.
Countersink the nails slightly below the surface. Fill the holes with wood filler for a smooth finish.
If you’re using a hammer, place a small piece of scrap wood over the molding to avoid dents or marks from missed hammer blows. A nail set tool makes countersinking easier and more accurate.
Handling Common Issues
Beginners often struggle with gaps at the corners. If you have small gaps, fill them with caulk or wood filler. Sand after it dries.
For tight joints, press the molding firmly and wipe away excess glue.
If you find one side of the molding doesn’t sit flat, check for dust or dried paint underneath. Sometimes a small piece of debris can prevent a good bond, so always check surfaces before gluing.
Credit: decorandthedog.net
Finishing Touches
Finishing is where your project comes to life. Careful painting or staining makes the molding look like it belongs.
Filling And Sanding
Fill any nail holes, gaps, or seams with wood filler or caulk. Let it dry, then sand gently.
Wipe the door clean again to remove dust.
If you want a perfectly smooth surface, use a tack cloth after sanding. This picks up fine dust that regular rags can miss.
Priming
Apply a primer to the molding and door, especially if you’re painting. Primer helps paint stick and hides small flaws.
Let the primer dry completely. Follow the manufacturer’s instructions for drying times.
If you’re using a strong color or covering dark wood, a tinted primer can save time and improve the final look.
Painting Or Staining
Paint with a brush, roller, or spray. Use thin coats for a smooth finish. If staining, apply evenly and wipe off excess.
Let each coat dry before adding another. Usually, two coats are enough.
For best results, use cabinet-grade paint or stain. These are more durable and resist chips.
A helpful tip: If you want a sprayed finish but don’t own a sprayer, foam rollers can give a similar effect without brush marks. For staining, apply in the direction of the wood grain for an even color.
Comparing Paint And Stain Finishes
Here’s a comparison to help you choose:
| Finish | Look | Durability | Maintenance | Best For |
|---|---|---|---|---|
| Paint | Smooth, uniform color | High | Easy to clean | Modern styles |
| Stain | Natural wood grain | Medium to high | Needs touch-ups | Traditional looks |
Paint hides flaws but covers wood grain. Stain shows the grain but needs more care.
If you have kids or pets, paint is usually easier to clean and more resistant to sticky fingerprints.
Reinstalling Cabinet Doors
After the finish dries, reinstall the doors. Use the labels you made earlier to put each door and hinge back in the right place.
Check that the doors open and close smoothly. If molding is too thick, it might hit the cabinet frame. Adjust hinges if needed.
If the molding causes minor rubbing, you can often adjust the hinge screws to move the door slightly. For larger problems, carefully sand the edge of the molding until the door opens freely.
Advanced Tips For Perfect Results
Even simple projects can become stunning with a few advanced techniques.
Adding Multiple Layers
For a richer look, stack two or three molding types. For example, use a thin bead molding on top of a wider base. This adds depth and complexity.
You can also mix materials—pairing wood with painted MDF for contrast. When stacking, glue and clamp each layer separately, letting each one dry before adding the next.
Creating Custom Designs
Use your imagination. Try geometric patterns, arches, or circles. You can even paint the molding a different color for contrast.
Some creative homeowners use stencils to add patterns inside the molding frames, or use metallic paint to highlight details for a luxury effect.
Installing Molding On Glass Doors
If your cabinets have glass panels, use special adhesive and avoid nails. Frame the glass with molding for a high-end look.
A tip: When working near glass, tape off the area to avoid smudges or glue marks. Use a thin, flexible molding to fit neatly around the glass.
Avoiding Common Mistakes
Some mistakes are easy to avoid:
- Don’t rush measurements or cuts.
- Don’t skip sanding and priming.
- Don’t use thick molding that hits hinges or frames.
Many beginners forget to check door clearance after adding molding. Always test before final installation.
Another common issue is forgetting to let paint or glue fully cure before handling. Patience pays off with a long-lasting, beautiful result.
Maintenance And Longevity
Cabinet door molding needs care to stay beautiful. Regular maintenance prevents chips, stains, and loose pieces.
Cleaning
Wipe molding with a soft, damp cloth. Avoid harsh chemicals. If painted, use mild soap.
For grooves and details, use a soft brush or an old toothbrush to remove dust.
Repairing Damage
If molding chips or cracks, fill with wood filler and touch up paint or stain. Loose molding can be re-glued and nailed.
Save a bit of your original paint or stain for future touch-ups. Label the container with the date and color for easy reference.
Preventing Wear
Install molding in dry, temperature-stable rooms. Humidity can cause wood and MDF to swell.
If you live in a humid area, consider sealing the back of the molding with a clear finish before installation. This extra step helps prevent warping over time.
Credit: erinzubotdesign.com
Cost And Time Estimates
Knowing the cost and time helps you plan better. Here’s a breakdown:
Cost
- Molding: $1–$5 per foot for wood, $0.50–$2 for MDF
- Paint or stain: $10–$30 per quart
- Tools: $50–$200 (if you don’t own them)
A typical kitchen with 10 cabinet doors might cost $150–$500 for materials.
If you already have some tools or leftover paint, your costs will be even lower. Don’t forget to budget for extras like brushes, sandpaper, or new hardware if you want a complete makeover.
Time
- Planning and measuring: 1–2 hours
- Cutting and fitting: 2–4 hours
- Gluing and nailing: 2–3 hours
- Finishing: 4–8 hours (includes drying time)
Most projects can be finished in a weekend.
Adding complex designs or multiple layers of molding may add an extra day. Factor in drying time for glue and paint—rushing these steps can lead to problems later.
Comparing Diy Vs. Professional Installation
Should you do it yourself or hire a pro? Here’s a clear comparison:
| Factor | DIY | Professional |
|---|---|---|
| Cost | Low | High |
| Quality | Depends on skill | Consistent |
| Time | Longer | Faster |
| Flexibility | High (custom choices) | Medium |
| Learning | Yes | No |
DIY is cheaper and lets you customize, but mistakes can be expensive. Professionals are faster and give high-quality results, but cost more.
If you have never used a miter saw or painted cabinets before, try practicing on scrap wood first. This builds confidence and reduces errors when working on your actual cabinets.
Real-life Examples And Inspiration
Seeing real projects can spark ideas and show what’s possible.
- Modern kitchen: Flat cabinet doors with simple shaker molding, painted white.
- Traditional bathroom: Bead and cove molding, stained to match wood vanity.
- Creative kids’ room: Brightly colored molding in geometric shapes.
One non-obvious insight: Some homeowners use molding to hide uneven cabinet doors. By adding molding, you can disguise slight size differences.
Another tip: If you want a vintage look, distress the molding after painting using fine sandpaper. This makes new cabinets look old.
A creative example: In a small laundry room, one homeowner used leftover molding to create a chevron pattern on each cabinet door, turning a plain space into a design feature.
Safety Considerations
Safety matters, especially when cutting wood and using adhesives.
- Always wear goggles and gloves.
- Keep children and pets away from the workspace.
- Use tools according to manufacturer instructions.
- If painting indoors, ventilate the room.
If you’re sensitive to paint fumes, choose low-VOC paints and stains. Always read product labels for safety instructions.
Sourcing Materials And Guidance
Many home improvement stores carry molding, glue, and paint. Staff can help with measurements and recommendations. For deeper guidance, you can read more about molding types and cabinet upgrades at Home Depot.
Local lumber yards may also offer unique molding profiles or custom cuts. Online videos and forums can offer step-by-step visuals if you need extra help.
Frequently Asked Questions
What Type Of Molding Works Best For Cabinet Doors?
For most projects, MDF molding is best because it’s easy to cut, affordable, and paints well. Use wood molding for natural or stained finishes. Avoid thick molding that can interfere with hinges.
Can I Put Molding On Laminate Cabinet Doors?
Yes, you can add molding to laminate doors. Clean the surface well and use a glue designed for laminates. Sometimes, roughen the area lightly with sandpaper to help the glue stick.
How Do I Prevent Gaps At The Corners?
Cutting accurate 45-degree angles with a miter saw helps. If gaps appear, fill them with wood filler or caulk before painting. Always dry fit the pieces before gluing.
Should I Paint Or Stain Molding Before Attaching?
Painting or staining before attaching can make finishing easier, especially for intricate moldings. However, touching up after installation is often needed to cover nail holes and seams.
What If My Cabinet Doors Have Curved Or Beveled Edges?
If doors have curved edges, use flexible molding or choose designs that work with the shape. Flexible trim is available at many stores. For beveled edges, attach molding to the flat center panel for best results.
Adding molding to cabinet doors is a rewarding project that transforms your space. With careful planning, the right tools, and patient finishing, you can achieve results that rival professional installations. Whether you want a modern update or a classic look, molding gives you control and creativity.
Start small, learn as you go, and soon your cabinets will look stunning.