
When you look at a kitchen, bathroom, or even a hallway cabinet, one detail often stands out: the hardware. These are the handles, knobs, and pulls that not only let you open the doors and drawers but also add style and character to the entire space. Installing hardware on cabinets may seem simple, but a clean, professional finish takes some planning, patience, and know-how. Whether you’re updating old cabinets or finishing a new project, understanding how to put hardware on cabinets correctly can transform your space and add value to your home.
Many people try to rush this step, thinking it’s just a matter of screwing on a few knobs. But the wrong placement, tools, or technique can leave you with crooked pulls, uneven doors, or even splintered wood. If you want to avoid these common mistakes and get a result that looks like it was done by a pro, this guide will take you through every detail.
Why Cabinet Hardware Matters
Cabinet hardware serves both function and style. You use it every day, so it needs to be strong and comfortable. But it’s also one of the first things people see in a room. The right hardware can update a dated kitchen or make simple cabinets look custom-made. In fact, a study by Houzz found that 64% of homeowners who remodeled their kitchens changed their cabinet hardware for a fresh look.
Choosing and installing hardware is also a cost-effective way to improve the look of your home. Compared to replacing cabinets, new knobs and pulls cost much less and can often be installed in one afternoon.
Types Of Cabinet Hardware
Before you start drilling, it’s important to know the different types of hardware and what works best for your cabinets.
Knobs
Knobs are small, usually round or square, and attach with a single screw. They’re common for cabinet doors and sometimes used on drawers. Knobs come in many styles—from modern metal to classic glass.
Pulls
Pulls (also called handles or bars) have two screw holes and are often used on drawers. They give you more grip, which is helpful for heavy drawers. Pulls can be simple or very decorative.
Cup Pulls
These are half-moon shaped pulls that you grip from underneath. Cup pulls are popular in farmhouse or vintage kitchens.
Backplates
A backplate sits behind a knob or pull. It can protect the cabinet from scratches and add visual interest.
Latches
Latches are often used in traditional or country kitchens. They keep cabinets securely closed and add an old-fashioned touch.
Appliance Pulls
For built-in appliances like fridges or dishwashers, you may need appliance pulls. These are larger and made to handle more weight.
Edge Pulls
Edge pulls are mounted on the top or side edge of a cabinet door or drawer, creating a sleek, modern look.
Knowing these types helps you choose hardware that fits your style and your cabinets’ needs.
Tools And Materials Needed
To get a professional finish, gather the right tools and materials before you start. Here’s what you’ll likely need:
- Drill (cordless or corded)
- Drill bits (usually 3/16″ or 1/4″ for most hardware screws)
- Screwdriver (manual or electric)
- Measuring tape or ruler
- Pencil or marker
- Masking tape (to prevent splintering)
- Cabinet hardware template or jig (for accurate placement)
- Awl or nail (for making starter holes)
- Level (for long pulls or multiple cabinets)
- Screws (usually included with hardware, but check length)
- Safety glasses
- Painter’s tape (optional, for marking)
- Wood filler (for mistakes or old holes)
- Sandpaper (for smoothing filled holes)
You might not need every tool for every job, but having these on hand makes the process smoother.
Planning Hardware Placement
One of the most common mistakes is guessing where to put knobs and pulls. Bad placement can throw off the look of your whole room. Take time to plan before drilling any holes.
Visual Balance
Hardware should look balanced and be comfortable to reach. For upper and lower cabinets, keep lines straight so everything looks tidy.
Standard Placement Guidelines
Here are some common measurements used by cabinet installers:
- Knobs on doors: Place 2.5″ to 3″ from the bottom corner (base cabinets) or top corner (wall cabinets), and 1″ to 2″ in from the edge.
- Pulls on doors: Position the bottom hole 2.5″ to 3″ from the bottom corner and 1″ to 2″ in from the edge. The pull should run vertically.
- Knobs on drawers: Centered left to right, and top to bottom. For tall drawers, you can place two knobs.
- Pulls on drawers: Centered, or for wide drawers, use two pulls or one long pull.
- Double doors: Place hardware on the opposite sides, mirroring each other for symmetry.
Using Templates And Jigs
A hardware template or jig is a plastic or metal tool with pre-marked holes. It helps you drill in the same spot every time, speeding up the process and reducing mistakes. You can buy one or make your own with cardboard.
Mark Before Drilling
Always mark the exact spot with a pencil before drilling. If you’re unsure, use masking tape to try different positions without damaging your cabinets.
How To Choose The Right Hardware
Not all hardware fits every cabinet. Consider these points:
Cabinet Style
- Modern cabinets: Go for sleek bar pulls or edge pulls.
- Traditional cabinets: Classic knobs, cup pulls, or decorative handles.
- Transitional cabinets: Mix of styles, often simple pulls with subtle detail.
Material And Finish
Popular materials include stainless steel, brass, zinc, and ceramic. Choose a finish that matches your faucet and light fixtures—like brushed nickel, oil-rubbed bronze, or matte black.
Size
- Knobs: 1″ to 1.5″ diameter is standard.
- Pulls: For drawers, a common rule is to choose pulls about one-third the width of the drawer. For example, a 15″ drawer would get a 5″ pull.
- Heavy drawers: Consider longer or sturdier pulls.
Durability
High-use kitchens need hardware that can stand up to daily wear. Solid metal is more durable than hollow or painted hardware.
Price
Hardware can cost from $1 for a basic knob to $20 or more for designer pulls. Count every knob and pull before ordering, and buy a few extras for mistakes or future needs.
Matching Or Mixing
You can use the same hardware throughout, or mix knobs and pulls for interest. Just keep finishes and styles compatible.
Step-by-step: How To Put Hardware On Cabinets
Now, let’s get hands-on. Here’s a practical guide to installing cabinet hardware like a pro.
1. Prepare Your Workspace
Clear your counters and open the cabinets and drawers. Put down a drop cloth if you’re working over finished surfaces. If you’re replacing old hardware, remove it and fill any old holes with wood filler. Let dry and sand smooth.
2. Select Your Hardware Placement
Decide if you want knobs, pulls, or both. For a uniform look, measure and mark all cabinet doors and drawers before drilling. Use a template or jig for consistency.
3. Mark The Drill Holes
Place masking tape over the area to prevent splintering. Mark the drill hole with a pencil through your template. Double-check measurements before moving on.
4. Drill Pilot Holes
Use a sharp drill bit slightly smaller than your hardware screw. Drill straight through the tape and cabinet face. For thick drawers, use a longer bit or drill from both sides to avoid splintering.
5. Attach The Hardware
Insert the screw from the inside of the cabinet or drawer and tighten the knob or pull on the front. For pulls, hand-tighten both screws before fully securing. Make sure the hardware is straight before final tightening.
6. Check Alignment
Step back and check that everything lines up. For long pulls, use a level. Make adjustments before fully tightening.
7. Clean Up
Remove masking tape and wipe away pencil marks. Test each knob and pull to make sure they’re secure and comfortable.
8. Repeat For All Cabinets
Continue for each door and drawer, using your template for even spacing.

Credit: www.thriftydecorchick.com
Common Mistakes And How To Avoid Them
Most problems with cabinet hardware come from rushing or skipping steps. Here are mistakes beginners make and how to avoid them.
Guessing Placement
Never eyeball hardware placement. Use a template and measure every time.
Using The Wrong Drill Bit
A too-large bit can make holes that are loose and wobbly. Start small—you can always enlarge the hole if needed.
Not Using A Pilot Hole
Screwing directly into wood can split it. Always drill a pilot hole first.
Over-tightening Screws
Too much force can crack the hardware or the cabinet face. Tighten until snug, not until it won’t turn anymore.
Not Checking For Obstructions
On drawers, make sure the screw won’t hit the sides or the contents of the drawer. For doors, check for shelves or hinges in the way.
Ignoring Door Thickness
Standard hardware screws are for 3/4″ thick doors. If your cabinets are thinner or thicker, you may need shorter or longer screws.
Forgetting To Test
Before drilling all your cabinets, install one knob or pull. Check the look and feel, then continue.
Special Cases: Drawers, Double Doors, And Pantry Cabinets
Not all cabinets are the same. Here’s how to handle special situations.
Installing On Drawers
For wide drawers (over 24″), consider two knobs or pulls. Place them each about one-third in from the edge for even pulling force. For heavy drawers, this prevents stress on the hardware.
Installing On Double Doors
On doors that meet in the middle, hardware should be mirrored. Use a level to keep handles lined up.
Pantry And Tall Cabinets
For tall pantry doors, use longer pulls for better grip. Place the pull vertically, about waist height for most people.
Repairing And Updating Old Hardware Holes
If you’re replacing old hardware with a new size or shape, you may need to fill and redrill holes.
- Remove old hardware and clean the area.
- Fill holes with wood filler, slightly overfilling.
- Let dry completely, then sand smooth.
- Touch up paint or stain if needed.
- Measure and mark new holes using a template.
This process prevents visible holes and gives your cabinets a fresh look.
Comparing Different Hardware Install Methods
Let’s break down three common ways to install cabinet hardware:
| Method | Tools Needed | Speed | Best For | Accuracy |
|---|---|---|---|---|
| Manual Measuring | Tape, ruler, pencil, drill | Slow | 1-2 cabinets | Medium |
| Store-Bought Template | Template, drill | Fast | Multiple cabinets | High |
| Custom Cardboard Jig | Cardboard, tape, drill | Medium | Odd sizes/shapes | High if made well |
As you can see, templates and jigs save time and improve accuracy, especially for large kitchens.
Matching Hardware To Home Styles
Choosing the right hardware isn’t just about function—it’s also about style. Here’s how common hardware types fit with popular design trends:
| Home Style | Recommended Hardware | Finish Ideas |
|---|---|---|
| Modern | Bar pulls, edge pulls | Brushed nickel, matte black |
| Farmhouse | Cup pulls, ceramic knobs | Oil-rubbed bronze, antique brass |
| Traditional | Glass knobs, decorative handles | Polished brass, chrome |
| Transitional | Sleek pulls, understated knobs | Satin nickel, matte black |
Mixing hardware can work, but keep a consistent finish for a unified look.
Hardware Placement Examples For Different Cabinets
Let’s look at real-world examples to clarify common placements:
- Base cabinet doors: Knobs 2.5″ up from bottom, 1.5″ in from edge.
- Wall cabinet doors: Knobs 2.5″ down from top, 1.5″ in from edge.
- Standard drawers: Pulls centered horizontally and vertically.
- Wide drawers: Two pulls, each 1/3 in from edge.
- Tall pantry doors: Long pull, mounted vertically at arm height.
- Corner cabinets: Place knob or pull where both doors meet for easy access.
- Appliance panels: Large pulls, matched to other cabinet hardware.
These guidelines cover most kitchen and bathroom setups.
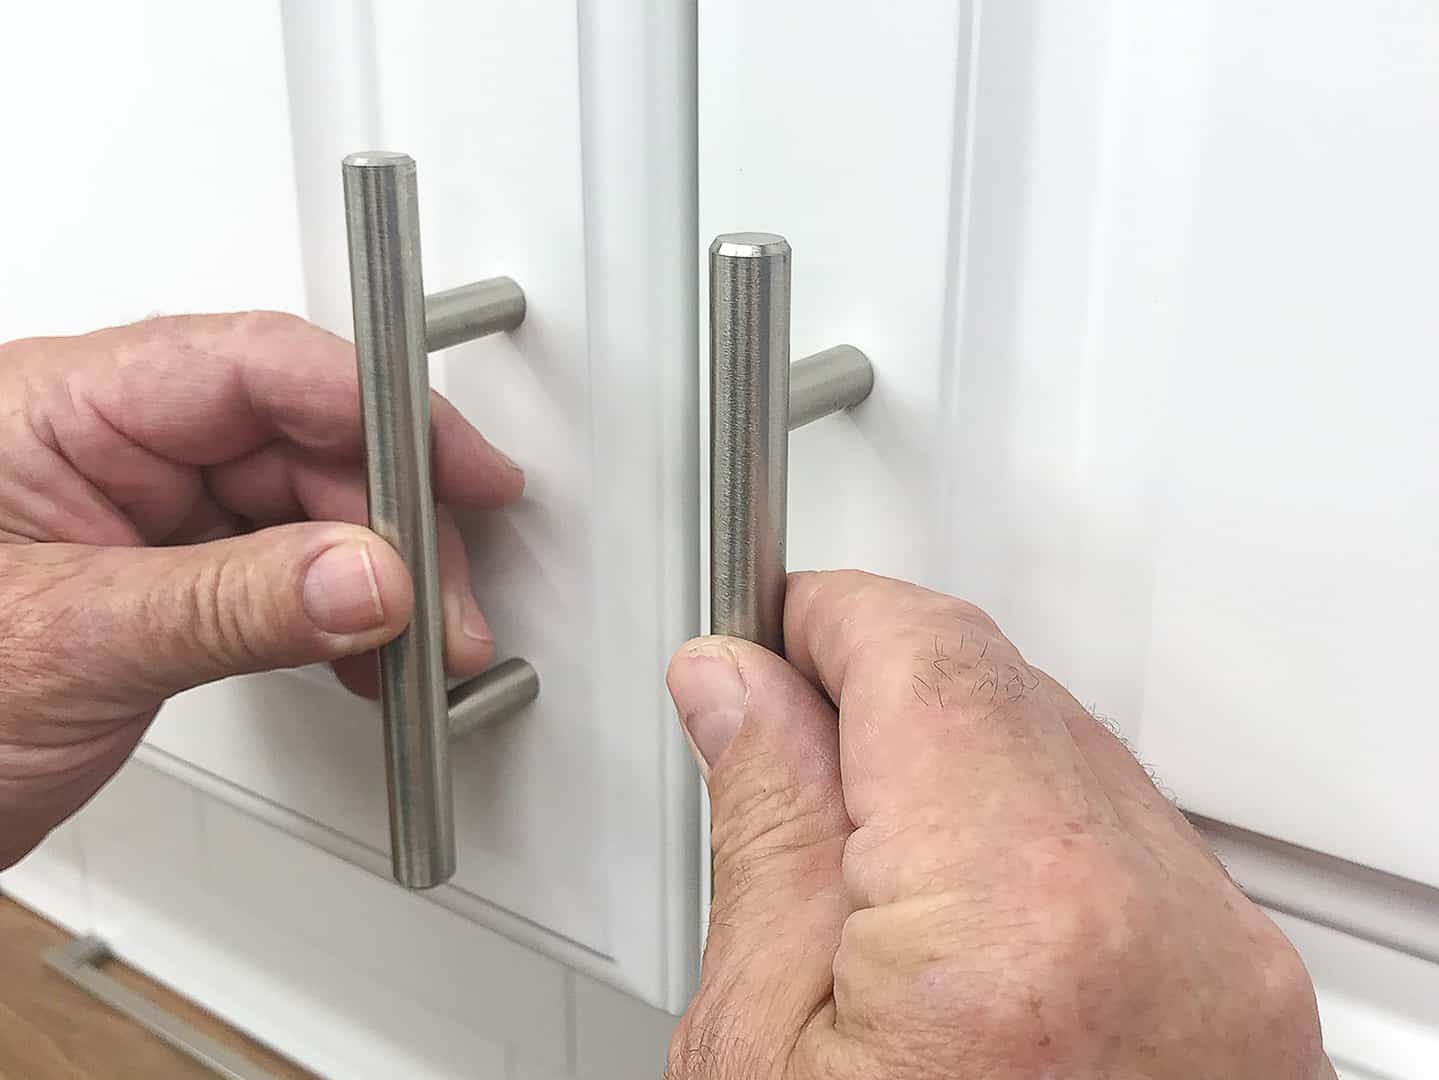
Credit: truepositiontools.com
Two Advanced Tips Pros Use
Most beginners miss these:
- Test with Painter’s Tape: Before drilling, attach hardware with double-sided tape or painter’s tape. Open and close the door to feel the placement.
- Check Handedness: For left-handed users, consider mirroring hardware if it feels more natural.
These small steps can make a big difference in daily use.
Cleaning And Maintaining Cabinet Hardware
After installation, keep your hardware looking new:
- Wipe with a damp cloth and mild soap.
- Avoid harsh chemicals that can wear finishes.
- Tighten any loose screws yearly.
- For solid brass or copper, polish as needed.
Proper care extends the life and look of your hardware.
Cost And Value Considerations
Quality hardware is an investment. Here’s a cost breakdown:
- Basic knobs/pulls: $1–$4 each
- Mid-range: $5–$10 each
- Designer: $15–$30 each
A standard kitchen might need 30–40 pieces. Expect to spend $100–$500 for a full set, depending on your choices.
According to Remodeling Magazine’s Cost vs. Value Report, minor kitchen remodels (including hardware updates) have one of the highest returns on investment for home projects, sometimes over 70%.
When To Hire A Pro
Most homeowners can install hardware themselves with patience and careful measuring. But consider a professional if:
- You have expensive or delicate cabinets (like solid wood or painted finishes)
- You want a highly custom look or complex pattern
- You lack the right tools or confidence
A professional installer can finish a large kitchen in a few hours, with guaranteed results.
Safety Tips
- Always wear safety glasses when drilling.
- Hold cabinet doors steady to avoid slipping.
- Keep fingers clear of the drill bit.
- Clean up sawdust to prevent slipping.
These simple steps keep your project accident-free.
Comparing Materials: Durability And Maintenance
Here’s how popular hardware materials compare:
| Material | Durability | Maintenance | Style Fit |
|---|---|---|---|
| Stainless Steel | High | Low, wipe clean | Modern, transitional |
| Brass | Medium-High | Occasional polishing | Traditional, vintage |
| Zinc Alloy | Medium | Low, wipe clean | All styles |
| Ceramic | Medium | Low, avoid dropping | Farmhouse, vintage |
| Glass | Medium | Low, gentle cleaning | Traditional, vintage |
Choose material based on your kitchen’s needs and your cleaning habits.
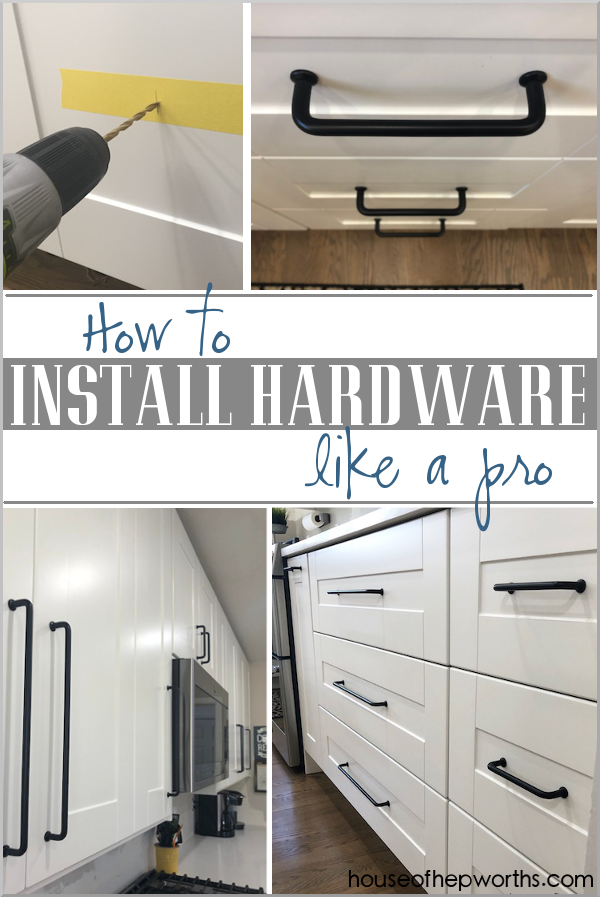
Credit: www.houseofhepworths.com
Troubleshooting: Fixing Common Problems
If you run into issues:
- Loose hardware: Check for stripped holes. Fill with toothpicks and wood glue, let dry, then redrill.
- Crooked pulls: Loosen screws, adjust, and retighten.
- Splintered wood: Use wood filler and sand smooth before repainting.
- Wrong screw length: Replace with screws that match your cabinet thickness.
Most problems can be fixed without removing the entire door or drawer.
Environmental And Health Considerations
Some hardware contains lead or other heavy metals. For kitchens, choose lead-free and RoHS-compliant hardware for health and safety. Many reputable brands offer eco-friendly finishes, too.
Recycling old hardware is another smart move. Donate reusable handles to local charities or recycling centers.
Where To Learn More
If you want in-depth technical details, the Wikipedia Cabinetry Page covers cabinet construction and related hardware in detail.
Frequently Asked Questions
How Do I Measure For Cabinet Hardware Placement?
Use a measuring tape and mark the spot according to standard guidelines (like 2. 5″ from the bottom for base cabinets). A hardware template or jig helps keep placement consistent.
Can I Install Hardware Without A Drill?
While possible, using a drill is highly recommended. Manually screwing into wood is difficult and can split the cabinet. A small cordless drill with the right bit makes the job easier and cleaner.
What Size Screws Do I Need For My Cabinet Hardware?
Most hardware comes with 1″ screws, designed for 3/4″ cabinet doors. For thicker or thinner doors, buy screws that extend about 1/4″ past the back of the hardware. Always check before starting.
How Do I Fix A Crooked Knob Or Pull?
Loosen the screw, adjust the hardware to the correct position, and retighten. If the hole is off, fill it with wood filler, let dry, and redrill in the right spot.
Should All The Hardware In My Home Match?
Not necessarily. You can mix styles between rooms (kitchen vs. bathroom), but keep hardware in the same room matching in finish and style for a coordinated look.
Upgrading your cabinet hardware is one of the simplest ways to refresh your kitchen or bath. With careful planning, the right tools, and attention to detail, you can achieve a look that’s both beautiful and functional. Take your time, measure twice, and enjoy the transformation you bring to your home.