
Pulling up vinyl plank flooring can seem like a big task, but with the right guidance, it’s much easier than most people think. Whether you’re planning a renovation, fixing water damage, or simply want a new look, removing vinyl planks is something you can do yourself. Many homeowners and renters choose vinyl plank flooring because it’s affordable, durable, and easy to install. But when it’s time to take it out, knowing the correct steps and tricks makes all the difference.
If you make mistakes while removing vinyl flooring, you risk damaging your subfloor, creating extra repair work, or even hurting yourself. That’s why this guide covers everything you need to know, from preparation to cleaning up after removal. You’ll learn how to identify your plank type, gather the right tools, and avoid common pitfalls many beginners don’t realize.
By the end, you’ll feel confident and ready to tackle this project—without stress or confusion.
Understanding Vinyl Plank Flooring Types
Before you start pulling up vinyl plank flooring, it’s important to know what type you have. Not all vinyl planks are installed the same way, and removal methods vary.
Click-lock Planks
These click-lock planks snap together without glue or nails. They “float” above the subfloor. Removal is usually easier since you can just lift them out once you start at the edge.
Glue-down Planks
Glue-down vinyl planks are attached with adhesive. You’ll need to loosen the glue before you can remove the planks. This process takes more time and effort.
Loose Lay Planks
Loose lay planks rest on the floor without glue or locking systems. They’re weighted to stay in place. Removal is straightforward, but dust or debris under the planks can make them stick.
Peel-and-stick Planks
Peel-and-stick vinyl planks have adhesive backing. You peel off the protective layer and stick them to the floor. Removing these planks often leaves sticky residue.
Why does this matter? Because using the wrong removal technique can damage your subfloor or make the process much harder. If you’re not sure which type you have, try to lift a plank at the edge. If it pops up easily, it’s likely click-lock or loose lay. If it resists, you probably have glue-down or peel-and-stick.
Preparing For Vinyl Plank Removal
Proper preparation is the key to a smooth removal. Many people rush into pulling up planks and regret it later. Here’s how to prepare:
Clear The Room
Take out all furniture, appliances, and decor. Don’t forget rugs, curtains, or anything resting on the floor.
Gather Essential Tools
You’ll need these tools for most vinyl plank removal jobs:
- Utility knife (for cutting planks or adhesive)
- Pry bar (to lift planks, especially at edges)
- Hammer (for gentle tapping)
- Floor scraper (for adhesive removal)
- Gloves (to protect your hands)
- Safety goggles (important for eye protection)
- Mask (to avoid breathing in dust or fumes)
- Garbage bags (for old planks and debris)
- Heat gun or hair dryer (for loosening glue, if needed)
Protect The Subfloor
If you plan to reuse the subfloor, lay down drop cloths or plastic sheeting around the edges. This prevents scratches, dents, and mess.
Turn Off Appliances
If you have vinyl planks near kitchen appliances or radiators, unplug them or turn them off. This avoids electrical hazards.
Ventilation
Open windows or turn on fans. Removing vinyl can release dust or chemical fumes, especially if glue is involved.
Check For Moisture
If you’re removing vinyl due to water damage, check for moisture under the planks. Mold can be hidden. Wear a mask and gloves, and be ready to clean moldy areas.
Step-by-step Guide To Removing Vinyl Plank Flooring
Now, let’s dive into the exact steps. The process is a bit different for each vinyl plank type, so follow the instructions for your flooring.
1. Start At An Edge Or Corner
Begin at a wall or doorway. Use your utility knife to cut through caulk or trim if it blocks the planks. If you see baseboards, remove them gently with a pry bar.
2. Lift The First Plank
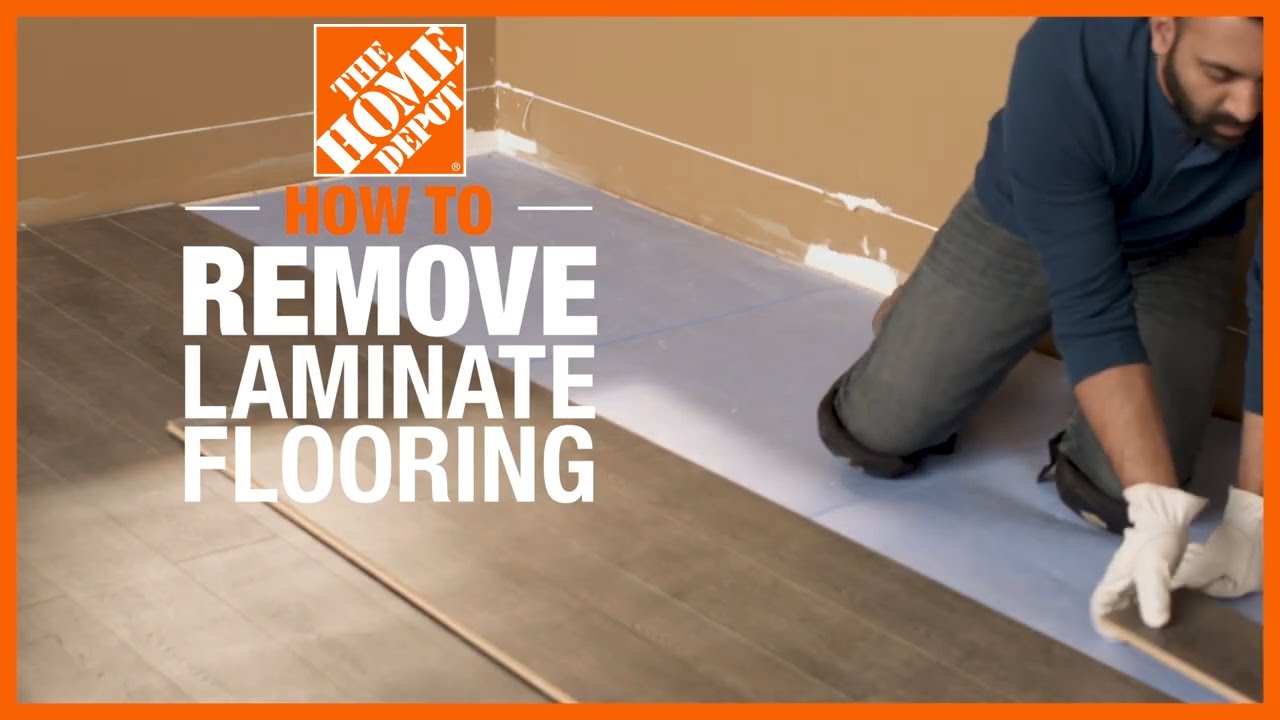
For click-lock or loose lay planks, insert your pry bar under the edge and lift. For glue-down or peel-and-stick, score the edges with your knife and try to peel up a corner.
3. Remove Additional Planks
Once the first plank is out, work your way along the edge, lifting each plank. For click-lock, you may need to tilt the planks to unlock them. For glue-down, use a floor scraper and a heat gun to soften adhesive.
4. Deal With Adhesive
With glue-down and peel-and-stick planks, expect leftover adhesive. Use a floor scraper and heat to loosen it. Work slowly to avoid damaging the subfloor.
5. Remove Residue
Sticky glue can be stubborn. Try mineral spirits or adhesive remover for tough spots. Always test a small area first to avoid damaging the subfloor.
6. Inspect The Subfloor
After all planks are removed, check the subfloor for damage, mold, or leftover debris. Sweep thoroughly. If you see cracks or holes, fill them with wood filler or patching compound.
7. Clean Up
Bag up old planks and debris. Vacuum the area to remove dust. If you plan to install new flooring, make sure the subfloor is smooth, dry, and clean.
Tips For Easier And Safer Vinyl Plank Removal
Removing vinyl flooring can be tiring, but these tips help you avoid common mistakes and save time.
Work In Small Sections
Don’t try to remove all planks at once. Work in 2–3 foot sections. This prevents fatigue and reduces risk of damaging the subfloor.
Use Proper Tools
A floor scraper makes adhesive removal much easier. If you don’t have one, rent from a hardware store.
Heat Is Your Friend
A heat gun or even a hair dryer softens glue and makes planks easier to lift. Be careful not to overheat, which can damage the planks or subfloor.
Keep Planks Flat
Stack removed planks flat to avoid warping. If you plan to reuse them, this is especially important.
Watch Out For Hidden Nails Or Screws
Sometimes installers add extra fasteners. Check carefully as you lift planks. Remove any nails or screws to avoid injury.
Don’t Rush
Rushing can cause damage. Take your time, especially with glue-down planks.
Avoid Water
Don’t use water to clean adhesive. It can cause swelling or mold in the subfloor.
Save Sample Planks
Keep a few sample planks. If you need to match future flooring, this helps.
Check Local Disposal Rules
Vinyl planks may need special disposal. Check your city’s rules before tossing them.
Comparing Removal Difficulty By Flooring Type
Some vinyl plank types are easier to remove than others. Here’s a quick comparison:
| Vinyl Plank Type | Removal Difficulty | Adhesive Residue | Estimated Time per 100 sq ft |
|---|---|---|---|
| Click-Lock | Easy | None | 1–2 hours |
| Glue-Down | Hard | Heavy | 3–4 hours |
| Loose Lay | Easy | None | 1–2 hours |
| Peel-and-Stick | Moderate | Medium | 2–3 hours |
Tools Comparison: What Works Best For Vinyl Plank Removal?
Having the right tools makes the job faster and safer. Here’s how basic tools compare:
| Tool | Best Use | Efficiency | Cost |
|---|---|---|---|
| Utility Knife | Scoring edges, cutting planks | Moderate | $5–$15 |
| Pry Bar | Lifting planks, removing trim | High | $10–$25 |
| Floor Scraper | Removing adhesive | High | $20–$40 |
| Heat Gun | Loosening glue | High | $30–$60 |
| Hammer | Tapping pry bar, removing nails | Moderate | $10–$20 |
Credit: www.youtube.com
Handling Subfloor Issues After Vinyl Plank Removal
After you pull up vinyl plank flooring, the subfloor may have issues. It’s important to fix these before installing new flooring.
Common Subfloor Problems
- Adhesive residue
- Scratches
- Dents
- Moisture damage
- Uneven surfaces
Fixing Adhesive Residue
Scrape off as much adhesive as possible. For stubborn spots, use mineral spirits or commercial adhesive remover. Wear gloves and ventilate the area.
Repairing Scratches And Dents
Fill scratches with wood filler if your subfloor is wood. Let it dry, then sand smooth.
Addressing Moisture Damage
If you see water stains or mold, treat the area with bleach or mold remover. Let it dry completely before adding new flooring.
Leveling Uneven Surfaces
Use floor patching compound for dips or bumps. Spread it with a trowel, let it dry, and sand smooth.
Checking For Structural Damage
If you find deep cracks or soft spots, call a professional. Subfloor repairs can be complicated.
Dealing With Obstacles During Vinyl Plank Removal
Sometimes you run into unexpected problems, like stuck planks or hidden pipes. Here’s how to handle them:
Planks Stuck Under Trim
Use a utility knife to cut along the trim. Gently lift the trim with a pry bar. Don’t force it—breakage is common.
Planks Glued Too Well
Use a heat gun to soften glue. Work slowly. If the glue won’t budge, try a commercial adhesive remover.
Planks Around Appliances
Unplug and move appliances before removal. If planks are cut around appliances, you may need to trim edges with a utility knife.
Hidden Pipes Or Wires
If you suspect pipes or wires under the floor, proceed carefully. Don’t use force. Consult a professional if unsure.
Mold Or Mildew
Wear a mask and gloves. Remove planks, clean the area with bleach, and let it dry before replacing flooring.

Credit: www.reddit.com
Vinyl Plank Removal For Large Areas
Removing vinyl plank flooring in large rooms or entire homes takes planning. Here’s how to manage bigger projects:
Create A Removal Plan
Divide the space into sections. Work one section at a time to avoid fatigue.
Recruit Help
Ask friends or family for assistance. Teamwork speeds up the process, especially for heavy or stubborn planks.
Rent Professional Equipment
For large areas, consider renting a floor scraper or industrial heat gun. These tools save time and effort.
Schedule Disposal
Arrange for junk pickup or a dumpster if you have lots of planks. Don’t pile debris indoors—this can attract pests.
Take Breaks
Work for 30–45 minutes, then rest. This keeps you safe and prevents mistakes.
Tips To Avoid Damage During Removal
Avoiding damage is crucial, especially if you plan to reuse the subfloor or planks.
Don’t Use Excessive Force
Gentle pressure works better than brute force. Forcing planks can crack them or gouge the subfloor.
Protect Walls And Trim
Lay down drop cloths near walls. Use a pry bar carefully to avoid damaging trim.
Clean As You Go
Sweep debris regularly. Dust and grit can scratch surfaces.
Check For Asbestos
Older homes may have asbestos in adhesives or underlayment. If you suspect asbestos, stop and consult a professional.
Label Planks For Reuse
If you plan to reinstall planks elsewhere, label them by section. This makes reinstallation easier.
What To Do After Removing Vinyl Plank Flooring
Once all planks are gone, you need to prepare for the next steps.
Clean The Subfloor
Sweep and vacuum thoroughly. Remove all adhesive and debris.
Inspect For Issues
Look for cracks, holes, or moisture. Fix problems before installing new flooring.
Decide Next Steps
Choose your next flooring type—carpet, tile, hardwood, or new vinyl. Make sure the subfloor meets the requirements for your chosen material.
Dispose Of Old Planks Responsibly
Recycle if possible. Some vinyl planks are recyclable. Check local guidelines.
Consider Upgrading Underlayment
If you plan new vinyl flooring, upgrade underlayment for better comfort and soundproofing.
Common Mistakes To Avoid
Many people make avoidable errors during vinyl plank removal. Here’s what to watch for:
1. Skipping Preparation
Not clearing the room or gathering tools leads to frustration.
2. Using Excessive Force
This damages planks and subfloor.
3. Ignoring Adhesive Residue
Leftover glue affects new flooring installation.
4. Not Checking For Moisture
Moisture can cause mold and damage.
5. Rushing The Job
Fast removal often causes mistakes and injuries.
6. Improper Disposal
Throwing vinyl planks in regular trash may break local rules.
7. Not Wearing Safety Gear
Cuts and eye injuries are common. Gloves and goggles help.
8. Skipping Subfloor Inspection
Problems hidden under planks can ruin your next flooring.
9. Failing To Ventilate
Fumes from adhesive removers are dangerous.
10. Not Saving Sample Planks
You may need samples for matching or repairs.
Real-life Example: Removing Vinyl Plank Flooring After Water Damage
Imagine a homeowner finds water damage in the kitchen. The vinyl plank flooring is swollen and peeling. Here’s how they handled removal:
- Cleared the room and unplugged appliances.
- Used a pry bar to lift loose planks near the damaged area.
- Used a heat gun to soften glue under stubborn planks.
- Scraped adhesive with a floor scraper.
- Cleaned the subfloor and treated mold with bleach.
- Filled cracks with patching compound.
- Installed new vinyl planks after the subfloor dried.
This approach prevented further damage and ensured a smooth installation. The homeowner avoided common mistakes by preparing well and working slowly.
Environmental Impact Of Vinyl Plank Flooring Removal
Vinyl planks are petroleum-based and not always recyclable. Improper disposal harms the environment. Some communities offer vinyl recycling programs. Check your local waste authority for options.
Using eco-friendly adhesive removers and proper disposal methods reduces your environmental impact. If you plan to install new flooring, consider greener options like bamboo or cork.
Vinyl Plank Removal Costs: Diy Vs Professional
Removing vinyl plank flooring yourself saves money, but takes time and effort. Professional removal costs vary:
| Removal Method | Cost (per 100 sq ft) | Time Required | Best For |
|---|---|---|---|
| DIY | $50–$150 (tools & supplies) | 2–4 hours | Small rooms, budget projects |
| Professional | $300–$600 | 1–2 hours | Large areas, tough adhesive |
Hiring professionals is faster, but costs more. For glue-down or large areas, pros can prevent damage. DIY is ideal for simple jobs.
Extra Insights Most Beginners Miss
- Heat guns aren’t just for glue. They also help loosen planks warped from water damage, making removal easier.
- Don’t forget about underlayment. Sometimes vinyl planks sit on a thin foam or cork layer. Removing this is part of the job, and leftover underlayment affects new flooring.
- Sample planks help with insurance claims. If you remove flooring due to damage, keeping samples helps prove the type and value to insurance.
Credit: www.youtube.com
Frequently Asked Questions
What Is The Easiest Way To Remove Click-lock Vinyl Planks?
Start at an edge or corner. Use a pry bar to gently lift the first plank. Tilt and unlock each plank as you go. No glue means minimal residue and quick removal.
How Do I Remove Glue-down Vinyl Planks Without Damaging The Subfloor?
Use a heat gun to soften adhesive. Scrape slowly with a floor scraper. Avoid using water. Test adhesive removers on a small area first. Work in small sections to prevent damage.
Can I Reuse Vinyl Planks After Removal?
You can reuse click-lock or loose lay planks if they’re undamaged. Glue-down and peel-and-stick planks are harder to reuse due to adhesive residue. Clean planks and stack flat for reuse.
How Do I Dispose Of Old Vinyl Plank Flooring?
Check your local waste authority. Some areas recycle vinyl planks. Don’t throw them in regular trash without checking rules. Arrange for junk pickup or use a recycling center.
Is It Safe To Remove Vinyl Planks Myself?
Yes, if you use proper tools and safety gear. Wear gloves, goggles, and a mask. Ventilate the area. If you suspect asbestos or major damage, consult a professional or refer to EPA guidelines.
Final Thoughts
Pulling up vinyl plank flooring is a task you can handle with the right knowledge, tools, and patience. Whether your planks are click-lock, glue-down, loose lay, or peel-and-stick, preparation is the key to success. Don’t rush—work in small sections, protect your subfloor, and clean as you go.
Avoid common mistakes by wearing safety gear, checking for moisture, and disposing of planks responsibly.
Many beginners overlook the importance of inspecting the subfloor and saving sample planks. These steps can save you trouble during installation or repairs. If the job feels too big, don’t hesitate to ask for help or hire a pro. By following this guide, you’ll avoid headaches and achieve a smooth, safe vinyl plank removal. If you need more information about flooring removal, visit Family Handyman for trusted advice.
With careful planning and the right approach, you’ll turn a difficult task into a manageable project—and get your floor ready for whatever comes next.