Getting ready to chalk paint your furniture can be both exciting and a bit intimidating. Maybe you’ve seen stunning photos online of old dressers turned into works of art, or perhaps you just want to freshen up a thrift-store find. Chalk paint is famous for its matte finish and forgiving nature, but the secret to a smooth, long-lasting result lies in proper preparation. Skipping steps or rushing through the process can lead to peeling, uneven color, or even stains bleeding through your beautiful new look.
If you want your chalk-painted furniture to turn out like the pictures that inspired you, it’s crucial to get the prep work right. In this guide, you’ll find clear, step-by-step advice on how to prepare almost any type of furniture for chalk paint.
From cleaning away years of grime to handling tricky surfaces, you’ll learn how to avoid common mistakes and discover pro tips that will make your project stand out. Whether you’re a first-timer or have painted before, you’ll finish this article ready to tackle your next piece with confidence.
Why Preparation Matters For Chalk Paint
Chalk paint is known for sticking to many surfaces with little fuss, but that doesn’t mean you can just open the can and start painting. Proper preparation ensures:
- The paint adheres evenly and doesn’t peel or flake off later.
- Stains, oils, or tannins don’t seep through and ruin your finish.
- You get a smoother, more professional result, even if you’re new to painting.
Skipping prep might save time, but it’s one of the most common reasons DIY chalk paint projects fail. Even though chalk paint is more forgiving than regular paint, it isn’t magic—dirt, grease, and old wax can cause big problems.
Assessing Your Furniture
Before you get out your brush, take a good look at your furniture. Understanding its material and condition helps you choose the right prep steps.
What Is The Furniture Made Of?
Chalk paint works well on many surfaces, but not all surfaces are the same:
- Solid wood (oak, pine, maple): Usually easy to prep and paint.
- Veneer: A thin layer of wood over plywood or MDF. Needs careful sanding and cleaning.
- Laminate or melamine: Slick, plastic-like surfaces that need extra prep for paint to stick.
- Metal, glass, or plastic: Special steps or primers may be needed.
- Previously painted or varnished wood: May require more cleaning and sometimes light sanding.
Check For Damage
Look for:
- Scratches, dents, or chips
- Loose parts or joints
- Water stains or discoloration
- Peeling paint or varnish
Fixing these issues before painting makes your finished piece look much better and last longer.
Identify Old Finishes
Is there wax, oil, or a thick varnish on the surface? Chalk paint may not stick well to these. Old wax especially can cause paint to slide or bubble.
Pro Tip: Run your hand over the surface. If it feels slick or sticky, there may be old wax, oil, or heavy varnish present.

Credit: chalkingupsuccess.com
Gathering Tools And Materials
Having the right tools on hand makes the prep process smoother and faster. Here’s what you’ll typically need:
- Mild soap or furniture cleaner
- Bucket and clean rags
- Fine-grit sandpaper (220 grit works well)
- Medium-grit sandpaper (120–150 grit) for repairs
- Sanding block or electric sander (for large surfaces)
- Screwdriver or drill
- Wood filler or putty (for repairs)
- Putty knife
- Masking tape
- Drop cloth or newspaper
- Protective gloves and goggles
- Tack cloth
- Vacuum or brush for dust removal
You don’t need every item for every project. For example, you may not need wood filler if your furniture is in perfect shape.
Cleaning The Furniture
A clean surface is the foundation for great chalk paint results. Even invisible dirt or grease can cause paint to peel or look uneven.
How To Clean Furniture Before Chalk Paint
- Remove hardware: Take off handles, knobs, and hinges with a screwdriver. This lets you paint all surfaces easily.
- Dust thoroughly: Use a dry cloth or vacuum with a brush attachment.
- Mix mild soap and water: Dish soap works well. Avoid harsh cleaners that leave residue.
- Wipe all surfaces: Use a damp (not soaking wet) cloth or sponge. Get into corners, crevices, and under edges.
- Rinse with clean water: Go over the piece again with a clean, damp cloth to remove soap residue.
- Let it dry: Wait until the furniture is completely dry before moving to the next step.
Non-obvious insight: Even if your furniture looks clean, body oils from hands or years of furniture polish can cause chalk paint to resist sticking. Always clean, even new-looking pieces.
Repairing Damage And Filling Holes
Small cracks, dents, or holes can show through chalk paint, especially matte finishes. Fix them now for a flawless look.
Basic Repairs
- Tighten loose screws or joints: If the piece wobbles, use a screwdriver or wood glue to fix it.
- Fill holes and deep scratches: Use wood filler or putty. Apply with a putty knife, slightly overfilling the area.
- Let filler dry: Check the product instructions for drying time.
- Sand smooth: Once dry, sand the filled areas flush with the surface using fine-grit sandpaper.
Pro Tip: For deep gouges, fill in layers rather than all at once. This prevents shrinkage and cracking.
Sanding: When And How Much?
A common myth is that you never need to sand before chalk painting. While it’s true that chalk paint can stick to many surfaces, a quick sanding almost always improves results.
Do You Need To Sand?
- Solid wood: A light sanding helps paint grip, especially on glossy surfaces.
- Veneer or laminate: Sanding is important to scuff up the shiny surface.
- Previously waxed or oily surfaces: Sanding helps remove any residue.
- Raw, rough wood: Sand lightly to smooth rough spots.
How To Sand Furniture For Chalk Paint
- Start with medium-grit sandpaper (120–150 grit) for rough areas or old finishes.
- Switch to fine-grit (220 grit) for a final smooth pass.
- Sand by hand or use a sanding block for control. For large, flat areas, an electric sander speeds up the job.
- Always sand in the direction of the wood grain to avoid scratches.
- Remove all dust: Use a vacuum, then a tack cloth to pick up fine particles.
Non-obvious insight: Even a quick, light sanding can make a big difference, especially on high-touch areas like tabletops, armrests, or drawer fronts.
Dealing With Wax, Oil, And Heavy Varnish
Old wax, oil, or thick varnish is a chalk paint enemy. If you paint over these, your finish may crack, bubble, or peel. Removing these finishes takes extra time but is worth it.
How To Remove Wax
- Apply mineral spirits: Use a clean rag dampened (not soaked) with mineral spirits.
- Wipe the surface: Work in small sections, changing rags as needed.
- Repeat until the rag comes away clean: This means the wax is gone.
- Wash with soap and water: Remove any remaining residue.
- Let dry thoroughly.
Removing Old Oil And Heavy Varnish
For thick varnish or sticky old finishes:
- Use a liquid deglosser or paint stripper for very tough finishes (follow all safety instructions).
- Sand after removing the finish to smooth the surface.
Pro Tip: Wax is often invisible. If you suspect wax but aren’t sure, rub a small area with mineral spirits. If the rag picks up a yellow or brown residue, there’s wax present.
Priming: When Is It Needed?
Chalk paint often says “no primer needed” on the can. Sometimes this is true, but not always. Priming helps block stains, stop bleed-through, and improve adhesion on tricky surfaces.
When Should You Prime Before Chalk Paint?
- Painting over mahogany, cherry, or oak: These woods can bleed tannins through your paint.
- Painting over knots or water stains
- Painting laminate, glass, or metal
- Switching from a dark to a very light color
How To Prime For Chalk Paint
- Choose a stain-blocking primer: Water-based or shellac-based primers both work.
- Apply a thin, even coat: Use a brush or roller.
- Let dry fully: Check the can for drying time.
- Lightly sand if needed: After priming, a quick sand with fine-grit paper smooths out brush marks.
Non-obvious insight: Even if your paint “sticks” without primer, stains or tannins can show up days or weeks later. Priming is cheap insurance for tricky surfaces.
Masking And Protecting Areas
Before painting, protect areas you don’t want painted.
- Use masking tape along edges, hardware, or glass panels.
- Place a drop cloth or old newspaper under the furniture to catch drips.
- Remove drawers and doors if possible, and mask inside edges for a neat finish.
Final Dust And Inspection
Dust is the enemy of a smooth paint finish. Right before you start painting:
- Go over all surfaces with a tack cloth
- Double-check for dust in corners, carvings, and hardware holes
- Inspect for missed repairs or rough spots
Special Cases: How To Prep Tricky Surfaces
Veneer And Laminate
- Clean thoroughly.
- Lightly sand to dull the shine—do not sand through the veneer.
- Prime with a bonding primer for extra grip.
Metal
- Clean with a degreaser.
- Sand lightly to remove rust or shine.
- Apply a metal primer before chalk paint.
Glass
- Clean with alcohol or glass cleaner.
- Lightly sand for grip.
- Use a bonding primer.
Previously Painted Furniture
- Clean and sand to even out old brush marks.
- Prime if switching between very different colors.
Troubleshooting Common Problems
Paint Doesn’t Stick
- Check for leftover wax or oil.
- Sand and clean again, then try a bonding primer.
Stains Bleed Through
- Prime with a stain-blocking primer and repaint.
Surface Feels Rough After Sanding
- Wipe with a tack cloth and sand again with finer paper.
Paint Drips Or Pools
- Use less paint per coat; two thin coats are better than one thick one.
Sample Preparation Scenarios
Old Wooden Dresser
- Remove hardware, clean with soap and water.
- Fill small holes and sand smooth.
- Lightly sand all surfaces.
- Wipe clean, mask edges, and prime stained areas.
Glossy Laminate Nightstand
- Clean and dry.
- Sand lightly to dull the surface.
- Wipe away dust.
- Prime with bonding primer.
Antique Chair With Wax Finish
- Remove wax with mineral spirits.
- Wash with soap and water.
- Sand lightly.
- Wipe clean and prime any stained areas.
Comparing Prep Methods
Here’s how different preparation methods impact chalk paint adhesion and finish:
| Preparation Method | Paint Adhesion | Finish Quality | Risk of Peeling/Bleeding |
|---|---|---|---|
| No prep (just paint) | Poor to Fair | Uneven, may chip | High |
| Clean only | Fair | Better but still risky | Medium |
| Clean + Light Sand | Good | Smoother, longer-lasting | Low |
| Clean + Sand + Prime | Excellent | Professional, durable | Very Low |
Practical Tips For A Flawless Finish
- Always work in a well-ventilated area.
- Wear gloves when using chemicals like mineral spirits or deglosser.
- Clean brushes and sandpaper regularly to avoid transferring dust or residue.
- Mark hardware and screws in bags for easy reassembly.
- If painting drawers, paint the front but leave side edges bare so they slide easily.
Estimated Time And Effort For Prep Steps
To help plan your project, here’s a comparison of average prep times for a medium-sized piece of furniture:
| Step | Estimated Time | Effort Level |
|---|---|---|
| Remove hardware | 10 minutes | Low |
| Cleaning | 15–30 minutes | Low |
| Filling and repairs | 20–40 minutes (+ drying) | Medium |
| Sanding | 15–30 minutes | Medium |
| Priming (if needed) | 30–45 minutes (+ drying) | Low |
| Final dusting and masking | 10–15 minutes | Low |
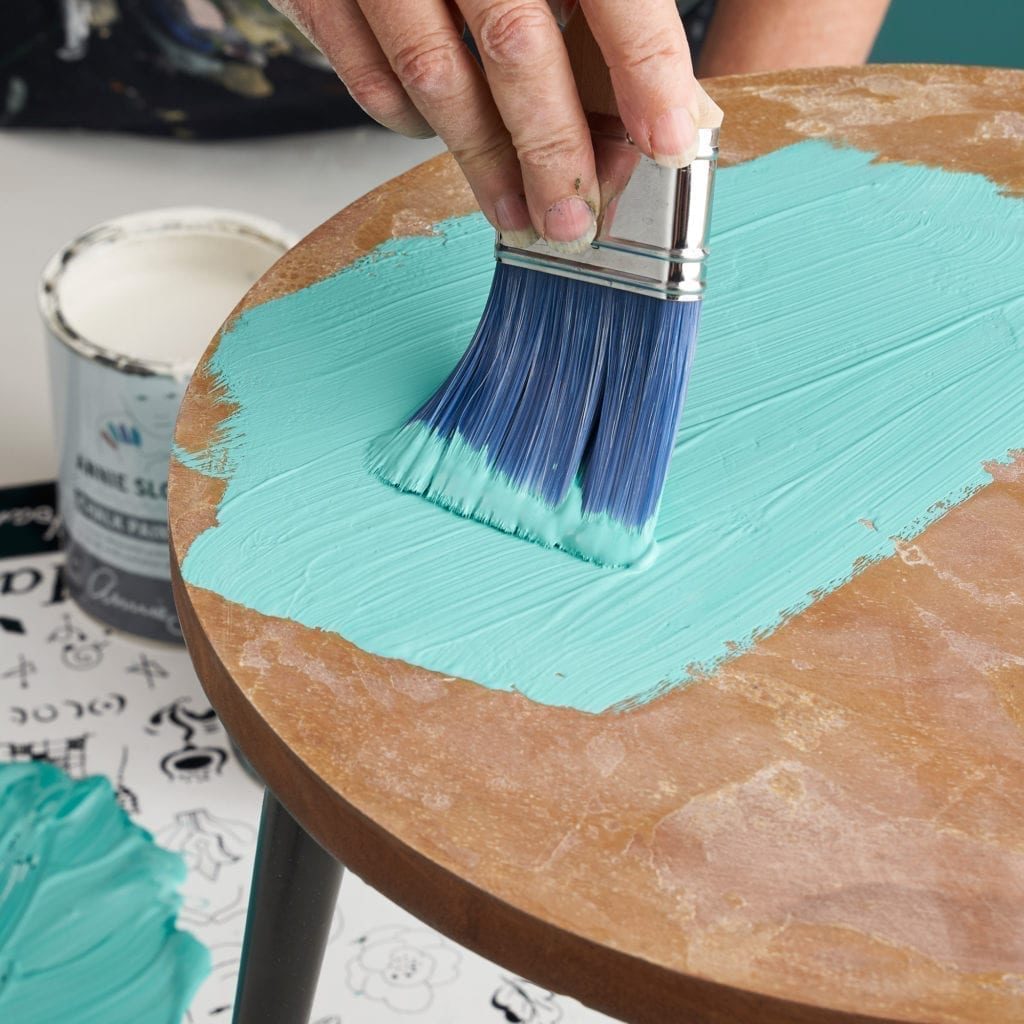
Credit: www.anniesloan.com
Common Mistakes To Avoid
- Skipping cleaning: Dirt and grease cause paint to peel.
- Not removing wax or polish: These invisible layers can ruin your finish.
- Neglecting repairs: Small holes or loose joints will stand out after painting.
- Skipping sanding on glossy or laminate surfaces: Paint will likely chip or scratch off.
- Not priming stain-prone surfaces: Tannins or old stains can bleed through days later.
- Painting too soon after cleaning: Moisture can get trapped under paint, causing bubbles.
How To Test Your Prep
Before you paint the entire piece, test your prep work:
- Paint a small, hidden area (like the back or inside a drawer).
- Let it dry completely.
- Try to scratch off the paint with your fingernail. If it comes off easily, clean and sand more or use a primer.

Credit: www.amazon.com
After Preparation: Ready To Chalk Paint
Once your furniture is clean, repaired, sanded, dust-free, and dry, you’re ready to paint. Chalk paint goes on easily and dries quickly, but the time spent preparing your surface pays off with a beautiful, long-lasting finish.
Remember, good preparation is the best way to guarantee success. It may seem like extra work, but skipping steps often leads to disappointment and more work later.
If you want more in-depth information about chalk paint and its history, check out this Wikipedia article on chalk paint.
Frequently Asked Questions
How Do I Know If My Furniture Needs Sanding Before Chalk Painting?
If your furniture is glossy, slick, or made from laminate, it needs a light sanding for the paint to stick well. If it’s raw, unfinished wood, just a quick sand to smooth rough areas is enough. Painted or varnished wood usually benefits from sanding to help the new paint grip.
Can I Chalk Paint Over Waxed Furniture?
No, you need to remove old wax first. Use mineral spirits and a clean rag, then wash with soap and water. If you skip this, the paint may not stick or could bubble and peel.
What Should I Do If Stains Bleed Through My Chalk Paint?
Apply a stain-blocking primer over the stains, let it dry, and repaint the area. Some woods (like mahogany or oak) are prone to bleed-through even with chalk paint.
Do I Have To Remove All Old Paint Or Varnish Before Using Chalk Paint?
Not always. If the old paint or varnish is in good shape (not peeling), just clean and sand it lightly. Remove any loose or flaking areas completely.
Is Priming Always Necessary Before Chalk Paint?
No, not always. But it’s important on surfaces that are glossy, stained, or likely to bleed tannins (like mahogany), or when painting over laminate, metal, or glass. Priming helps ensure your finish stays beautiful for years.
Getting your furniture ready for chalk paint is all about patience and attention to detail. The time you spend cleaning, repairing, and prepping will reward you with a piece that looks great and lasts for years. Enjoy your next chalk paint project!