Woodworkers, DIY fans, and even children with handmade toys often face a simple but tricky problem: how to make wood slide on wood smoothly. If you’ve ever built a drawer that sticks, a wooden game that drags, or a sliding door that won’t budge, you know the frustration. Wood is beautiful and strong, but when it rubs against itself, it grips and catches. Luckily, there are smart, safe, and easy ways to make wood glide—without fancy tools, and with things you probably already have.
This article is your complete guide to making wood slide on wood. Whether you’re restoring an old dresser, building furniture, or just want to fix a sticky window, you’ll find all the options, clear instructions, and practical tips you need here.
You’ll also discover two or three surprising methods that most beginners miss. By the end, you’ll understand not only how to make wood slippery, but also why some solutions work better for certain projects.
Why Does Wood Stick? The Science Of Friction
Before you start, it helps to know why wood-on-wood friction happens. When two pieces of wood touch, their surfaces aren’t smooth at a microscopic level. Instead, they’re full of tiny hills and valleys. When you try to slide them, these bumps catch on each other, creating resistance. This is called surface friction.
Things that increase friction:
- Rough or unfinished wood surfaces
- Dust, dirt, or wood fibers between pieces
- Humidity causing wood to swell
Things that reduce friction:
- Smoother, sealed, or waxed surfaces
- Clean contact points
- Lubricants or special coatings
Knowing this, you can pick the right method to solve your problem.
Preparing Wood Surfaces For Sliding
Almost every method starts with good surface prep. Don’t skip this—it’s often the difference between so-so and super smooth results.
1. Sanding
Sanding removes rough spots and splinters. Start with a medium grit sandpaper (100–150) to take down high points, then finish with fine grit (220–320) for a polished surface. Always sand in the direction of the wood grain, not against it, to avoid scratches.
Tip: Use a sanding block for flat areas, and folded sandpaper for grooves or corners. After sanding, wipe the area with a damp cloth to remove dust.
2. Cleaning
Even a little dust or debris can make wood stick. Use a tack cloth or a slightly damp rag to remove all particles. For sticky residue, a little rubbing alcohol on a cloth works well. Let the wood dry before adding any coatings or lubricants.
Credit: www.woodgears.ca
Choosing The Right Lubricant
Not all lubricants are safe or effective for wood. Some can stain, attract dirt, or even damage the wood over time. Here are the most common and safest choices, plus when to use each.
1. Wax
Paste wax is a favorite among woodworkers. It gives a slick surface, is long-lasting, and doesn’t stain most woods.
How to use:
- Apply a small amount of paste wax with a clean, soft cloth.
- Rub in a thin, even layer over the sliding area.
- Let it dry for about 10 minutes, then buff with a dry cloth until shiny.
Tip: Carnauba wax is extra hard and durable. Beeswax is softer and natural but may need reapplying more often.
2. Soap
Surprisingly, dry bar soap (like plain white soap) works well for drawers and small sliding parts.
How to use:
- Rub the dry soap bar directly on the sliding surfaces.
- Move the wood back and forth to spread the soap evenly.
Soap is fast and easy, but it doesn’t last as long as wax. It’s best for light-duty or quick fixes.
3. Candle Wax
A simple white candle works much like bar soap, but it lasts longer. Rub the candle over the wood, focusing on the contact points. Buff lightly with a cloth if needed.
4. Silicone Spray
Silicone spray lubricants are widely available and very effective. They create a thin, invisible film that repels water and resists dirt.
How to use:
- Spray a small amount on a cloth (not directly on the wood).
- Wipe the sliding surfaces.
- Let it dry for a few minutes before use.
Warning: Test on an out-of-sight area first. Some silicone sprays can darken unfinished wood.
5. Special Wood Lubricants
There are lubricants made just for wood, like sliding door sprays or drawer glides. These often combine silicone with other ingredients for even better results.
Comparing Common Wood Lubricants
To help you choose, here’s a quick comparison:
| Lubricant | Durability | Messiness | Best For |
|---|---|---|---|
| Paste Wax | High | Low | Drawers, furniture |
| Bar Soap | Low | Low | Quick fixes |
| Candle Wax | Medium | Low | Doors, toys |
| Silicone Spray | High | Medium | Heavy use, humidity |
| Special Wood Lubricants | High | Low | Professional results |
Natural Ways To Make Wood Slide
Some people avoid chemicals or want all-natural solutions. Here are two time-tested methods that work without store-bought sprays.
1. Beeswax And Mineral Oil
Mixing beeswax with a little food-safe mineral oil makes a smooth, safe wood finish. Melt them together (about 1:4 ratio wax to oil), cool until soft, then rub onto the wood and buff. This is ideal for kitchen drawers, cutting boards, and children’s toys.
2. Rubbing With Hardwoods
A little-known tip: rubbing two hardwood scraps together can polish both surfaces. This “burnishes” the wood, making it smoother and slipperier. It won’t match wax for slickness, but it’s chemical-free and quick.
Sealing And Finishing For Lasting Slide
Sometimes, sealing the wood is better than just adding a lubricant. A good finish smooths the surface, fills in the tiny valleys, and makes future sliding easier.
1. Polyurethane
Water-based polyurethane dries clear and hard. Apply with a brush, let dry, then lightly sand and re-coat for a glassy-smooth finish. This is best for sliding tabletops or shelving.
2. Shellac
Shellac is a natural resin that dries fast and feels silky. It’s less durable than polyurethane but easy to fix or recoat. Use for light-use items or antiques.
3. Lacquer
Lacquer gives a hard, smooth surface but needs careful handling (good ventilation and proper safety gear). It’s often used on fine furniture.
4. Varnish
Varnish is tougher and more flexible, good for outdoor or high-humidity areas.
When using any finish, always sand lightly between coats and follow the maker’s instructions for drying time.
Adding Physical Sliding Aids
Sometimes, the best way to make wood slide is to add something between the pieces. Here are practical, often-overlooked options.
1. Nylon Tape Or Uhmw Tape
Ultra-high molecular weight polyethylene (UHMW) tape is super slippery and easy to use. Stick it onto drawer runners, sliding doors, or game boards. It’s thin, nearly invisible, and lasts for years.
2. Plastic Glides Or Rollers
Small plastic buttons, Teflon glides, or nylon rollers can be nailed or screwed to the bottom of drawers or sliding parts. These reduce friction a lot, especially for heavy furniture.
3. Felt Pads
Felt pads are more for protection than sliding, but on smooth wood they can help reduce sticking and scratching. They’re not as slippery as tape or glides, but they’re cheap and easy to install.
4. Ball Bearings Or Drawer Slides
For heavy loads (like big drawers or sliding platforms), nothing beats ball-bearing drawer slides. They’re a bit more work to install, but the sliding action is nearly effortless and lasts for decades.
Comparing Physical Sliding Aids
See how these aids compare for different needs:
| Sliding Aid | Cost | Durability | Skill Needed | Best Use |
|---|---|---|---|---|
| UHMW Tape | Medium | High | Low | Drawers, doors |
| Plastic Glides | Low | High | Low | Furniture feet |
| Felt Pads | Low | Medium | Low | Lightweight items |
| Ball Bearings | High | Very High | Medium | Heavy drawers |
Credit: www.thegritandpolish.com
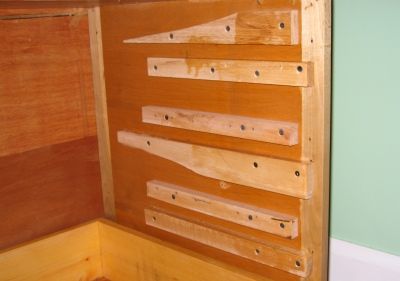
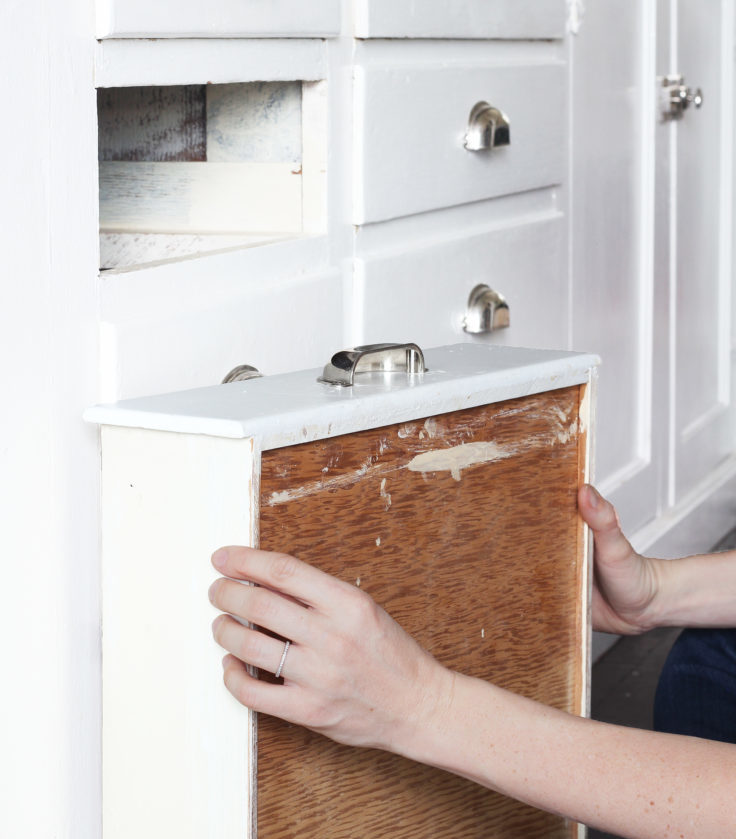
Step-by-step: Making A Wooden Drawer Slide Smoothly
Let’s walk through a common example: fixing a sticky wooden drawer.
Step 1: Remove And Inspect
Take out the drawer. Look for rough spots, wear, or swollen wood. Check both the drawer edges and the runners inside the cabinet.
Step 2: Sand The Contact Points
Use medium, then fine sandpaper, focusing only on the places where wood rubs. Don’t over-sand—just enough to make them smooth.
Step 3: Clean Thoroughly
Wipe away all dust. Even a little leftover grit can cause problems.
Step 4: Choose Your Lubricant
For most drawers, paste wax or UHMW tape works best.
- For wax, apply a thin layer, let dry, and buff.
- For tape, cut strips to fit, stick them on, and press firmly.
Step 5: Test The Fit
Slide the drawer in and out several times. If it’s still sticky, repeat the sanding and waxing, or check for deeper problems (like warped wood).
Pro insight: If the drawer has expanded from humidity, sometimes you need to sand a tiny bit off the sides or bottom—not just the surface.
Step 6: Regular Maintenance
Reapply wax once or twice a year, or if you notice sticking again. Keep the area clean.
Advanced Tips For Special Projects
Some sliding wood projects need a little extra help. Here’s what to do in special cases.
Outdoor Sliding
For outdoor wood (like patio furniture), use marine-grade varnish or exterior-rated lubricants. These resist water and weather.
Heavy Loads
For anything carrying weight (large shelves, big drawers), add nylon glides or ball-bearing slides. Lubricants alone won’t hold up.
Moving Parts In Toys
For toys, choose food-safe wax or mineral oil. Avoid chemical sprays, as kids may put them in their mouths.
Antique Furniture
For antiques, avoid modern sprays. Stick to beeswax or paste wax. These preserve the finish and are reversible.
Non-obvious Insight: Grain Direction Matters
Sliding with the grain is always smoother than against it. If you’re building from scratch, design sliding parts to move with the grain when possible.
Non-obvious Insight: Humidity Control
High humidity makes wood swell and stick. Use a dehumidifier in the room, or add a packet of silica gel inside furniture to keep things sliding year-round.
Mistakes To Avoid When Trying To Make Wood Slide
- Using Oil-Based Lubricants: Don’t use cooking oil, motor oil, or greasy sprays. These can stain, go rancid, and attract dust.
- Skipping Surface Prep: Even the best wax won’t help if the wood is rough or dirty.
- Over-Lubricating: Too much wax or spray can gum up and collect dirt. Thin layers are best.
- Ignoring Underlying Problems: If wood is warped, split, or too tight, lubrication alone won’t fix it.
- Mixing Lubricants: Don’t mix different types (like wax and silicone spray), as this can create sticky patches.
When To Consider Rebuilding Or Upgrading
Sometimes, making wood slide isn’t enough. If you’ve tried everything and still have problems, it might be time to:
- Replace warped or cracked parts
- Switch to metal or plastic runners
- Add modern drawer slides
This is especially true for heavy furniture or high-use items. Don’t be afraid to upgrade for safety and ease.
Real-world Examples
Restoring A Vintage Dresser
Sarah bought a beautiful old dresser, but the drawers wouldn’t budge. She sanded the runners, applied beeswax, and added thin UHMW tape. The drawers now glide like new—without changing the look or value.
Building A Wooden Game Board
Tom made a wooden air hockey game for his kids. The puck stuck on raw wood. He sanded the surface, finished with polyurethane, and waxed it. Now, the puck slides smoothly, making the game fun and fair.
Fixing A Sticky Door
Maria’s sliding closet door was always hard to open. She cleaned the track, sanded rough spots, and added nylon tape. The door now opens with one hand.
Cost And Time Estimates
How much does it cost and how long does it take? Here’s a rough idea for basic projects:
| Method | Material Cost | Time Needed | Maintenance |
|---|---|---|---|
| Paste Wax | $5–$15 | 30 min | 1–2x/year |
| UHMW Tape | $10–$20 | 20 min | Rarely |
| Plastic Glides | $4–$10 | 15 min | Never |
| Silicone Spray | $6–$12 | 10 min | 1–2x/year |
Environmental And Health Considerations
Some people worry about chemicals, especially with food, pets, or children. Always check product labels. For food-safe needs, stick with mineral oil, beeswax, or food-grade wax. Avoid sprays with unknown ingredients.
For more details on wood finishes and safety, see this Wikipedia article on wood finishing.
Frequently Asked Questions
What Is The Best Way To Make Wood Slide On Wood For A Drawer?
The best method is to sand and clean the contact points, then apply a thin layer of paste wax or stick UHMW tape to the runners. This combination gives a smooth, long-lasting slide without staining or mess.
Can I Use Vegetable Oil Or Cooking Oil As A Lubricant For Sliding Wood?
No, you should not use vegetable or cooking oils. They can become sticky, go rancid, and attract dust. Use beeswax, paste wax, or silicone spray instead.
How Often Should I Reapply Lubricant To Keep Wood Sliding Smoothly?
It depends on use. For most drawers or sliding parts, once or twice a year is enough. If you notice sticking, clean and reapply as needed. Tape or plastic glides usually last much longer without reapplication.
Is Sanding Always Necessary Before Adding Wax Or Lubricant?
Sanding isn’t always needed, but it’s strongly recommended if the surface is rough or has splinters. A smooth surface helps any lubricant work better and last longer.
Are There Any Lubricants Safe For Children’s Wooden Toys?
Yes, use food-safe mineral oil, beeswax, or a mix of the two. Avoid sprays and unknown chemicals. These natural options make toys slide easily and are safe for kids.
—
Making wood slide on wood can be simple or advanced, but the right method always starts with understanding friction, proper preparation, and choosing the best solution for your project. With these tips, you can fix sticky drawers, build better furniture, and enjoy the beauty of wood—without the struggle.

Credit: www.youtube.com