Burnishing a floor is one of those tasks that transforms an ordinary surface into a shiny, polished masterpiece. If you’ve ever walked into a hotel lobby or a spotless supermarket and noticed the floor gleaming, you’ve seen the power of burnishing.
It’s more than just cleaning—it’s about making your floors look their absolute best and keeping them strong for longer. But for many people, the steps and secrets of burnishing can seem confusing. This guide will walk you through every detail you need to know, from what burnishing actually means to the exact process, tools, and mistakes to avoid.
Whether you work in facility maintenance, manage a small business, or want your home floors to shine, learning how to burnish a floor the right way saves time, money, and effort. You’ll also protect your floors from damage and give visitors a great first impression.
Let’s dig into the entire process, clear up common myths, and explain everything with simple language and clear examples.
What Is Floor Burnishing?
Burnishing is a special way to make a floor surface smooth and shiny. It’s not the same as buffing. While buffing uses low-speed machines to clean and polish, burnishing uses high-speed machines (usually 1000–3000 RPM) to heat and smooth the floor’s finish. The result is a much brighter shine and a harder, more protective surface.
Burnishing is common for VCT (Vinyl Composition Tile), terrazzo, and some types of concrete and marble floors. The process works best on floors that already have a finish or wax layer. If you try to burnish unfinished or soft floors, you can damage them.
Here’s a simple way to remember:
- Buffing: Low speed, less shine, good for cleaning or light polishing.
- Burnishing: High speed, high shine, strengthens finish, longer-lasting protection.
Why Burnish A Floor?
Many people ask why they should go through the trouble of burnishing. Here are the main reasons:
- Better Appearance: Burnished floors reflect light and look cleaner and more professional.
- Longer Floor Life: The process makes the finish harder, which means less wear and fewer scratches.
- Easier Cleaning: Dirt and dust can’t stick as easily to a smooth, shiny surface.
- Cost Savings: Floors that last longer need fewer repairs and replacements.
- Safer Surfaces: Burnished floors are less likely to have rough patches or dull spots that can cause slips.
An often-overlooked benefit is that regular burnishing can reduce dust in the air. Smooth floors mean less dirt gets kicked up by shoes or cleaning tools—a real plus for people with allergies.
Credit: www.imperialdade.com
Types Of Floors You Can Burnish
Not all floors are safe for burnishing. Some materials work better than others. Here’s a quick look:
| Floor Type | Can Be Burnished? | Notes |
|---|---|---|
| VCT (Vinyl Composition Tile) | Yes | Needs finish layer |
| Terrazzo | Yes | Apply sealer first |
| Concrete | Yes | Best with polished finish |
| Marble/Stone | Yes | Use special pads |
| Wood | No | Can be damaged by heat |
| Laminate | No | Top layer can melt |
Always check the manufacturer’s instructions for your floor type before burnishing. Some floors need extra preparation or special products.
Tools And Materials Needed
Burnishing requires more than a mop and bucket. Here’s what you need:
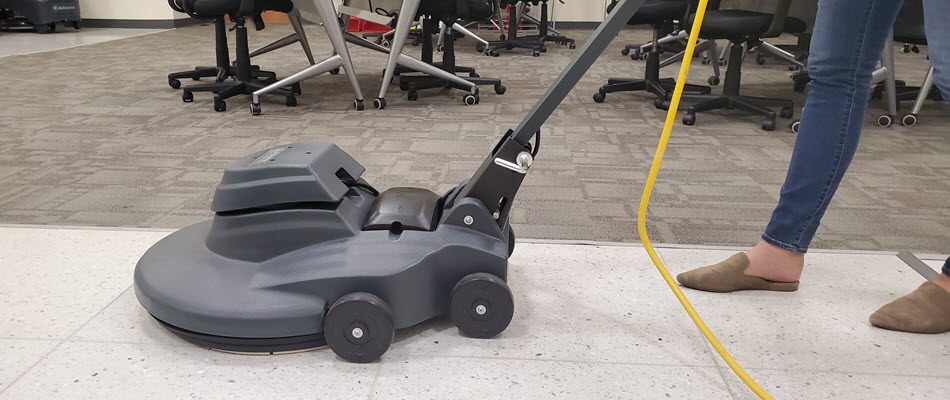
- High-Speed Burnisher: The most important tool. Usually 1000–3000 RPM. Walk-behind and ride-on models are available.
- Burnishing Pads: Not all pads are the same. Choose the right pad for your floor type (white, pink, beige, or specialty pads).
- Dust Mop or Vacuum: For removing dust and debris before you start.
- Wet Mop and Bucket: To clean spills or sticky spots first.
- Floor Finish/Polish: If your floor needs a new layer before burnishing.
- Spray Buff Solution (Optional): Some people use this to help with shine, but not always necessary.
- Personal Protective Equipment (PPE): Gloves, safety glasses, and sometimes ear protection.
- Warning Signs: To keep people away from the work area for safety.
Many beginners forget the importance of choosing the right pad. Using the wrong pad can scratch or dull your floor instead of making it shiny.
Preparing To Burnish: Steps Before You Start
Preparation is as important as the actual burnishing. Skipping these steps can lead to poor results or even damage.
1. Clear The Area
Move all furniture, rugs, and objects out of the way. Make sure the floor is free from obstacles.
2. Sweep Or Vacuum
Use a dust mop or vacuum to remove all dust, dirt, and grit. Even tiny bits can scratch the finish during burnishing.
3. Wet Mop The Surface
Damp mop the floor with a neutral cleaner. Make sure there are no sticky spots, spills, or oily marks. Let the floor dry completely before burnishing.
4. Inspect The Finish
Check for worn areas, deep scratches, or places where the finish is gone. If the floor looks patchy, you may need to apply more finish and let it dry before burnishing.
5. Put Up Warning Signs
Safety first. Place signs at all entrances to the work area so no one walks through while you’re working.
6. Gather Tools
Check that your burnisher, pads, and other materials are ready. Make sure the machine is plugged in and working.
Extra Tip: If your floor is very dirty or sticky, clean it twice. Dirt left on the floor can melt during burnishing and stick to the surface, making it dull.
The Floor Burnishing Process: Step-by-step
Now for the main event. Follow these steps for best results.
1. Choose The Right Pad
Pick a burnishing pad that matches your floor type and finish. White and pink pads are common for VCT and polished concrete. For harder surfaces or tougher jobs, use beige or specialty pads.
2. Set Up The Machine
Plug in your burnisher and check that all safety features are working. Attach the correct pad. If using a walk-behind model, adjust the handle to a comfortable height.
3. Start In A Corner
Begin burnishing in a far corner of the room and work backward toward the exit. This keeps you from stepping on freshly burnished areas.
4. Work In Small Sections
Move the burnisher slowly, overlapping each pass by about one-third. Don’t rush—the pad needs time to heat and polish the finish.
5. Watch For Buildup
If the pad picks up dirt or finish, stop and clean or change the pad. Dirty pads can scratch the floor.
6. Check The Shine
After one or two passes, check the shine. If the floor is not glossy enough, make another slow pass.
7. Repeat Across The Area
Continue section by section until you’ve covered the entire floor.
8. Clean Up
When finished, vacuum or dust mop the floor again to remove any powder or residue from burnishing.
9. Return Furniture
Wait at least 30 minutes before moving furniture back, to allow the finish to cool and harden.
Non-obvious insight: Many people overwork the same spot, hoping for more shine. This can actually burn or damage the finish. If the floor doesn’t shine after two slow passes, it may need a new coat of finish, not more burnishing.
Credit: www.youtube.com
Key Factors For A Perfect Burnish
Getting a high-gloss, smooth floor is not just about following steps. Here are some important factors that make a big difference:
Pad Condition And Type
- New pads work better than old, worn-out ones.
- Dirty pads can scratch or dull the finish.
- Use the right pad color for your floor type.
Machine Speed
- High-speed (1000–3000 RPM) is best.
- Lower speeds may not create enough heat for a good shine.
Room Temperature And Humidity
- Very cold or humid rooms can affect the finish.
- Ideal temperature: 65–75°F (18–24°C).
Cleanliness
- Even small amounts of dust can cause scratches.
- Always clean the floor before and after burnishing.
Floor Finish Quality
- Old or poor-quality finish may not shine, no matter how much you burnish.
- Sometimes, a new coat of finish is needed first.
Comparing Burnishing To Other Floor Care Methods
People often confuse burnishing with buffing, polishing, or scrubbing. Here’s a simple comparison:
| Method | Machine Speed (RPM) | Main Purpose | Result |
|---|---|---|---|
| Buffing | 175–400 | Light cleaning, minor shine | Low to medium gloss |
| Burnishing | 1000–3000 | High shine, harden finish | Very glossy, durable surface |
| Polishing | 400–800 | Smooth out surface | Satin to high gloss |
| Scrubbing | 175–400 | Deep cleaning, remove dirt | Clean, not shiny |
Burnishing stands out because it both shines and hardens the floor finish, making it last longer.
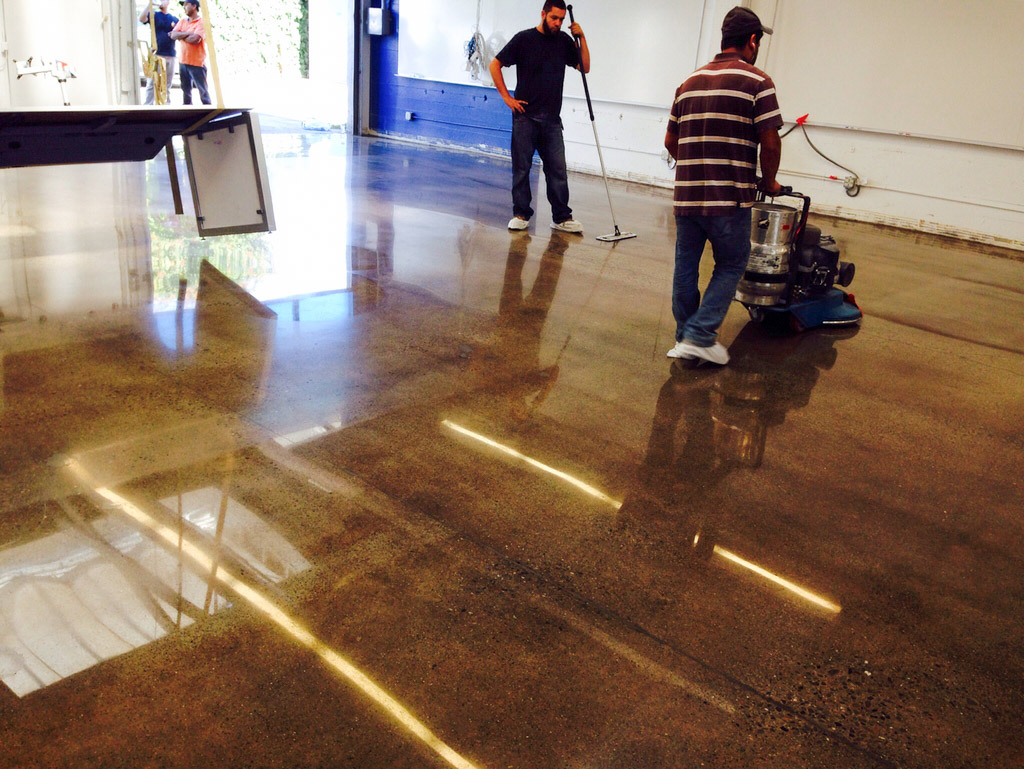
Credit: cleancutconcrete.com
How Often Should You Burnish A Floor?
The answer depends on the type of building, the amount of foot traffic, and the floor material.
- High-traffic areas (hospitals, schools, supermarkets): Every 1–2 weeks
- Medium-traffic areas (offices, small shops): Every 2–4 weeks
- Low-traffic areas (homes, storage rooms): Every 1–2 months
If a floor looks dull, it’s usually time to burnish. But don’t overdo it. Too much burnishing can wear down the finish and eventually harm the floor.
Common Mistakes To Avoid
Even experienced people sometimes make mistakes. Here are some of the most common:
- Skipping Pre-Cleaning: Dirt left on the floor can get trapped in the finish or scratch the surface.
- Wrong Pad Choice: Using a pad that’s too rough can damage the finish, while too soft may not shine well.
- Burnishing Wet Floors: The finish can smear or become uneven. Always let the floor dry first.
- Using a Dirty Pad: This can leave streaks or scratches.
- Not Checking Machine Speed: Low-speed machines can’t create the needed heat for true burnishing.
- Ignoring Edges and Corners: Most burnishers can’t reach edges well. Hand-polish these areas or use a detail tool.
- Burnishing Too Often: Over-burnishing wears down the finish.
- Not Using Safety Signs: Someone could slip or walk through your work area, causing accidents or marks.
Extra tip: Beginners often use too much floor finish, thinking it leads to more shine. In reality, thick layers can become sticky and attract dirt. Thin, even coats are best.
Advanced Tips For Professional Results
If you want to go beyond basic shine, try these methods used by pros:
Use A Spray Buff Solution
While not always needed, spray buff solution can help fix scuffs and add extra gloss. Lightly spray in front of the burnisher, then pass over it. Don’t soak the floor.
Alternate Pad Directions
If your floor has marks or swirls after burnishing, try changing the direction of your passes (for example, go north-south, then east-west). This evens out the shine.
Maintain Your Machine
Regularly clean and inspect your burnisher. Worn belts, loose parts, or dirty fans can lower performance and even damage the floor.
Record Your Process
Keep a log of when and how you burnish each area. This helps plan future maintenance and spot problems early.
Use Entry Mats
Place mats at entrances to catch dirt before it reaches the floor. This simple step reduces scratches and means less frequent burnishing.
Safety Considerations
Burnishing machines are powerful and can be dangerous if not used correctly.
- Wear PPE: Gloves, safety glasses, and ear protection if the machine is loud.
- Use Dry Hands: Wet hands plus electricity are a serious risk.
- Check Cords: Make sure power cords are not frayed and stay out of walkways.
- Secure the Area: Keep others away while you work.
- Machine Handling: Never leave the machine running unattended.
If you’re new to burnishing, ask a trained person for a demonstration. Reading the manual for your machine is always smart.
Burnishing Frequency And Maintenance Schedules
Every building is different. The right schedule keeps floors looking great and avoids unnecessary work.
Example Maintenance Schedule
| Area Type | Burnishing Frequency | Other Notes |
|---|---|---|
| Hospital Corridor | Weekly | Heavy traffic, quick wear |
| Retail Store | Every 2 weeks | Increase during holidays |
| Office Lobby | Every month | Spot burnish high-traffic paths |
| Residential Home | Every 2 months | Only if VCT or similar floor |
Adjust the schedule as needed. If the floor looks dull or dirty even after cleaning, it may need burnishing sooner.
Choosing The Right Burnishing Machine
There are many burnishers on the market. Here’s what matters most:
Size And Power
- Small machines (13–20 inches): Good for homes and small spaces.
- Large machines (20–27 inches): Best for commercial spaces.
- Ride-on burnishers: For very large areas (warehouses, airports).
Speed
- 1000–1500 RPM: Enough for most jobs.
- 2000–3000 RPM: For super-high gloss.
Power Source
- Electric: Quiet, no fumes, but needs a cord.
- Propane: Very powerful, no cord, but makes fumes—needs good ventilation.
- Battery: Cordless, quieter than propane, but may be less powerful.
Features
- Dust control: Some machines have vacuum systems to collect burnishing dust.
- Adjustable handles: For comfort and safety.
Cost
Prices range from a few hundred dollars for small electric machines to several thousand for large or ride-on models. Renting is a good choice for small jobs.
Common mistake: Buying a machine that’s too powerful or too large for your space. It’s better to match the size of the machine to the size of your rooms.
How To Care For Your Floor After Burnishing
Burnishing is only part of a good floor care routine. Here’s how to keep your floor shiny longer:
- Daily Dust Mopping: Removes dirt that can scratch the finish.
- Damp Mopping: Use a neutral cleaner, not harsh chemicals.
- Spot Cleaning: Wipe up spills right away.
- Avoid Dragging Furniture: Lift to move heavy items.
- Use Entry Mats: Catch dirt and grit before they reach the floor.
- Reapply Finish as Needed: When the shine can’t be restored, add a new finish coat.
Non-obvious insight: Many people use regular household cleaners, but some contain acids or bleach that can dull or damage the finish. Always use products made for your floor type.
Troubleshooting: Fixing Common Burnishing Problems
Sometimes, things don’t go as planned. Here’s how to solve common issues:
- Streaks or Haze: Usually from dirty pads or unfinished cleaning. Clean the floor and use a clean pad.
- Powdery Residue: Often caused by a finish that’s too soft or old. Remove residue and reapply a harder finish if needed.
- Uneven Shine: Check that you’re overlapping passes and not moving too quickly.
- Burn Marks: May be from staying in one spot too long. Move the machine slowly and evenly.
- Sticky Floor: Too much finish applied or not enough drying time. Remove excess and let dry fully.
If a problem keeps happening, consult with a floor care professional or the finish manufacturer.
Environmental And Health Considerations
Burnishing uses electricity and sometimes chemicals. Here’s how to reduce impact:
- Use Green Seal-certified finishes for lower VOCs (fumes).
- Choose electric or battery machines instead of propane if air quality is a concern.
- Dispose of pads and chemicals properly—never pour finish down the drain.
- Ventilate the area when using strong chemicals or propane machines.
Caring about the environment also protects the health of people who use the building.
When To Call A Professional
Burnishing can usually be done by in-house staff, but sometimes you need help:
- Very large areas: Professionals have large machines and teams.
- Historic or expensive floors: Mistakes can be costly.
- Deep scratches or heavy wear: May need repair before burnishing.
- Unusual floor types: Some materials need special treatment.
A professional can also train your staff to do it right in the future.
Frequently Asked Questions
What’s The Difference Between Burnishing And Buffing A Floor?
Burnishing uses a high-speed machine to create a very glossy, hard finish. Buffing is done at a lower speed and gives a moderate shine. Burnishing is better for maintaining a strong, long-lasting finish on commercial floors.
Can I Burnish A Floor Myself, Or Do I Need A Professional?
Most people can burnish their own floors if they follow the steps and use the right tools. However, for large areas or expensive floors, it’s wise to get professional advice or hire a service.
How Do I Know If My Floor Needs Burnishing Or A New Finish?
If the floor is dull but still feels smooth, burnishing may restore the shine. If the finish is scratched, worn through, or sticky, you’ll need to apply a new finish first.
Can I Use Any Cleaning Product Before Burnishing?
No. Only use neutral floor cleaners. Avoid harsh chemicals, acids, or bleach, as these can damage the finish and reduce shine.
Where Can I Learn More About Proper Floor Care?
Reliable resources include the manufacturer’s website for your floor or machine, and trusted organizations such as the International Sanitary Supply Association (ISSA).
A perfectly burnished floor not only looks great but also protects your investment for years. By following the steps and tips in this guide, you’ll get results that make any room feel welcoming and well cared for. Whether you burnish once a month or every week, the right technique makes all the difference.