
Making a door mat at home is more than just a fun DIY project—it’s a way to welcome friends and family into your space with something uniquely yours. Store-bought door mats are everywhere, but a homemade one lets you choose the size, color, and style that perfectly fits your entryway and personality.
Plus, making a door mat can be easy, affordable, and even relaxing. Whether you want a simple mat to wipe shoes or a creative statement piece, this guide will show you every step.
Here, you’ll find not only the main methods for making door mats but also expert tips, material comparisons, and solutions to common problems. Even if you’ve never tried a craft like this before, you’ll finish with a mat you’ll be proud to put at your front door.
Let’s start creating something useful and beautiful!
Understanding Door Mats
Before you begin, it helps to know what makes a good door mat. The right mat should clean shoes, stay in place, last a long time, and look good. A door mat is often the first thing guests see, so its appearance matters, but so do function and durability.
Key Features Of A Good Door Mat
- Durability: Needs to handle foot traffic, weather, and dirt.
- Absorbency: Should soak up water to keep floors dry.
- Non-slip backing: Prevents slipping, especially when wet.
- Easy to clean: Should be simple to shake out, vacuum, or wash.
- Style: Matches your home’s look and your taste.
Types Of Door Mats
- Outdoor mats: Made for weather, rough cleaning, and tough materials.
- Indoor mats: Often softer, focus on trapping dirt and water.
- All-weather mats: Work both inside and out, usually rubber or coir.
- Decorative mats: More about style, sometimes less about cleaning.
Knowing what you want helps you pick the right materials and design for your project.
Choosing Your Door Mat Material
One of the first decisions is what your mat will be made from. This affects cost, appearance, cleaning, and how long it lasts.
Here’s a comparison of common materials for DIY door mats:
| Material | Durability | Ease of Cleaning | Cost | Best For |
|---|---|---|---|---|
| Coir (Coconut Fiber) | High | Medium | Medium | Outdoor, scraping mud |
| Cotton Rope | Medium | High | Low | Indoor, soft feel |
| Rubber | Very High | Very High | Medium | All-weather, non-slip |
| Old Towels/Fabric | Low-Medium | High | Very Low | Budget, indoor use |
| Jute Rope | High | Medium | Low | Rustic look, outdoor |
| Astroturf (Synthetic Grass) | Very High | High | Medium | Heavy dirt, outdoor |
Non-obvious insight: Many people forget that the base of the mat (what’s underneath) is as important as the top. A strong backing, like rubber or heavy canvas, stops slipping and keeps the mat flat.
Practical tip: If you live somewhere rainy, choose materials that dry fast and resist mold.

Credit: www.silhouetteschoolblog.com
Planning Your Door Mat: Size, Shape, And Design
A little planning saves time and avoids mistakes.
Measuring Your Space
Use a tape measure to find the width of your door and the space in front of it. Most door mats are 18 x 30 inches (about 45 x 75 cm), but you can adjust to fit your space. Allow a few inches on each side so the mat doesn’t block the door or look too small.
Choosing A Shape
- Rectangle: Most common, fits well for standard doors.
- Half-moon: Good for rounded entryways, adds style.
- Circle: Fun for playrooms or patios.
- Custom shapes: With fabric or rope, you can make stars, hearts, or anything you like.
Picking A Design
Decide if you want a simple, plain mat or a decorated one. You can add color, patterns, your family name, or fun sayings. If you plan to paint or stencil the mat, think about colors that won’t show dirt easily.
Non-obvious insight: Busy designs hide stains and wear better than plain light mats.
Tools And Supplies You’ll Need
Here are the basic supplies for the most popular DIY door mat methods. You won’t need everything on this list—pick what fits your project.
- Material for the top: Coir matting, cotton rope, jute rope, old towels, or rubber sheet
- Backing material: Rubber mat, heavy canvas, or outdoor carpet grip
- Scissors or utility knife: For cutting materials
- Hot glue gun and glue sticks: For sticking pieces together
- Strong craft glue or fabric glue: For fabric-based mats
- Paint (acrylic or outdoor craft paint): For decorating
- Stencils or painter’s tape: For designs
- Measuring tape or ruler
- Permanent marker or fabric pen: For marking cuts and designs
- Protective gloves: For working with glue or paint
- Heavy object or rolling pin: For pressing mat flat
- Optional: Sewing machine (for fabric mats), staple gun (for extra hold), spray sealer (for painted mats)
Methods For Making A Door Mat
Let’s dive into the most effective and popular ways to make a door mat at home. Each method suits different materials, styles, and skill levels. Choose the one that matches your needs and what you already have.
1. Rope Door Mat
A rope mat is tough, classic, and looks great with almost any entryway. You can use cotton rope for softness or jute rope for a rustic, outdoor look.
Materials
- 50–100 feet of 1/2″ or 3/4″ rope (cotton or jute)
- Hot glue gun and glue sticks
- Non-slip rubber backing (cut to size)
- Scissors
- Heavy object for pressing
Steps
- Lay your rubber backing on a flat surface.
- Start coiling the rope tightly from one end. Place a line of hot glue as you go.
- Continue coiling and gluing until you reach the size you want (usually about 18 x 30 inches for a rectangle or a 2-foot circle).
- For a rectangle, glue rope back and forth in rows instead of a coil.
- When finished, press with a heavy object until glue sets.
- Trim any excess rope or backing.
Pro tip: For a decorative touch, use colored rope or spray-paint sections before assembling.
2. Painted Coir Door Mat
This is a classic option that lets you add any design you like. Coir (coconut fiber) mats are easy to find at hardware stores.
Materials
- Plain coir mat (pre-cut or buy a large sheet and cut to size)
- Outdoor acrylic paint
- Stencils or painter’s tape
- Paintbrushes or foam sponges
- Protective gloves
- Spray sealer (optional)
Steps
- Place your mat on newspaper to protect your work area.
- Use stencils or tape to lay out your design.
- Dab paint onto the mat. Don’t brush—it pushes paint too deep.
- Let dry for several hours.
- Spray with sealer for extra durability (optional).
Pro tip: Use dark paint for designs—it lasts longer and hides dirt better.
3. Upcycled Fabric Door Mat
If you have old towels, jeans, or t-shirts, turn them into a mat! This is a fun, eco-friendly project.
Materials
- Old towels, jeans, or thick fabric
- Heavy-duty scissors
- Strong fabric glue or sewing machine
- Rubber backing or old bath mat
- Measuring tape
Steps
- Cut fabric into long strips (about 2 inches wide).
- Braid or weave the strips together. For a braid, tie three strips together and braid tightly.
- Coil the braid on the backing, gluing as you go.
- Cover the whole backing, then press flat until dry.
Pro tip: Mix different colors for a playful look, or use similar shades for a classic style.
4. Rubber Door Mat From Recycled Materials
Rubber mats are perfect for wet or muddy entrances.
Materials
- Old rubber mats, yoga mats, or tire inner tubes
- Strong scissors or utility knife
- Ruler or measuring tape
- Strong glue (for joining pieces)
- Paint (optional)
Steps
- Cut your rubber to the desired size and shape.
- For texture, cut slits or holes in a pattern.
- Join pieces with glue if needed.
- Paint or add designs if you wish.
Pro tip: Use a pattern of holes or lines for better grip and drainage.
5. Astroturf Door Mat
Astroturf (synthetic grass) is great for scraping shoes and dries quickly.
Materials
- Sheet of astroturf (available at hardware stores)
- Utility knife
- Rubber or heavy canvas backing (optional)
- Glue
Steps
- Cut astroturf to the size and shape you want.
- Glue astroturf to backing for extra strength.
- Press flat until dry.
Practical tip: If you don’t use a backing, use a heavy sheet so the mat stays flat.
Decorating And Personalizing Your Door Mat
This is where you can get creative! Even a simple mat can look special with a few personal touches.
Painting Techniques
- Use stencils to add words (“Welcome,” “Home,” your name) or patterns.
- Painter’s tape can make stripes, borders, or geometric shapes.
- For a weathered look, use dry brushing or a sponge.
Adding Fabric Or Rope Details
- Hot-glue a border of colored rope or fabric around the edge.
- Sew on patches or applique shapes for a playful mat.
Using Outdoor Vinyl Or Stickers
Some craft stores sell outdoor-grade vinyl stickers you can press onto your mat. These last for months and are easy to replace.
Sealing Your Design
For mats that will get wet, spray a clear acrylic sealer over painted or decorated areas. This helps protect your design and makes cleaning easier.
Non-obvious insight: Avoid very light colors for outdoor mats—they show dirt fast and fade in sunlight.
Step-by-step Example: Making A Custom Painted Coir Mat
Here’s a full example for beginners who want to make a custom mat with a “Welcome” design.
Materials
- 18 x 30 inch plain coir mat
- Outdoor acrylic paint (black and gold)
- Alphabet stencils (2–4 inch size)
- Painter’s tape
- Foam brush
- Spray sealer
- Newspaper or tarp
Steps
- Lay the mat on newspaper in a well-ventilated area.
- Use painter’s tape to mark a border around the edge (about 2 inches in).
- Place stencils in the center to spell “Welcome.”
- Use the foam brush to dab black paint over the stencils. Hold the stencil down tightly for clean edges.
- Remove the stencils and let dry for 1 hour.
- Use gold paint to add dots or small designs in the corners.
- Let the mat dry overnight.
- Spray the whole mat with sealer for water resistance.
- Place your mat at the door and admire your work!
Practical tip: For sharper lines, press the stencil flat with one hand while dabbing with the other.
Comparing Mat Types: Which Is Best For You?
It’s helpful to compare the main types of homemade mats by their strengths.
| Mat Type | Best For | Maintenance | Difficulty Level |
|---|---|---|---|
| Painted Coir | Personalized design, outdoors | Shake out, repaint as needed | Easy |
| Rope Mat | Rustic look, indoor/outdoor | Shake out, spot clean | Medium |
| Upcycled Fabric | Eco-friendly, indoor | Machine washable, air dry | Medium |
| Rubber Mat | Wet, muddy areas | Hose off, air dry | Easy |
| Astroturf | Heavy dirt, outdoor | Shake out, hose off | Easy |
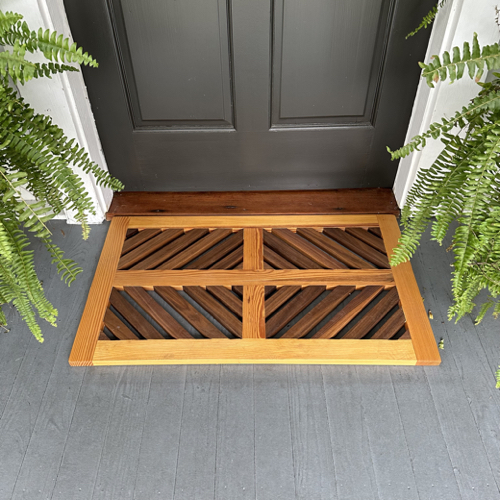
Credit: thecraftsmanblog.com
Common Mistakes And How To Avoid Them
Even simple projects have some pitfalls. Here’s how to avoid the most frequent problems:
- Mat is too thick or thin: Thick mats can block doors, thin mats slide around. Measure under your door before starting.
- Design wears off quickly: Use outdoor-grade paint, and always seal your designs.
- Backing comes loose: Glue well, press flat, and let dry fully before using.
- Mat slips: Always use a non-slip backing if your surface is smooth (like tile or wood).
- Edges fray: For fabric or rope, glue or sew edges tightly. For coir, trim loose fibers after making.
- Moldy or smelly mats: Let mats dry out after rain, and avoid leaving them wet for days.
- Color fades: Place mats out of direct sun if possible, or choose darker colors.
Non-obvious insight: Many people try to make mats bigger than their space. Make sure to measure with the door open and closed to check for clearance.
Care And Maintenance Tips
A well-made mat lasts longer with the right care.
- Shake out dirt weekly.
- Vacuum (for coir or rope mats) to pull out trapped grit.
- Hose off rubber or astroturf mats and let them dry in the sun.
- Spot clean stains with mild soap and water.
- Avoid machine washing coir or rubber mats—they can fall apart.
- If the mat is always wet, bring it inside to dry.
Where To Find Materials
Most supplies can be found at local hardware stores, craft shops, or online. If you want to save money, look for old rugs, towels, or rubber mats at thrift shops or recycling centers. Rope, coir, and astroturf are widely available in garden centers.
For designs or inspiration, check out project ideas on WikiHow.
Advanced Tips For Custom Door Mats
Ready to level up your project? Try these expert ideas:
- Layer two mats (a larger plain one with a smaller decorative mat on top) for extra style.
- Add metal corners or grommets for a modern look and to keep corners flat.
- Personalize with family initials or house numbers using stencils.
- Use glow-in-the-dark paint for fun nighttime effects.
Remember, the best mat is the one that fits your needs and style—don’t be afraid to experiment.

Credit: www.youtube.com
Frequently Asked Questions
How Long Does It Take To Make A Homemade Door Mat?
Most projects take 1 to 3 hours depending on design and drying time for paint or glue. Rope and braided mats can take longer, especially if you’re new to braiding or coiling.
Which Material Is Best For Outdoor Door Mats?
Coir, rubber, and astroturf are the most durable for outdoor use. They handle rain, sun, and heavy dirt better than fabric mats.
How Can I Keep My Mat From Slipping?
Always use a non-slip rubber backing or place your mat on a rough surface like concrete. You can buy non-slip mats or cut old rubber mats to fit.
Can I Make A Door Mat Without Any Sewing?
Yes! Most methods in this guide use glue and cutting only. Only the upcycled fabric mat may need some sewing, but you can use strong fabric glue instead.
How Do I Clean A Homemade Door Mat?
Shake out dirt regularly. For rubber or astroturf mats, hose off outside. For rope or coir mats, vacuum or brush. Avoid soaking coir or rope mats, as they can hold water and grow mold.
Making your own door mat is a simple way to add personality and function to your home. By choosing the right materials, planning your design, and following these tips, you’ll have a mat that’s both practical and one-of-a-kind. Enjoy the process—and don’t be surprised if guests ask where you bought your new mat!