Lofting a queen bed is a smart way to create more space in your room. Whether you live in a small apartment, share a dorm, or want extra storage, raising your bed can make your room feel bigger and more organized.
Many people think lofting is only for small twin beds, but a queen bed can be lofted safely with the right steps and tools.
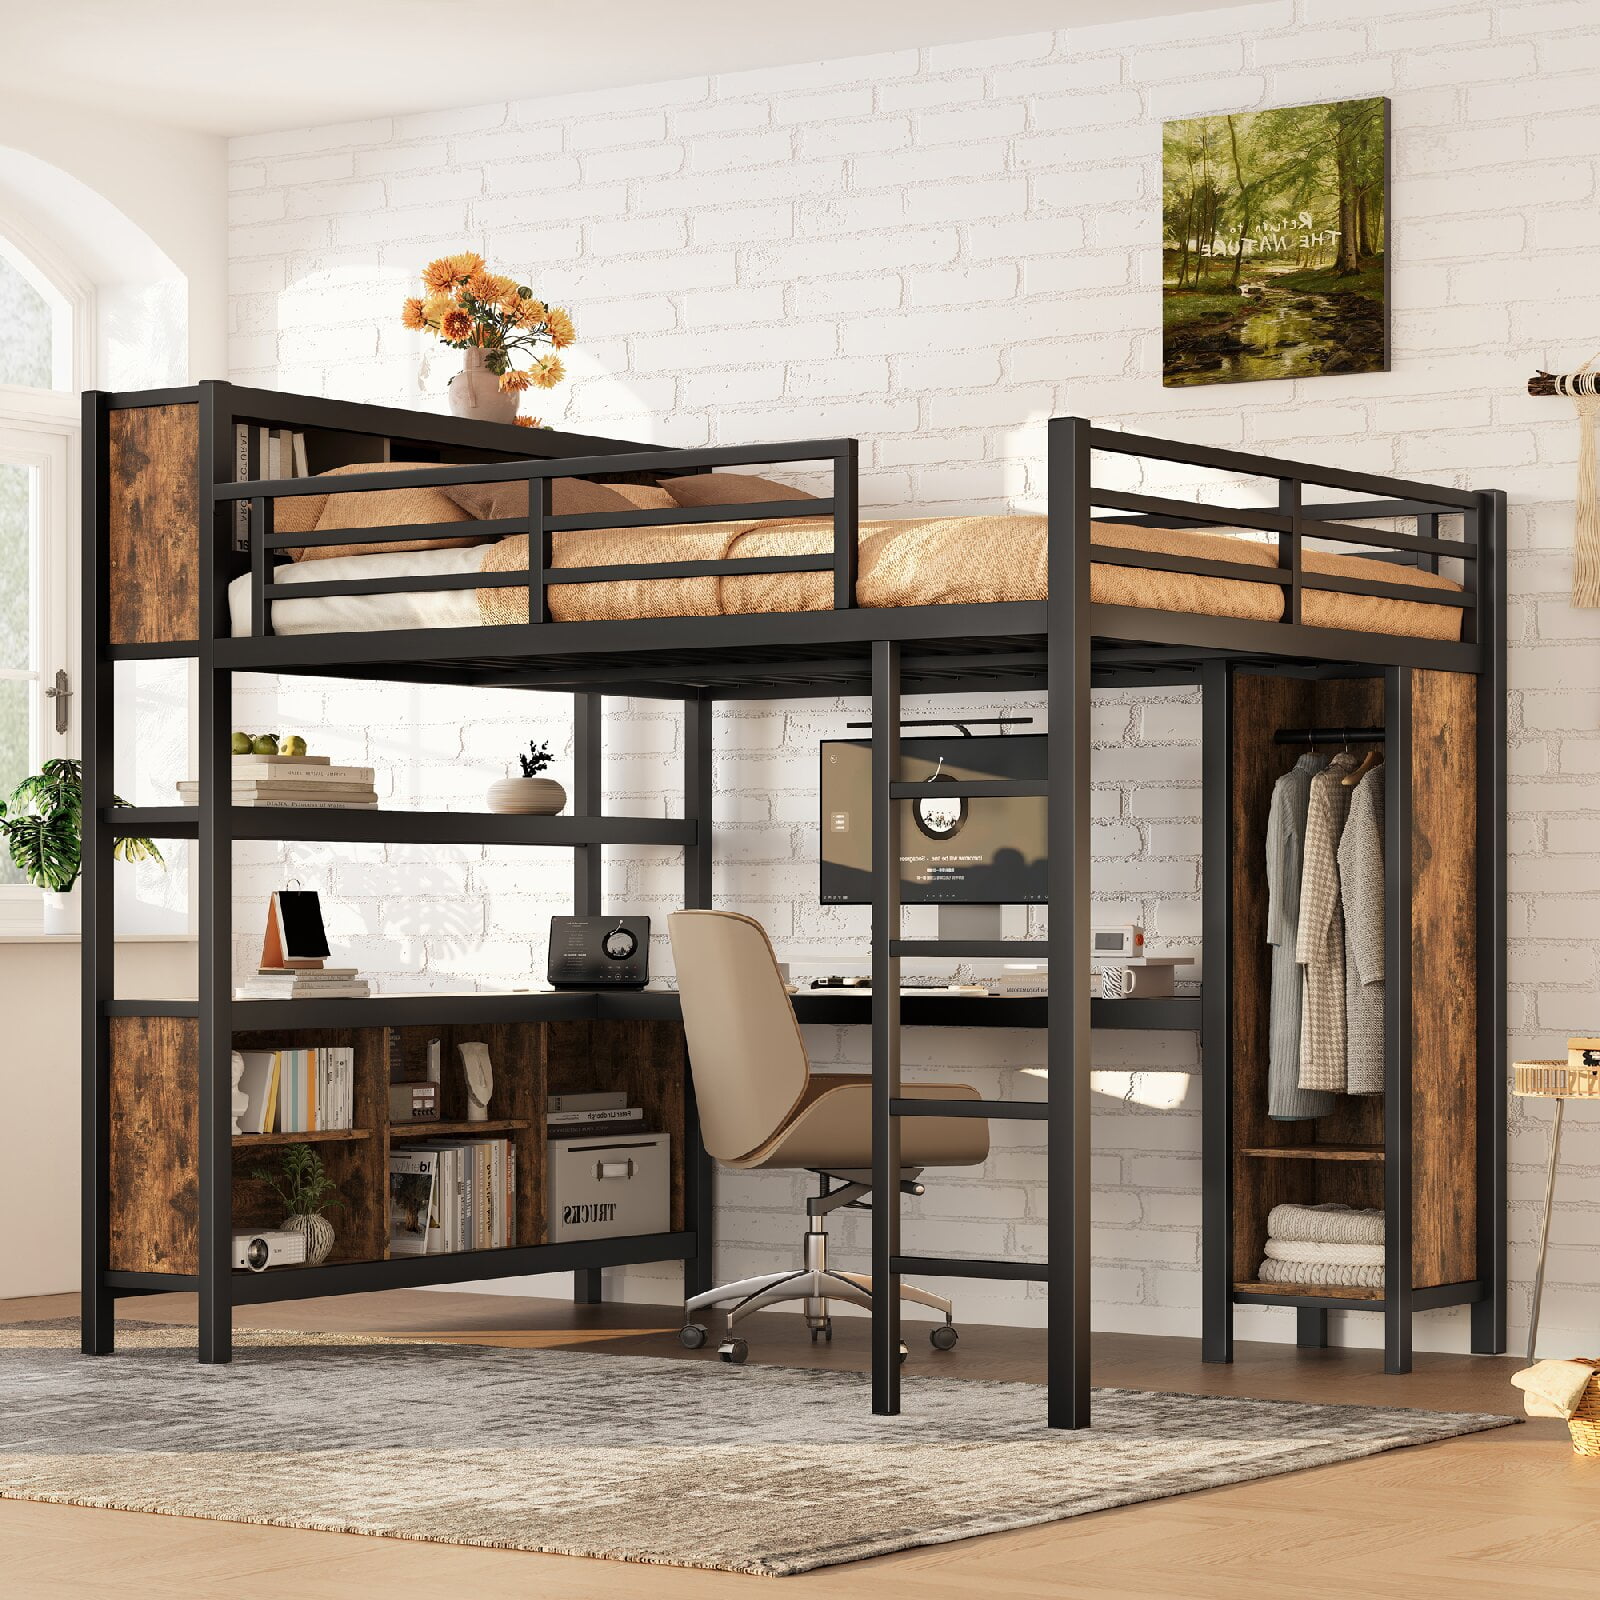
Lofting is not just about lifting your bed. It’s about creating a practical, comfortable, and stylish living area. Some people use the space under the bed for a desk, a sofa, or even a mini living area. Others need extra storage for clothes, books, or sports gear.
Whatever your goal, you’ll need to know the right way to loft a queen bed, what materials to use, and how to avoid common mistakes. This guide will walk you through every step, share expert tips, and help you avoid costly errors.
Why Loft A Queen Bed?
There are several reasons why people choose to loft their queen beds. The main reason is space-saving. In many cities, rooms are getting smaller, but people still need a place to sleep, work, and store things. Lofting helps you use every inch of your room. You can fit a desk, a dresser, or even a small sofa under the bed. Students, young professionals, and small families can all benefit from the extra space.
Another reason is organization. When you raise your bed, you create new areas to keep things neat and tidy. No more piles of clothes on the floor or books stacked in every corner. You can add bins, drawers, or shelves under the bed.
A third reason is style. A lofted bed can make your room look modern and creative. You can design the space under your bed to match your personality. Some people create a cozy reading nook, while others design a cool gaming area.
Finally, lofting a queen bed can be cost-effective. Instead of renting a bigger apartment or buying more furniture, you can use the space you already have.
Types Of Lofted Queen Beds
Not all loft beds are the same. There are different styles and methods to loft a queen bed, each with its own benefits and challenges.
1. Diy Loft Bed Frame
Building your own frame is popular for people who want a custom look or need a special size. This method lets you choose materials, height, and style. However, it takes time, tools, and some building skills.
2. Commercial Loft Bed Kits
Many companies sell loft bed kits made for queen-size mattresses. These kits usually include all parts and instructions. They are easier to assemble, but can be expensive. Make sure the kit supports the weight of a queen bed and the people using it.
3. Bed Risers
If you don’t want a full loft, bed risers can lift your bed a few inches to create extra storage. This is a simple and affordable option. However, it won’t give you enough space for a desk or sofa underneath.
4. Platform Loft Beds
A platform loft is a raised section in your room, like a stage. The bed sits on top, and the area underneath is open. This is common in tiny homes and modern apartments. It requires careful planning and sometimes professional help.
5. Suspended Loft Beds
Some people use ceiling-mounted beds with strong cables or chains. This style is bold and modern, but needs expert installation. Safety is very important with this option.
Comparing Lofting Methods
Here’s a quick comparison to help you see the differences.
| Method | Cost | Skill Needed | Space Under Bed | Best For |
|---|---|---|---|---|
| DIY Frame | Medium | High | Full | Custom designs |
| Commercial Kit | High | Low-Medium | Full | Quick solutions |
| Bed Risers | Low | Low | Limited | Extra storage |
| Platform Loft | High | High | Full | Tiny homes |
| Suspended Bed | High | Expert | Full | Modern style |
Planning Your Lofted Queen Bed
Before you start, spend time planning. Many people skip this step, but it can save you money, time, and headaches later.
Measure Your Room
First, measure the size of your room. Write down the width, length, and height. Make sure there is enough space for a lofted bed. Don’t forget to measure the door, windows, and any low ceilings or light fixtures.
Check Bed Size
A standard queen bed is 60 inches wide and 80 inches long. The frame may be bigger. You need extra space around the bed for safety and comfort. Think about how high you want to loft the bed. Most people loft to 55–70 inches above the floor, but the height can change based on your needs.
Decide The Purpose
What will you put under the bed? A desk, a sofa, storage, or something else? If you want a desk, check if you can sit comfortably without hitting your head. If you want a sofa, make sure it fits under the bed with extra space to sit up.
Choose Your Materials
Sturdy materials are key for safety. Most lofted beds use solid wood (like pine, oak, or maple) or metal (like steel). Avoid cheap particle board or thin metal. The frame must support the bed, mattress, and people.
Make A Simple Sketch
Draw a simple plan of your room and bed. Mark where the bed will go, and what will be under it. This helps you see if your idea will work before you start building.
Check Building Codes
Some apartments or dorms have rules about lofted beds. Check with your landlord, building manager, or campus office before you start.
Tools And Materials You’ll Need
Gather all tools and materials before you start. This makes the process smoother and helps you avoid last-minute trips to the store.
Basic Tools
- Tape measure
- Pencil and notebook
- Level
- Drill and drill bits
- Screwdriver
- Saw (for wood frames)
- Hammer
- Wrench set
- Safety goggles and gloves
Materials
- Wood or metal beams (at least 2×6 inch wood for queen beds)
- Bed slats or plywood for mattress support
- Heavy-duty bolts and screws
- Brackets and corner braces
- Ladder or stairs
- Sandpaper or file (for smoothing edges)
- Paint or finish (optional)
Optional Add-ons
- Guard rails (for safety)
- Under-bed lighting
- Curtains for privacy
- Shelves or storage units
Pro tip: Always buy more screws, bolts, and brackets than you think you need. It’s better to have extras than to run out halfway through the build.
Step-by-step Guide: How To Loft A Queen Bed
Now that you have your plan, tools, and materials, it’s time to loft your queen bed. Follow these steps carefully for a sturdy, safe result.
1. Clear The Area
Move all furniture and items away from the work area. You’ll need space to work and move around the bed.
2. Build Or Assemble The Frame
If you bought a commercial kit, follow the instructions carefully. For DIY builds, start with the four corner posts. These must be strong and tall enough for your desired loft height.
- Mark the height on each post.
- Attach cross beams (side-to-side and head-to-foot) using heavy-duty bolts.
- Use a level to make sure everything is straight and even.
3. Add Support Beams
Install extra support beams under the bed area, especially in the middle. Queen beds are heavy, so don’t skip this step. More supports mean less risk of sagging or wobbling.
4. Secure The Mattress Platform
Lay bed slats or a solid plywood sheet across the frame. Secure these with screws or bolts. The platform should fit tightly and not move or rattle.
5. Attach The Ladder Or Stairs
Connect the ladder or stairs to the frame. Ladders can be fixed or removable. Make sure they are sturdy and have non-slip steps.
6. Install Guard Rails
Guard rails are important for safety, especially if you move around in your sleep. Attach rails to the open sides of the bed, at least 5-7 inches above the mattress.
7. Check Stability
Before using your lofted bed, shake it gently. It should not wobble or creak. Test by putting weight on different areas. If anything feels loose, tighten the bolts or add more support.
8. Move Your Mattress And Bedding
Carefully lift your queen mattress onto the loft. Add your bedding, pillows, and blankets.
9. Arrange The Space Under The Bed
Now you can set up a desk, sofa, or storage under the loft. Leave enough space to move comfortably and safely.
Safety Tips And Warnings
Lofting a queen bed is safe when done properly. But mistakes can cause injury or damage. Here are key safety tips:
- Never overload the bed. Check the weight limit of your frame or kit. Queen beds are heavier than twins or fulls.
- Use strong materials only. Avoid thin wood, weak metal, or old recycled parts that might not support enough weight.
- Secure all bolts and screws. Loose hardware can make the bed wobble or collapse.
- Check stability often. Every few months, check bolts and supports. Tighten as needed.
- Don’t skip guard rails. Even adults can roll out of bed, especially if sleeping high up.
- Use a sturdy ladder. Make sure it can hold your weight and is easy to climb.
- Keep the area clear. Don’t store tall items that could hit the underside of the bed or make you trip.
- Don’t jump on the bed. Lofted beds are not designed for heavy jumping or rough play.
- Be careful with ceiling fans or low lights. Leave enough space above the bed for sitting up safely.
- Ask for help with lifting. Queen mattresses are heavy and awkward to lift alone.
Non-obvious insight: Always check your floor’s strength before lofting a queen bed. Some old buildings or upper floors may not support extra weight. If in doubt, ask a building professional.
Credit: www.walmart.com
Common Mistakes When Lofting A Queen Bed
Many people make the same errors when trying to loft a queen bed. Here’s what to avoid:
Choosing The Wrong Height
Some people loft the bed too high or too low. If it’s too high, you may feel unsafe or hit your head on the ceiling. If it’s too low, you can’t use the space underneath. Always measure and plan before building.
Using Weak Materials
Don’t use cheap wood, plastic, or thin metal pipes. Queen beds are large and need strong support.
Skipping The Center Support
Some DIY builders forget to add a middle beam. This can cause the bed to sag or break over time.
Not Anchoring To The Wall
For added safety, consider anchoring the bed frame to the wall. This prevents wobbling or tipping, especially on slippery floors.
Poor Ladder Placement
A ladder placed in a bad spot can be hard to climb, especially at night. Make sure it’s easy to reach from the floor and the bed.
Ignoring Building Rules
Many apartments and dorms have rules about lofted beds. Breaking these rules can lead to fines or being asked to remove the bed.
Not Planning Emergency Exits
In case of a fire or emergency, make sure you can get down quickly and safely. Avoid blocking windows or doors.
Pro tip: Take photos during each step of your build. If you have problems later, you can show these to a repair person or building manager.
Creative Ideas For Under The Loft
Once your queen bed is lofted, you have a new world of space below. Here are some creative and practical ideas:
Home Office
Place a desk and chair under the loft. Add shelves for books and supplies. This creates a quiet, private spot to work or study.
Cozy Lounge
Add a small sofa, bean bags, or floor cushions. Hang fairy lights and curtains for a cozy retreat. Perfect for reading, gaming, or relaxing.
Extra Storage
Install shelves, drawers, or bins. Store out-of-season clothes, sports gear, or holiday decorations. Use clear containers so you can see what’s inside.
Mini Guest Area
Put a futon or daybed under the loft. This gives you a place for friends or guests to sleep.
Hobby Space
Set up a craft table, music area, or art corner under your bed. Keep supplies organized with bins and hooks.
Non-obvious insight: Use rolling carts or under-bed drawers for flexible storage. You can move them out easily when you need to clean or rearrange.
Cost Breakdown: What To Expect
The price to loft a queen bed can vary a lot. Here’s a basic breakdown of costs.
| Item | Estimated Cost (USD) |
|---|---|
| Wood (for DIY) | $100 – $300 |
| Metal frame kit | $400 – $800 |
| Bed slats/plywood | $50 – $150 |
| Bolts, screws, hardware | $30 – $80 |
| Ladder or stairs | $50 – $200 |
| Paint/finish | $20 – $60 |
| Guard rails | $40 – $100 |
| Extras (lighting, curtains, etc.) | $20 – $100 |
Total cost: For a DIY wood loft, expect to spend $200–$500. For a metal kit, $500–$1,000 is common. Prices depend on quality, design, and where you live.
Tip: Buying used materials or repurposing old furniture can save money, but always check for strength and safety.
Maintenance And Care
A lofted queen bed needs regular care to stay safe and sturdy.
- Check bolts and screws every 3–6 months. Tighten any that feel loose.
- Dust and clean under the bed regularly. Dust can collect quickly in small spaces.
- Watch for signs of stress, like cracks in wood or bent metal. Repair or replace parts as needed.
- Lubricate metal joints if your bed has squeaks.
- Repaint or refinish wood surfaces every few years to prevent wear.

Credit: www.amazon.com
Real-life Examples
Many people have lofted queen beds in creative ways. Here are a few examples:
- A college student in New York built a DIY loft with storage bins and a desk under the bed. She added LED strip lights and a curtain for privacy.
- A couple living in a tiny apartment used a commercial metal loft kit. They created a cozy sofa lounge underneath, with shelves for books and games.
- A family in a small house built a platform loft for their teenager. The area under the bed became a music practice space, with a keyboard and speakers.
Each of these examples shows how lofting a queen bed can make a small space feel bigger and more functional.
When To Call A Professional
Some projects are best left to experts. Call a professional if:
- You are not comfortable with tools or building.
- Your floor or walls seem weak.
- You want a suspended or platform bed.
- You need help installing guard rails or ladders.
A professional can help design and build a safe, strong loft that matches your needs.
Environmental Impact
Using recycled or sustainably sourced wood can reduce the environmental impact of your lofted bed. Look for FSC-certified wood or repurpose old furniture. Avoid toxic paints or finishes. A well-built lofted bed can last for many years, reducing waste.
Useful Resources
For more inspiration or detailed plans, you can check out guides on Wikipedia’s Loft Bed page. You’ll find photos, design ideas, and links to further reading.
Frequently Asked Questions
How Much Weight Can A Lofted Queen Bed Hold?
Most well-built lofted queen beds can support 500–800 pounds, including the mattress and people. Always check the weight limits for your specific frame or kit. For DIY builds, use strong wood or metal, and add extra supports to increase strength.
Can I Loft A Queen Bed In A Rental Apartment?
Yes, but check your lease or ask your landlord first. Some rentals do not allow lofted beds or drilling into walls. Consider a freestanding frame that does not need anchors if you have restrictions.
Is It Safe To Loft A Queen Bed?
It is safe if you use strong materials, build carefully, and follow safety tips like adding guard rails and a sturdy ladder. Check the bed often for loose bolts or cracks. Never overload the bed or use weak materials.
How High Should I Loft My Queen Bed?
Most people loft a queen bed 55–70 inches above the floor. The right height depends on your ceiling and what you want under the bed. Make sure you have enough space to sit up in bed, and enough headroom underneath for comfort.
Can I Use Bed Risers To Loft A Queen Bed?
Bed risers can lift your bed a few inches, but they are not strong or tall enough for a full loft. For a true loft, use a solid frame or commercial kit designed for queen beds.
Final Thoughts
Lofting a queen bed is a practical way to make your room bigger, more organized, and more stylish. It’s possible for almost anyone, whether you want a simple storage solution or a full living area under your bed. With careful planning, the right materials, and a focus on safety, you can create a lofted bed that fits your life and your space.
Take your time, measure twice, and don’t be afraid to ask for help. A well-built lofted queen bed can improve your room for years to come.

Credit: www.amazon.com