A sloping concrete floor can be a major problem in homes, workshops, and commercial spaces. It can cause furniture to wobble, doors to swing, and even create trip hazards. More importantly, an uneven floor often signals deeper issues, such as poor installation or subsidence.
Fixing this problem is not just about looks—it’s about safety and function. If you want to install new flooring, like tile or wood, the surface must be flat and stable. Leveling a sloping concrete floor might sound like a big job, but with the right steps, tools, and some patience, you can restore your floor to a smooth, even finish.
This guide explains how to level a sloping concrete floor from start to finish. You’ll learn how to check the slope, choose the right materials, and complete the project with confidence—even if you’re not a professional contractor. Along the way, you’ll discover tips and pitfalls that most beginners miss.
Let’s get started.
Understanding Floor Slope And Why It Matters
A sloping floor isn’t always obvious at first. Sometimes, you only notice after placing a ball on the floor and watching it roll away, or when a new piece of furniture won’t sit flat. You might also notice a sloping floor if you spill water and see it running consistently toward one side of the room, or if you feel yourself walking slightly uphill or downhill.
These subtle signs can creep up over time, especially in older homes.
Common causes include:
- Poor workmanship during the original pour. For example, not using the proper guides or not allowing concrete to settle evenly can lead to unevenness.
- Foundation settlement. Over years, soil under the house can compact or wash away, causing one side of the slab to sink.
- Water damage or erosion under the slab. Leaking pipes or poor drainage can wash away supporting soil, creating voids and dips.
- Changes in temperature or humidity. Concrete naturally expands and contracts, which can cause small shifts that add up over decades.
Problems caused by sloping floors:
- Cracks in walls or tiles, as the building frame twists or adjusts to the uneven base.
- Gaps under baseboards, which not only look bad but can let in pests or drafts.
- Uneven wear on flooring materials, especially with softer coverings like vinyl or carpet.
- Increased risk of falls, especially for children, elderly, or anyone with mobility issues.
If you ignore a sloping floor, the problem usually gets worse. For example, water can pool in the low spots, leading to mold or structural damage. Over time, excessive slope can even affect your doors and windows, making them hard to open or close.
Before leveling, check if the slope is due to a serious foundation problem. Sometimes, it’s best to call a professional for an inspection, especially if cracks are wider than 1/4 inch or doors and windows stick.
Tools And Materials You’ll Need
Leveling a concrete floor requires some specialized tools and materials. Here’s what you’ll need for most projects:
- 6-foot spirit level or laser level, to accurately check flatness over larger areas. A short level isn’t enough for wide rooms.
- Measuring tape to identify and mark differences in height.
- Chalk line for marking straight guide lines across the floor.
- Concrete grinder or floor scraper (for removing high spots), especially important for older or painted slabs.
- Bucket and mixing paddle for preparing self-leveling compound.
- Self-leveling compound (the main material for filling low spots).
- Primer (for better bonding).
- Trowel or squeegee to spread the compound evenly.
- Protective gear (gloves, goggles, mask), because concrete dust can irritate skin and lungs.
- Shop vacuum or broom to keep the worksite clean.
- Plastic sheeting (to protect walls and doors from splashes).
- Sealant (optional, for cracks).
Choosing The Right Self-leveling Compound
Not all self-leveling products are the same. Here’s a comparison of three popular types:
| Type | Best For | Key Features | Drying Time |
|---|---|---|---|
| Cement-based | Most indoor floors | Strong, durable, easy to pour | 4-24 hours |
| Gypsum-based | Radiant heat floors | Lightweight, good thermal properties | 6-48 hours |
| Polymer-modified | High-traffic areas | Flexible, resists cracking | 2-12 hours |
Always check the product label for compatibility with your floor. Some self-levelers are only for interior use and can’t handle moisture, so if your area is damp (like a basement), pick one rated for that environment. Also, check the minimum and maximum thickness—some products can’t be poured too thin or thick.
Beginner tip: Buy a little extra compound. It’s common for first-timers to underestimate how much they need, especially if the floor has a lot of dips.
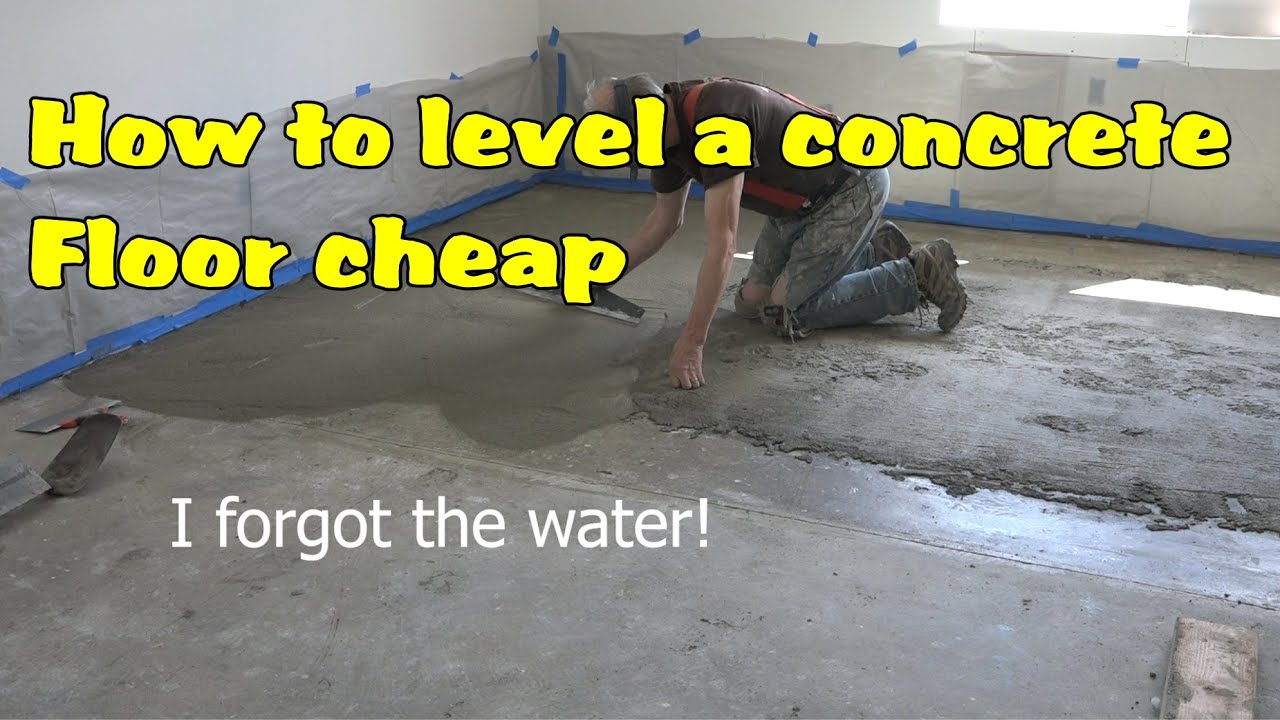
Credit: www.youtube.com
Assessing The Slope Of Your Concrete Floor
Before you can fix a slope, you need to know exactly where the high and low spots are. This step is often rushed, but it’s the foundation of a successful project.
Step-by-step Assessment
- Clear the floor: Remove all furniture, rugs, and debris. The surface must be fully exposed, including corners and edges.
- Check for cracks and damage: Mark any large cracks or holes. Use a flashlight to inspect dim corners. Sometimes, hairline cracks are easy to miss.
- Measure the slope: Place your 6-foot level on the floor in several areas. Check both directions (length and width). If the bubble is not centered, the floor is sloping. For a more precise reading, you can slide a stack of coins or small blocks under one end until the bubble centers. Measure the gap to estimate the height difference.
- Mark high and low spots: Use a chalk line to outline these areas. Write the difference in height on the floor using a marker. This will help you later when pouring compound.
- Use a laser level for accuracy: Set the laser at one end of the room. Walk around and measure the height difference at several points. Write down the largest difference. Laser levels are especially useful for larger rooms or when you want to check for subtle dips that aren’t obvious with a bubble level.
Pro tip: Most self-leveling compounds can cover up to 1 inch of difference in one pour. If your floor is more uneven, you may need to do multiple pours or grind down high spots first.
Non-obvious insight: Floors don’t always slope in just one direction. Some rooms have “waves” or multiple dips, so check in several directions and not just across the longest wall.
Preparing The Floor For Leveling
Preparation is the most important part of leveling a sloping concrete floor. Skipping these steps can lead to poor bonding, cracking, or a failed repair.
Cleaning And Repair
- Sweep or vacuum the entire floor. Remove dust, dirt, and loose particles. Even small amounts of debris can weaken the bond.
- Scrape off glue or paint with a floor scraper or grinder. The surface must be clean for the compound to stick. Old adhesives from carpet or vinyl must be fully removed.
- Repair cracks and holes: Use a concrete patch or sealant. Let it dry according to the manufacturer’s instructions. For large cracks, widen them slightly with a chisel for better patching.
- Seal gaps at walls or doors: Use foam or caulk to stop the compound from leaking. Pay attention to spots around heating vents or pipes—compound can leak into these gaps and make a mess.
Beginner mistake: Not cleaning enough. Even tiny patches of dust or oil can cause self-leveler to separate or bubble.
Priming The Surface
Primer is often overlooked, but it’s vital for a strong bond. Apply primer with a roller or brush, covering the entire area. Let it dry (usually 1-2 hours). Some primers turn clear when ready.
Non-obvious insight: If you skip primer, the self-leveling compound may dry too fast and crack or pull away from the concrete. Some compounds even require two coats of primer for very porous or old concrete.
Extra tip: If your floor is very porous, dilute the first coat of primer with water (follow product instructions) to help it soak in.
Grinding Down High Spots
If your floor has big humps, don’t try to cover them with compound. Instead, grind them down first.
- Mark the high spots clearly. Use chalk or tape so you don’t lose sight of them as you work.
- Use a concrete grinder with a diamond cup wheel. Always follow the tool’s safety instructions.
- Wear safety gear (dust mask, goggles, ear protection). Concrete dust is harmful if breathed in.
- Move slowly and check your progress often with the level. Take your time—going too fast can create new low spots.
- Vacuum dust after grinding. It helps prevent dust from interfering with the self-leveler’s bond.
Tip: Renting a grinder for a day is usually affordable and much faster than trying to chip away by hand.
Non-obvious insight: Always check local tool rental stores for “dust shrouds” for grinders. These attachments connect to vacuums and keep your workspace much cleaner.
Mixing And Pouring Self-leveling Compound
This is the heart of the project. It’s important to work quickly—most self-leveling products set in 10-20 minutes.
Mixing Instructions
- Read the product instructions carefully. Water ratios matter. Too much water makes the mixture weak, too little makes it hard to spread.
- Fill a clean bucket with the right amount of water.
- Add powder slowly while mixing with a paddle on a drill. Pouring all at once can cause clumps.
- Mix for 2-3 minutes until smooth (no lumps). Use a high-speed mixer if possible.
- Let the mix sit for 2 minutes, then remix briefly. This helps reduce air bubbles.
Mistake to avoid: Don’t add extra water. Too much water can weaken the final floor. If you need more working time, mix smaller batches instead of diluting.
Pouring And Spreading
- Start at the lowest point of the floor. The compound will flow outward.
- Pour the mixture and let it flow. The compound will seek its own level.
- Use a trowel or gauge rake to help move the compound into corners and edges. Work quickly and don’t overwork it—self-leveling compounds set fast.
- Work quickly—you have a limited time before it starts to set.
- Check your progress with the level as you go. It’s easier to fix mistakes before the compound hardens.
Pro tip: For large rooms, get help. One person can mix while another pours and spreads.
Non-obvious insight: For rooms with obstacles (pipes, posts), pour compound in sections, using temporary foam barriers to control flow. Remove barriers before the compound fully sets.

Credit: www.reddit.com
Dealing With Large Slopes Or Multi-level Floors
If your floor is very sloped (more than 1 inch difference), you may need to use another approach.
Layering The Compound
Most self-levelers can be poured in layers. Let each layer dry before adding the next.
Example: If your floor is 2 inches off, do two pours of 1 inch each. Let the first layer cure completely.
Extra tip: Lightly sand each layer before applying the next to help bonding.
Building A Tapered Slope
Sometimes, you need to create a gentle ramp (for example, to match an adjacent room). Use a straightedge to guide the slope while pouring. Finish with a trowel to smooth the surface.
Non-obvious insight: For wheelchair access or smooth transitions, check local building codes for the recommended slope ratio.
Using Concrete Resurfacer
For extremely rough floors, consider a concrete resurfacer. It’s thicker and can be applied up to several inches deep.
| Product | Max Depth Per Layer | Best Use |
|---|---|---|
| Self-leveling compound | 1 inch | Minor slopes |
| Concrete resurfacer | 2-3 inches | Major slopes, rough surfaces |
| Traditional concrete mix | Any depth | Full rebuilds, outdoor use |
Non-obvious insight: If you try to fix a large slope with a single thick pour of self-leveler, it may not dry properly and can crack or shrink. Always build up in layers for strength.
Curing And Drying: Patience Pays Off
After pouring, resist the urge to walk on or cover the floor too soon. Curing is when the material gains strength.
- Most self-leveling compounds can be walked on after 4-8 hours, but check the package.
- Heavy furniture or flooring should wait 24-48 hours.
- Keep the area well-ventilated but avoid strong fans that dry the surface too fast.
- Temperature and humidity affect drying time. In cold or damp rooms, curing may take longer.
Tip: Cover the floor with plastic sheeting if dust or debris is a problem during curing.
Non-obvious insight: Letting the floor cure fully is not just about strength—trapped moisture can cause glue or wood floors above to fail. Always check moisture levels if you’re installing hardwood.
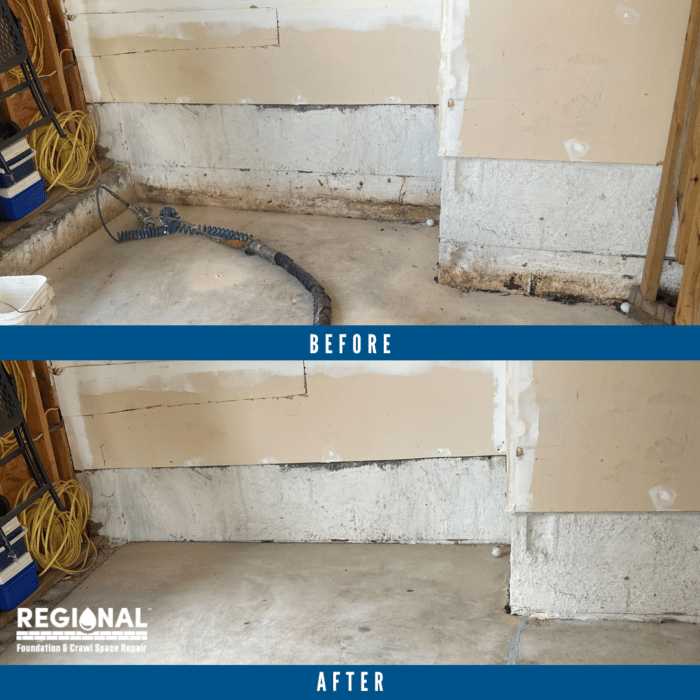
Credit: regionalwaterproofing.com
Installing Flooring Over The Leveled Concrete
Once your floor is level and fully cured, you can install your final flooring—whether it’s tile, laminate, wood, or carpet.
Tips For Best Results
- Check for flatness again with a long level or straightedge. Small bumps can be sanded smooth.
- Remove dust with a vacuum or damp mop before laying new flooring.
- Use the right underlayment for your flooring type. For example, use a moisture barrier under wood or laminate.
- Follow manufacturer instructions for adhesives or fasteners.
- For tile, use a quality thinset mortar and check tiles for lippage (uneven tile edges).
Mistake to avoid: Don’t rush into installing flooring before the self-leveling compound has cured. Moisture left in the floor can damage wood or cause tile to loosen.
Extra tip: If you plan to install radiant floor heating, check compatibility with both the self-leveling compound and your chosen flooring.
Common Problems And How To Solve Them
Even with careful work, problems can happen. Here’s how to handle the most common ones.
Cracks In The New Surface
- Cause: Floor moved during curing, or compound was too thick.
- Solution: Fill with a flexible sealant. For large cracks, grind out and refill.
- If cracks keep returning, check for ongoing movement or moisture problems below.
Compound Didn’t Set
- Cause: Wrong water ratio or poor mixing.
- Solution: Remove soft spots and re-pour with a new batch.
- Double-check your mixing technique and the water temperature.
Uneven Finish
- Cause: Didn’t spread compound fast enough, or didn’t check with a level.
- Solution: Lightly sand high spots and fill low spots with a thin layer.
- If the problem is widespread, consider another thin pour over the whole floor.
Pro tip: If you see bubbles or pinholes, use a primer or sealer before the next layer.
Non-obvious insight: Sometimes, bubbles are caused by air escaping from cracks or gaps in the slab. Make sure the surface is fully sealed before pouring.
Safety Considerations
Working with concrete and leveling compounds has some risks.
- Wear gloves and eye protection when mixing and pouring.
- Use a mask if grinding or sanding concrete.
- Ventilate the area to avoid breathing dust or fumes.
- Keep children and pets away from the work zone until the floor is fully dry.
Extra tip: Concrete dust can damage electronics—cover or move sensitive devices out of the room.
When To Call A Professional
While many homeowners can level a mildly sloping floor, some cases need expert help.
- The slope is more than 2 inches across a small room.
- There are signs of structural movement (large cracks, shifting walls).
- The floor is above a basement or crawl space with moisture problems.
- You’re not comfortable using power tools or handling heavy bags.
Non-obvious insight: Sometimes, a sloping floor signals a bigger structural problem. Fixing just the surface won’t solve the root issue.
If you’re unsure, talk to a contractor or structural engineer. They can advise if you need foundation repair before leveling.
Tip: Many contractors offer free inspections or quotes, which can help you plan your project and avoid expensive mistakes.
Cost Breakdown: Diy Vs. Professional Leveling
Leveling a floor yourself can save money, but it’s important to budget for all materials and tools.
| Item | DIY Cost (approx.) | Pro Cost (approx.) |
|---|---|---|
| Self-leveling compound (per 50 lbs) | $35 | Included |
| Primer (per gallon) | $25 | Included |
| Concrete grinder (rental/day) | $60 | Included |
| Labor | $0 | $2-5 per sq. ft. |
| Miscellaneous (tools, safety gear) | $40 | Included |
A typical 200 sq. Ft. room might cost $150-$300 DIY, or $500-$1,500 with a contractor. Prices vary by location, project size, and the amount of prep work needed.
For more details on concrete repair and leveling, check the Family Handyman guide.
Non-obvious insight: When comparing costs, consider your time and effort. Large projects or those with difficult access may be worth hiring a pro, especially if you lack experience.
Maintenance Tips For A Level Floor
After leveling, you want your floor to stay even for years. Here’s how to protect your investment:
- Fix leaks quickly: Water under the slab can cause new slopes.
- Seal exterior cracks: Stop moisture from entering. Inspect your home’s foundation and repair any visible cracks.
- Check for settling: If doors or windows start sticking, inspect the floor again.
- Use furniture pads: Heavy objects can dent softer surfaces.
- Keep gutters and downspouts clear: Direct water away from your foundation to prevent erosion.
Non-obvious insight: Many floors develop new slopes due to changing soil under the building. Seasonal checks can prevent surprises. In areas with clay soil, changes in moisture can cause the ground to swell or shrink, subtly shifting the slab.
Extra tip: Mark your floor with small pencil lines at key points after leveling. If they move or tilt in the future, you’ll notice right away.
Frequently Asked Questions
What Is The Maximum Slope I Can Fix With Self-leveling Compound?
Most self-leveling compounds can handle up to 1 inch of slope per pour. For deeper dips, you’ll need to apply in layers or consider using a concrete resurfacer.
How Long Before I Can Install Flooring Over A Leveled Concrete Floor?
Wait at least 24 hours for self-leveling compound to cure before installing flooring. Check the product label—some compounds need 48 hours, especially in humid conditions. If you’re unsure, use a moisture meter to test the surface.
Can I Level A Concrete Floor Without Removing Old Tiles Or Carpet?
No, all old flooring must be removed before leveling. The compound needs to bond directly to clean, bare concrete for best results.
Is It Possible To Level A Sloping Floor Without Professional Tools?
For minor slopes (less than 1/2 inch), you can use basic tools like a long straightedge and trowel. For bigger projects, renting a grinder or using a laser level will give better results. If you’re working in a small bathroom or closet, sometimes a simple patching compound is enough.
What Causes A Concrete Floor To Start Sloping Over Time?
Common causes include soil settling, moisture problems, poor original installation, or structural movement in the building. Fixing the surface won’t stop further movement if the root problem isn’t solved.
Leveling a sloping concrete floor is a smart investment in your home’s safety and comfort. With careful planning, the right materials, and attention to detail, you can achieve a smooth, lasting result. If you face big challenges or structural issues, don’t hesitate to consult a pro.
Your home—and your peace of mind—are worth it.