Moisture is often the silent enemy of stored items. It sneaks in, causes mold, rust, and strange smells, and can ruin valuable belongings. Whether you keep family photos, seasonal clothes, electronics, or important documents, keeping moisture out of storage containers is a must. People often think just closing a container is enough, but humidity can still seep in through tiny openings or changes in temperature. This article explains, in simple and clear language, how to protect your things from moisture damage, what methods work best, common mistakes people make, and practical tips for all types of storage containers. If you want to keep your valuables safe and dry, read on for a complete guide.
Why Moisture Is A Problem In Storage Containers
When you put items into a storage container, you probably want them to stay in the same condition. But even small amounts of moisture can damage them in ways you might not expect. Mold and mildew love damp spaces, and so do insects. Paper, fabric, leather, metal, and even plastic can all be damaged. Clothes can start to smell bad, electronics may stop working, and food can rot or attract pests.
A study by the Environmental Protection Agency (EPA) shows that humidity over 60% can start to cause mold growth in just 24 to 48 hours. In basements, garages, and attics, humidity often rises above this level, especially during certain seasons.
So, it’s not just about big leaks or spills—it’s about controlling even small amounts of moisture.
How Moisture Gets Into Storage Containers
People often believe that once a lid is snapped shut, their belongings are safe. But moisture can enter storage containers in several ways:
- Air leaks: Most containers are not airtight. Humid air can move in and out, especially with temperature changes.
- Condensation: If you store items when they are warm and then the air cools down, water droplets form inside the container.
- Damp items: Storing anything that isn’t fully dry introduces moisture from the start.
- Climate changes: Moving containers from a cold to a warm area can cause condensation on the inside walls.
To keep things dry, you need to stop moisture before it starts, block it from getting in, and remove what’s already there.
Choosing The Right Storage Container
Not all containers protect against moisture equally. The material, seal, and even shape of a container matter. Here’s a look at the most common types and how they compare:
| Container Type | Moisture Protection | Best For | Downsides |
|---|---|---|---|
| Plastic bins with gasket seals | Excellent | Long-term storage, important items | More expensive |
| Basic plastic bins | Moderate | General storage | Not airtight |
| Metal containers | Good (if sealed) | Tools, outdoor items | Rust risk, heavy |
| Cardboard boxes | Poor | Short-term, dry places | Absorbs moisture, weakens |
| Vacuum-sealed bags | Excellent | Clothes, bedding | Can leak if not sealed well |
Airtight containers with a gasket seal are the best for blocking humidity. For electronics or valuable papers, consider a waterproof and airtight box. For clothes and fabrics, vacuum-seal bags are lightweight and keep out both air and moisture.
Preparing Items Before Storage
One step that many people miss is making sure their belongings are ready for storage. Placing damp or dirty items in a container guarantees problems later.
- Clean everything: Dust, food crumbs, or oils can attract moisture and pests.
- Dry items completely: Even a little dampness can spread moisture throughout the container.
- Use the right wrapping: Wrap delicate items in acid-free paper, not newspaper, which can add moisture.
- Allow items to air out: Let fabrics or shoes sit out for a few hours before sealing them away.
For electronics, take out the batteries before storage. Batteries can leak and create extra humidity.
Creating A Dry Storage Environment
Sometimes, the storage space itself is the problem. Basements, garages, and attics often have high humidity. To reduce problems:
- Use a dehumidifier: This removes water from the air and is especially helpful in closed rooms.
- Store containers off the floor: Use shelves or pallets to avoid contact with damp ground.
- Keep storage areas clean: Dirt and dust can hold moisture and attract bugs.
A dry room makes it much easier to keep containers dry on the inside.
Using Desiccants And Moisture Absorbers
A simple way to keep storage containers dry is to use desiccants—materials that absorb moisture from the air. Silica gel packets are the most common, but there are other options:
- Silica gel: Sold in small packets or bulk containers. Absorbs water vapor and can be reused if dried in the oven.
- Calcium chloride: Found in products like DampRid, these crystals work well for closed containers but should not touch stored items directly.
- Activated charcoal: Absorbs both moisture and odors.
- Baking soda: Cheap and easy to find. Best for small spaces.
- Rice: Sometimes used in emergencies, but less effective than real desiccants.
Place these inside containers, but not directly on important items. Change them every few months or according to package instructions.

Credit: stomostorage.com
How To Seal Containers Correctly
Even the best container will not work if it’s not sealed properly. Here’s how to do it right:
- Check the gasket: Make sure the rubber or foam gasket is in good condition and seated properly.
- Close all latches: For containers with multiple clasps, fasten each one tightly.
- Avoid overfilling: Items that press against the lid can break the seal.
- Test the seal: Fill with a little water (without your items), close, and tip upside down. If water leaks out, air can get in.
For extra protection, use plastic wrap or special weatherproof tape around the lid.
Monitoring Humidity Inside Containers
You can’t always see moisture, but you can measure it. Small humidity indicator cards or mini digital hygrometers are cheap and can be placed inside containers. Aim to keep humidity below 50%. If it gets higher, replace desiccants or open the container to air things out.
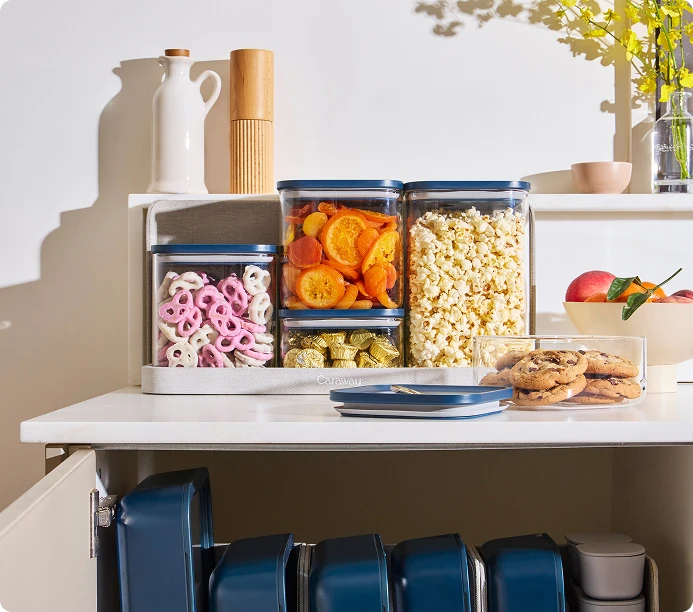
Credit: www.carawayhome.com
Location Matters: Where To Store Your Containers
Where you put your storage containers affects how much moisture they will face. Here’s a quick comparison:
| Location | Moisture Risk | Best Practices |
|---|---|---|
| Basement | High | Use airtight bins, dehumidifier, store off floor |
| Garage | Medium to high | Avoid cardboard, check for leaks, use desiccants |
| Attic | Medium | Protect from temperature swings, use sealed containers |
| Closet (indoors) | Low | Keep air flowing, avoid damp items |
| Outdoor shed | Very high | Use waterproof containers, check often |
The safest places are cool, dry, and have steady temperatures. If you must use a risky spot like a basement, always double up on moisture protection.
Common Mistakes That Let Moisture In
Many people make the same errors, often without realizing it:
- Storing damp items: Even slightly wet clothes or shoes can cause problems.
- Using damaged containers: Cracks or broken seals allow air and water vapor inside.
- Placing containers on concrete: Floors can “sweat” and transfer moisture up.
- Ignoring climate changes: Moving a box from a cold car to a warm house causes condensation.
- Using cardboard boxes: They absorb moisture, especially in humid climates.
Avoid these mistakes by checking each item and container before storing.

Credit: itppackaging.com
Special Tips For Different Types Of Items
Some items need extra care because they are more sensitive to moisture.
Paper, Photos, And Documents
- Use acid-free folders or sleeves.
- Place documents in zip-lock bags with a silica packet.
- Store upright to avoid warping.
Clothes And Textiles
- Wash and dry completely before storage.
- Fold and place in vacuum-sealed bags.
- For wool or silk, add cedar blocks to repel moths (not as a moisture solution, but as added protection).
Electronics
- Remove batteries.
- Wrap in anti-static bubble wrap.
- Store in airtight containers with silica gel.
Food
- Use food-grade containers with tight lids.
- Add a food-safe desiccant packet (check they are safe for food contact).
- Do not store near cleaning chemicals, as fumes can get inside.
Tools And Metal Items
- Apply a thin coat of oil to prevent rust.
- Wrap in a clean, dry cloth.
- Store with a desiccant in a metal or plastic box.
How Often To Check On Stored Items
Set a schedule to check on stored containers, especially if they hold valuable or sensitive items. Every two to three months is a good rule for most things. Look for:
- Signs of condensation or droplets inside the lid
- Musty smells, which suggest mold or mildew
- Discoloration or warping of items
- Faded or wet desiccant packets (many turn color when used up)
If you see any problems, air out the container, replace desiccants, and dry or clean items as needed.
When To Use Climate-controlled Storage
Sometimes, at-home solutions are not enough. If you live in a humid area or need long-term storage, climate-controlled storage units can help. These units keep temperature and humidity stable, usually below 55% humidity and between 55°F and 80°F (13°C to 27°C). This is ideal for antiques, musical instruments, and important documents.
Climate-controlled storage costs more—usually 30–50% more than regular storage—but it can save you money and heartache in the long run. For more about humidity and storage safety, see the EPA’s guide on mold and moisture.
Natural Ways To Keep Moisture Out
If you want to avoid chemicals, there are some natural ways to control moisture:
- Uncooked rice: Cheap and absorbs some water vapor, but less effective than silica gel.
- Chalk: A few sticks can help absorb humidity in small containers.
- Salt: Table salt can pull moisture from the air, but it dissolves and can be messy.
While these methods are not as powerful as commercial desiccants, they work for small jobs or as a backup.
What To Do If Moisture Gets In
If you open a container and find things are damp, act fast:
- Remove items immediately: Air them out in a dry, warm place.
- Clean and dry the container: Use a towel and let it sit open to dry fully.
- Check for mold: Clean any spots with a mix of vinegar and water.
- Replace desiccants: Old ones won’t work anymore.
- Repack only when dry: Never put items back until both they and the container are totally dry.
A common mistake is to just add more desiccant and close the lid. This traps moisture with your items and can make things worse.
When You Need Professional Help
For valuable antiques, rare books, or electronics that have gotten very wet, sometimes you need expert help. Restoration specialists use special drying rooms, freeze-drying, or chemical treatments to save items that would otherwise be lost. If items are expensive or irreplaceable, do not try to fix severe water damage yourself.
Comparing Home Remedies And Commercial Products
Many people try home remedies to save money. But how do they compare to commercial options?
| Moisture Absorber | Effectiveness | Cost | Ease of Use |
|---|---|---|---|
| Silica gel packets | High | Low to moderate | Very easy |
| Calcium chloride (DampRid) | Very high | Moderate | Easy (do not spill) |
| Uncooked rice | Low to moderate | Very low | Easy |
| Chalk | Low | Very low | Easy |
| Baking soda | Moderate | Very low | Easy (replace often) |
For most people, silica gel offers the best mix of price, ease, and performance. Home remedies are fine for short-term storage or backup, but not for valuable items.
Two Non-obvious Insights Most Beginners Miss
- Temperature changes matter as much as humidity. Many people focus only on how wet the air is, but rapid temperature swings cause water droplets to appear inside containers, even if the air is not very humid. Try to keep storage spaces at a steady temperature.
- Airtight is not always best for everything. For some items, like food or leather, a little airflow is better than a sealed box. Too little air can trap existing moisture and encourage mold if the item was not perfectly dry to start. Understand what your items need before sealing them up.
Final Thoughts
Protecting your belongings from moisture in storage containers takes a little planning, but it’s worth the effort. Choose the right container, use desiccants, prepare items carefully, and store them in the best possible location. Check them regularly, and don’t be afraid to use commercial products for important things.
With these steps, you can keep clothes, papers, electronics, and memories safe and dry for years to come.
Frequently Asked Questions
What Is The Best Desiccant For Storage Containers?
Silica gel packets are the most popular and effective for most storage needs. They are safe, reusable, and absorb a lot of moisture. For larger spaces, calcium chloride products work well, but should be used carefully.
How Do I Know If Moisture Is Getting Into My Container?
Look for signs like condensation, musty smells, or mold spots. You can also use a small humidity indicator card or digital hygrometer inside the container to monitor humidity levels.
Can I Use Regular Plastic Bins For Long-term Storage?
Basic plastic bins offer some protection, but they are not airtight. For long-term storage, especially in humid areas, use bins with a gasket seal or vacuum-sealed bags. Cardboard is never a good choice for long-term storage.
How Often Should I Replace Desiccant Packets?
Check desiccants every two to three months. Many packets change color when they are used up. If you see moisture, replace them right away. For important items, replace them more often.
What Is The Ideal Humidity Level For Storage Containers?
Try to keep humidity inside containers below 50%. Above this level, mold and mildew can start to grow quickly. Use desiccants and store containers in a dry, cool place to keep levels low.