Installing a home security system brings peace of mind, but challenges can arise—especially when your door frames have mold. Mold not only creates an unhealthy environment but also makes it difficult to attach devices like the SimpliSafe entry sensor securely. Many homeowners struggle with getting sensors to stick, aligning them properly, and ensuring long-term reliability when mold is present. This guide gives you a step-by-step approach to installing your SimpliSafe entry sensor on a door with mold, covering every detail from surface preparation to post-installation maintenance.
You’ll learn why mold affects sensor installation, how to deal with it safely, and which tools and methods work best. Whether you’re a DIY beginner or have some experience, you’ll discover practical insights that often get missed—like how humidity can impact adhesives and what to do if your door frame is uneven due to mold damage.
By the end, you’ll be confident that your sensor will stay in place and work reliably, even in challenging conditions.
Why Mold Matters For Simplisafe Entry Sensor Installation
Before you start, it’s important to understand why mold is a problem for smart home sensors. Mold creates a layer of organic material on surfaces, which can prevent adhesives from sticking. Over time, mold can also cause wood or paint to weaken and flake, leading to poor sensor attachment. If the sensor isn’t attached well, it can fall off or give false alarms.
Beyond just installation, mold can also affect your family’s health. When you disturb moldy areas, spores can enter the air, which may cause breathing problems or allergies. This means you need to be extra careful when preparing the area and installing your sensor.
Tools And Supplies You’ll Need
Having the right tools makes the process easier and safer. Here’s a list of what you’ll need to install a SimpliSafe entry sensor on a moldy door:
- SimpliSafe entry sensor kit (includes sensor, magnet, and adhesive strips or screws)
- Protective gear: Gloves, mask (N95 recommended), and safety glasses
- Mild detergent or special mold cleaner
- Isopropyl alcohol (at least 70%)
- Soft cloths or paper towels
- Small brush (like a toothbrush)
- Putty knife or scraper (for stubborn mold)
- Sandpaper (medium grit, optional)
- Replacement adhesive strips (if the included ones are not strong enough)
- Screwdriver and small screws (if you prefer a mechanical fix)
- Caulk or wood filler (for repairing damaged spots)
- Measuring tape
- Pencil
Having all these supplies ready will save time and reduce frustration, especially since moldy areas often need extra cleaning and prep.

Credit: www.amazon.com
Step 1: Assess The Mold Situation
Start by checking the door frame and the area where you plan to install the sensor. Look for:
- Black, green, or white spots
- Soft or flaky wood
- Musty smell
- Signs of moisture (dampness, condensation)
If the mold covers a large area or the wood feels soft and rotten, you may need professional help. For small, surface-level mold, you can proceed with careful cleaning. If you have allergies or asthma, wear your protective mask and gloves before touching moldy areas.
Step 2: Clean And Treat The Mold Area
Proper cleaning is the most important part of a successful installation. Mold prevents adhesives from sticking, so cleaning ensures a strong bond.
Cleaning Steps
- Put on protective gear: Mold spores can irritate your lungs and skin.
- Mix a cleaning solution: Use a mix of water and mild detergent, or a commercial mold remover.
- Scrub gently: Use your small brush to scrub the moldy area. Don’t use too much water—damp, not soaking, is best.
- Wipe away residue: Use a clean cloth or paper towel to dry the area.
- Disinfect: Wipe the area with isopropyl alcohol to kill remaining spores and remove grease or oils.
- Let it dry completely: Moisture will weaken adhesives and may cause mold to return.
If the mold is stubborn, gently scrape with a putty knife, but avoid damaging the wood. For rough spots, a light sanding can help create a smooth surface for the sensor.
When To Seek Help
If the mold returns quickly, or if you see deep damage (like crumbling wood), professional repair is safer. Mold inside the wall or frame can cause bigger issues over time.
Step 3: Repair And Prepare The Surface
Once the area is clean and dry, check if the surface is smooth and hard. Mold can cause wood to become uneven, soft, or cracked. A poor surface won’t hold the adhesive or screws well.
Surface Repair Tips
- If the wood is slightly pitted, use a wood filler or caulk to fill gaps. Let it dry, then sand smooth.
- For minor cracks, sanding and wiping with alcohol can be enough.
- If the surface is very rough, use medium-grit sandpaper to create a flat area.
A smooth, dry, and mold-free area is key to long-lasting sensor installation. Skipping this step means the sensor may fall off after a few days or weeks.
Step 4: Plan Sensor Placement
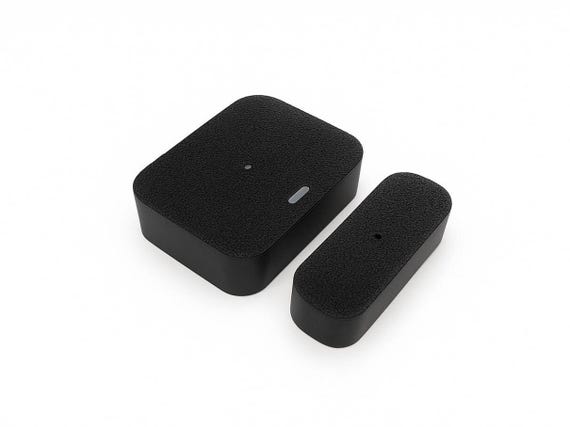
The SimpliSafe entry sensor consists of two parts: the sensor (usually larger) and the magnet (smaller). They must be mounted so that when the door is closed, they are within 2 inches (about 5 cm) of each other. The most common placement is:
- Sensor on the door frame (stationary part)
- Magnet on the door itself (moving part)
But if the frame is too damaged or moldy, you may reverse this. The goal is to have both parts as close as possible when the door is closed, and to avoid areas where mold is likely to return.
Measuring And Marking
- Hold both parts in place and close the door to check alignment.
- Use a pencil to lightly mark the positions.
- Use a measuring tape to ensure the gap is less than 2 inches.
If the area is too uneven, try moving the sensor a few inches along the frame or door until you find a flat, solid spot.
Credit: www.etsy.com
Step 5: Attach The Sensor Using Adhesive
Most SimpliSafe sensors come with strong adhesive strips for easy installation. Adhesive is fast and does not require drilling, but only works on clean, dry, and smooth surfaces.
Adhesive Installation Steps
- Wipe both the sensor back and the surface with isopropyl alcohol for best adhesion.
- Peel off the adhesive backing from the sensor.
- Press the sensor firmly onto the marked spot on the frame for 30 seconds.
- Repeat with the magnet on the door itself.
Do not open or close the door for at least 1 hour to allow the adhesive to cure. For best results, wait 24 hours before testing the sensor.
When To Use Replacement Adhesive
If your door frame is painted, old, or still slightly uneven, the included adhesive may not be strong enough. In this case:
- Use high-strength mounting tape (like 3M VHB)
- Cut the tape to fit the sensor base
- Attach as described above
High-humidity areas, such as bathrooms or kitchens, may require even stronger adhesives.
Step 6: Screw-mount For Extra Strength
If you want maximum security, or if adhesives don’t stick well due to residual mold damage, screws offer a more permanent fix.
Screw Installation Steps
- Use the screw holes on the sensor base (remove the back cover to access them).
- Mark screw positions with a pencil.
- Use a small drill or screwdriver to make pilot holes (if needed).
- Drive in the screws until the sensor is secure.
- Repeat for the magnet if it has mounting holes.
Be careful not to overtighten, which can crack the sensor plastic. Use short screws so they don’t go too deep into the frame.
Which Method Is Best?
Here’s a quick comparison to help you choose:
| Method | Pros | Cons | Best For |
|---|---|---|---|
| Adhesive | Easy, no tools, quick | Weak on moldy/uneven surfaces | Clean, smooth wood or metal |
| Screws | Very strong, reliable | Requires drilling, permanent holes | Damaged or rough wood frames |
| High-strength tape | Stronger than included adhesive | May leave residue | Painted or uneven surfaces |

Credit: www.shutterstock.com
Step 7: Test The Sensor
After the sensor and magnet are installed, it’s time to test the system. This confirms the sensor works and is in the right position.
Testing Steps
- Open the SimpliSafe app or use the keypad.
- Put the system in “Test” mode.
- Open and close the door—the system should chime or show a signal when the door opens.
- If nothing happens, check the alignment. The gap should be less than 2 inches.
- Adjust the sensor or magnet as needed and retest.
If the sensor is not detecting, try moving the parts closer together or changing the placement slightly.
Step 8: Seal And Protect The Area
To keep the sensor working well, you want to prevent mold from returning. After installation:
- Make sure the area stays dry. Fix any leaks or drafts.
- Clean the sensor and surrounding area regularly.
- If you see mold starting again, clean it right away.
If you had to use caulk or filler, let it dry fully before installing the sensor. This prevents new mold from forming underneath.
Step 9: Long-term Maintenance And Troubleshooting
Sensors can fail over time, especially in damp or mold-prone areas. Here’s how to keep your entry sensor working:
Maintenance Tips
- Check the sensor monthly: Make sure it’s still attached firmly.
- Look for mold regrowth: Clean right away if you see any.
- Replace batteries as needed (usually once per year).
- Re-apply adhesive or tighten screws if the sensor feels loose.
Common Problems And Fixes
| Problem | Possible Cause | Solution |
|---|---|---|
| Sensor falls off | Weak adhesive, mold, moisture | Clean and dry area, use stronger tape or screws |
| False alarms | Poor alignment, loose magnet | Check position, adjust if needed |
| No signal | Batteries dead, signal blocked | Replace batteries, move sensor if necessary |
| Mold returns | Ongoing moisture, leaks | Fix leaks, use dehumidifier |
Non-obvious Insights For Sensor Installation On Moldy Doors
Many guides skip practical realities that matter for real homes. Here are two insights beginners often miss:
- Surface temperature affects adhesives. If you install the sensor when the door frame is cold (below 50°F/10°C), adhesives will not bond well—even if the surface is clean. Try to install at room temperature for best results.
- Humidity matters even after cleaning. If your home is humid, the area may feel dry but still contain moisture. Use a hairdryer on a low setting to warm and dry the area just before installing the sensor.
Also, if your door frame is warped due to repeated mold damage, consider using a mounting plate (a small piece of plastic or wood) glued or screwed to the frame. Attach the sensor to this plate instead of the damaged frame. This method provides a flat, solid surface and can be painted to match your door trim.
Safety Precautions When Dealing With Mold
Working with mold is not just a cleaning job—it’s a health risk. Follow these rules:
- Always wear gloves and a mask
- Work in a well-ventilated area
- Dispose of cleaning materials in sealed bags
- Wash hands and change clothes after handling mold
If you feel sick or have breathing problems, stop and get help. For more on mold safety, the Centers for Disease Control and Prevention (CDC) offers trusted advice: CDC Mold Cleanup Guide.
Example: Real-life Installation
Let’s look at a real scenario. Lisa, a homeowner in Florida, tried to install her SimpliSafe entry sensor on a door with moldy trim. The sensor kept falling off, even after cleaning. She realized the surface was still damp inside, so she dried it with a hairdryer and waited overnight.
She also switched to a stronger mounting tape, pressing for a full minute. The sensor finally stayed in place, and after sealing the trim with caulk, mold did not return.
This example shows the importance of patience and the right materials. Don’t rush—let each step dry fully before moving to the next.
When To Call A Professional
If you see these warning signs, call a pro:
- Large areas of mold (bigger than a hand)
- Strong musty odor from inside the wall
- Soft, crumbling wood
- Recurring mold despite cleaning
A professional can remove deep mold and repair the door frame, making it safe for sensor installation.
Frequently Asked Questions
What If The Mold Keeps Coming Back After Cleaning?
Recurring mold means there is ongoing moisture—maybe from leaks, poor ventilation, or condensation. Fix the water source first, or the mold (and sensor problems) will return. If you can’t find the cause, call a mold remediation specialist.
Can I Use Glue Instead Of Adhesive Or Screws?
Strong construction glue can hold the sensor, but it’s messy and hard to remove later. Adhesive tape or screws are better because they allow you to reposition or replace the sensor without damaging your door.
Is It Safe To Install The Sensor If There Is A Little Bit Of Mold Left?
Ideally, remove all visible mold before installing. Even small amounts can weaken adhesives and cause health issues. If you can’t remove all the mold, use screws for attachment and seal the area to prevent further growth.
What Should I Do If The Door Frame Is Very Uneven Or Damaged?
For very uneven or damaged frames, attach a small flat mounting plate (plastic or wood) to the frame first. Then, attach the sensor to this plate. It gives you a stable base and improves sensor reliability.
Will The Sensor Work If The Magnet And Sensor Are More Than 2 Inches Apart?
No. The SimpliSafe entry sensor requires the sensor and magnet to be less than 2 inches apart when the door is closed. If the gap is larger, the system won’t detect opening or closing reliably. Move the parts closer together or use shims if needed.
Bringing It All Together
Installing a SimpliSafe entry sensor on a moldy door is challenging, but not impossible. With careful cleaning, the right tools, and smart installation methods, you can protect your home and your health. Remember, the key steps are removing mold, preparing the surface, choosing the best attachment method, and checking alignment. Pay attention to small details like temperature and humidity, and always keep safety first. If you face big mold problems or wood damage, don’t hesitate to get professional help. By following these steps, your entry sensor will stay secure and reliable—giving you the protection you expect from your SimpliSafe system.