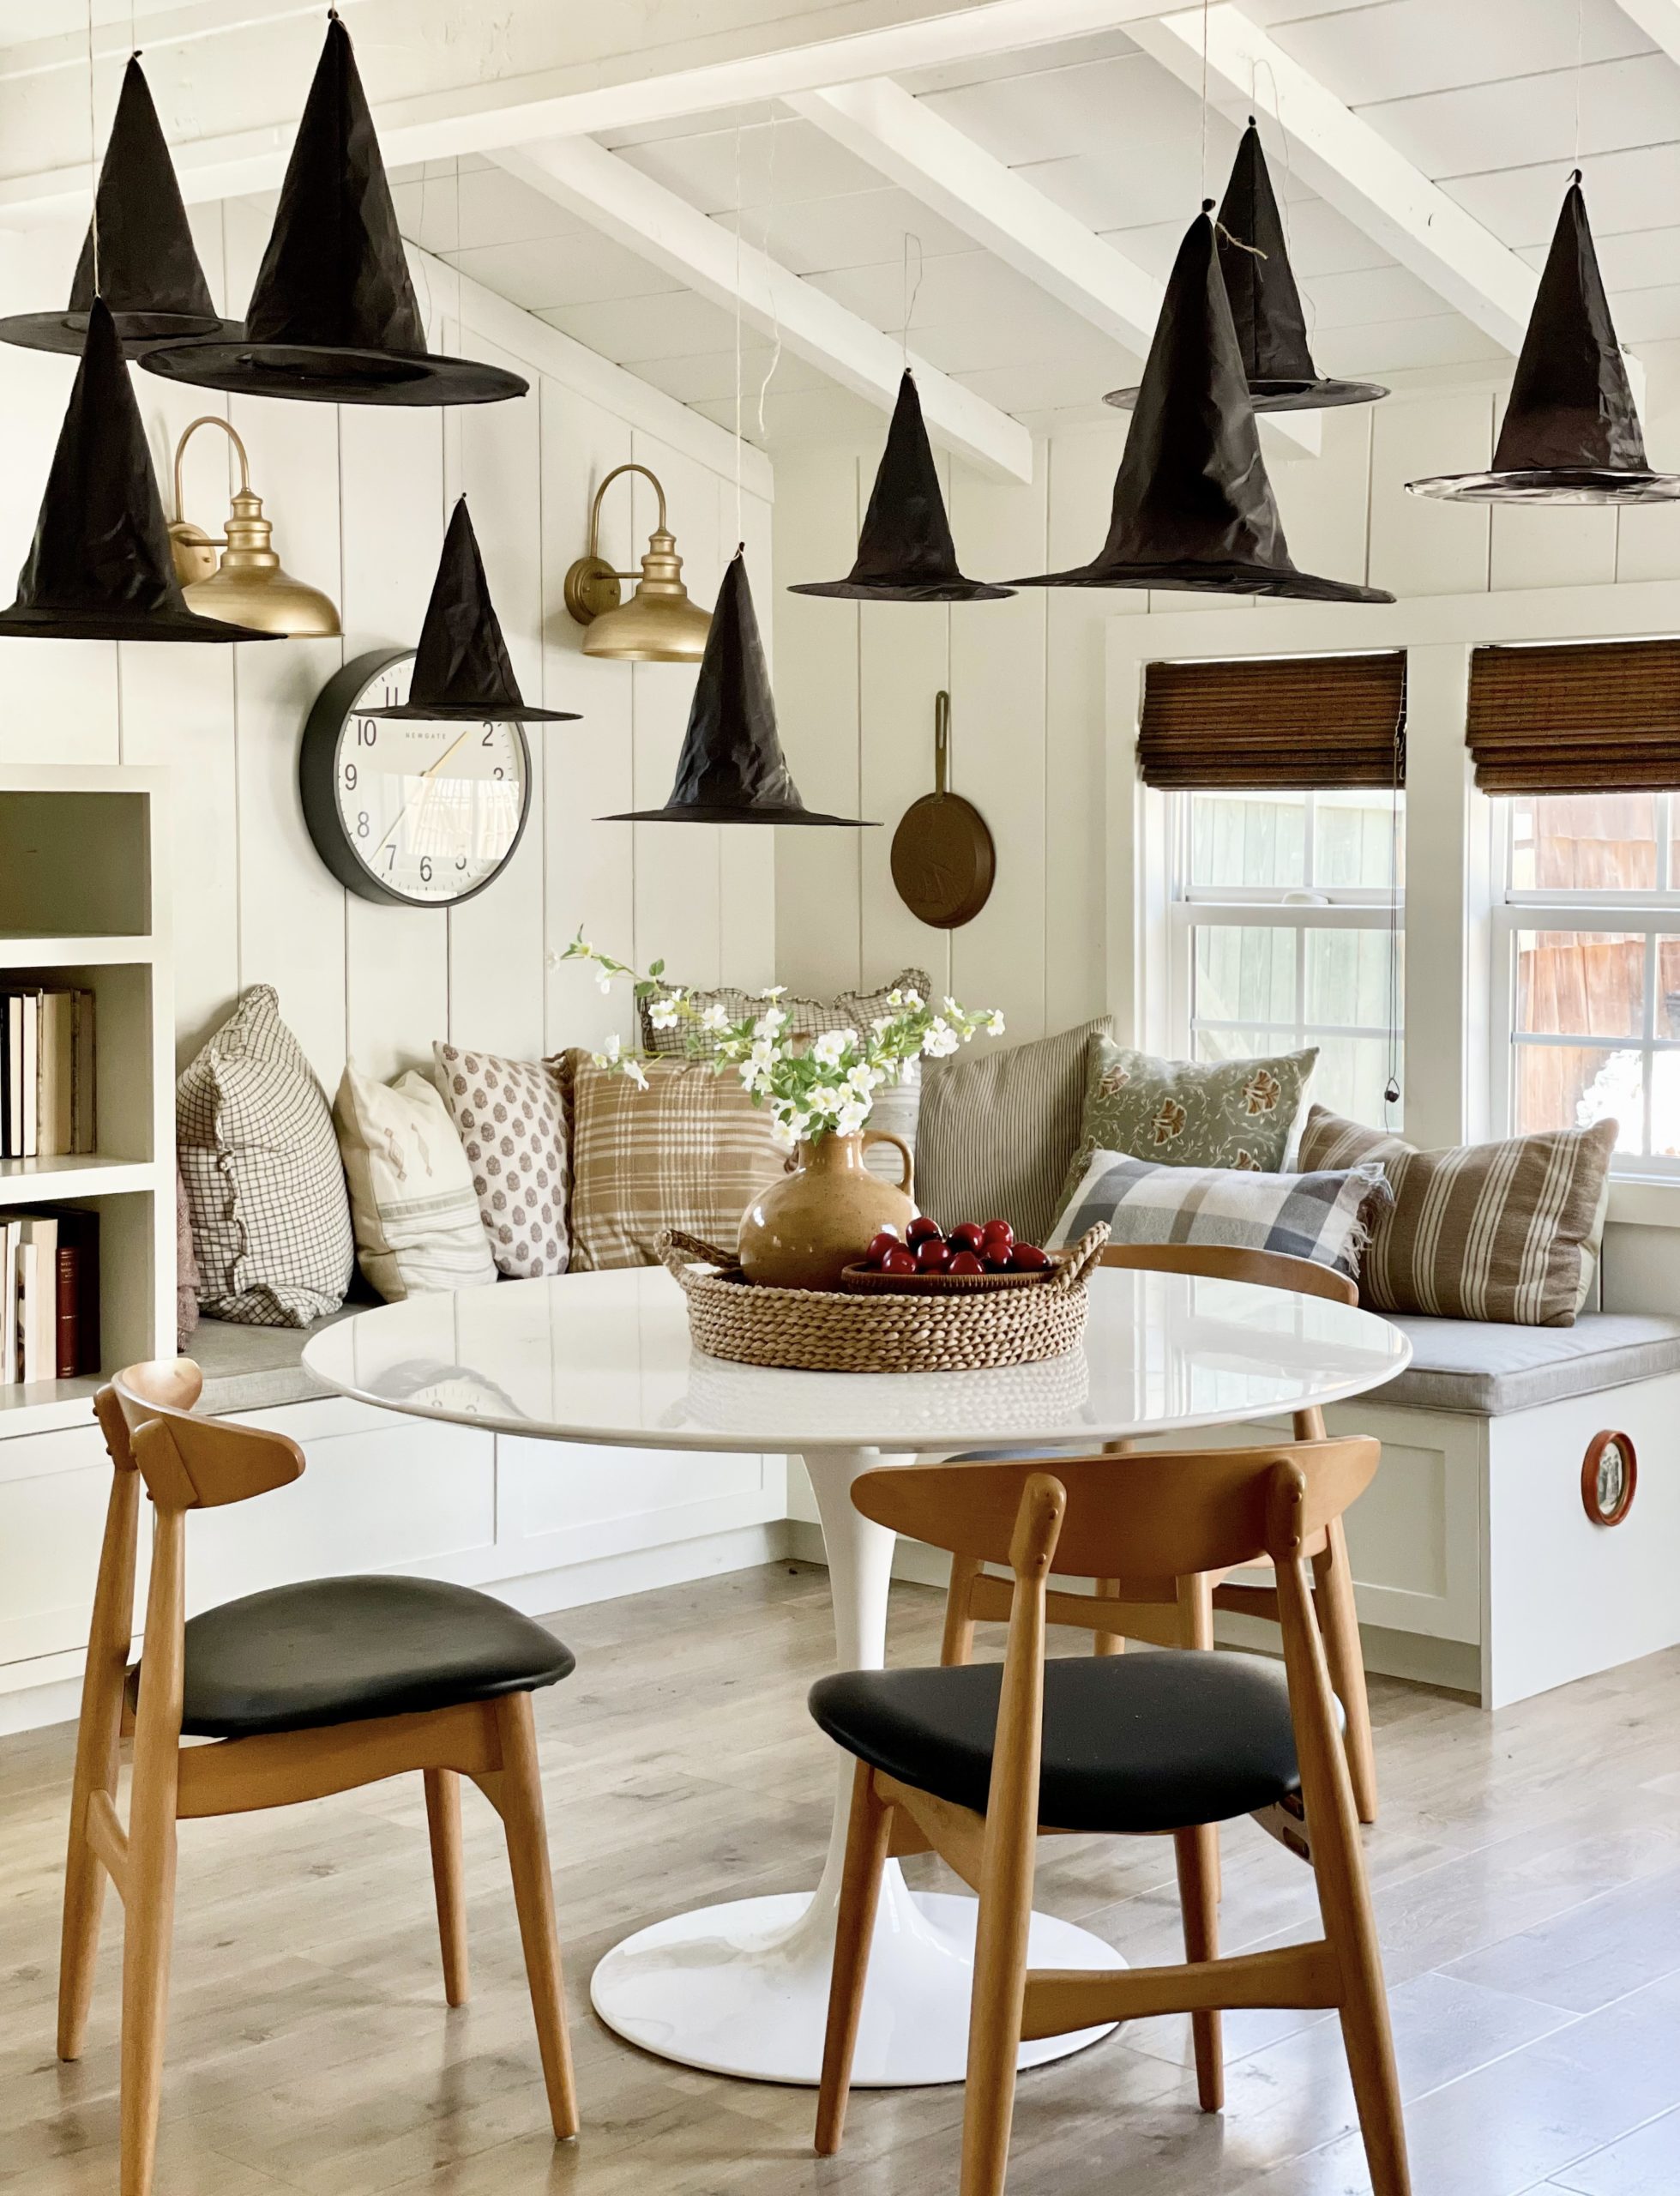
Creating a magical Halloween atmosphere doesn’t have to be expensive or complicated. Hanging witches hats from the ceiling is a simple way to transform any space—home, classroom, office, or party venue—into a spellbinding scene. These floating hats capture attention, spark imagination, and set the perfect mood for spooky celebrations or seasonal displays.
Many people want to try this DIY project, but are unsure how to do it neatly, safely, and without making a mess. This guide breaks down every detail you need, from the best materials and creative ideas to step-by-step instructions, troubleshooting, and pro-level tips.
Whether you’re a first-time decorator or an experienced Halloween enthusiast, you’ll find everything you need to make your witches hats float like magic.
Why Hang Witches Hats From The Ceiling?
Witches hats hanging from the ceiling have become a popular Halloween decoration for a reason. They’re lightweight, easy to personalize, and give a three-dimensional look that’s much more interesting than paper cutouts or window stickers. When hats sway gently, they create a sense of movement and mystery.
These decorations work for all ages, making them suitable for children’s parties and grown-up events alike. They’re budget-friendly, reusable, and can be adapted to any size room. Plus, you don’t need advanced crafting skills—just some basic supplies and a little creativity.
Materials: What You Really Need (and What To Avoid)
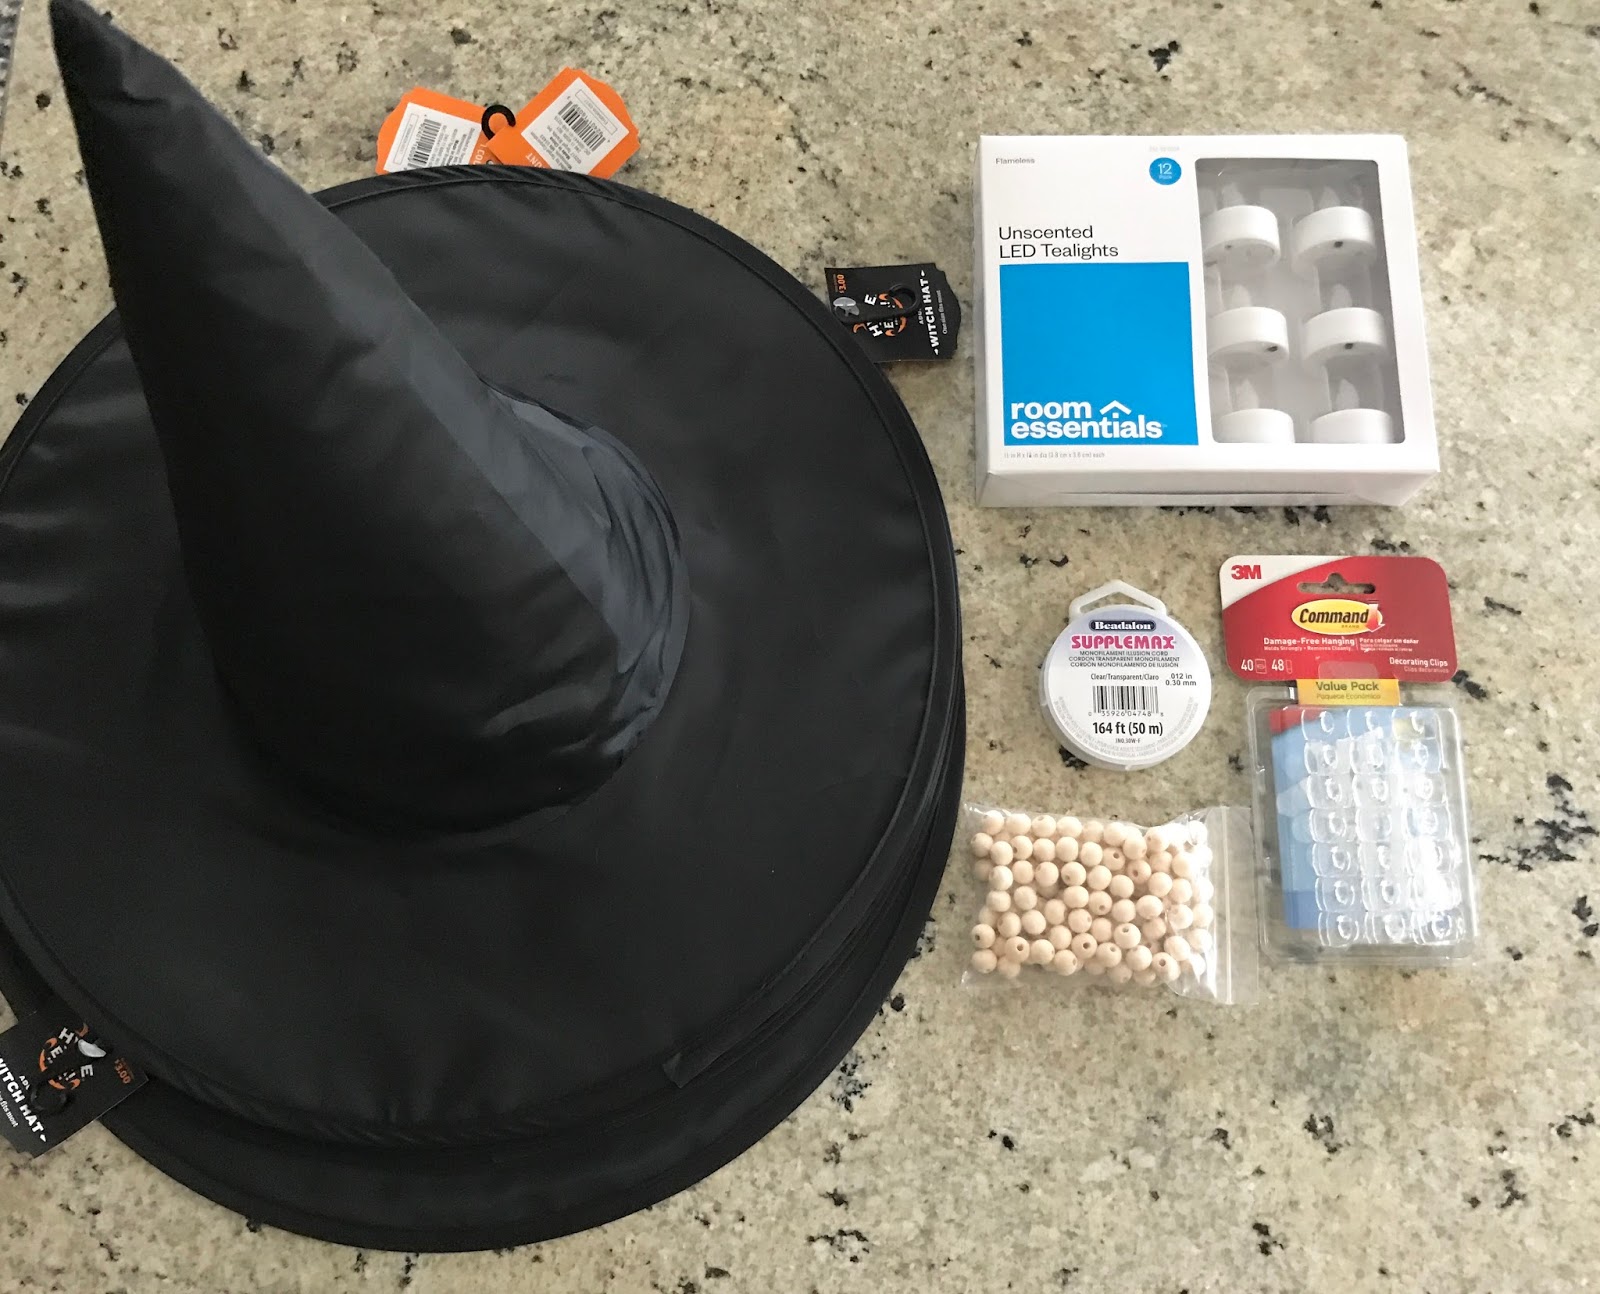
Getting the right materials makes the process smoother and the result more impressive. There’s a huge range of options, but not all are equal. Here’s a detailed breakdown.
Essential Materials
- Witches hats
- Lightweight felt or fabric hats work best.
- Plastic party hats are also common.
- Avoid heavy hats, which can pull down ceilings or tape.
- Clear fishing line or strong thread
- Invisible lines make hats appear to float.
- Monofilament (clear nylon) is ideal for strength and invisibility.
- Ceiling hooks or removable adhesive hooks
- Command hooks or similar brands hold well without damage.
- For temporary setups, adhesive hooks are best.
- For permanent decor, small screw-in hooks can work.
- Needle (optional)
- For threading fishing line through the tip of the hat.
- Tape (optional)
- Clear tape can help secure knots or attach lines inside hats.
- Scissors
- For cutting thread or fishing line neatly.
Optional Decorative Extras
- LED tea lights (to make hats glow)
- Ribbons, tulle, or streamers
- Glitter glue or paint
- Plastic spiders or bats (for added spookiness)
- Glow-in-the-dark stickers
Materials To Avoid
- Heavy-duty hooks (can damage ceilings)
- Thick string or colored yarn (visible, ruins the floating effect)
- Real candles (fire hazard)
- Hot glue guns (can melt thin hats or damage ceilings)
Choosing The Best Witches Hats
Not all witches hats are created equal. Here’s how to pick the right ones for your project.
Material
- Felt/fabric hats: Soft, lightweight, and easy to pierce with a needle. Best for hanging.
- Plastic hats: Cheaper, but sometimes harder to pierce. Still lightweight and fine for most ceilings.
Size
- Standard party hats (about 15 inches tall) are most common.
- For small rooms, mini hats (8–10 inches) work well.
- For dramatic effect, mix sizes.
Color & Design
- Classic black is timeless and fits most themes.
- Purple, green, or orange hats add color.
- Glitter or metallic hats catch light for extra sparkle.
Where To Buy
- Party supply stores
- Online retailers (Amazon, Walmart, Target)
- Craft stores (Michaels, Hobby Lobby)
- Dollar stores (for budget options)
Cost Comparison
Here’s a quick look at common options:
| Type of Hat | Material | Cost per Hat (USD) | Best For |
|---|---|---|---|
| Standard Felt | Felt/Fabric | $2–$5 | Durable, reusable |
| Plastic Party Hat | Plastic | $1–$3 | One-time use, big parties |
| Mini Hat | Felt/Plastic | $1–$2 | Small spaces, mixing sizes |
| Deluxe Glitter | Fabric/Glitter | $5–$10 | Feature pieces, special events |
Non-obvious insight: Mixing hat sizes and colors creates a more interesting display than using identical hats.
Measuring And Planning Your Layout
Before you start hanging, take a few minutes to plan your display. This step saves time and prevents mistakes.
How Many Hats?
- Small room (10×10 ft): 4–6 hats look balanced.
- Medium room (15×15 ft): 6–12 hats.
- Large room or hall: 12+ hats for a dramatic effect.
Spacing
- Leave at least 18–24 inches between hats to avoid crowding.
- Hang some hats lower and others higher for a floating, layered effect.
Mapping Your Ceiling
- Sketch your room on paper and mark where hats will go.
- Mark the spots on the ceiling with a pencil or sticky note.
Height
- Hang hats so the brim is at least 6 inches above head level to avoid bumping.
- For children’s parties, hang them higher for safety.
Example Layout
| Room Size | Number of Hats | Typical Spacing | Recommended Height |
|---|---|---|---|
| Small (10×10 ft) | 4–6 | 24 in. | 80 in. from floor |
| Medium (15×15 ft) | 6–12 | 24–36 in. | 80–90 in. from floor |
| Large (20×20 ft) | 12–24 | 36 in. or more | 90 in. from floor |
Pro tip: Odd numbers of hats (5, 7, 9) often look more natural than even numbers.
Step-by-step Guide: Hanging Witches Hats From The Ceiling
Ready to get started? Here’s the most reliable method, broken down into simple steps.
Step 1: Prepare Your Hats
- Remove any tags or packaging.
- Check for dust or wrinkles—smooth out hats if needed.
- Decide if you want to decorate hats before hanging (easier than decorating in the air).
Step 2: Cut Fishing Line
- Measure how far you want the hats to hang from the ceiling.
- Add 6 extra inches to each piece for tying knots.
- Cut one piece of fishing line for each hat.
Step 3: Attach Line To Each Hat
- Thread the fishing line through the tip of the hat using a needle.
- If the hat is hard to pierce, tape the line to the inside tip.
- Tie a strong double knot so the line is secure.
- Test by gently tugging to make sure it won’t slip out.
Non-obvious insight: If you want hats to spin or move, leave a little slack in the line. For still hats, pull the line tight.
Step 4: Attach Hooks To The Ceiling
- Clean the area of the ceiling where hooks will go (dust can prevent adhesion).
- Stick removable adhesive hooks according to the planned layout.
- Wait a few minutes for adhesive to set (follow package instructions).
- If using screw-in hooks, twist them in gently—don’t force or you’ll damage the ceiling.
Step 5: Hang The Hats
- Tie the loose end of each fishing line to its hook.
- Adjust height by knotting again or trimming excess line.
- Step back and check for balance and spacing.
- Make small adjustments as needed.
Step 6: Add Extra Decorations
- Drop LED tea lights into hats if you want them to glow.
- Attach ribbons, spiders, or other extras now.
- Make final checks for safety and appearance.
Safety Tips And Mistakes To Avoid
Common Mistakes
- Using heavy hats: Can pull down hooks or damage ceiling.
- Hanging hats too low: People bump into them.
- Skipping layout planning: Leads to crowded or uneven results.
- Using weak tape: Hats fall down overnight.
Safety Advice
- Use flame-free LED lights only—never real candles.
- Test adhesive hooks before hanging all hats.
- Avoid hanging hats near ceiling fans or vents.
- For older ceilings (plaster, popcorn), test hook adhesion in a hidden spot first.
Experience-based tip: If you rent your home, removable hooks are best. They come off without leaving marks.

Credit: www.randrathome.com
Creative Variations And Advanced Ideas
Want to go beyond basic hats? Try these ideas to make your display stand out.
1. Glowing Witch Hats
Place a battery-powered LED tea light inside each hat. The light shines through the fabric, creating a mystical glow. For extra effect, use color-changing LEDs.
2. Themed Clusters
Group hats in clusters of three at different heights. This adds visual interest and fills larger spaces more efficiently.
3. Add Hanging Accessories
Tie plastic spiders, bats, or tiny potion bottles to the fishing line above each hat. This gives the illusion that the hats are attracting spooky creatures.
4. Floating Hat Parade
Hang hats in a winding line across a hallway or entryway. Guests walk under a “parade” of floating hats.
5. Glow-in-the-dark Accents
Stick glow-in-the-dark stars or moons to hats for a magical effect when the lights go out.
6. Interactive Hats
Slip a small treat or note inside each hat for a party game. Guests pick a hat and discover a surprise.
7. Outdoor Porch Display
If weather is dry, hang hats from a covered porch for outdoor parties. Use weather-resistant hats and strong hooks.
Pro tip: Test outdoor displays for wind before your event.
Troubleshooting: What To Do If Things Go Wrong
Hats Won’t Stay Up
- Check hook adhesion—clean and dry the ceiling before applying.
- Use stronger adhesive or switch to screw-in hooks.
Line Slips Through Hat
- Tie a double knot and tape it inside the hat for extra security.
Hats Spin Too Much
- Use a heavier fishing line or thread.
- Add a tiny piece of tape to the line to slow spinning.
Hats Are Uneven
- Adjust knots at the hook or inside the hat until they line up.
Damage To Ceiling
- Always test a small, hidden area first.
- Use removable hooks to avoid holes or marks.
Straight-to-the-point tip: Take your time with setup. Rushing leads to crooked or fallen hats.
Budgeting Your Project
How much does it really cost to hang witches hats from a ceiling? Here’s a quick breakdown for a typical small room setup.
- 6 felt hats: $15
- 1 pack fishing line: $4
- 1 pack removable hooks (12 hooks): $6
- 1 pack LED tea lights (6): $8
Total: $33 for a complete, reusable setup.
Money-saving tip: Buy supplies in bulk with friends or neighbors for group parties.
How To Store And Reuse Witches Hats
Want to use your hats again next year? Proper storage keeps them looking new.
- Carefully untie fishing line and remove hooks.
- Gently fold felt hats—don’t crush the brim.
- Store hats in a dry, dust-free box.
- Keep fishing line and hooks in a labeled bag.
- For decorated hats, wrap in tissue paper to protect glitter or paint.
Calm expert’s advice: Never store hats in damp basements or attics. Moisture can cause mold or warping.
Going Beyond: Making Your Own Witches Hats
If you can’t find ready-made hats or want custom designs, make your own using basic craft supplies.
Diy Felt Hat Method
Materials:
- Black craft felt (one 18×24 inch sheet per hat)
- Hot glue (for brims)
- Scissors
- Cardboard (for stiff brims)
Steps:
- Cut a large circle for the brim and a triangle for the cone.
- Roll felt triangle into a cone and secure with glue.
- Attach cone to brim using hot glue.
- Let dry, then decorate as desired.
Friendly mentor tip: Handmade hats are perfect for kids’ parties and can be personalized with names or stickers.
Comparison: Hanging Witches Hats Vs Other Ceiling Decor
Wondering if floating hats are the right choice? Here’s how they stack up against other popular Halloween ceiling decorations.
| Decoration Type | Ease of Setup | Visual Impact | Reusability | Cost |
|---|---|---|---|---|
| Witches Hats | Easy | High | Yes | Low–Medium |
| Hanging Bats | Medium | Medium | Yes | Low |
| Paper Lanterns | Easy | Medium | Yes | Medium |
| Spider Webs | Easy | Low–Medium | No | Low |
| Balloon Clusters | Easy | Low | No | Low |
Key takeaway: Witches hats offer a high-impact, reusable, and cost-effective option compared to many other ceiling decorations.
Credit: prettyonfridays.com
Making Your Display Instagram-worthy
If you want your decor to stand out in photos or on social media, pay attention to a few extra details.
- Use uplighting or spotlights to cast dramatic shadows.
- Take photos from below for the best “floating” effect.
- Match your hats with other Halloween elements—broomsticks, cauldrons, or a “witches kitchen” table.
- Add a themed backdrop for party selfies.
Pro insight: Black or dark purple backgrounds make hats look like they’re floating in mid-air.
Eco-friendly Tips
Want to decorate without waste? Here’s how to make your witches hats display more sustainable.
- Choose felt hats made from recycled materials.
- Use reusable adhesive hooks.
- Store and reuse all parts year after year.
- Avoid plastic decorations where possible.
- Donate hats you don’t need to local schools or theaters.
For more ideas on eco-friendly party decor, you can visit the EPA’s waste reduction page.
Credit: www.randrathome.com
Frequently Asked Questions
How Do You Hang Witches Hats Without Damaging The Ceiling?
Use removable adhesive hooks (like Command hooks). Clean the area first, press the hook firmly, and let it set before hanging. Avoid nails or screws in rental properties.
Can You Hang Witches Hats Outdoors?
Yes, but only in covered areas and dry weather. Use weather-resistant hats and strong hooks. Test for wind and avoid hanging during storms.
What’s The Best Way To Make Hats Glow?
Place LED tea lights inside each hat. Choose battery-powered, flame-free lights for safety. Avoid real candles to prevent fire hazards.
How Do You Keep Hats From Spinning Or Twisting?
Use heavier fishing line or add a small weight inside the hat. For very still hats, tape or pin the line at two points inside the brim.
How Do You Store Witches Hats After Halloween?
Untie fishing line, gently fold hats, and store in a dry, dust-free box. Keep hooks and line together in a labeled bag for easy reuse next year.
Floating witches hats are a simple yet magical way to decorate for Halloween or any themed event. With the right materials, a little planning, and some creativity, you can create a stunning display that’s safe, reusable, and sure to impress.
Whether you keep it classic or go wild with glowing, themed, or interactive hats, you’ll add a unique touch that guests will remember. Happy decorating!