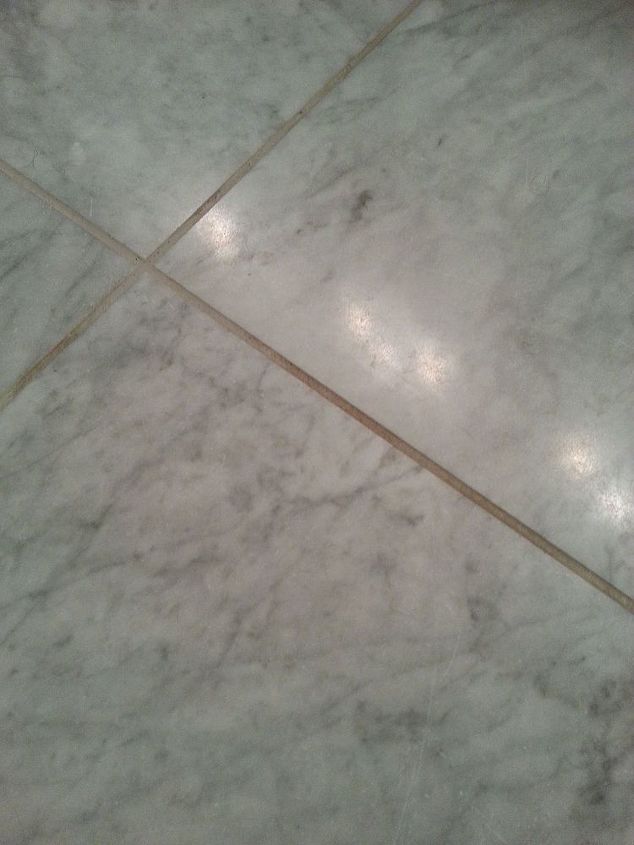
Keeping your white grout clean on a marble floor can feel impossible. Marble is beautiful but also sensitive. Grout attracts dirt and stains, turning gray or yellow even with gentle use. Many people try to clean grout with strong chemicals, but these can damage marble. If you want your marble floor to look perfect, you need the right methods—safe, effective, and practical.
This guide explains how to clean white grout on marble floors, even if you’ve never done it before. You’ll learn which cleaners are safe, how to remove deep stains, and the best ways to protect your floor for years. If you follow these steps, your grout will look bright and your marble will stay undamaged.
Even better, you’ll build a routine that prevents future headaches.
Why White Grout Gets Dirty On Marble Floors
White grout is famous for showing every speck of dirt. It often changes color faster than dark grout. On marble floors, this problem gets worse because:
- Marble is porous. Dirt, spills, and moisture can move from the marble into the grout and vice versa. Even if you mop regularly, liquids can seep in and create stains from below the surface.
- Grout is rougher than marble. This surface holds dust, mold, and stains. Tiny holes and dips in grout make it a magnet for anything that touches your floor—mud, pet hair, even drops of coffee.
- Household cleaning mistakes can make things worse. Many cleaners that work on grout can etch or dull marble. Some people use bleach or vinegar, hoping for a quick fix, but end up with damaged stone.
If you mop with dirty water or use harsh chemicals, stains will get deeper. Even a little leftover soap can cause yellowing or a sticky film. Understanding these risks helps you avoid common mistakes that can be hard to fix later.
Essential Tools And Supplies For Cleaning
Before you start, gather the right tools. Using the wrong brush or cleaner could scratch your marble or make the grout even dirtier. Having everything ready saves time and reduces the risk of making a mess.
| Tool or Supply | Why It Matters |
|---|---|
| Soft-bristle brush | Scrubs grout without scratching marble |
| Microfiber cloths | Wipe up residue safely |
| pH-neutral cleaner | Removes dirt gently |
| Spray bottle | Applies cleaner evenly |
| Plastic scraper | Lifts sticky debris without scratching |
| Small bucket | Holds clean rinse water |
| Baking soda (optional) | Safe, gentle stain remover |
| Marble sealer (if resealing after cleaning) | Protects marble and grout from stains |
Never use metal brushes, magic erasers, or acidic products (like vinegar or lemon) on marble. These can cause permanent damage. A common beginner mistake is grabbing a kitchen scrub pad or stiff brush—these might work elsewhere but will scratch the stone and dull its shine, sometimes with just one use.
Always check your tools before starting.
Step-by-step Guide: Cleaning White Grout On Marble Floors
Cleaning grout on marble needs patience and the right method. Rushing or using shortcuts can ruin your floor. If you’re new, take your time and follow each step closely.
1. Dry Cleaning First
Always start dry. Remove loose dirt, sand, or debris using:
- A soft broom or vacuum with a brush head
- A dry microfiber cloth for corners
This step keeps grit from scratching your marble during wet cleaning. It’s easy to overlook, but missing this can lead to thousands of tiny scratches over time, making marble look dull and old.
If you have pets or kids, do an extra pass to pick up hair and crumbs hiding in grout lines. Even a few grains of sand can cause damage if dragged across the floor with a wet mop.
2. Prepare Your Cleaning Solution
Mix a pH-neutral cleaner with warm water. Check the label—some tile and stone cleaners say “safe for marble. ” If you’re unsure, use just warm water the first time.
Never mix bleach, vinegar, or ammonia into your cleaning water. These damage marble and often discolor grout. Many “all-purpose” cleaners are too harsh, even if they say “natural.” Always read the ingredients.
For a homemade option, use only a few drops of gentle dish soap in a gallon of water. Avoid anything with citrus, as it’s acidic.
3. Apply Cleaner Safely
- Pour your cleaner into a spray bottle.
- Lightly mist the grout lines. Do not soak the entire floor. Too much liquid can seep under tiles and cause stains or even loosen the grout.
- Let the cleaner sit for 5 minutes but do not let it dry out.
Tip: Work in small sections (about 4×4 feet) so the cleaner doesn’t dry before you scrub. If you notice the cleaner drying too quickly, lightly re-mist before scrubbing.
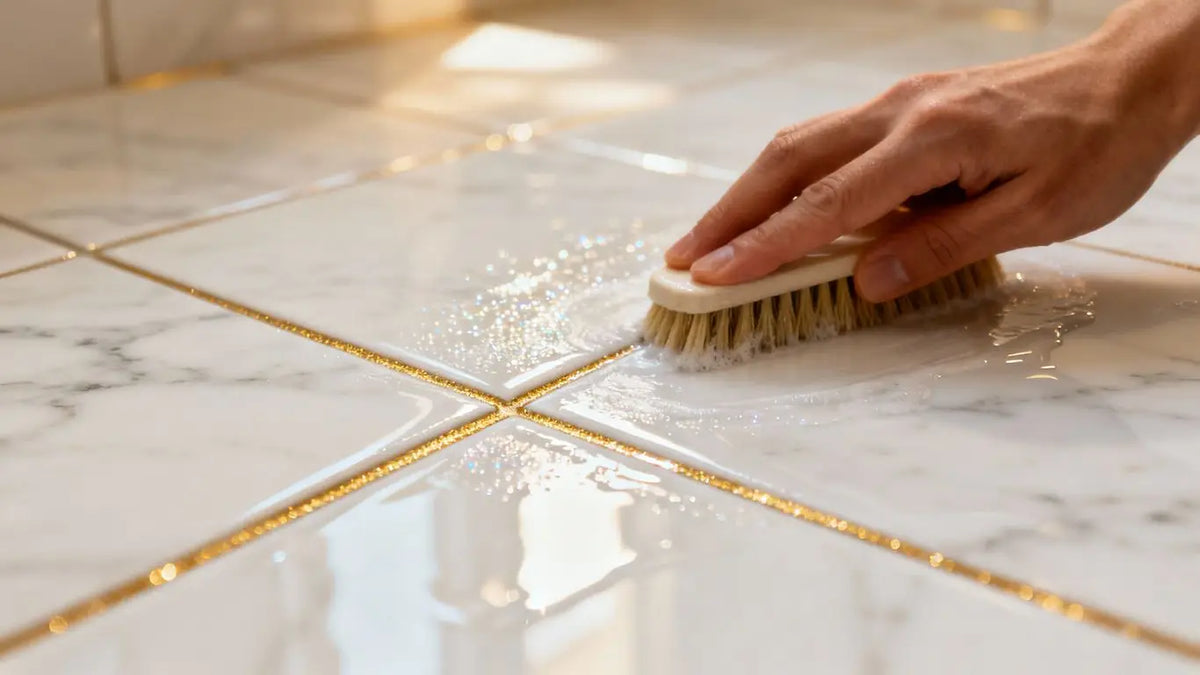
4. Scrub The Grout Gently
Use a soft-bristle brush (like a toothbrush or special grout brush). Scrub only the grout lines—avoid brushing the marble itself.
- Use gentle, circular motions.
- For tough stains, apply a little more cleaner and wait another 2 minutes.
Why not scrub harder? Aggressive scrubbing can scratch marble and wear down grout. If a stain doesn’t come out right away, it’s better to repeat the process than to risk damage.
For corners or tight spaces, cut an old toothbrush at an angle for more control. This helps you reach difficult spots without rubbing the marble.
5. Rinse Thoroughly
Wipe each cleaned section with a damp microfiber cloth. Use fresh, clean water. Never reuse dirty water.
Repeat this step until all cleaner is removed. Residue can attract more dirt if left behind. It’s tempting to skip this, but even a small amount of leftover cleaner can lead to sticky spots and new stains.
Change your rinse water often. The cleaner your rinse, the better your results.
6. Dry Immediately
After rinsing, dry the area with a dry microfiber towel. Water left on marble can cause spots or dullness. If cleaning a large area, work in sections and dry as you go.
If you live in a humid climate, use a fan to speed up drying and prevent mildew.
7. Inspect And Repeat If Needed
After the floor dries, check your grout. If it’s still stained, repeat steps 3–6. Some old stains need several passes. Don’t rush—slow, gentle cleaning is safest.
If stains don’t fade after three tries, move to advanced stain removal steps.
Advanced Stain Removal For White Grout
Sometimes, regular cleaning isn’t enough. Here’s how to tackle tough stains without risking your marble.
Spot-treat With Baking Soda Paste
Baking soda is gentle but effective. Mix a small amount with water to make a thick paste.
- Apply the paste directly to stained grout lines.
- Cover with plastic wrap and let it sit for 15–30 minutes. This keeps the paste moist and helps it work deeper.
- Gently scrub with a soft brush, then rinse thoroughly.
Baking soda is less abrasive than commercial powders and safe for marble when used carefully. Always keep the paste only on grout—if it spreads to marble, wipe it off right away.
If the stain is stubborn, repeat the process. Sometimes, multiple treatments are needed for old or deep stains.
Use Hydrogen Peroxide With Caution
Hydrogen peroxide can help with organic stains (like coffee or wine) on white grout, but it should never touch the marble. Here’s how:
- Dip a cotton swab in 3% hydrogen peroxide.
- Dab only the grout, avoiding marble.
- Let it sit for 5 minutes, then rinse immediately.
Never pour peroxide directly—it can etch marble if spilled. Work slowly and have a damp cloth ready to wipe any drips.
If you have many stains, work on a few lines at a time to reduce risk.
Commercial Grout Cleaners
Some grout cleaners claim to be marble-safe. Always check reviews and test on a small, hidden area first. If you’re unsure, stick to pH-neutral products.
Call the manufacturer if you have questions. Sometimes, “marble-safe” means it won’t damage stone, but it may still dull the finish over time.
Steam Cleaning: Is It Safe?
Steam can loosen dirt, but high heat and moisture may damage marble. If you use a steam cleaner:
- Use the lowest steam setting.
- Keep the nozzle moving—never hold it in one place.
- Dry the area immediately.
Steam should be a last resort, not a regular method. Frequent steam cleaning can loosen grout and cause tiles to shift.
Credit: www.surfacesgalore.com
What To Avoid When Cleaning Grout On Marble
Many mistakes can ruin a marble floor fast. Here’s what to avoid:
- Acidic cleaners: Vinegar, lemon juice, or bathroom cleaners eat away marble and grout.
- Bleach: It whitens grout but also damages marble and weakens grout over time.
- Hard brushes: Metal or stiff nylon can leave scratches.
- Abrasive powders: Many “grout powders” are too rough for marble.
- Soaking the floor: Too much water seeps into grout and marble, causing stains and mold.
The biggest error is “spot treating” with household chemicals without testing. Always check compatibility first.
Another common mistake is using a dirty mop or rag. Old dirt and soap can undo your hard work in minutes.
How To Keep Grout White Longer
Once your grout is clean, it’s important to keep it that way. Prevention is easier than deep cleaning.
Seal Grout And Marble
Sealing creates a barrier against moisture and stains. Most marble floors are sealed when installed, but grout may need resealing every 6–12 months.
- Use a penetrating sealer labeled safe for marble and grout.
- Apply with a small brush or applicator bottle.
- Wipe off excess from marble before it dries.
Sealing is the most powerful way to prevent future stains. Mark your calendar so you don’t forget. If water soaks into grout instead of beading up, it’s time to reseal.
Clean Spills Immediately
Marble and grout soak up spills quickly. Wipe up wine, juice, or oily foods right away with a damp cloth, then dry the area.
For bathrooms, wipe away shampoo or soap spills quickly. These can leave yellow marks if left overnight.
Regular Cleaning Routine
- Sweep or vacuum at least twice a week.
- Mop weekly with a pH-neutral cleaner.
- Dry mop after each wet cleaning.
Consistency keeps small stains from becoming big problems. For busy homes, stick to a schedule.
Use Entry Mats
Sand, grit, and dirt scratch both marble and grout. Place mats at entrances and ask guests to remove shoes.
Choose mats with a non-slip backing. Wash or shake out mats often to keep them effective.
Avoid Wax And Oil-based Products
Some people try to “shine” marble with wax. These products collect dirt, make grout sticky, and are hard to remove. Stick to products made for marble.
If you already used wax, ask a pro for help with removal. DIY fixes can smear wax into grout.

Credit: www.reddit.com
Comparing Grout Cleaning Methods
Different cleaning methods have their pros and cons. Here’s a quick comparison:
| Method | Effectiveness | Safety for Marble | Best For |
|---|---|---|---|
| pH-neutral cleaner + brush | High | Very Safe | Routine cleaning |
| Baking soda paste | Medium-High | Safe if controlled | Tough stains |
| Hydrogen peroxide (spot use) | Medium | Safe only if kept off marble | Organic stains |
| Commercial grout cleaner | Varies | Check label/test first | Heavy soiling |
| Steam cleaning | Medium | Risky if not careful | Deep cleaning (rarely) |
Choose a method based on your floor’s needs. Regular gentle cleaning is safest for most homes.
Practical Tips Most People Miss
Many guides skip real-life details. Here are insights beginners often miss:
1. Test Cleaners In Hidden Spots
Even “marble-safe” cleaners can vary. Always test in a closet or corner to check for etching or color change. Wait 24 hours to see the full effect.
2. Use Multiple Cloths
Don’t use the same cloth to rinse and dry. Always switch to a clean, dry microfiber towel after rinsing. This avoids streaks and water spots.
3. Change Rinse Water Often
Dirty rinse water puts old grime back on your grout. Change it after every few square feet. If you see the water turning cloudy, replace it.
4. Avoid Colored Brushes And Cloths
Sometimes, cheap colored tools leave dye on grout or marble. Use white or uncolored supplies when possible. Dyes can be impossible to remove from porous grout.
5. Open Windows
Ventilate while cleaning. Some cleaners, even neutral ones, can cause headaches in closed spaces. Good airflow helps the floor dry faster too.
Two other easy-to-miss tips: wear gloves to protect your skin from dryness, and keep pets away until the floor is dry—paw prints can leave new stains.
Dealing With Mold And Mildew In Grout
Marble bathrooms and kitchens are prone to mold. Mold looks like black, green, or pink stains in grout lines. Here’s how to handle it safely:
- Mix a pH-neutral cleaner with warm water.
- Scrub gently with a soft brush.
- Rinse well and dry completely.
If mold returns, check for leaks or poor ventilation. Never use bleach or strong mold killers on marble.
For stubborn mold, call a stone-care professional. DIY methods sometimes make things worse. If you smell musty odors or see mold growing back quickly, it’s a sign of a bigger moisture problem.
How To Brighten Old Grout Without Damage
If your grout looks permanently stained, you may need to restore or recolor it. Safe options include:
- Grout colorant: These are special sealers that recolor and seal grout. Choose one labeled “marble-safe.” They can bring old grout back to life and add protection against future stains.
- Professional cleaning: Experts have special tools and products not sold in stores. They often use low-pressure steam or gentle chemical poultices for deep stains.
- Re-grouting: Removing and replacing old grout is possible but expensive. Only a skilled installer should do this on marble.
Avoid “miracle” pens or dyes from hardware stores—they often stain marble. If you try a colorant, mask the marble with painter’s tape to prevent spills.
Cleaning Frequency: How Often Is Enough?
How often you clean depends on foot traffic, pets, and the room’s use.
| Room Type | Recommended Grout Cleaning Frequency |
|---|---|
| Entryway | Weekly |
| Kitchen | Every 1-2 weeks |
| Bathroom | Every 1-2 weeks (watch for mold) |
| Living room/bedroom | Every 2-3 weeks |
| Low-traffic areas | Monthly |
Adjust as needed if you see stains or notice dirt collecting faster. High-traffic homes or homes with kids and pets may need more frequent attention.
When To Call A Professional
Sometimes, DIY is not enough. Call a marble or stone-care expert if:
- Grout is stained black, orange, or pink and won’t respond to gentle cleaning
- Marble is scratched, etched, or dull after cleaning
- Mold keeps coming back, even after repairs
- You want to re-grout or deep-seal the floor
Professionals use special machines and sealers that deliver better results without risk. If you’re unsure about a cleaner, call an expert rather than risk permanent damage.
Credit: www.hometalk.com
White Grout And Marble: Common Myths
Let’s clear up a few myths:
- Myth: Vinegar is safe for all tile and grout.
Fact: Vinegar etches marble and weakens grout.
- Myth: Bleach always makes grout white.
Fact: It can make grout brittle and ruin marble.
- Myth: All grout sealers are the same.
Fact: Some sealers darken marble or leave a sticky residue.
- Myth: Magic erasers are gentle.
Fact: They’re abrasive and can scratch marble.
- Myth: Grout colorants are for DIY only.
Fact: Professional colorants give better, longer-lasting results.
Another myth: “Marble is too delicate for homes with kids or pets.” With good care and the right methods, marble and white grout can stay beautiful in busy households.
Real-world Example: Restoring A Marble Bathroom Floor
Sophie’s bathroom had white marble and grout that turned yellow over 5 years. She tried vinegar and bleach before learning they could damage her floor. Here’s what worked for her:
- She switched to a pH-neutral stone cleaner and soft brush.
- She spot-treated stubborn stains with baking soda paste.
- She rinsed with clean water and dried carefully.
- She sealed the grout and marble a week later.
Her grout became brighter—not perfect, but much better. Most important, her marble stayed shiny and unmarked. She now cleans every week and wipes up water and spills immediately.
A key detail: Sophie used a separate towel just for drying, which stopped streaks on the marble. She also put a small fan in the bathroom to help the floor dry faster, which stopped mold from coming back.
Frequently Asked Questions
How Can I Tell If A Cleaner Is Safe For Marble?
Look for pH-neutral or “safe for natural stone” on the label. Test a small, hidden spot before using any new product. Avoid anything with “acid,” “vinegar,” or “bleach” in the ingredients. When in doubt, contact the manufacturer.
Can I Use A Steam Mop To Clean Marble Grout?
It’s risky. High heat and moisture can damage marble or weaken grout. If you must use steam, set it to low, keep the head moving, and dry the area quickly. For regular cleaning, stick to gentle methods.
Why Does My Grout Keep Turning Yellow?
Yellowing is usually from mopping with dirty water, soap residue, or old sealers. It can also happen if you use wax or oil-based cleaners. Clean with fresh water, rinse well, and avoid waxy products.
Should I Seal My Marble Floor And Grout Myself?
You can, but choose a penetrating sealer labeled for marble and grout. Follow the directions and wipe up excess quickly. If unsure, ask a professional for help, especially on expensive floors.
What Should I Do If I Scratched The Marble While Cleaning Grout?
Stop cleaning immediately. Don’t try to buff out scratches yourself. Use a soft cloth to remove dust, then call a marble restoration expert. DIY fixes can make scratches worse.
Keeping white grout clean on marble floors takes effort, but it’s worth it. With the right tools and careful cleaning, you can enjoy bright grout and beautiful marble for years. If you want more details on stone care, check trusted sources like the National Park Service. Remember, gentle methods are best—your marble will thank you.