A basin wrench is one of those tools that often sits quietly in a plumber’s toolbox, but when you need it, nothing else can do the job. If you have ever tried to loosen or tighten the nuts that hold a faucet in place under a sink, you know how cramped and awkward that space can be.
Traditional wrenches are simply not designed for that narrow, hard-to-reach area. This is where the basin wrench shines. In this article, you will discover exactly what a basin wrench is, why it is special, how it works, and the many ways it can make your plumbing tasks faster and less frustrating.
Whether you are a DIY homeowner or a professional plumber, understanding how to use this tool effectively can save you time and headaches. Along the way, you will learn tips that even many experienced users miss, and see real-world examples of its uses.
What Is A Basin Wrench?
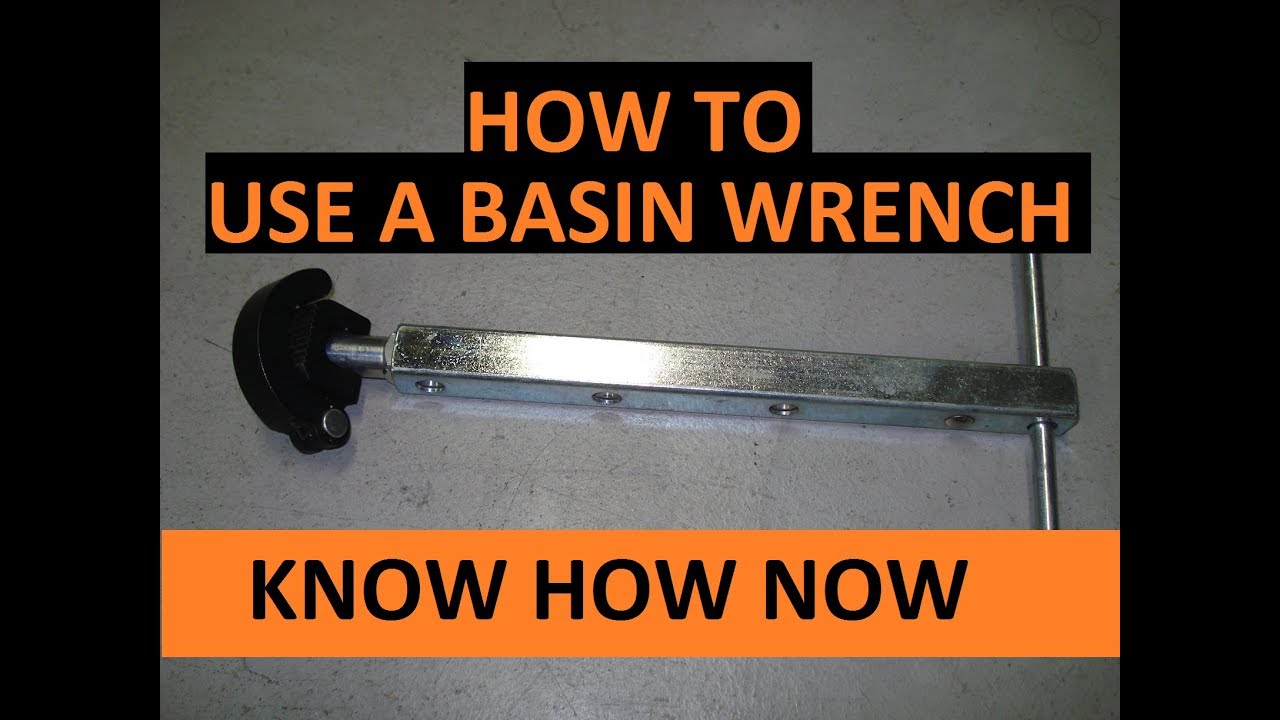
A basin wrench is a specialized hand tool designed for working on faucet nuts that are located in tight spaces, especially under sinks. The typical basin wrench has a long, narrow shaft and a spring-loaded, pivoting jaw at one end. The other end usually has a comfortable crossbar or T-handle for turning. Its main purpose is to reach and grip nuts that are otherwise inaccessible to regular wrenches or pliers.
Key Features
- Long shaft: Usually between 10 to 18 inches, allowing the user to reach deep under sinks.
- Pivoting jaw: The jaw adjusts its angle so it can grip nuts in various positions, even when access is not straight-on.
- Spring mechanism: Helps the jaw automatically lock onto the nut for a more secure grip.
- T-handle or crossbar: Makes turning easier, especially in tight spots.
- Slender profile: Designed to fit between pipes and other obstacles under sinks.
How It Works
When you slide the basin wrench’s jaw over the nut, the spring and pivot allow it to grip the nut tightly. Turning the handle rotates the nut, while the long shaft keeps your hands away from cramped spaces. The jaw’s teeth bite into the nut, giving you extra leverage and preventing slips.
Why Basin Wrenches Are Essential For Plumbing
Many faucet installations are tucked away in cabinets, behind pipes, or pressed against walls. The nuts holding these faucets, often called mounting nuts or lock nuts, can be almost impossible to reach with standard tools. This is where the basin wrench becomes indispensable.
Common Plumbing Tasks
- Installing or removing faucets: Most sinks have mounting nuts that are hard to reach. The basin wrench is designed specifically for these nuts.
- Repairing leaks: Leaky faucets often need to be removed to replace washers, gaskets, or the whole unit. The basin wrench simplifies this process.
- Tightening loose connections: Over time, nuts under the sink can loosen. The basin wrench helps you tighten them without removing the whole sink.
- Replacing supply lines: Water lines attached to faucets are often held by nuts in awkward spots. The basin wrench makes removing and installing these much easier.
Two Insights Beginners Miss
- Right Direction Matters: The jaw is designed to grip in one direction. If you want to loosen a nut, the jaw must face one way; to tighten, flip the wrench so the jaw faces the other way. Many beginners try to turn the wrench the wrong way, causing slips and frustration.
- Jaw Adjustment Is Key: The pivoting jaw can be adjusted for different nut sizes. Some people do not realize they can tilt the jaw for a better grip, which can prevent rounding off nuts or damaging them.
Types Of Basin Wrenches
There are several types of basin wrenches, each with its own advantages. Understanding the differences helps you pick the right one for your needs.
Standard Basin Wrench
This is the most common type. It has a fixed-length shaft, a spring-loaded jaw, and a crossbar handle.
Advantages:
- Simple and reliable
- Affordable
- Works on most household sinks
Limitations:
- May not reach very deep or high places
Telescoping Basin Wrench
A telescoping basin wrench has a shaft that can extend or shorten. This feature allows you to adjust the length depending on the depth of the sink or the location of the nut.
Advantages:
- More versatile
- Can reach nuts in deep or shallow sinks
Limitations:
- Slightly heavier
- Mechanism can wear out over time
Ratcheting Basin Wrench
Some basin wrenches have a ratcheting feature, allowing you to turn the handle back and forth without removing it from the nut.
Advantages:
- Faster operation in tight spaces
- Reduces hand fatigue
Limitations:
- More expensive
- Ratchet can break if overloaded
Adjustable Jaw Basin Wrench
These have jaws that can be widened or narrowed for different nut sizes, often using a thumbwheel.
Advantages:
- Fits a wider range of nuts
- Reduces need for multiple tools
Limitations:
- More moving parts mean more things to break
- Can be bulkier
Comparison Table: Types Of Basin Wrenches
Here is a quick comparison of the main types:
| Type | Main Feature | Best Use | Drawback |
|---|---|---|---|
| Standard | Fixed shaft, pivoting jaw | General plumbing | Limited reach |
| Telescoping | Adjustable shaft length | Deep sinks | Heavier, more moving parts |
| Ratcheting | Ratcheting handle | Quick repetitive turns | Higher cost |
| Adjustable Jaw | Variable jaw size | Different nut sizes | Bulkier head |
How To Use A Basin Wrench
Using a basin wrench can be tricky if you have never tried it before. Here is a step-by-step guide to get it right.
- Identify the Nut: Look under the sink and locate the faucet’s mounting nut.
- Select the Right Wrench: Choose a basin wrench that matches the nut’s size and the depth you need to reach.
- Position the Jaw: Place the jaw of the wrench over the nut. Make sure the teeth grip the sides, not the corners.
- Set the Direction: Check which way you need to turn (clockwise to tighten, counterclockwise to loosen) and set the jaw to grip in that direction.
- Turn the Handle: Use the crossbar or T-handle to turn. If it is stuck, apply steady pressure—do not jerk.
- Remove or Tighten: Once the nut is loose or tight, carefully remove the wrench.
Example Scenario
Imagine you are replacing an old kitchen faucet. After shutting off the water, you crawl under the sink and see two rusty mounting nuts holding the faucet. Using a standard wrench is impossible; there is not enough space to turn it.
You grab your basin wrench, adjust the jaw so it grips the nut, and turn the handle. The long shaft lets you reach up past the drain pipes, and the jaw’s teeth hold the nut firmly as you unscrew it.
The faucet comes free without a struggle.
Common Mistakes
- Wrong jaw direction: If the jaw is facing the wrong way, you will not grip the nut properly.
- Too much force: Yanking hard can strip the nut or break the wrench.
- Poor alignment: Not centering the jaw can cause it to slip off.
:max_bytes(150000):strip_icc()/SPR-how-to-use-a-basin-wrench-2718720-hero-A-6ba9e7b86b5c4c978b68a58c483237a9.jpg)
Credit: www.thespruce.com
When To Use A Basin Wrench
Not every plumbing job calls for a basin wrench. Here are situations where it is the best tool:
- Faucet installation or removal: The classic use case.
- Tightening supply line nuts: When standard wrenches cannot fit.
- Working behind toilets: Some toilet installations have similar hard-to-reach nuts.
- Replacing sprayers or soap dispensers: Kitchen sinks often have extra accessories held by hidden nuts.
When Not To Use One
If you can easily reach the nut with a regular wrench or pliers, use those instead. Basin wrenches are not as precise for exposed nuts, and their jaws can damage decorative finishes.
Key Features To Look For When Buying A Basin Wrench
Choosing the right basin wrench can make your work much easier. Here are the most important factors to consider:
Shaft Length
The shaft must be long enough to reach under your sink. Standard lengths are 10, 12, and 18 inches. For deep sinks or hard-to-reach nuts, choose a longer or telescoping model.
Jaw Capacity
Check the jaw’s maximum opening. Most basin wrenches handle nuts from 3/8 inch to 1-1/4 inches. Some adjustable models go wider.
Handle Design
A comfortable handle reduces hand fatigue. T-handles or crossbars offer good leverage and grip.
Build Quality
Look for tools made from hardened steel. The jaw teeth should be sharp and strong, not soft or rounded.
Price Vs. Value
A basic basin wrench costs between $15 and $30. Ratcheting or telescoping models can cost up to $50. For regular home use, a quality standard wrench is enough. For frequent plumbing work, invest in a ratcheting or telescoping model.
Manufacturer Reputation
Brands like Ridgid, Crescent, and Channellock are known for quality hand tools. Read user reviews and check warranties.
Credit: www.youtube.com
How A Basin Wrench Compares To Other Plumbing Tools
It is easy to confuse a basin wrench with other wrenches. Here’s how it stacks up:
| Tool | Main Use | Strength | Weakness |
|---|---|---|---|
| Basin Wrench | Faucet nuts in tight spots | Reaches narrow spaces | Limited to specific tasks |
| Adjustable Wrench | General plumbing nuts | Versatile | Cannot reach under sinks |
| Channel Lock Pliers | Large nuts and pipes | Strong grip | Needs open space |
| Socket Wrench | Bolts and regular nuts | Fast turning | Bulky for sink work |
Real-world Examples Of Basin Wrench Uses
To understand the value of a basin wrench, it helps to see it in action. Here are common scenarios:
Kitchen Faucet Replacement
When swapping out an old kitchen faucet, you will often find the mounting nuts corroded and stuck. A basin wrench makes it possible to grip these nuts without removing the sink or damaging nearby pipes.
Bathroom Sink Upgrades
Modern bathroom vanities are compact, leaving little room for tools. A basin wrench is almost always needed to install or remove faucets in these setups.
Fixing Leaky Connections
Supply lines that feed water to your faucet can develop leaks at the connection point. Tightening these nuts by hand is impossible in most cases; the basin wrench is perfect for this job.
Installing Water Filtration Systems
Many under-sink filtration units require attaching adapters to the cold water line. The nuts holding these adapters are often positioned in cramped spaces. The basin wrench allows you to reach and secure these connections.

Credit: www.youtube.com
Maintenance And Care Tips
A good basin wrench can last many years with the right care.
- Clean after use: Wipe off water and grime to prevent rust.
- Lubricate the pivot: A drop of oil on the jaw’s pivot keeps it moving smoothly.
- Check for wear: Inspect the jaw teeth; replace the wrench if they become dull or chipped.
- Store dry: Keep the wrench in a dry toolbox to avoid corrosion.
Advanced Tips For Getting The Most From Your Basin Wrench
Here are some practical, experience-based tips that can help you avoid frustration:
Use Lighting
Under the sink is dark. A small, head-mounted LED light or a work light can help you see the nut clearly.
Try Penetrating Oil
If a nut is rusted or stuck, spray it with a penetrating oil like WD-40. Wait 10-15 minutes, then try the wrench. This trick can save you a lot of effort.
Use Two Hands
If space allows, use one hand to steady the shaft and the other to turn the handle. This gives you better control and prevents the wrench from slipping.
Practice The Jaw Flip
Before crawling under the sink, practice flipping the jaw to change the turning direction. This saves time and confusion when you are working in a tight spot.
Know When To Stop
If a nut will not budge and you risk rounding it off, stop and reassess. Sometimes, cutting the nut with a hacksaw or calling a professional is safer.
Safety Considerations
While basin wrenches are generally safe, there are some risks to watch for:
- Pinched fingers: The pivoting jaw can snap shut unexpectedly.
- Falling tools: Working overhead means the wrench can drop. Wear safety glasses and keep tools secure.
- Sharp edges: Old nuts and sink edges can be sharp. Wear gloves to protect your hands.
- Electrical hazards: Be aware of any garbage disposal wiring or under-sink outlets. Avoid contact with water if wiring is present.
Environment And Material Compatibility
Basin wrenches are designed mainly for metal nuts, usually brass or stainless steel. They can also grip some plastic nuts, but be careful—too much force can crack plastic. For decorative or coated nuts, place a rag between the jaw and the nut to avoid scratches.
When To Replace Your Basin Wrench
No tool lasts forever. Signs you need a new basin wrench include:
- Worn or smooth jaw teeth: These cannot grip nuts effectively.
- Loose or wobbly pivot: The jaw will slip off.
- Bent shaft: This can make the wrench hard to control.
For the average homeowner, a quality wrench lasts years. Professionals may replace their wrench more often due to heavy use.
Alternatives To Basin Wrenches
In some cases, other tools can do the job:
- Locking pliers: For exposed nuts, these can work, but not in tight spots.
- Socket sets with extensions: Sometimes fit, but not for faucet nuts.
- Specialty faucet socket sets: Sold for certain models, but not as universal as basin wrenches.
Still, nothing matches the basin wrench for its combination of reach, grip, and compact size.
Environmental Impact And Sustainability
Most basin wrenches are made of steel, which is recyclable. High-quality wrenches can be re-sharpened or reconditioned if the manufacturer supports it. Choosing a durable, long-lasting tool helps reduce waste. Old, broken wrenches can often be recycled at metal collection points.
Troubleshooting Common Problems
Sometimes, things go wrong even with the right tool. Here are solutions to typical issues:
- Wrench slips off the nut: Make sure the jaw teeth are biting into flat sides, not corners. Clean any grease or corrosion from the nut.
- Jaw will not pivot: Lubricate the pivot point with oil or WD-40.
- Cannot get enough leverage: Try using a longer wrench or adding a piece of pipe to the handle (careful not to over-torque).
- Nut is corroded: Use penetrating oil, let it soak, then try again. If it still will not move, you may need to cut it off.
Cost Vs. Benefit: Is A Basin Wrench Worth It?
For most homeowners, a basin wrench is not a tool you use every day. But when you need it, it can save hours of frustration and prevent expensive mistakes. Plumbers consider it essential for a reason. Even if you only use it once every few years, the cost is small compared to the time and effort saved.
Where To Learn More
If you want to see a basin wrench in action, many home improvement stores offer workshops, and online video tutorials can help you master the tool. For a thorough explanation, see the Wikipedia basin wrench page.
Frequently Asked Questions
What Size Nuts Does A Basin Wrench Fit?
Most basin wrenches fit nuts from 3/8 inch to 1-1/4 inches in diameter. Adjustable models can handle even larger sizes. Always check the wrench’s specifications to be sure it matches your plumbing.
Can I Use A Basin Wrench On Plastic Nuts?
Yes, but use caution. Too much force can crack plastic. For plastic nuts, grip gently and avoid over-tightening. If possible, use a rag between the jaw and the nut for extra protection.
How Do I Change The Direction Of The Jaw?
Simply flip the wrench so the jaw faces the direction you need to turn. The jaw is designed to grip when pulled in one direction. Practice flipping it before you start your project.
What Should I Do If The Nut Will Not Move?
Apply a penetrating oil and let it soak in for 10-15 minutes. If the nut is still stuck, tap it lightly with a hammer to break the corrosion. If all else fails, consider cutting the nut off.
Are There Alternatives To A Basin Wrench?
In some cases, adjustable pliers or special faucet socket sets can work. However, for most under-sink nuts, the basin wrench is the best tool because of its reach and jaw design.
A basin wrench is a simple tool, but it solves a very real problem. If you work on plumbing—even just once in a while—adding this tool to your kit can save you time, effort, and frustration. With the right technique and a quality wrench, those hard-to-reach nuts under the sink will never be a problem again.