
Getting epoxy off a concrete floor can feel like trying to remove glue from your hands—frustrating and stubborn. Many homeowners and professionals face this problem after a renovation project, a failed DIY floor coating, or when moving into a new space. Epoxy is popular because it’s tough, glossy, and resistant to spills. But what if you want it gone? Maybe it’s peeling, yellowed, or you simply want a new look. The process is not quick, but with the right tools, knowledge, and patience, you can return your concrete floor to its raw state or prep it for something fresh.
In this guide, you’ll find clear steps, safety advice, and real-world tips to get epoxy off concrete without damaging the surface. Whether you’re dealing with a small patch or a full garage floor, you’ll learn methods for both mechanical and chemical removal.
This article also covers ways to avoid common mistakes, answers to burning questions, and expert insights you might not expect. Let’s get your floor back to its best.
Understanding Epoxy And Concrete Bond
Epoxy is more than just a sticky coating. It’s a two-part resin system—when you mix the resin and hardener, they create a strong chemical bond. Once cured, epoxy bonds tightly to concrete, filling pores and creating a hard, plastic-like surface. This powerful bond is what makes removal tricky.
Concrete itself is porous. Epoxy seeps into these pores, making it hard to scrape off with simple tools. This is why “peeling” or “chipping” rarely works for a whole floor. The bond strength means you’ll need more than elbow grease.
Key Insight: Many beginners think epoxy is like paint and will simply flake off with a scraper. In reality, its chemical grip is much stronger. Knowing this helps you choose the right removal strategy.
Safety First: Protect Yourself And Your Space
Before you start, safety is your top priority. Epoxy removal can create dust, fumes, and flying debris. Some chemicals used are strong and require careful handling.
Personal Protective Equipment (PPE) you should use:
- Safety goggles to protect your eyes from dust and splashes
- Heavy-duty gloves (nitrile or chemical-resistant)
- Long sleeves and pants to protect skin
- Respirator mask (not just a simple dust mask; use a mask rated for organic vapors if using solvents)
- Sturdy shoes (preferably steel-toe if using heavy equipment)
Ventilation: Open windows and doors. Use fans to direct fumes outside. If working indoors, take regular breaks outside.
Protect surroundings: Cover nearby walls, furniture, and items with plastic sheeting or drop cloths. Epoxy dust and chemical splashes can stain or damage other surfaces.
Tip: Never mix different chemical strippers. If you switch products, clean the surface first to avoid dangerous reactions.
Credit: www.westerncanadacoatings.ca
Methods To Remove Epoxy From Concrete
There are two main ways to get epoxy off concrete: mechanical removal and chemical removal. The best method depends on the area size, thickness of epoxy, and your comfort with tools or chemicals.
Mechanical Removal Methods
These methods use force and abrasion to physically grind, chip, or blast the epoxy away. They are less about dissolving the bond, more about breaking it.
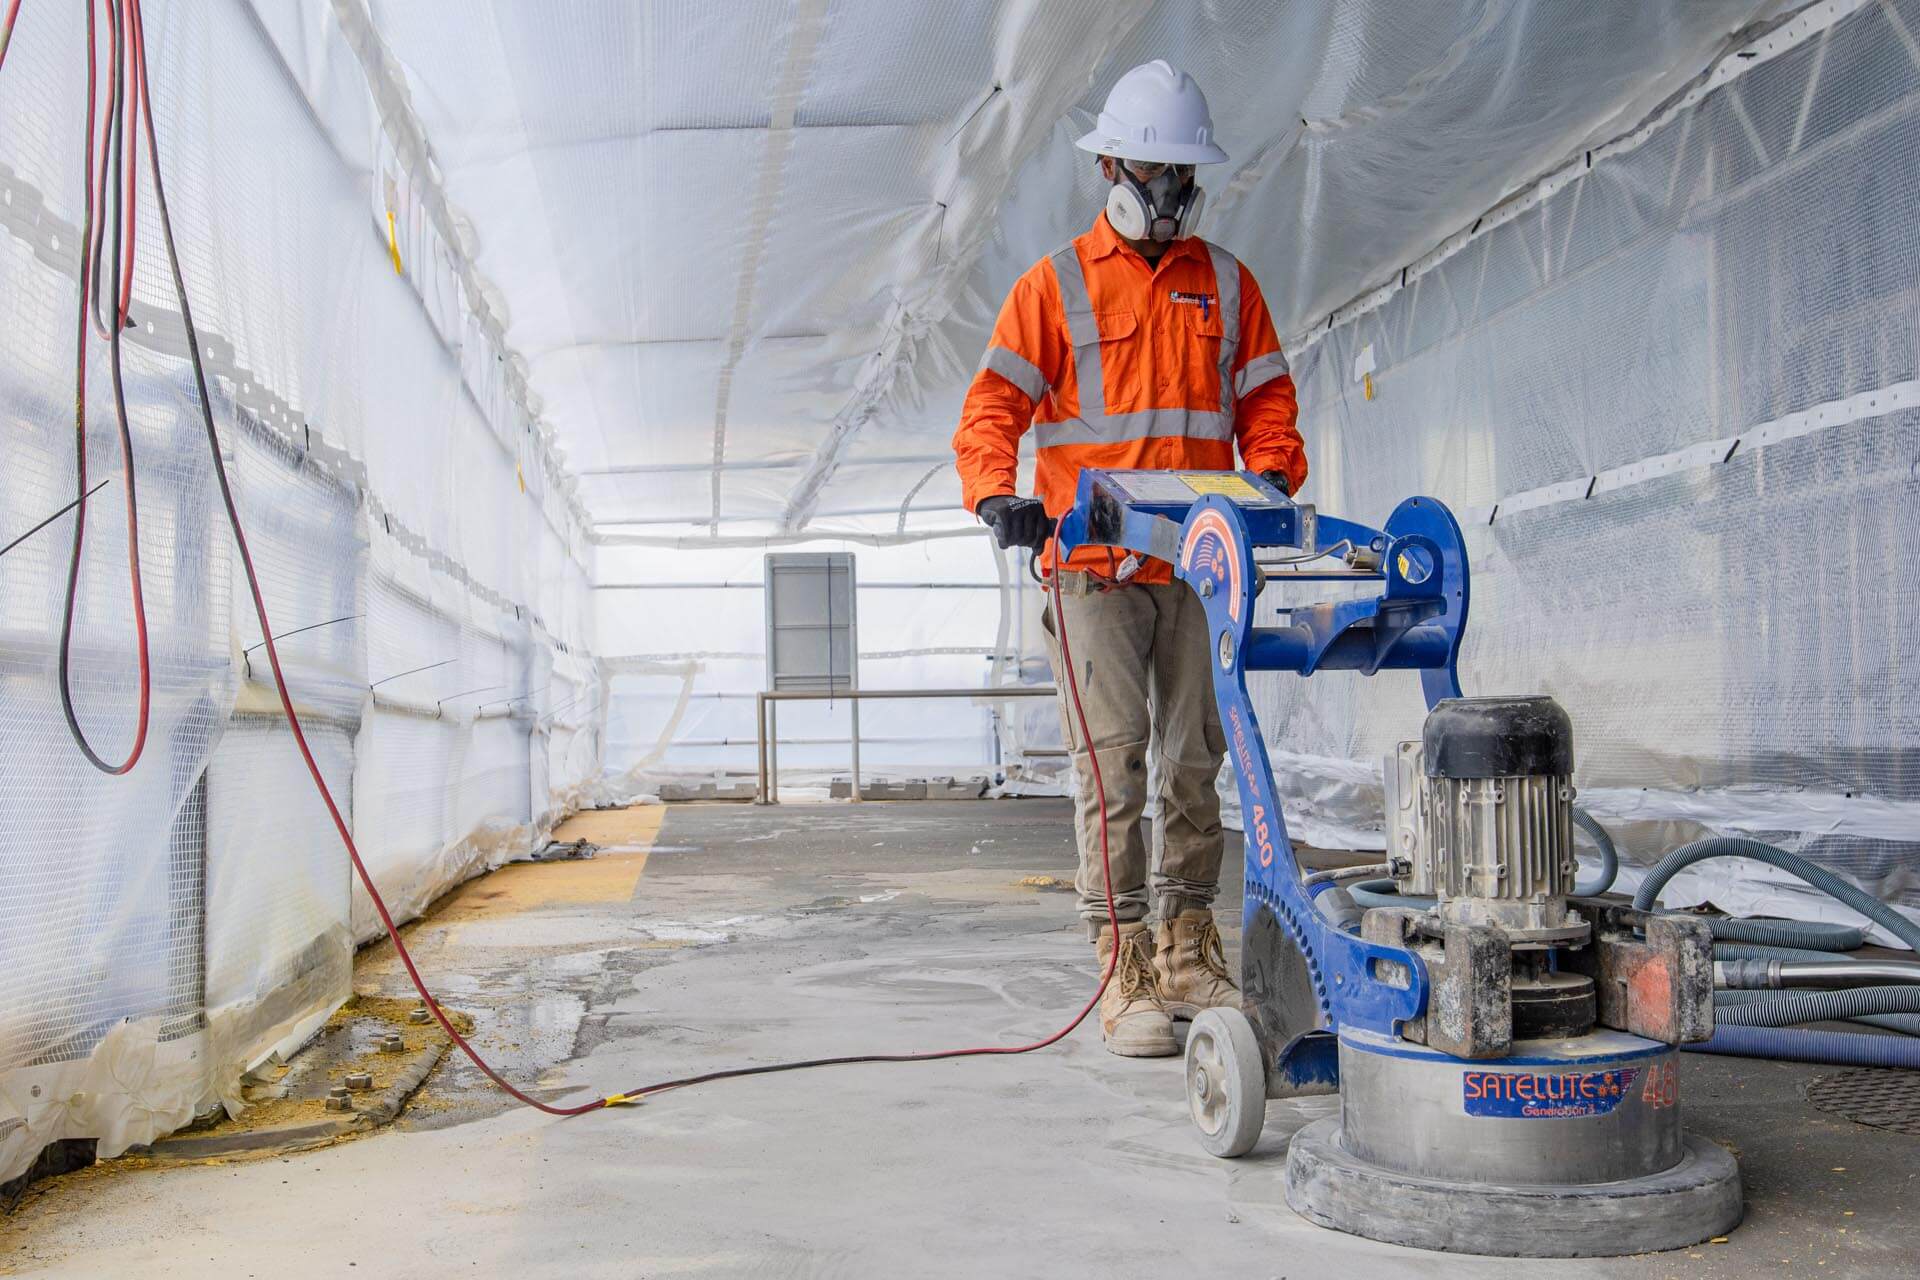
1. Floor Grinder
A floor grinder is a machine with rotating abrasive discs. It scrapes off layers of epoxy and concrete, leaving a smooth surface.
When to use: Large areas (like garages, warehouses), thick or old epoxy.
Pros:
- Fast for big jobs
- Leaves a flat finish
Cons:
- Noisy and dusty
- Can damage concrete if used incorrectly
How to use:
- Rent a concrete grinder (ask for one with diamond segments).
- Wear PPE and connect the grinder to a vacuum (if possible).
- Start at one edge, move slowly in overlapping passes.
- Check your progress often—don’t over-grind and gouge the floor.
- Sweep and vacuum dust often.
Tip: Start with a coarse grinding wheel, then switch to a finer one to smooth the surface.
2. Shot Blaster
A shot blaster uses tiny steel balls that shoot out and bounce off the floor, breaking the epoxy into small pieces and roughening the concrete.
Best for: Very large areas, industrial floors.
Pros:
- Removes tough coatings quickly
- Prepares floor for new coatings
Cons:
- Expensive to rent
- Needs experience to use safely
Tip: Practice on a test patch first. Too much blasting can pit the concrete.
3. Handheld Power Tools
You can use angle grinders or oscillating multi-tools with abrasive attachments for small areas or edges.
Best for: Corners, steps, small patches.
How to use:
- Choose a diamond cup wheel or carbide scraper attachment.
- Work slowly. Don’t force the tool—let the abrasive do the work.
- Keep the tool moving to avoid gouges.
Caution: These tools make lots of dust. Use a vacuum attachment if possible.
4. Scrapers And Chisels
Manual methods still have their place for thin or flaky epoxy.
- Use a sturdy paint scraper, putty knife, or cold chisel.
- Tap lightly with a hammer under the edge of the epoxy.
- Work in small sections.
Tip: Scraping is easier if the epoxy is already peeling or if you softened it with heat or solvent.
Chemical Removal Methods
These methods use solvents or special strippers to break the chemical bond between epoxy and concrete.
1. Commercial Epoxy Strippers
Special epoxy removers are designed to soften or break down epoxy coatings.
How to use:
- Read the label for safety instructions.
- Apply the stripper with a brush or roller.
- Wait the recommended time (usually 30 minutes to several hours).
- Scrape off softened epoxy.
- Repeat if needed.
Pros:
- Effective for stubborn or thick layers
- Less dust than grinding
Cons:
- Strong fumes
- Requires careful cleanup
2. Solvent-based Removers
Common solvents like methylene chloride or acetone can break down epoxy, but are toxic and flammable.
Tip: Use only in well-ventilated areas. Wear a respirator rated for chemical fumes.
- Pour or brush on the solvent.
- Let it soak until epoxy softens (10–60 minutes).
- Scrape away with a putty knife.
Warning: Solvents may not work on all epoxy types and can discolor the concrete.
3. Caustic (alkaline) Strippers
Some products use strong bases (like sodium hydroxide) to attack epoxy. They are less flammable but can burn skin.
- Apply as directed.
- Let sit for several hours.
- Scrape off residue.
- Neutralize with vinegar or water, then rinse.
Tip: Test in a corner—some caustic strippers can roughen concrete.
4. Heat Gun
Applying heat can soften epoxy enough to scrape it off.
- Use a heavy-duty heat gun (not a hair dryer).
- Heat a small area (keep gun moving, don’t burn the floor).
- Scrape softened epoxy with a putty knife.
Best for: Small areas, thick drips, or glue-like spots.
Caution: Heat can release fumes—ventilate well.
5. Diy Natural Methods
If you want to avoid strong chemicals, try these, but know they’re less effective:
- Vinegar: Soak rags in white vinegar, lay on the epoxy for several hours, then scrape.
- Citrus-based removers: Gentler on you and the environment, but slow to work.
Key Insight: Natural methods work best on thin or new epoxy—not on thick, fully cured coatings.
Step-by-step Guide: Removing Epoxy From Concrete
Here’s a practical sequence that works for most homeowners facing an old epoxy-coated floor.
Step 1: Assess The Floor
- Is the epoxy thin or thick?
- Is it peeling or tightly bonded?
- How big is the area?
- Is the concrete underneath smooth or rough?
Knowing this helps you pick the right tools and methods.
Step 2: Prepare The Area
- Remove all furniture, boxes, or items.
- Sweep and vacuum the floor.
- Cover walls and nearby surfaces with plastic sheeting.
Tip: Removing dust and debris helps you see the epoxy better and keeps your tools from clogging.
Step 3: Choose Your Method
- For thick or stubborn epoxy on a large floor, start with a floor grinder.
- For small spots or drips, try a scraper or heat gun.
- If you want to avoid grinding, try a chemical stripper.
Insight: Many beginners waste time with weak methods on big jobs. For a whole garage, mechanical removal is usually faster.
Step 4: Test A Small Area
- Always test your chosen method in a corner.
- Check for damage to the concrete.
- Adjust tools or chemicals as needed.
Step 5: Remove Epoxy
If using mechanical tools:
- Start at one corner, work methodically.
- Don’t rush—overlapping passes ensure even removal.
- Sweep/vacuum dust regularly.
If using chemicals:
- Apply stripper evenly.
- Wait the recommended time—don’t rush this step.
- Scrape off softened epoxy.
- Repeat if needed.
Tip: Some areas will need multiple passes or a mix of methods. Be patient.
Step 6: Clean Up
- Remove all debris, dust, or chemical residue.
- Wash the floor with water (and soap if needed).
- Let the floor dry completely.
Key Insight: Leftover chemicals can interfere with new coatings or sealers. Rinse thoroughly.
Step 7: Inspect And Repair
- Check for gouges or rough patches.
- Fill holes or cracks with concrete patch.
- Sand smooth if needed before applying new finish.
Comparing Epoxy Removal Methods
Choosing the right method is critical. Here’s a comparison to help you decide:
| Method | Best For | Speed | Skill Level | Cost | Risks |
|---|---|---|---|---|---|
| Floor Grinder | Large areas | Fast | Medium | High (rental) | Can damage floor |
| Shot Blaster | Industrial floors | Very fast | High | Very high (rental) | Pits surface |
| Hand Tools | Small spots | Slow | Low | Low | Labor intensive |
| Chemical Stripper | Stubborn epoxy | Medium | Medium | Medium | Toxic fumes |
| Heat Gun | Small, thick patches | Slow | Low | Low | Fumes, burns |
Tip: For most home garages, a floor grinder rented from a hardware store is the best mix of speed and cost.
Tools And Products: What You Really Need
Don’t get stuck with the wrong gear. Here’s a handy summary of what works best.
| Tool/Product | Purpose | When to Use | Notes |
|---|---|---|---|
| Diamond Grinder | Grinding off epoxy | Large, thick coatings | Rent from tool store |
| Epoxy Stripper | Chemically soften epoxy | Stubborn, small jobs | Follow safety instructions |
| Putty Knife | Scraping softened epoxy | Small areas | Sturdy metal blade preferred |
| Shop Vacuum | Clean up dust | All methods | HEPA filter best |
| Respirator Mask | Protect from fumes | Chemical methods | Organic vapor rated |
Practical tip: If you’re unsure, visit a local hardware store and show them photos of your floor. Staff can recommend the right tool for your specific situation.
Mistakes To Avoid When Removing Epoxy
It’s easy to make costly errors, especially if you’re new to this kind of project. Here are the most common mistakes and how to avoid them:
- Skipping safety gear. Epoxy dust and fumes can cause breathing problems or skin burns. Always use gloves, goggles, and a respirator if needed.
- Using the wrong tool. A small hand scraper won’t work for a whole garage. For large jobs, mechanical tools are much more efficient.
- Not testing first. Always test your chosen method in a hidden corner to avoid damaging the entire floor.
- Rushing the process. Removing epoxy takes time. If you try to hurry, you might gouge the concrete or leave sticky residue.
- Mixing chemicals. Never mix different strippers or solvents. This can create dangerous fumes or even start a fire.
- Ignoring ventilation. Chemical fumes can build up quickly indoors. Always keep windows and doors open, and use fans.
- Not cleaning up thoroughly. Residue from strippers or dust can prevent new coatings from sticking. Clean and rinse the floor well before refinishing.
- Over-grinding. Using a grinder too aggressively can leave deep scratches or uneven surfaces. Go slow and check your progress often.
- Not repairing the floor after removal. Even careful removal can leave small holes or rough spots. Patch and smooth these areas before applying a new finish.
Non-obvious tip: Some concrete floors have a sealer under the epoxy. If you see shiny patches after removal, you may need to strip or grind again before painting or sealing.
How To Dispose Of Epoxy And Chemical Waste
Don’t just wash everything down the drain. Epoxy waste, chemical strippers, and contaminated rags can harm the environment or clog your pipes.
- Collect epoxy chips and dust in heavy-duty trash bags.
- Chemical waste: Let small amounts evaporate outdoors in a safe, ventilated spot if allowed by local rules. Otherwise, store in sealed containers and bring to a hazardous waste facility.
- Check local disposal rules. Some cities have special drop-off days for paint, solvents, and chemicals.
- Never pour solvents or stripper down the drain. This can pollute water supplies and damage plumbing.
Resource: For safe disposal guidelines, see the EPA’s household hazardous waste page: EPA Household Hazardous Waste.
Credit: perfectconcretecare.com.au
Preparing The Floor For A New Finish
Once the epoxy is gone and the concrete is clean, you might want to seal, paint, or re-coat your floor. Here’s how to prep it right:
- Check for moisture: Tape a plastic sheet to the floor for 24 hours. If water forms underneath, wait to coat.
- Patch and repair: Fill cracks and holes with a concrete patch.
- Etch if needed: Some new coatings need a slightly rough surface. Use a concrete etcher if your floor is very smooth.
- Vacuum and mop: Remove all dust and debris.
- Let dry fully: Concrete must be completely dry before painting or sealing.
Tip: Many new coatings will not stick if there’s any epoxy or sealer left. Double-check corners and edges.
When To Call A Professional
Sometimes, it makes sense to hire an expert:
- The epoxy is several millimeters thick or covers a very large area.
- The concrete is valuable (polished, decorative, heated).
- You need the floor finished quickly for a business.
- You’re uncomfortable with chemicals, power tools, or heavy lifting.
Professionals have industrial grinders, dust extractors, and safety training. While it costs more, you’ll save time and avoid mistakes.
Cost estimate: Professional epoxy removal typically ranges from $2 to $5 per square foot, depending on thickness and location.
Real-life Examples
Example 1: A homeowner tried to remove peeling epoxy from a garage with a paint scraper. After hours of slow progress, he rented a diamond grinder and finished the job in a day. He learned that for large jobs, power tools save time and energy.
Example 2: A small business owner used a chemical stripper in an unventilated basement. Fumes built up, causing headaches. After moving the project outdoors, he finished safely and without health issues.
Key takeaway: The right method and safety steps make all the difference.
Frequently Asked Questions
How Long Does It Take To Remove Epoxy From A Concrete Floor?
The time depends on the method, epoxy thickness, and area size. For a one-car garage, using a floor grinder, it might take 4–6 hours. Chemical removal can take a day or more, especially if you need to repeat applications. Small spots can be done in an hour or two.
Will Removing Epoxy Damage My Concrete?
If you use the right tools and don’t rush, most concrete floors are unharmed. Over-grinding or aggressive scraping can leave scratches or gouges. Always test in a small spot first and use the gentlest method that works.
Can I Paint Or Seal The Floor Right After Removing Epoxy?
Yes, but only after you’ve cleaned the floor thoroughly and let it dry. Any leftover epoxy, dust, or chemical residue will prevent new coatings from sticking. Wait at least 24 hours after cleaning before applying a new finish.
Are There Eco-friendly Ways To Remove Epoxy?
Some citrus-based or biodegradable strippers are less toxic than traditional chemicals, but they work slowly and may not be effective on thick epoxy. Mechanical methods (grinding, scraping) make less chemical waste but create dust. Always collect and dispose of waste properly.
What If Some Epoxy Won’t Come Off?
For stubborn patches, try repeating your chosen method, or switch to a stronger tool or stripper. Sometimes, a combination works best: soften with a stripper, then grind or scrape. If small spots remain, they can often be sanded smooth and painted over.
—
Removing epoxy from concrete is a tough job, but not impossible. With the right approach, safety gear, and a little patience, you can restore your floor or prepare it for a fresh new look. Start small, use the right tools, and don’t be afraid to ask for expert help if you’re overwhelmed. Soon, your concrete will be ready for whatever comes next.
Credit: entropyresins.com