Many homes built before the 1990s have a unique ceiling texture known as popcorn ceiling. This bumpy, cottage cheese-like finish was once popular for its sound-dampening qualities and ability to hide imperfections. But as homes age, homeowners often notice cracks forming in these ceilings. These cracks can make a room look neglected, and worse, they may grow if not addressed. Fixing popcorn ceiling cracks can feel intimidating, but with the right knowledge, tools, and techniques, you can restore your ceiling’s appearance and even prevent future issues.
In this guide, you’ll learn what causes popcorn ceiling cracks, how to assess their severity, and the step-by-step process to repair them. You’ll also discover materials and techniques that make the job easier, along with expert tips to get a clean, lasting finish.
Whether you’re a DIY enthusiast or a homeowner facing this problem for the first time, you’ll find everything you need to fix popcorn ceiling cracks confidently.
Why Popcorn Ceilings Crack
Cracks in popcorn ceilings often surprise homeowners, but understanding the causes helps prevent them from reappearing. The most common reasons include:
- Natural settling – As a house settles, ceilings can flex and shift, especially at joints where drywall sheets meet.
- Moisture damage – Leaks from roofs, plumbing, or high humidity can weaken the ceiling material.
- Structural movement – Vibrations from heavy appliances, foot traffic on the floor above, or even earthquakes can stress the ceiling.
- Poor installation – If the original drywall or popcorn texture was not applied correctly, cracks are more likely to form.
- Aging materials – Over time, paint, joint compound, and the popcorn texture lose elasticity, making them prone to cracking.
A common mistake is to fix only the surface crack without addressing the underlying issue. For example, painting over a crack caused by a leak won’t last unless you fix the leak first.
Assessing The Damage
Before you start any repair, it’s important to evaluate the type of crack and the extent of the problem.
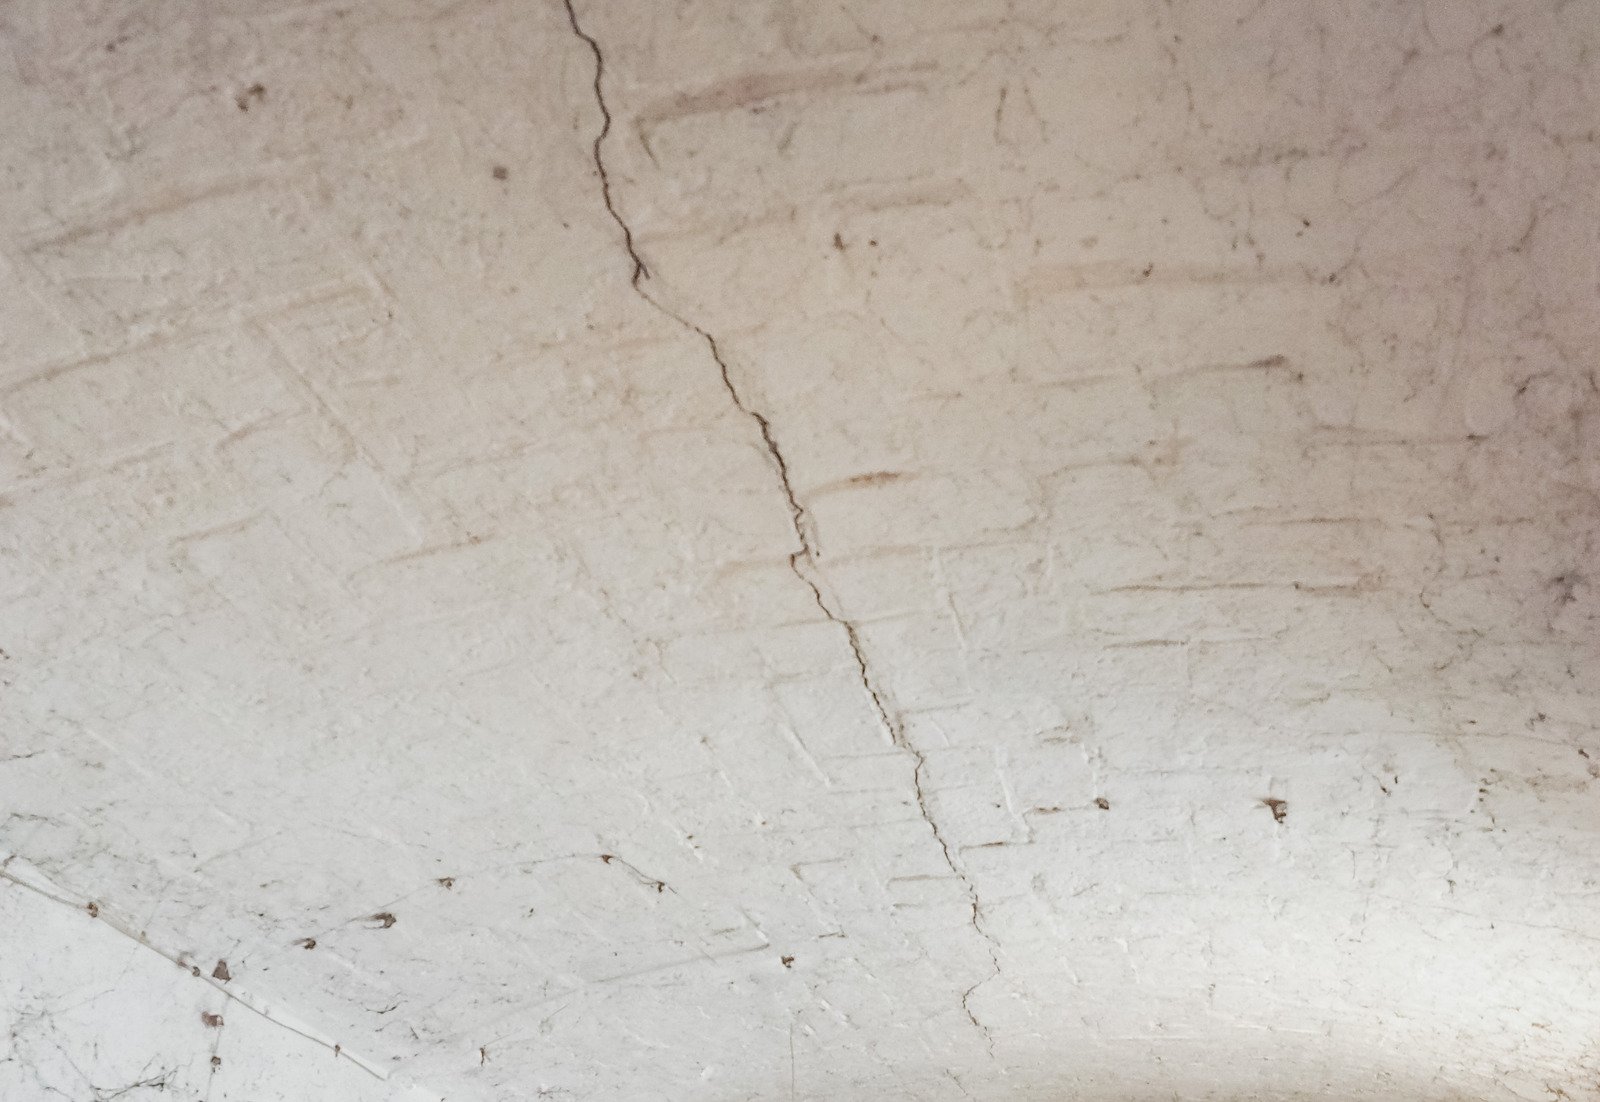
Types Of Cracks
- Hairline cracks: Thin, shallow, and usually less than 1/16 inch wide. Often cosmetic.
- Wide or deep cracks: More than 1/8 inch wide, possibly signaling structural issues or water damage.
- Spiderweb cracks: Small cracks radiating from a point, often due to settling.
- Discolored cracks: May indicate water damage, which needs to be fixed before cosmetic repairs.
When To Call A Professional
If the crack is more than 1/4 inch wide, runs across the entire ceiling, or if the ceiling feels soft or wet, consider hiring a pro. Also, homes built before 1980 may have asbestos in the popcorn texture. Disturbing asbestos is dangerous. In this case, have the material tested before you begin.
Tools And Materials Needed
Gathering the right tools and materials before you start makes the process smoother. You’ll need:
- Drop cloths or plastic sheeting
- Painter’s tape
- Ladder or step stool
- Utility knife
- Putty knife (4″ and 6″ sizes)
- Sanding sponge or fine sandpaper (120-220 grit)
- Drywall joint compound or spackle
- Popcorn ceiling patch or spray texture
- Primer (stain-blocking if water damage was present)
- Ceiling paint (to match your ceiling)
- Dust mask and safety glasses
- Spray bottle with water
- Optional: Asbestos testing kit (if needed)
For larger repairs, you may need a small drywall saw or replacement drywall.
Preparation: Safety And Setup
Safety is a priority when working overhead. Lay down drop cloths to protect floors and furniture. Wear a dust mask and safety glasses, especially if you’ll be sanding. If your home was built before 1980, test the ceiling material for asbestos before you disturb it.
Cover the area below the crack with plastic and use painter’s tape to protect walls. Move furniture out of the way, if possible. Good lighting will help you see all cracks and imperfections.
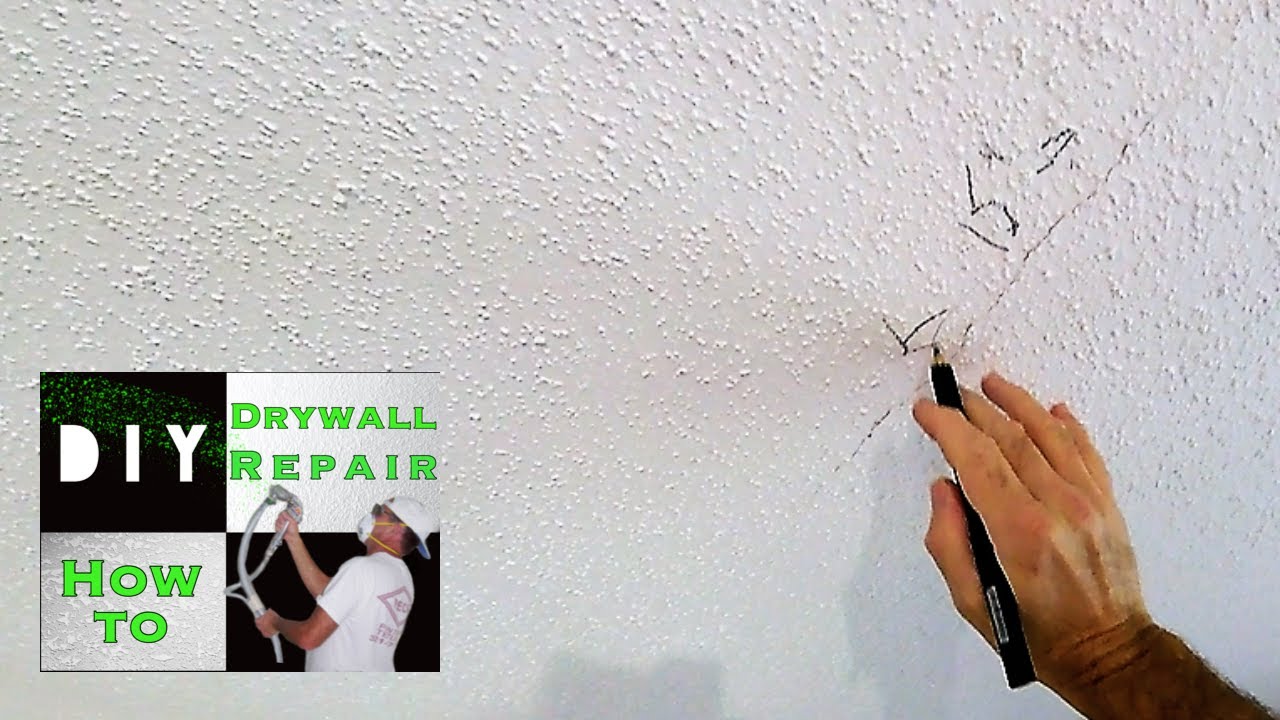
Step-by-step: How To Fix Popcorn Ceiling Cracks
1. Inspect And Clean The Crack
Use a ladder or step stool to get a close look. Check for signs of moisture or mold. If the area is stained, yellowed, or soft, address the source of water before proceeding.
Gently clean the area with a damp cloth to remove dust and debris. For greasy spots, use a mild detergent. Let the area dry fully.
2. Remove Loose Texture And Damaged Material
With a utility knife or putty knife, carefully scrape away any loose or flaking popcorn texture around the crack. Remove only what comes off easily—do not gouge or enlarge the crack. This step ensures a smooth repair.
If you see crumbling drywall, use a drywall saw to cut out the damaged section. For most cracks, this isn’t necessary.
3. Widen And Undercut The Crack
This step is often skipped by beginners but helps the patch hold. Use a utility knife to slightly widen the crack (no more than 1/8 inch) and create a small V-shaped groove. This gives the joint compound more surface area to grip.
4. Apply Joint Compound Or Spackle
Using a 4-inch putty knife, apply a thin layer of drywall joint compound over the crack. Press the compound into the groove, then smooth it out so it’s flush with the ceiling. Feather the edges to blend with the surrounding texture.
Let it dry fully (usually 24 hours). For deep cracks, apply a second coat if needed.
5. Sand Smooth
Once dry, lightly sand the patched area with a sanding sponge or fine sandpaper. The goal is a smooth, even surface that doesn’t stand out from the rest of the ceiling.
Be gentle—too much sanding can damage the surrounding texture.
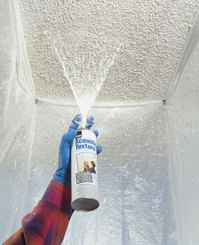
6. Re-create Popcorn Texture
This is the step many DIYers fear, but it’s easier with the right product. There are two common options:
- Popcorn ceiling patch (premixed): Sold in small tubs, applied with a sponge or brush.
- Spray popcorn texture: Sold in aerosol cans, good for small areas.
Shake or mix the product well. Lightly dampen the patched area with a spray bottle. Apply the texture, matching the existing look as closely as possible. Practice on a piece of cardboard first if you’re unsure.
Hold the spray can about 12-18 inches from the ceiling. For thicker texture, apply several light coats, letting each dry in between.
Pro tip: The new texture will look brighter when wet but will blend in as it dries.
7. Prime And Paint
Once the new texture is dry (usually 24 hours), apply a stain-blocking primer if you repaired water damage. For regular cracks, a standard ceiling primer is fine.
After priming, paint the patched area with ceiling paint. Feather the edges into the surrounding area. Two thin coats are better than one thick coat.
Popcorn Ceiling Crack Repair: Detailed Example
Let’s look at a common scenario:
- You notice a 6-inch hairline crack in your living room popcorn ceiling.
- The crack is dry with no stains or sagging.
- You decide to fix it yourself.
Step 1: Lay down drop cloths, set up your ladder, and put on safety glasses.
Step 2: Gently clean the area with a damp cloth.
Step 3: Use a utility knife to widen the crack slightly and create a shallow groove.
Step 4: Apply joint compound using a putty knife, feathering the edges.
Step 5: After 24 hours, sand lightly to smooth.
Step 6: Spray popcorn texture from 12 inches away, using quick bursts to match the existing pattern.
Step 7: When dry, prime and paint the area to match the ceiling.
Result: The crack is invisible, and the repair blends with the rest of the ceiling.
When Cracks Reveal A Bigger Problem
Sometimes, cracks are a sign of deeper issues. Here’s how to tell:
- Large, recurring cracks: If cracks keep returning in the same spot, you may have movement in your ceiling joists or a shifting foundation.
- Soft, sagging areas: Moisture may have weakened the drywall. Large areas may need to be replaced.
- Multiple cracks in a pattern: This can signal structural issues or severe settling.
If you see these signs, consult a licensed contractor or structural engineer. Fixing only the surface without solving the underlying problem means the crack will come back.
Comparing Popcorn Ceiling Repair Vs. Removing Texture
Homeowners often debate whether to repair a cracked popcorn ceiling or remove the texture entirely. Here’s a comparison to help decide:
| Repair Popcorn Ceiling | Remove Popcorn Texture |
|---|---|
| Quick for small cracks | Time-consuming, messy |
| Maintains original look | Smoother, modern finish |
| Lower cost ($10-$50 for DIY) | Higher cost ($1-$2/sq.ft.) |
| Possible asbestos risk if disturbed | Must test for asbestos before removal |
| Good for minor cracks | Best if texture is damaged or disliked |
Most homeowners choose to repair cracks unless they want a new ceiling look or have widespread damage.
Matching Popcorn Texture: Tips And Tricks
Matching the popcorn texture after repair can be tricky. Here are practical tips:
- Test different products: Texture varies by brand and age. Try a few test sprays on cardboard.
- Adjust spray distance: Closer spray gives a thicker texture; farther gives a finer look.
- Use a sponge or brush: For small spots, dabbing with a damp sponge can mimic the original pattern.
- Blend edges: Lightly feather the new texture into the old to avoid a visible patch.
- Paint after drying: The true match is only visible once the paint dries.
Remember, no two popcorn ceilings are exactly alike. Aim for a close match rather than perfection.
Preventing Future Popcorn Ceiling Cracks
Once you’ve fixed your ceiling, you’ll want to prevent more cracks. Here’s how:
- Control moisture: Use exhaust fans in bathrooms, fix leaks quickly, and keep indoor humidity below 50%.
- Avoid excess weight: Don’t hang heavy items from the ceiling without proper anchors.
- Minimize vibrations: Place large appliances (like washers) on vibration pads.
- Monitor for movement: Watch for signs of settling or shifting in your home.
Regularly inspect your ceilings and address small cracks early before they grow.
Credit: www.youtube.com
Common Mistakes To Avoid
Some errors can make popcorn ceiling repairs more difficult or less durable:
- Skipping preparation: Not cleaning or protecting the area leads to poor adhesion and a messy job.
- Ignoring the cause: Fixing the crack without addressing leaks or movement means the problem will return.
- Mismatched texture: Not testing the texture product can result in a patch that stands out.
- Over-sanding: Too much sanding can damage the surrounding texture, making repairs obvious.
- Neglecting safety: Failing to check for asbestos puts your health at risk.
Tools And Products: Comparison
Choosing the right tools and products makes a big difference. Here’s a comparison of common repair options:
| Product/Tool | Best For | Notes |
|---|---|---|
| Joint compound | Crack filling, smoothing | Dries hard, easy to sand |
| Spray popcorn texture | Recreating texture | Best for small patches |
| Premixed popcorn patch | Very small areas | Quick, but may not match all textures |
| Sanding sponge | Smoothing patch | Less dust than sandpaper |
| Stain-blocking primer | Water-damaged ceilings | Prevents stains from bleeding through |
For most repairs, a combination of joint compound, spray popcorn texture, and a sanding sponge will do the job.
Popcorn Ceiling Repair Cost Breakdown
Repairing a popcorn ceiling crack is usually affordable, especially if you do it yourself. Here’s a typical cost breakdown:
- Joint compound or spackle: $6–$12 per tub
- Spray popcorn texture: $8–$15 per can
- Primer and ceiling paint: $15–$30 per quart
- Sandpaper or sponge: $2–$5
- Drop cloths, tape: $5–$10
Total (DIY): $35–$70 for most small cracks.
Hiring a professional costs more—typically $100–$300 for a single crack, depending on location and ceiling size. If asbestos is present, professional abatement can cost thousands of dollars.
Real-world Example: Fixing A Water-damaged Crack
Suppose you find a 12-inch brown-stained crack in a popcorn ceiling after a roof leak. Here’s how you’d handle it:
- Fix the leak and dry the ceiling fully.
- Cut out any soft or sagging drywall with a saw.
- Install new drywall if needed, tape, and apply joint compound.
- Sand smooth and let dry.
- Apply spray popcorn texture to match.
- Prime with a stain-blocking primer to stop brown stains from bleeding through.
- Paint with ceiling paint for a seamless look.
This process takes longer but ensures the problem won’t return.
Credit: www.drywallmedic.com
Advanced Tips For Lasting Repairs
Experienced pros use some extra tricks for better results:
- Use mesh tape for wide cracks: Embedding mesh tape in joint compound over the crack adds strength.
- Feather repairs wide: Extend the repair area a few inches beyond the crack for a less visible patch.
- Prime before texturing: Priming the patch before applying texture improves adhesion.
- Check for joist movement: If cracks keep reappearing, fasten the drywall to joists with longer screws.
Thinking ahead and using professional techniques can mean fewer repairs in the future.
Popcorn Ceiling Cracks Vs. Other Ceiling Types
Wondering how popcorn ceiling repairs compare to other ceiling styles? Here’s a quick comparison:
| Ceiling Type | Repair Difficulty | Special Considerations |
|---|---|---|
| Popcorn | Moderate | Matching texture is tricky |
| Flat/Smooth | Easy | No texture matching needed |
| Knockdown | Moderate | Requires special tools |
| Swirled | Hard | Artistic skill needed for pattern |
Popcorn ceilings are easier to fix than artistic swirls but harder than flat ceilings.
Credit: www.annarbor.com
When To Remove Popcorn Texture Instead
While repairing cracks is usually best, consider removing popcorn texture if:
- The ceiling has repeated, large cracks or water damage.
- You plan a major renovation.
- You want a modern, smooth look.
- Asbestos testing shows it’s safe to remove.
Removal is a bigger project but can increase home value and reduce future maintenance.
Useful Resources And Further Reading
If you want more details on popcorn ceiling repairs, or need help with asbestos testing, visit the EPA Asbestos Information page. Always follow safety guidelines when working with textured ceilings.
Frequently Asked Questions
How Can I Tell If My Popcorn Ceiling Has Asbestos?
Homes built before 1980 often used asbestos in ceiling textures. The only way to be sure is to have a small sample tested by a certified lab. Do not disturb the ceiling until you get the results.
Can I Paint Over A Popcorn Ceiling Crack?
Painting over a crack may hide it temporarily, but the crack will usually reappear. It’s best to fill the crack with joint compound, retexture, and then paint.
What If My Popcorn Ceiling Keeps Cracking In The Same Spot?
Recurring cracks often mean a structural problem, such as loose drywall or shifting joists. Strengthen the ceiling with additional screws and use mesh tape in your repair. If the issue persists, consult a contractor.
Is It Safe To Remove Popcorn Texture Myself?
If your ceiling contains asbestos, do not remove it yourself. Hire a licensed abatement professional. For asbestos-free ceilings, removal is possible with proper safety gear (mask, goggles, plastic sheeting) but is messy and time-consuming.
Are There Alternatives To Popcorn Ceiling Texture?
Yes, you can choose from smooth ceilings, knockdown texture, orange peel, or swirled patterns. Many homeowners now prefer flat, smooth ceilings for a modern look.
Fixing popcorn ceiling cracks takes patience and the right approach. By following these steps and using proper materials, you can restore your ceiling and keep it looking great for years to come. With a little care, most small cracks are easily repaired—and your ceiling will look as good as new.