When planning a new floor, many homeowners now choose vinyl plank flooring. It looks like real wood, lasts for years, and is simple to clean. But to get the best results, you need to lay the planks the right way from start to finish. Even small mistakes can lead to gaps, uneven seams, or planks that move. This guide explains, step by step, how to lay vinyl plank flooring for a smooth, professional look. You’ll discover tips that even some contractors miss, practical advice for difficult rooms, and ways to avoid common errors. Whether you are a do-it-yourself beginner or already have some experience, this article gives you the full picture, so you’ll feel confident from prep to finish.
Why Vinyl Plank Flooring Is A Popular Choice
Vinyl plank flooring has changed home design over the past decade. It combines the beauty of wood with better durability and lower cost. Homeowners pick vinyl planks for many reasons:
- Water resistance: Most planks are waterproof, so you can use them in kitchens, bathrooms, and basements.
- Easy installation: Many products use a simple click-lock system.
- Comfort: Vinyl is softer underfoot than tile or hardwood, making rooms warmer and quieter.
- Low maintenance: It only needs basic cleaning and rarely scratches.
- Affordability: It costs less than real wood but looks almost the same.
Recent surveys show that over 30% of new flooring sales in the US are vinyl plank products. The variety in colors, textures, and finishes is wider than ever.
Types Of Vinyl Plank Flooring
Before you start, you need to choose the right type of vinyl plank flooring. Each type has different installation needs.
| Type | Installation Method | Water Resistance | Durability |
|---|---|---|---|
| Luxury Vinyl Plank (LVP) | Click-lock, glue-down | High | Excellent |
| Rigid Core Vinyl (SPC/WPC) | Click-lock | Waterproof | Superior |
| Glue Down Vinyl Plank | Adhesive | Good | Good |
| Loose Lay Vinyl Plank | No adhesive | Moderate | Fair |
- Click-lock planks are the most popular for DIY because they fit together easily.
- Glue-down types are better for commercial spaces or high-traffic areas.
- Rigid core planks (SPC and WPC) stay flat and work well over uneven subfloors.
Tools And Materials You’ll Need
Prepare all tools and materials before you start. Having everything ready saves time and prevents mistakes.
Essential tools:
- Utility knife with sharp blades
- Tape measure
- Spacers (for expansion gaps)
- Rubber mallet
- Pull bar and tapping block
- Pencil and straight edge
- Level
- Square (carpenter’s or speed square)
- Pry bar (if removing old trim)
- Safety glasses and gloves
Materials:
- Chosen vinyl plank flooring (buy 10% extra for mistakes/cuts)
- Underlayment (if needed)
- Transition strips and end moldings
- Silicone or caulk (for wet areas)
- Cleaning supplies for prep
Pro tip: Don’t skip the spacers. Expansion gaps are crucial for preventing buckling and keeping your floor flat over time.
Preparing The Subfloor
The quality of your subfloor affects the final look and life of your vinyl plank flooring. Most problems—like squeaks or uneven planks—start with poor prep.
1. Remove Old Flooring
Take out carpet, laminate, or old vinyl. For tile, you can sometimes lay vinyl planks on top if the tile is flat and secure. Remove any glue or debris.
2. Check For Flatness
Use a long level to check the subfloor. It should not have dips or bumps over 1/8 inch in 6 feet. Fill low spots with floor patch or self-leveling compound. Sand down high spots.
3. Clean The Surface
Vacuum and mop the floor. Dust, dirt, or small stones can cause bumps or noises under your planks.
4. Dryness And Moisture
Moisture damages all flooring. Test the floor with a moisture meter, especially in basements or concrete slabs. Wait for the area to dry or use a vapor barrier.
5. Underlayment
Some planks have underlayment attached. If not, roll out underlayment according to the manufacturer’s instructions. Overlap seams by a few inches and tape them.
Insider tip: Many DIYers forget that even small uneven spots can telegraph through thin vinyl planks. Spend more time flattening and cleaning than you think you need.
Acclimating The Vinyl Planks
Vinyl planks need to adjust to your room’s temperature and humidity. If you skip this, planks might expand or shrink after installation.
- Bring the planks inside at least 48 hours before installing.
- Keep them flat and unopened in the room where they’ll be laid.
- Room temperature should be between 65°F and 85°F (18°C–29°C).
This step is critical, especially in climates with big temperature swings.
Planning The Layout
Careful planning gives your floor a balanced, professional look. Rushing this step leads to awkward cuts and wasted material.
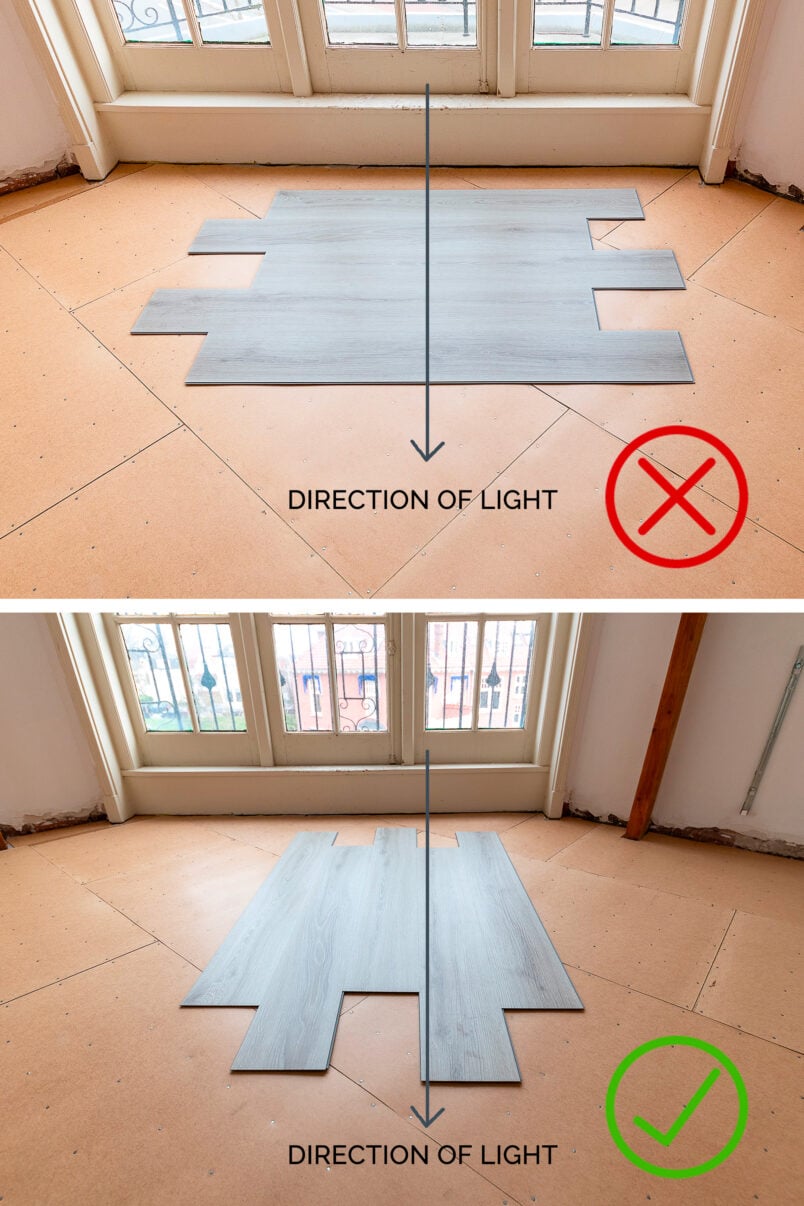
1. Decide On Direction
Most people lay planks parallel to the longest wall or in the direction of the main light source. This makes rooms look larger and the seams less visible.
2. Find The Center
Measure the room and mark the center with chalk lines. Dry-lay a few planks to see how the ends fit. Adjust so you don’t end up with a very skinny piece on one side.
3. Calculate Row Widths
Divide the room width by the plank width. If the last row is less than half a plank, adjust the starting row so both sides are even.
4. Plan For Doorways And Obstacles
Check where planks will meet door frames, closets, or cabinets. Plan cuts so seams don’t land in tricky places. Consider how you’ll transition to other rooms.
Non-obvious insight: Always stagger seams by at least 6 inches from row to row. This not only looks better but also strengthens the floor.
Credit: fantastichandyman.com.au
Cutting Vinyl Planks
Cutting vinyl planks is simple with the right tools. Most planks can be scored with a utility knife and snapped. For curves or angles, use a jigsaw.
Straight Cuts
- Measure and mark the cut line.
- Place a straight edge on the line.
- Score the top of the plank several times with a sharp utility knife.
- Snap the plank over the edge of a table or your knee.
Curved Or Notched Cuts
- Trace the shape with paper first.
- Use a jigsaw or fine-tooth handsaw.
- Always cut slowly to avoid chipping.
Around Door Frames
- Undercut the door trim with a hand saw.
- Slide the plank underneath for a clean look.
Practical tip: Change your utility knife blade often. Dull blades tear the plank’s surface and make uneven cuts.
Laying The First Row
Start in the left corner of the main wall. Place spacers between the plank and the wall to create a 1/4-inch expansion gap. This gap lets the floor move as the room temperature changes.
- Lay the first plank with the groove side facing the wall.
- Place the next plank end-to-end, clicking it into place.
- Use a tapping block if needed, but don’t hit too hard.
- Cut the last plank to fit, leaving the expansion gap.
Beginner mistake: Forgetting the expansion gap leads to buckling when the planks expand. Never install planks tight against the wall.
Installing The Remaining Rows
Continue laying planks row by row. Each row should be staggered so seams are not lined up.
Staggering Seams
- Start each new row with a piece at least 6 inches longer or shorter than the row before.
- Avoid repeating the same pattern in each row.
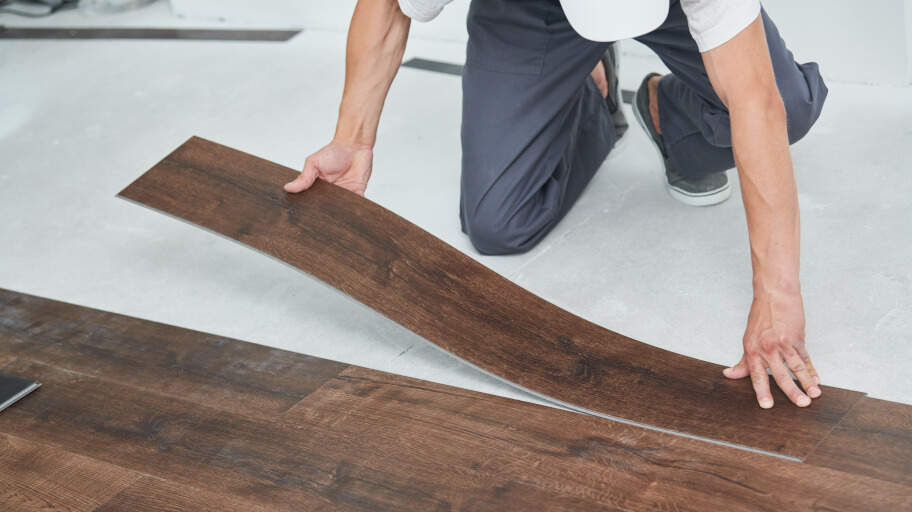
Clicking Planks Together
- Insert the tongue of the new plank into the groove of the previous row at a slight angle.
- Lower the plank and click it down.
- Tap gently with a mallet and tapping block to close gaps.
Fitting The Last Row
- Measure the space for the final row.
- Cut planks lengthwise to fit, keeping the expansion gap.
- Use a pull bar to click the last row in place.
Expert tip: If a plank won’t click in easily, check for debris in the groove or a misaligned tongue. Forcing it can damage the locking system.
Dealing With Obstacles: Doors, Vents, And Cabinets
Many rooms have tricky areas. Plan ahead for a smooth look.
Doorways
- Remove or undercut door trim so planks fit underneath.
- Use a pull bar to slide planks under the frame.
Floor Vents
- Measure and mark the vent opening.
- Cut the opening in the plank before installing.
- Cover with a floor vent cover.
Cabinets
- Never install planks under fixed cabinets.
- Stop the flooring at the cabinet edge and cover with trim.
Non-obvious insight: For large open-plan spaces, add a transition strip every 30 feet to allow for expansion. This is required by many manufacturers.
Installing Transition Strips And Moldings
Transitions cover expansion gaps and create a finished look between different flooring types.
- Use T-molding between rooms with the same height floor.
- Use reducer strips for different heights (e.g., vinyl to carpet).
- Use end caps against sliding doors or exterior doors.
Attach transitions with adhesive or screws, following the manufacturer’s instructions. Always keep the expansion gap under the molding.
Real world tip: Don’t glue transition strips to the vinyl planks. They need to “float” with the floor’s movement.
Finishing Touches: Cleaning And Inspection
Once all planks and transitions are in place:
- Remove all spacers from the edges.
- Install baseboards or quarter round to cover the expansion gap.
- Sweep and mop the floor to remove dust and fingerprints.
- Inspect for gaps, lifted edges, or loose planks. Fix any problems before using the room.
Avoid heavy furniture for 24 hours after installing, especially if you used glue-down planks.
Credit: www.littlehouseonthecorner.com
Mistakes To Avoid When Laying Vinyl Plank Flooring
Even careful DIYers make errors that lead to problems later. Here are the most common mistakes:
- Skipping acclimation: Planks may expand or contract, causing gaps.
- Ignoring subfloor prep: Uneven floors cause planks to separate or bounce.
- Forgetting expansion gaps: The floor can buckle or warp.
- Poor seam staggering: Weakens the structure and looks unprofessional.
- Not cleaning before installation: Dirt under planks causes noise and wear.
- Not checking for manufacturer’s guidelines: Some floors need special underlayments or transitions.
- Installing under cabinets: Floating floors need room to expand.
- Using too much force: Damages the click-lock system.
- Failing to leave transitions in large areas: May void the warranty.
- Cutting too short: Always measure twice before making cuts.
Insider knowledge: Professional installers always double-check the first few rows. A small alignment error multiplies as you move across the room, so it’s easier to fix early.
Maintenance Tips After Installation
Vinyl plank flooring is known for easy care, but proper maintenance keeps it looking new for years.
- Sweep or vacuum regularly to remove grit.
- Mop with a damp (not wet) mop and pH-neutral cleaner.
- Avoid harsh chemicals or abrasive pads.
- Place felt pads under furniture legs to prevent scratches.
- Use mats at entrances to catch dirt.
Stat: Well-maintained vinyl plank flooring can last 15–25 years in homes.
Comparing Vinyl Plank To Other Flooring Types
Choosing vinyl plank flooring often means comparing it to other options. Here’s how it stacks up:
| Feature | Vinyl Plank | Hardwood | Laminate | Ceramic Tile |
|---|---|---|---|---|
| Water Resistance | Excellent | Poor | Moderate | Excellent |
| Durability | High | High | Medium | High |
| Ease of Installation | Easy | Difficult | Moderate | Difficult |
| Comfort | Soft | Medium | Medium | Hard |
| Cost per Sq. Ft. | $2–$5 | $6–$12 | $1–$4 | $3–$10 |
Vinyl plank stands out for water resistance, comfort, and price. It’s one of the few options suitable for every room, even basements and bathrooms.
When To Call A Professional
Most homeowners can install click-lock vinyl planks with patience and attention to detail. However, consider a pro if:
- The subfloor is very uneven or damaged.
- The room has many angles, curves, or obstacles.
- You’re laying glue-down planks in a large space.
- You want to keep the manufacturer’s full warranty.
A professional can finish a room in 1–2 days and handle complex cuts or transitions.
For more detailed technical guides and standards, you can check the National Wood Flooring Contractors Association.
Credit: www.youtube.com
Frequently Asked Questions
How Much Does It Cost To Install Vinyl Plank Flooring?
The total cost depends on the quality of the planks, room size, and labor. DIY installation with mid-range planks is about $2–$5 per square foot. Hiring a pro adds $1–$3 per square foot. Always budget 10% extra for waste.
Can You Lay Vinyl Plank Flooring Over Tile Or Concrete?
Yes, you can lay vinyl planks over flat, secure tile or concrete. Make sure the surface is clean, dry, and even. Fill grout lines or cracks over 1/8 inch. Use a vapor barrier on concrete to prevent moisture.
Do You Need To Glue Down Vinyl Plank Flooring?
Most modern vinyl planks use a click-lock system and do not need glue. Glue-down is used in commercial areas or for certain thin planks. Follow the manufacturer’s instructions for your specific product.
How Long Does Vinyl Plank Flooring Last?
With proper installation and care, vinyl plank floors last 15–25 years in homes. In high-traffic commercial spaces, expect 10–15 years. Longevity depends on quality, cleaning, and avoiding heavy impact.
What Is The Difference Between Lvp And Spc Vinyl Plank?
LVP (Luxury Vinyl Plank) is flexible and feels softer underfoot. SPC (Stone Polymer Composite) is a rigid core plank—thicker, more durable, and waterproof. SPC is better for uneven subfloors and heavy traffic.
Vinyl plank flooring is one of the best choices for busy homes and offices. With the right tools and careful planning, you can install a floor that looks beautiful for years. Take your time, follow each step, and don’t rush the details.
A little patience now means a floor you can be proud of every day.