Bubbled veneer can make beautiful furniture or cabinetry look old and poorly maintained. You might see raised spots, blisters, or bulges on the wood surface and wonder if the piece is ruined. The good news is that bubbled veneer is a common problem, and with the right methods, you can often restore the smooth finish without replacing the entire panel. This guide will show you, step by step, how to fix bubbled veneer, why it happens, and how to prevent it in the future.
Veneer is a thin layer of real wood glued onto plywood, MDF, or particle board to give an attractive finish at a lower cost than solid wood. It’s found on tables, dressers, desks, cabinets, and even doors. But since veneer is only a thin layer, it can peel, bubble, or lift if exposed to moisture, heat, or poor handling.
Many people think fixing veneer is a job for professionals, but with patience and basic tools, you can do it yourself.
This article covers everything you need to know: causes of veneer bubbles, tools and materials needed, different repair methods for both small and large bubbles, what to do if the veneer is cracked or missing, and tips for a long-lasting repair. You’ll also learn about common mistakes and smart ways to protect your furniture from damage in the future.
What Causes Bubbled Veneer?
To repair veneer bubbles well, it’s important to understand what causes them. Most problems start because the glue holding the veneer to the base material fails. Here are the main causes:
- Moisture Exposure: Water is the number one enemy of veneer. If water seeps between the veneer and the base, the glue softens. The wood expands, and bubbles form. This often happens on surfaces that get wet, like bathroom cabinets or table tops.
- Heat and Humidity: High temperatures and humidity can also loosen glue. For example, a hot coffee cup or a sunbeam on a desk can cause small bubbles over time.
- Age and Poor Adhesive: Older furniture sometimes used animal-based glues that break down over decades. Newer pieces can have manufacturing defects where glue was not spread evenly.
- Physical Damage: Heavy objects dropped on the surface, or even dragging something sharp, can break the bond.
- Improper Cleaning: Using too much water or harsh cleaners can weaken the glue layer.
Non-obvious insight: Many people miss that even a tiny spill or steam can start the bubbling process. The damage may not appear for days or weeks, so it’s easy to forget the cause.
Tools And Materials You’ll Need
Before starting your repair, gather the right tools and materials. Having everything ready will help you work efficiently and avoid mistakes.
- Sharp utility knife or razor blade
- Syringe or fine glue applicator
- Wood glue (PVA glue is best for most repairs)
- Small paintbrush or toothpick
- Wax paper or plastic wrap
- Clamps (or heavy flat objects like books)
- Iron (for heat-based fixes)
- Fine-grit sandpaper (220 to 320 grit)
- Clean cloths
- Wood filler (if needed)
- Matching stain or finish
- Painter’s tape (optional)
- Vacuum or brush (for cleaning dust)
Pro tip: Buy the smallest bottle of wood glue you can; a little goes a long way, and fresh glue is more effective.
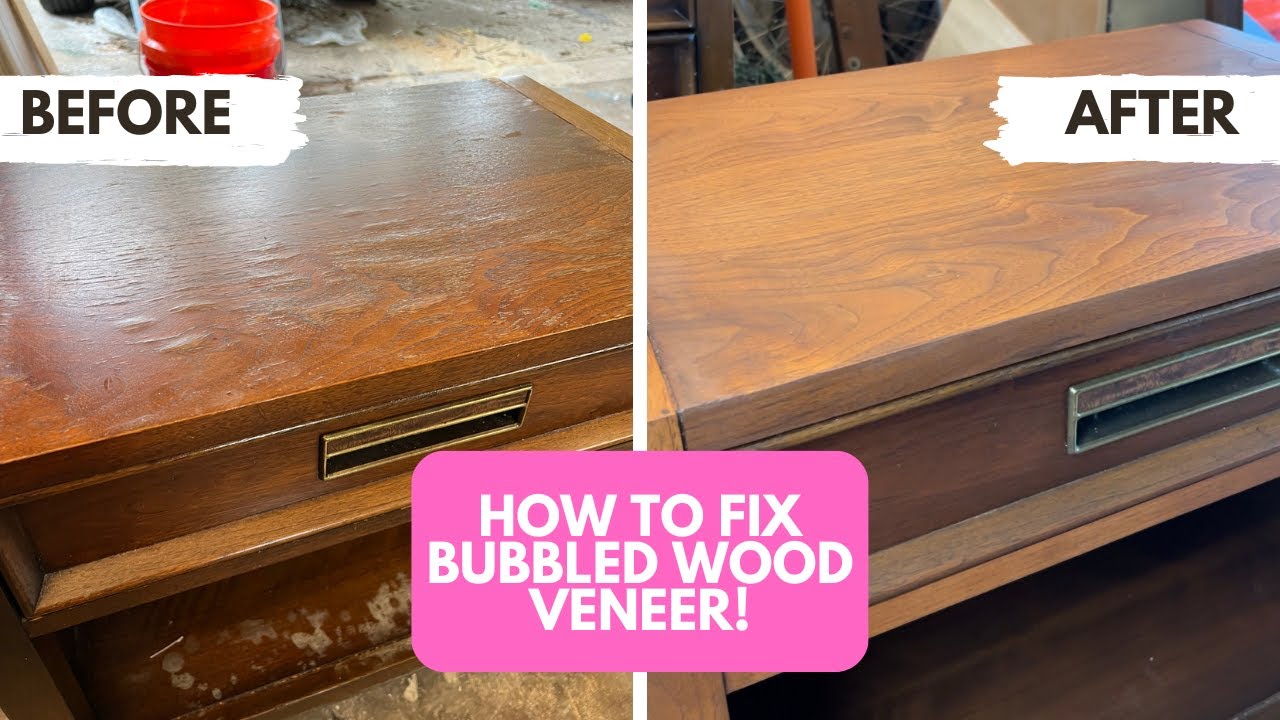
Credit: www.reddit.com
Assessing The Damage
Before jumping into repairs, take a moment to check the size and type of bubble. Not all bubbles are the same, and the repair method can change based on what you see.
- Small bubbles (under 1 inch): Usually caused by moisture or heat. The veneer is still flexible and not cracked.
- Large bubbles (over 1 inch): May feel loose and can have air or water under them. Sometimes the veneer is stiff or starting to crack.
- Cracked or missing veneer: If the bubble has split, or if a piece of veneer is missing, you’ll need extra steps.
Gently tap the area with your finger. If it feels hollow, it’s a true bubble. If it feels solid, it might be a raised grain or old finish.
Fixing Small Bubbled Veneer Areas
Small bubbles are the easiest to repair if you act quickly. Here are three effective methods, with steps for each.
Method 1: The Pin And Glue Technique
This is the most common way to fix a small bubble that hasn’t cracked.
- Clean the Area: Wipe the surface with a dry cloth to remove dust.
- Puncture the Bubble: Use a sharp utility knife or a fine needle to make a tiny hole in the center of the bubble. Make the cut just big enough for the glue.
- Inject Glue: Fill a syringe or fine-tip glue applicator with wood glue. Gently inject a small amount under the bubble.
- Spread the Glue: Press on the bubble with your finger, moving the glue evenly under the veneer.
- Cover with Wax Paper: Place wax paper or plastic wrap over the area to prevent sticking.
- Clamp or Weight: Use a clamp or set a heavy book on top. Leave it for at least 8 hours (overnight is best).
- Clean Up: Remove the clamp and wax paper. Wipe away any glue with a damp cloth.
- Sand Gently: If needed, use fine sandpaper to smooth the area. Apply matching finish if the sheen is different.
Non-obvious insight: If you don’t have a syringe, try using a thin straw or even a toothpick to push glue into the hole. The key is to get glue under the entire bubble.
Method 2: The Heat And Pressure Method
This method works best for bubbles caused by heat or humidity, especially if the glue is still soft.
- Place a Clean Cloth: Put a cotton cloth over the bubbled area.
- Set the Iron: Heat an iron to low or medium (no steam).
- Apply Heat: Press the iron gently on the cloth for 10–20 seconds. Check often to avoid scorching.
- Apply Pressure: Quickly place wax paper and a heavy object or clamp on top while the glue is warm.
- Let It Cool: Leave for several hours.
Why this works: The heat softens the old glue, making it sticky again, and pressure resets the bond.
Important tip: Never use a hot iron directly on wood—always use a cloth barrier.
Method 3: The Slit And Glue Method (for Stubborn Bubbles)
If the bubble won’t flatten with heat or a pin, a small slit can help.
- Make a Small Cut: Use a razor blade to cut along the grain, not across.
- Lift Gently: Use the tip to lift the veneer just enough to get glue underneath.
- Apply Glue: Use a brush or toothpick to insert wood glue under both sides.
- Clamp and Dry: Place wax paper and a clamp or heavy weight on top. Let dry.
- Sand and Finish: Lightly sand and apply finish if needed.
This method is more noticeable than the pin method but works for stubborn bubbles.
Fixing Large Or Multiple Bubbles
If you have several bubbles or larger areas, more careful work is needed to get a smooth finish.
Step 1: Clean And Inspect
Use a vacuum and a dry cloth to remove dust, dirt, or loose finish. Make sure the area is dry.
Step 2: Open The Bubble
- For bubbles bigger than 1 inch, use a sharp razor blade to make a straight slit along the grain, as this hides the cut better.
- Carefully lift both sides of the slit, but avoid tearing the veneer.
Step 3: Apply Glue
- Use a small brush or glue syringe to get glue under the entire area.
- Spread the glue evenly—missed spots will lead to more bubbles later.
Step 4: Clamp Firmly
- Place wax paper over the area.
- Use a wide, flat board and several clamps to press the veneer flat. Too much pressure can squeeze out all the glue, so aim for firm, not crushing.
- For very large bubbles, use a piece of scrap wood to spread out the pressure evenly.
Step 5: Let Dry
- Wait at least 8–12 hours for the glue to cure.
- Remove the clamps and wax paper.
Step 6: Sand And Refinish
- Sand lightly with fine paper, always with the grain.
- Stain or finish the area to match the rest of the surface.
Pro tip: If bubbles keep reappearing, it usually means the underlying substrate is damaged by water. Sometimes, you’ll need to dry out the wood completely before trying again.
Repairing Cracked Or Missing Veneer
Sometimes, the bubble breaks and the veneer cracks, or a piece falls off. Here’s how to handle these tougher repairs.
Filling Small Cracks
- Inject glue under the crack as in previous methods.
- Press the crack closed and clamp.
- Sand smooth once dry.
- Use a colored wood putty if the crack is visible.
Patching Missing Veneer
- Cut a Patch: Find a similar piece of veneer (many craft stores sell small sheets). Cut a patch slightly larger than the missing area.
- Trim to Fit: Place the patch over the missing spot and use a utility knife to trim it to the exact size.
- Apply Glue: Spread glue on the back of the patch and in the hole.
- Press and Clamp: Place wax paper and a clamp or heavy weight over the patch.
- Sand and Stain: Once dry, sand the edges flush and stain to match.
Non-obvious insight: You can use leftover veneer from a hidden part of the furniture (like the back or bottom) for a perfect match.
Dealing With Large Damaged Areas
If more than 25% of a surface is bubbled or missing, replacing the entire veneer sheet may be the best option. This is a bigger project and often best left to professionals, but ambitious DIYers can do it with patience.
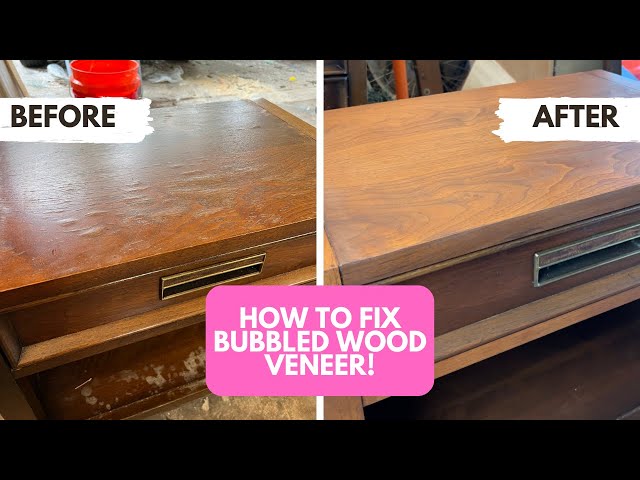
Credit: www.youtube.com
How To Blend And Hide Repairs
No repair is complete until it looks good. Matching the color and sheen is the secret to an invisible fix.
- Sand Lightly: Always use fine grit and sand only as much as needed.
- Clean Thoroughly: Remove all dust before applying any finish.
- Test Stains: Use scrap wood or an out-of-sight spot to test your stain or finish.
- Feather the Finish: Apply finish beyond the repair edge to blend with the original surface.
- Polish or Wax: Once dry, buff the area gently for a consistent shine.
Pro tip: Sometimes using a colored furniture marker or wax stick can hide tiny lines or mismatches.
Common Mistakes To Avoid
Many beginners make the same errors. Avoid these for a longer-lasting, better-looking result:
- Using too much glue: Extra glue can cause a thick spot or even new bubbles.
- Not clamping firmly enough: Without pressure, the veneer won’t bond flat.
- Skipping the drying time: Rushing the process causes weak repairs.
- Using the wrong glue: Avoid superglue or hot glue; they don’t flex and will often fail.
- Ironing too hot: High heat can scorch the veneer or loosen more glue.
- Sanding too hard: Veneer is thin; aggressive sanding can go right through to the substrate.
- Not matching the finish: An unmatched stain draws attention to the repair.
Non-obvious insight: Moisture causes most problems, so always check for leaks or spills before and after repair.
Credit: www.youtube.com
Preventing Veneer Bubbles In The Future
Fixing veneer is only part of the story. Protecting it from future bubbles will keep your furniture looking good for years.
Control Moisture
- Keep furniture away from direct sunlight and sources of steam (like kettles or humidifiers).
- Use coasters for drinks and mats for hot objects.
- Fix any roof or plumbing leaks quickly.
Clean Gently
- Dust with a soft, dry cloth.
- For sticky spots, use a damp cloth, then dry immediately.
- Avoid harsh cleaners or soaking.
Check Regularly
- Inspect surfaces every few months for small bubbles or loose spots.
- Fix problems early to avoid bigger repairs.
Use Furniture Wax Or Polish
- A thin layer of wax or polish can help seal the surface and keep out moisture.
Practical example: In high-humidity areas like Florida or Southeast Asia, a dehumidifier can help protect all your wood furniture from bubbling.
When To Call A Professional
Some veneer damage is too severe or valuable to risk with DIY fixes. Consider calling a professional if:
- The furniture is antique or valuable.
- The damaged area covers more than 25% of the surface.
- The substrate is rotten or moldy.
- You’ve tried DIY repairs, and the problem keeps coming back.
Professionals have tools and materials (like vacuum presses) that create a perfect, long-lasting bond.
Comparing Repair Methods: Diy Vs Professional
Sometimes, it helps to see how DIY methods compare to professional repair. Here’s a quick look:
| Aspect | DIY Repair | Professional Repair |
|---|---|---|
| Cost | Low (mainly tools and glue) | High ($75–$300+) |
| Skill Needed | Beginner to intermediate | Expert |
| Time Required | 1–2 days including drying | 1–3 days, sometimes longer |
| Finish Quality | Good if careful | Excellent, invisible repairs |
| Risk | Possible errors or visible seams | Very low |
Tools And Their Best Uses
Different tools can make your work easier or safer. Here’s a quick overview:
| Tool | Best For | Notes |
|---|---|---|
| Utility knife | Cutting veneer, making slits | Use sharp blade for clean cuts |
| Syringe | Injecting glue under bubbles | Prevents mess, targets area |
| Iron | Heat-based repairs | Low setting, always use a cloth |
| Clamps | Holding veneer flat while drying | Even pressure is important |
| Sandpaper | Smoothing repairs | Fine grit only (220+) |
Real-world Examples
Understanding how these steps work in real life helps you see what’s possible.
Example 1: A coffee table gets a small bubble after a spilled drink. The owner uses the pin and glue method. After 24 hours, the bubble is gone, and a quick touch-up with a stain marker hides the repair.
Example 2: A dresser in a humid climate develops several large bubbles. The owner uses the slit and glue method, clamps overnight, then sands and refinishes the area. The repair is solid, but the patch is slightly visible due to an unmatched stain.
Example 3: An old desk has a section of missing veneer. The owner cuts a patch from the back edge, glues it in place, and sands it flush. After refinishing, the repair blends in well and the desk gets many more years of use.
Environmental Impact And Sustainability
Repairing veneer instead of throwing away furniture is good for the environment. Each year, millions of tons of wood furniture end up in landfills, but many pieces can be saved with small repairs. Veneer repairs use very little new material and help preserve trees by making furniture last longer.
If you want to learn more about the environmental benefits of furniture restoration, read this Wikipedia article on furniture conservation.
Frequently Asked Questions
What Is Veneer, And Why Does It Bubble?
Veneer is a thin sheet of real wood glued onto a base, like plywood or MDF. It bubbles when the glue fails, usually because of water, heat, or age, letting air or moisture get under the veneer.
Can I Fix Veneer Bubbles Without Special Tools?
Yes, most veneer bubbles can be repaired with basic tools like a utility knife, glue, a heavy book, and a clean cloth. For better results, a glue syringe and clamps make the job easier.
Will The Repair Be Visible?
If you match the color and finish carefully, repairs are often hard to see. Small repairs can be nearly invisible, but larger patches may show a faint line or slight color difference.
How Do I Prevent Bubbles From Coming Back?
Keep furniture dry, use coasters and mats, and avoid cleaning with too much water. Regularly check for small bubbles and fix them early before they grow.
When Should I Call A Professional?
If the piece is valuable, antique, or the damage is large (over 25% of the surface), it’s smart to call a professional. They have special tools for perfect repairs and can match finishes exactly.
Restoring bubbled veneer is a practical, rewarding project that saves money and helps the environment. With careful work and attention to detail, you can bring wood surfaces back to life and enjoy their beauty for many more years.