A floor stain can transform a dull wooden surface into a stunning centerpiece, but a single mistake can turn your dream project into a disappointment. Maybe the color looks uneven, the finish is blotchy, or you see dark patches and lap marks everywhere.
If you’re staring at a floor stain job gone wrong, you’re not alone. Fixing a bad floor stain job is possible, but it takes the right approach, some elbow grease, and a bit of patience.
Many people think that fixing a bad stain means starting over from scratch, but that’s not always true. You can often repair mistakes, blend uneven color, and rescue your hardwood floors without sanding down to bare wood. The key is to understand what went wrong, choose the right solution, and use proven techniques.
In this detailed guide, you’ll learn step-by-step how to fix a bad floor stain job, discover tips professionals use, and avoid common mistakes that make things worse. Whether you’re dealing with minor blotches or a major staining disaster, this guide will help you restore your floor’s beauty and your peace of mind.
Understanding Why Floor Stains Go Wrong
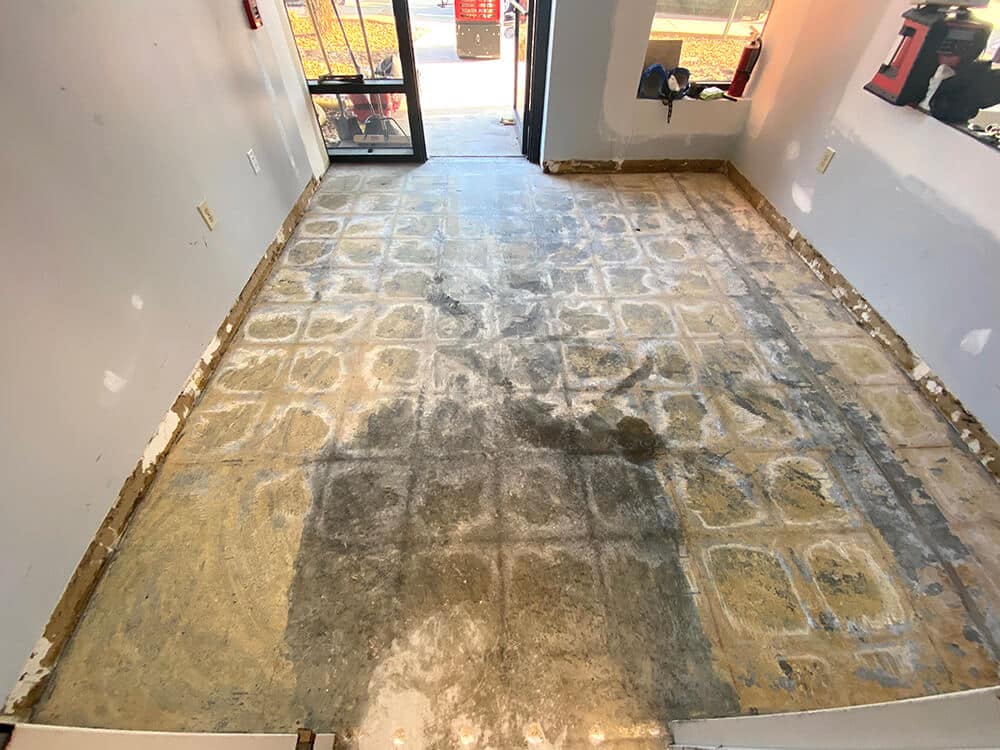
Before you can fix the problem, it’s important to know what caused it. Bad floor stain jobs usually happen for a few common reasons:
- Poor Surface Preparation: If dust, old finish, or oils remain on the floor, the stain won’t absorb evenly.
- Wrong Application Technique: Using too much or too little stain, not wiping it off in time, or letting it pool can all cause issues.
- Inconsistent Sanding: Sanding with different grits or not sanding evenly leads to uneven absorption.
- Environmental Conditions: Staining in high humidity or extreme temperatures can affect drying and color.
- Low-Quality Products: Cheap stains and finishes may not perform as expected.
Knowing the root cause saves time and helps you avoid repeating the same mistake.
Identifying The Type Of Floor Stain Problem
Not all stain problems are the same. Look closely at your floor and identify the exact issue. This helps you choose the right fix.
Common Floor Stain Problems
- Blotchy Appearance: Some areas are darker or lighter than others.
- Lap Marks: Overlapping strokes show visible lines or streaks.
- Dark Patches: Certain spots absorbed more stain, looking much darker.
- Light Spots: Areas that rejected stain or were missed during application.
- Sticky or Tacky Finish: The stain never fully dried, often feeling gummy.
- Uneven Color: The overall tone varies across the floor.
- Peeling or Flaking: The stain or finish is coming off in places.
Each problem needs a slightly different solution. For example, blotchiness often comes from poor sanding or not using a pre-stain conditioner, while sticky finishes are usually due to applying too much product or not wiping off the excess.
Essential Tools And Materials For Fixing Bad Stain Jobs
Before starting the repair, gather the right tools and materials. Having everything ready makes the process smoother and helps you avoid mistakes.
Must-have Tools
- Orbital sander (for large areas)
- Hand sanding block
- Sandpaper (grits: 80, 120, 150, 220)
- Clean rags (lint-free)
- Vacuum cleaner
- Tack cloths
- Wood stain (same color as original)
- Pre-stain wood conditioner
- Mineral spirits (for oil-based stains)
- Protective gloves
- Painter’s tape
- Small paintbrushes (for spot repairs)
- Polyurethane or other floor finish
Optional But Helpful
- Floor buffer (for very large rooms)
- Mask (to avoid inhaling dust or fumes)
- Knee pads (for comfort)
Using high-quality materials is important. Cheap rags or old sandpaper can leave fibers or scratches, making the repair look worse.
Evaluating The Damage: Spot Repair Vs Full Restoration
Not every bad stain job needs a full redo. Sometimes you can fix only the problem areas. Here’s how to decide:
When To Do Spot Repairs
- The problem is limited to a few small areas.
- The floor is otherwise in good shape.
- The color difference is not extreme.
When Full Restoration Is Needed
- The stain is uneven everywhere.
- There are major color differences across the floor.
- The finish feels sticky or peels over large areas.
Most people can save time and money by doing spot repairs, but know when a full strip and restain is the best choice.
Credit: paradigmconcretefl.com
Step-by-step Guide: How To Fix A Bad Floor Stain Job
Now let’s dive into the process. The right steps depend on your exact problem, but the following guide covers the most common situations.
Step 1: Clean And Inspect The Floor
Start by thoroughly cleaning the floor. Use a vacuum to remove dust, then wipe with a damp rag. This helps you see the true extent of the problem. Mark the worst spots with painter’s tape so you don’t miss them.
Step 2: Test A Small Area
Before you begin any repair, always test your method on a small, hidden area. This avoids making the problem worse. For example, a closet corner or under a piece of furniture works well.
Step 3: Fixing Minor Blotches And Light Spots
If you have only a few blotches or missed spots:
- Lightly sand the affected area with 150-220 grit sandpaper, feathering the edges into the good wood.
- Wipe away dust with a tack cloth.
- Apply pre-stain conditioner (if you skipped this before), let it dry.
- Using a small brush or rag, carefully apply the stain. Match the original color.
- Wipe off excess after 5-10 minutes.
- Let dry, then check if the color matches. Repeat if necessary.
- Once satisfied, reapply finish (polyurethane) to blend with the rest.
Step 4: Dealing With Dark Patches Or Lap Marks
For darker spots or visible lines:
- Sand the area with 120 grit sandpaper, focusing on the dark patch.
- Feather the edges so there’s no hard line between sanded and unsanded wood.
- Clean thoroughly.
- Apply a thin layer of matching stain. Wipe off quickly to avoid over-darkening.
- If the area is still too dark, repeat the sanding process.
- Once the color is even, reapply finish.
This technique works because sanding removes excess pigment, then you can control how much new stain you add.
Step 5: Fixing Sticky Or Tacky Stain
If the stain still feels sticky after 24-48 hours, it likely means too much stain was applied or it wasn’t wiped off properly.
- Try wiping the area with a rag dampened in mineral spirits (for oil-based stains). This can remove uncured stain.
- If that doesn’t work, sand lightly and reapply stain correctly.
- Let dry fully before adding finish.
Never apply finish over sticky stain; it will only get worse.
Step 6: Repairing Peeling Or Flaking Stain
Peeling usually means the stain or finish didn’t bond to the wood.
- Scrape off loose material with a plastic scraper.
- Sand the area to bare wood.
- Clean the dust.
- Apply pre-stain conditioner.
- Stain and finish as before.
Step 7: Full Floor Restoration (if Needed)
If the entire floor is a mess:
- Sand the whole floor using an orbital sander. Start with 80 grit, then 120, finishing with 150 or 220.
- Vacuum and wipe with tack cloths.
- Apply pre-stain conditioner to the entire floor.
- Stain evenly, working in small sections. Always wipe off excess.
- Let dry as recommended by the stain manufacturer.
- Apply two or three coats of finish for protection.
While this is more work, it’s sometimes the only way to achieve a consistent, attractive result.
Professional Tips For A Perfect Fix
Most beginners miss a few key tricks that can make the difference between an average fix and a seamless repair. Here are two non-obvious insights:
- Feathering Is Essential: When sanding or applying stain, always feather the edges. This avoids creating visible lines between old and new stain. Use a light touch and blend gradually outward.
- Color Testing Under Lighting: The color of wood stain can look very different under natural versus artificial light. Always check your repair at different times of day to make sure it blends well.
Another expert tip: Humidity and temperature matter a lot. Staining in high humidity or cold can slow drying, while hot, dry air can cause uneven absorption. Aim for a room temperature of 65-75°F and moderate humidity.
Common Mistakes To Avoid
Fixing a bad stain job can go wrong if you’re not careful. Here are the biggest mistakes to watch out for:
- Skipping sanding: Even minor repairs need sanding to blend the edges.
- Not cleaning thoroughly: Dust and dirt can ruin a new stain coat.
- Using the wrong stain color: Even “matching” stains can look different on your wood. Always test first.
- Applying too much stain: More is not better. Wipe off excess after a few minutes.
- Not letting stain dry fully: Rushing to apply finish can trap moisture and cause peeling.
- Ignoring safety: Always wear gloves and a mask when sanding or staining.
Comparing Stain Repair Methods
Choosing the right repair method depends on your situation. Here’s a comparison of the main approaches:
| Method | Best For | Difficulty | Time Needed | Cost |
|---|---|---|---|---|
| Spot Repair | Small blotches, light or dark patches | Easy-Moderate | 1-2 hours per spot | Low |
| Partial Sand & Restain | Medium areas, lap marks | Moderate | 3-5 hours | Medium |
| Full Sand & Restain | Whole floor, severe problems | Hard | 1-2 days | High |
This helps you plan your repair based on the size of the issue, your skill level, and your budget.
Credit: sparklesurfacecare.com
Choosing The Right Stain And Finish
Not all stains are created equal. If you need to restain, choose the right product for your wood type and room use.
Types Of Wood Stain
- Oil-based stain: Classic choice, deep color, longer drying time.
- Water-based stain: Faster drying, less odor, easy clean-up, but can raise wood grain.
- Gel stain: Thicker, good for vertical surfaces or woods prone to blotching.
Types Of Floor Finish
- Polyurethane (oil or water-based): Durable, common for hardwood floors.
- Wax or shellac: Less durable, more traditional, requires frequent maintenance.
Here’s a quick look at how they compare:
| Product | Drying Time | Durability | Best For |
|---|---|---|---|
| Oil-Based Stain | 6-24 hours | High | Deep color, high-traffic |
| Water-Based Stain | 1-4 hours | Moderate | Quick projects, easy clean-up |
| Gel Stain | 8-24 hours | High | Woods like pine, vertical surfaces |
| Polyurethane | 2-24 hours per coat | Very High | All hardwood floors |
Always check the manufacturer’s recommendations and follow directions carefully.
How To Prevent Bad Stain Jobs In The Future
Prevention is easier than repair. Follow these guidelines for your next project:
- Sand properly: Use the right grit sequence and sand evenly.
- Clean thoroughly: Remove all dust and oils before staining.
- Use pre-stain conditioner: Especially for soft woods like pine, birch, or maple.
- Apply stain evenly: Work in small sections, wipe off excess promptly.
- Let dry fully: Never rush to apply finish.
- Test everything: Always test color, technique, and finish before doing the whole floor.
A little extra time spent on preparation can save hours of frustration later.

Credit: diy.stackexchange.com
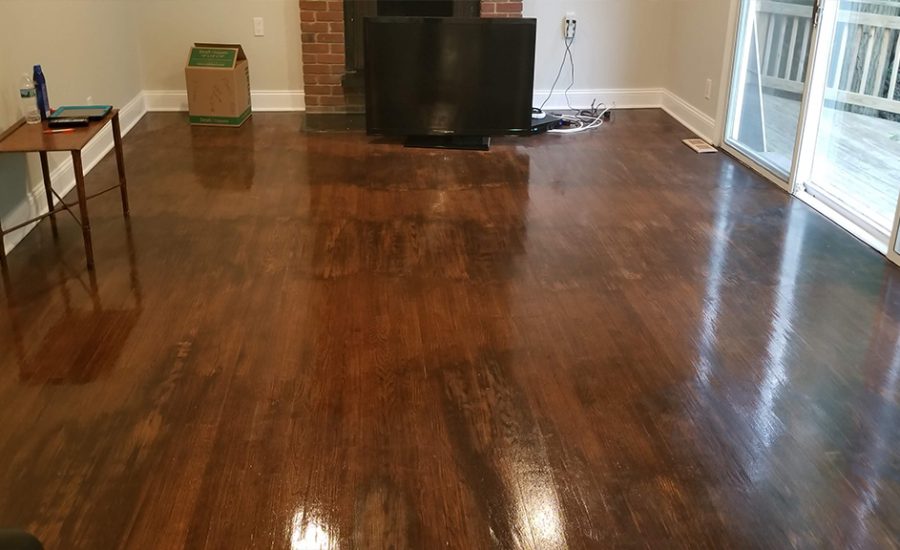
Real-world Example: Fixing A Blotchy Oak Floor
Let’s look at a real-life example. A homeowner stained their oak floor with a dark walnut stain. They skipped the pre-stain conditioner, and the result was a patchy, uneven color with light and dark spots.
What they did:
- Lightly sanded only the worst blotchy areas.
- Applied a pre-stain conditioner and let it dry.
- Carefully reapplied stain by hand, feathering the edges.
- After drying, they applied a water-based polyurethane for durability.
The result? The repaired areas blended almost perfectly with the rest of the floor. The key was patience and careful blending, not starting over from scratch.
When To Call A Professional
While many stain problems can be fixed by a careful DIYer, there are times when hiring a pro is wise:
- The problem covers the entire floor.
- The floor is expensive or historic.
- You don’t have the right tools or experience.
- The wood is damaged or warped.
A professional can sand, stain, and finish the floor quickly, often with better results.
How Much Does It Cost To Fix A Bad Stain Job?
Costs vary depending on the size of the area and the repair needed. Here are some average figures:
- Spot repairs: $20–$100 (mainly materials)
- Partial resanding and restain: $200–$500
- Full professional restoration: $3–$8 per square foot
DIY is usually cheaper, but can take much longer and may not always match professional quality.
Safety And Environmental Tips
Stains and finishes contain chemicals that can be harmful if inhaled or touched. Always:
- Wear gloves and a mask.
- Ventilate the room well.
- Dispose of rags safely. (Oily rags can catch fire if stored improperly. Always let them dry flat or soak in water before throwing away.)
- Avoid sanding lead-based finishes in older homes.
For more safety advice on finishing floors, you can visit the EPA’s guide.
Frequently Asked Questions
How Do I Fix A Stain That Is Too Dark?
Start by lightly sanding the dark area with fine-grit sandpaper, being careful to feather the edges. Clean away dust, then apply a matching stain lightly and wipe off quickly. Repeat as needed. If the whole floor is too dark, full sanding and restaining may be needed.
Can I Lighten A Stained Floor Without Sanding?
It’s very difficult to lighten a stain without sanding. You can try wiping the area with mineral spirits or a wood bleach, but results are often uneven. For best results, sanding is usually required.
Why Is My Floor Stain Sticky After Several Days?
Sticky stains happen when too much product is left on the wood or the room is too humid or cold. Try wiping with mineral spirits. If that fails, sand the area and reapply the stain properly.
Can I Restain Over A Bad Stain Job?
You should not apply new stain over old stain or finish. The new stain won’t absorb and will look uneven. Always sand down to bare wood, clean, and then restain for best results.
What Is The Best Way To Match Stain Color For Repairs?
Test several stain samples on a hidden piece of the same wood, under the same lighting. Buy small tester pots if available. Even stains with the same name can look different, so always test before committing.
Fixing a bad floor stain job may seem overwhelming, but with patience and the right methods, you can restore your floor’s beauty. Whether you’re tackling a small blotch or a major disaster, follow the steps in this guide, avoid common mistakes, and you’ll be proud of your results.
Remember, preparation and testing are the keys to a flawless finish.