Cleaning sanded wood is a critical step in woodworking, home renovation, and crafting. Whether you are preparing furniture for painting, getting a floor ready for staining, or creating a smooth surface for a handmade project, the way you clean sanded wood will directly affect your results.
Many people overlook this step, thinking that sanding alone is enough. However, even the best sanding can leave behind fine dust and debris that can ruin finishes, cause blotches, or weaken adhesives. If you want your woodwork to look professional, last longer, and feel smooth, learning how to clean sanded wood properly is essential.
This guide breaks down everything you need to know about cleaning sanded wood. You will discover not only the basic methods but also advanced tips, product comparisons, and solutions for tricky situations. Whether you are a beginner or have some experience, you will find clear explanations and practical advice that will help you avoid common mistakes and achieve the best results.
Why Cleaning Sanded Wood Matters
After sanding, wood may look clean, but it isn’t. Tiny dust particles get trapped in the surface and grain. If you skip cleaning or do it poorly, problems can follow:
- Poor finish adhesion: Paint, stain, and varnish need a clean surface to stick well. Leftover dust can prevent even coverage and cause peeling.
- Visible imperfections: Dust left behind can get trapped under finishes, creating bumps or a cloudy look.
- Surface damage: Some cleaning methods (like using water incorrectly) can raise the grain or scratch the wood.
- Health risks: Fine wood dust can be harmful if left in your workspace, causing breathing problems or allergies.
Understanding these risks makes it clear why cleaning is just as important as sanding itself.
Tools And Materials Needed
Before starting, gather the right tools and materials. Using the correct items makes the process easier and more effective.
- Vacuum cleaner with a soft brush attachment
- Tack cloth (a sticky cheesecloth used for dust removal)
- Microfiber cloths
- Compressed air (optional, for small crevices and carvings)
- Lint-free rags
- Denatured alcohol or mineral spirits (for deep cleaning or removing oily residues)
- Soft paintbrush
- Gloves and a mask (for safety, especially with solvents or fine dust)
- Clean water and a spray bottle (for some methods)
- Bucket (if using water-based cleaning)
- Mild dish soap (for sticky or greasy surfaces)
Not all tools are needed for every job. Pick what fits your project and wood type.
Step-by-step Process: How To Clean Sanded Wood
The method you choose depends on your project, wood type, and finish plan. Here’s a detailed, step-by-step approach that covers all situations.
1. Remove Loose Dust
Start by clearing away as much loose dust as possible.
- Use a vacuum cleaner with a soft brush attachment. Move gently along the grain to avoid scratching.
- For intricate areas or carvings, use compressed air or a soft paintbrush to get dust out of corners.
- Be thorough, especially on table edges, chair legs, or moldings where dust can hide.
Pro tip: Always vacuum before wiping. If you wipe first, you may press dust deeper into the wood’s pores.
2. Wipe With A Dry Cloth
Next, pick up remaining dust using a cloth.
- A microfiber cloth works best because it traps dust instead of spreading it.
- Wipe gently in the direction of the grain.
- Change cloths if they become dirty to avoid redepositing dust.
Non-obvious insight: Many beginners use paper towels, which can leave behind lint and even scratch soft woods. Microfiber is much safer and more effective.
3. Use A Tack Cloth
A tack cloth is a sticky piece of cheesecloth designed to lift the finest dust particles.
- Gently drag the tack cloth over the wood’s surface.
- Do not press hard, as tack cloths can leave residue if overused.
- Replace the cloth once it loses stickiness.
Common mistake: Pressing too hard or using a dirty tack cloth can add more problems than it solves.
4. Wet Cleaning (if Needed)
For some projects, a slightly damp method helps remove stubborn dust or grease.
- Use a clean, lint-free cloth dampened (not soaked) with water or a water and mild soap mix.
- Wipe the wood lightly. Never use a wet cloth—water can raise the grain or warp the wood.
- Dry the surface immediately with a dry cloth.
- Only use this method on wood that will be painted or sealed soon, not bare wood that will stay unfinished.
Advanced tip: On oily or resinous woods (like teak), use a cloth dampened with denatured alcohol or mineral spirits for better cleaning. Always test in a hidden area first.
5. Final Inspection
After cleaning, check your work:
- Use a bright light or flashlight to inspect the surface from different angles. Dust is more visible under raking light.
- Feel the surface with your hand. It should feel smooth and dust-free.
- If needed, repeat the cleaning steps until satisfied.
Comparing Cleaning Methods
Different cleaning methods work better in different situations. Here’s a comparison to help you choose:
| Method | Best For | Pros | Cons |
|---|---|---|---|
| Vacuuming | All wood types, flat and large surfaces | Quick, efficient, minimal scratching | May miss fine dust in pores |
| Microfiber cloth | Delicate, soft woods | No residue, easy to use | Needs frequent cleaning |
| Tack cloth | Final dust removal before finishing | Removes ultra-fine dust | May leave sticky residue if overused |
| Damp cloth | Greasy or sticky surfaces | Removes more than just dust | Risk of raising grain or warping |
| Compressed air | Intricate carvings or moldings | Excellent for hard-to-reach spots | Can blow dust into the air |
When To Use Solvents
Sometimes, dust is not the only problem. Oily residues, fingerprints, sap, or wax can prevent finishes from sticking. In these cases, solvents like denatured alcohol or mineral spirits are useful.
- Dampen a lint-free cloth with the solvent (never soak the wood).
- Wipe gently in the direction of the grain.
- Let the wood dry completely before finishing.
- Always work in a well-ventilated area and wear gloves.
Note: Never use harsh chemicals like acetone, which can damage many wood types.
Cleaning Different Types Of Wood
Different woods respond differently to cleaning methods. Here’s how to adjust your approach:
Hardwoods (oak, Maple, Cherry)
- Usually tolerate vacuuming, tack cloths, and microfiber cleaning.
- For open-grain woods like oak, dust can hide in pores—use a vacuum and compressed air for best results.
Softwoods (pine, Cedar, Fir)
- Softer surfaces scratch more easily. Use only microfiber or tack cloths—avoid stiff brushes.
- Do not use wet cleaning unless necessary, as softwoods absorb water quickly.
Exotic Woods (teak, Mahogany, Rosewood)
- Some have natural oils that can interfere with finishes.
- Clean with a solvent like denatured alcohol after removing dust to eliminate surface oils.
Engineered Woods (plywood, Mdf)
- Vacuuming and microfiber cloths are best.
- Avoid wet cleaning, as engineered woods absorb water and can swell.
Special Situations And Advanced Tips
Sometimes, you’ll face tricky cleaning problems. Here’s how to handle them.
Cleaning Sanded Wood With Deep Grain
Woods like oak or ash have open grain that traps dust.
- Use a vacuum with a brush attachment, then follow with compressed air to blow dust from the pores.
- After air, use a tack cloth gently.
- For stubborn dust, lightly dampen a soft brush with mineral spirits to lift particles.
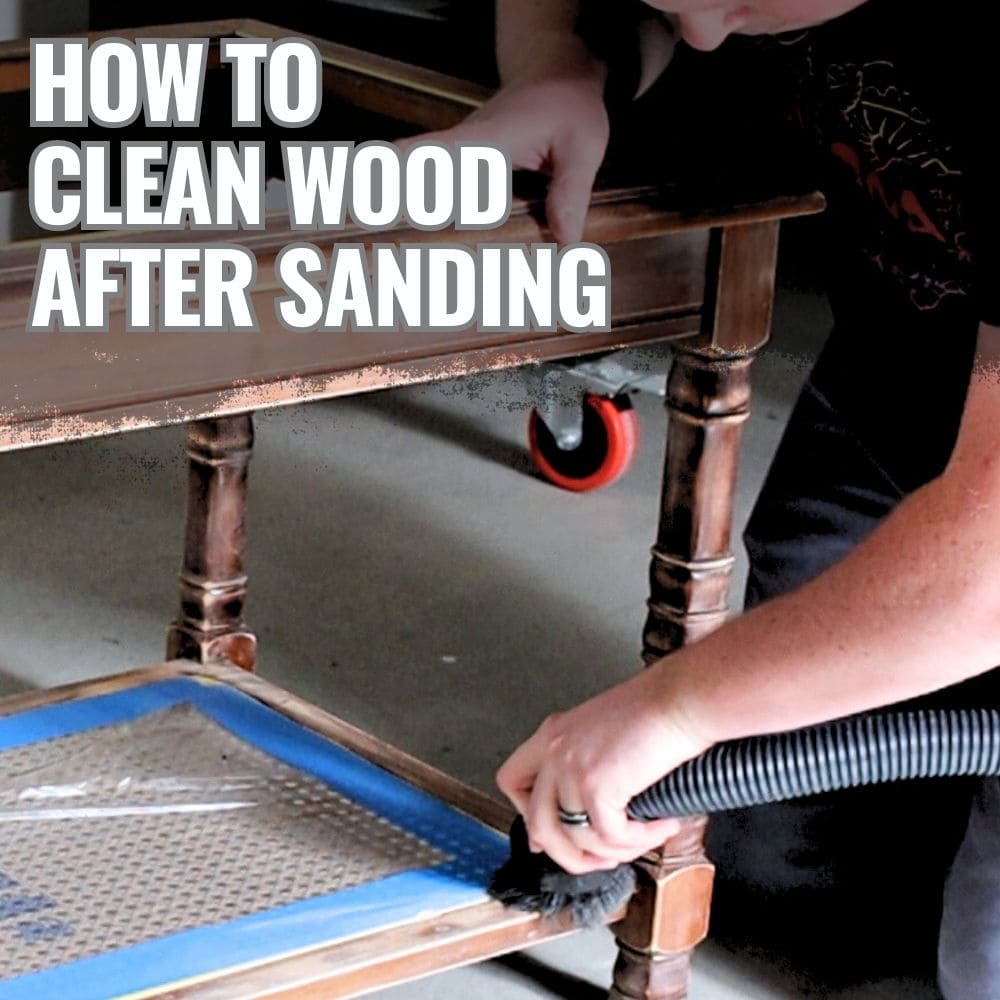
Cleaning Sanded Wood Furniture
Furniture often has curves, joints, and carvings.
- Use a small, soft paintbrush to loosen dust from corners.
- Follow with a vacuum and then a tack cloth.
- Inspect carefully, as dust left in joints will show up after staining or painting.
Cleaning Floors After Sanding
Wood floors require extra care due to their size and heavy use.
- Start with a thorough vacuuming, including edges and corners.
- Use a damp microfiber mop (almost dry) to pick up any fine dust.
- Allow the floor to dry fully before applying stain or finish.
Removing Stains Or Grease
If you find sticky spots or old stains, use a cloth dampened with mild soap and water or a solvent. Rinse and dry quickly. Never soak the wood.
Insider advice: Always let wood acclimate to room temperature after cleaning. Moisture, even from air, can affect the finish if you rush into sealing or staining.
Mistakes To Avoid
Many beginners make the same errors when cleaning sanded wood. Here’s what to watch out for:
- Using too much water: Wood is highly absorbent. Excess water can cause swelling, raised grain, or warping.
- Skipping tack cloths: Relying only on vacuuming or dry cloths often leaves fine dust behind.
- Pressing too hard: Aggressive cleaning can scratch or dent the surface, especially on softwoods.
- Not changing cloths often enough: Dirty cloths redeposit dust. Always use clean cloths for the final wipe.
- Ignoring safety: Fine wood dust can be harmful. Wear a mask and gloves, especially when using solvents.
Prepping For Different Finishes
How you clean sanded wood depends on the finish you plan to use.
For Staining
- Wood must be completely dust-free. Even small particles show up as dark spots.
- Avoid any residue from cleaning products, especially if using a water-based stain.
For Painting
- Cleaning can be a bit more forgiving, but dust will make the paint less smooth.
- If using latex paints, a damp cloth followed by tack cloth gives the best base.
For Clear Varnish Or Polyurethane
- The surface must be perfectly clean, as clear finishes highlight any trapped dust.
- Final pass with a tack cloth is essential.
For Oiling Or Waxing
- Remove all dust, but avoid water-based cleaning. Oil finishes don’t mix well with water.
- Use a cloth dampened with mineral spirits for the final clean.
How Often Should You Clean Sanded Wood?
For most projects, clean the wood after every sanding step. For example, if you sand with 80, 120, and 220 grit, clean after each stage. This prevents buildup and ensures each sanding level does its job.
Data point: Professional woodworkers spend up to 30% of their project time on cleaning and prep, not just sanding. This shows how critical proper cleaning is to the final result.

Credit: boldwallflowers.com
Eco-friendly Cleaning Options
For those concerned about the environment, there are green options:
- Use reusable microfiber cloths instead of disposable wipes.
- Choose plant-based soaps for damp cleaning.
- Avoid harsh chemicals; mineral spirits can be replaced with eco-friendly versions available at many hardware stores.
- Collect and properly dispose of sanding dust, as it can be used in compost for untreated wood.
Troubleshooting Common Problems
Even with care, issues can arise. Here’s how to fix them:
Raised Grain After Cleaning
Sometimes, damp cleaning raises the wood fibers, making the surface rough again.
- Let the wood dry fully.
- Lightly sand with the last-used grit (usually 220) to smooth the surface.
- Clean again with a dry cloth and tack cloth.
Dust Reappearing
Dust can settle from the air after you finish cleaning.
- Clean the workspace thoroughly before starting.
- Wait a few minutes after cleaning, then wipe down again before finishing.
- If possible, use an air purifier or vacuum with a HEPA filter.
Sticky Residue From Tack Cloth
This happens if you press too hard or use a poor-quality tack cloth.
- Lightly wipe the area with a clean microfiber cloth.
- If residue remains, use a little denatured alcohol on a cloth to remove it, then re-clean with a dry cloth.

Credit: floorsanding.co.uk
Comparison: Tack Cloths Vs. Microfiber Cloths
Both are popular, but which is best? Here’s a quick side-by-side:
| Feature | Tack Cloth | Microfiber Cloth |
|---|---|---|
| Removes Fine Dust | Excellent | Very Good |
| Leaves Residue | Possible | No |
| Reusable | No | Yes |
| Best For | Final Clean Before Finishing | General Cleaning, All Steps |
| Cost | Low | Medium |
Preparing Your Workspace
A clean workspace is as important as clean wood. Dust in the air and on nearby surfaces can undo your hard work.
- Cover floors and benches with clean drop cloths.
- Vacuum the area before and after sanding.
- Use a shop vacuum with a HEPA filter for best results.
- Keep pets and foot traffic away during cleaning and finishing.
Hidden insight: Dust can stay airborne for hours. If possible, let the room settle for an hour after major cleaning, then do a final dust-off.
Safety Precautions
Cleaning sanded wood is usually safe, but there are hazards:
- Wear a dust mask to avoid inhaling fine particles.
- Use gloves when handling solvents.
- Ensure good ventilation, especially with chemical cleaners.
- Store tack cloths and solvents away from heat, as they can be flammable.
Real-world Example: Cleaning A Sanded Tabletop
Imagine you have just sanded a dining table and want a flawless finish.
- Vacuum the surface and edges with a brush attachment.
- Use a microfiber cloth to pick up any missed dust.
- Wipe with a tack cloth for the final clean.
- Check for sticky spots or fingerprints—clean with mineral spirits if needed.
- Inspect with a bright light for any missed dust.
- Wait 10 minutes, then wipe once more with a clean, dry cloth before applying your finish.
Following these steps avoids common pitfalls, like dust bumps or uneven stain, and results in a smooth, beautiful tabletop.
Credit: arayofsunlight.com
Frequently Asked Questions
How Do I Know If The Wood Is Clean Enough After Sanding?
Shine a bright light at a low angle across the surface. If you see dust or haze, clean again. Run your hand lightly over the surface—it should feel smooth, not gritty. For critical projects, use both visual and touch tests.
Can I Use Just A Vacuum To Clean Sanded Wood?
A vacuum is a great first step but not enough alone. Vacuums may miss ultra-fine dust that hides in the grain. Always follow with a microfiber or tack cloth for the best results.
Is It Safe To Use Water On Sanded Wood?
Use water very carefully. Only a slightly damp, not wet, cloth is safe, and only when needed. Too much water can raise the grain or cause swelling, especially in softwoods and engineered woods.
What’s The Best Way To Clean Wood Before Staining?
Use a vacuum, then a microfiber cloth, and finish with a tack cloth. Avoid cleaners that leave residue, and make sure the wood is completely dry and dust-free before applying stain.
Are Tack Cloths Necessary For Every Project?
Tack cloths are not always required but are highly recommended for the final clean before finishing, especially when using clear finishes or stains. They help ensure no fine dust is left behind.
For more in-depth information about wood finishing, see this Wikipedia guide on wood finishing.
Cleaning sanded wood is more than just a quick wipe—it’s a key step for a flawless finish. With the right tools, a careful process, and attention to detail, you’ll set the stage for beautiful, lasting results in all your wood projects.