
Keeping your oven clean is not just about looks—it’s also about food safety and performance. One part many people forget is the oven door gasket. This rubbery strip forms a tight seal when the oven door is closed, holding heat in and keeping energy use low. But over time, food spills, grease, and crumbs can build up on the gasket, making it dirty and less effective. If ignored, a dirty gasket can cause heat to escape, bake food unevenly, or even damage the oven itself.
Learning how to clean your oven door gasket is a simple but important kitchen skill. It saves money, keeps your oven working efficiently, and helps avoid repairs. In this guide, you’ll discover the best ways to clean your oven door gasket, what tools you need, and smart tips that even experienced home cooks sometimes miss.
We’ll also cover mistakes to avoid and answer common questions at the end. Whether you’re a busy parent, a college student, or a first-time homeowner, you’ll find everything you need to keep your oven in top shape.
Understanding The Oven Door Gasket
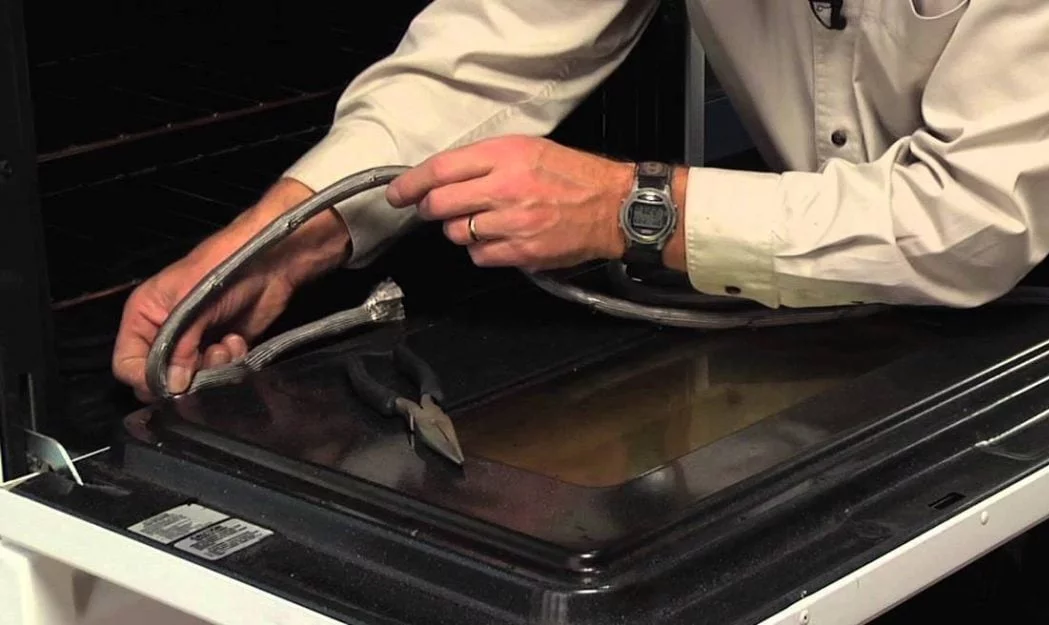
The oven door gasket is a flexible, heat-resistant seal—usually made from silicone or fiberglass—lining the edge of your oven door. Its main job is to keep hot air inside, which helps your oven heat evenly and cook food properly. Some gaskets are dark gray or black, while others are lighter, but all are designed to withstand high temperatures and repeated use. Without this seal, your oven would lose heat quickly, making it hard to bake or roast foods correctly.
Why The Gasket Gets Dirty
Every time you open your oven, steam, grease, and crumbs can escape. Over time, these particles settle into the gasket’s grooves, making it sticky and grimy. The soft material can also absorb oils and food residue, which can lead to bad smells or even mold.
Cooking foods like casseroles, pizzas, or baked goods can create splashes that land directly on the gasket. Even simple activities, such as wiping spills from the oven floor, can push crumbs into the gasket’s folds.
It’s easy to overlook the gasket since it’s out of direct sight. However, after a few months, you might notice a sticky layer or dark stains forming, especially if you cook foods with cheese, sauces, or oils. These residues can attract more dirt and cause the gasket to deteriorate faster.
Signs Your Gasket Needs Cleaning
- Sticky or greasy feel: If you touch the gasket and your fingers feel oily or sticky, dirt is present.
- Visible crumbs or food bits: Look closely for small pieces of food lodged in the folds.
- Dark stains or discoloration: Changes in color can mean old spills or burnt residue.
- Burnt smells when oven is on: Odors often come from debris stuck to the gasket heating up.
- Oven door doesn’t close tightly: If the door feels loose or you see gaps, dirt might be blocking the seal.
If you notice any of these signs, it’s time to clean the gasket. Regular checks can prevent bigger problems later, like uneven cooking or higher energy bills.
Tools And Supplies You’ll Need
Cleaning your oven door gasket doesn’t require fancy equipment. In fact, you probably have most supplies at home. Here’s what you’ll need:
- Soft sponge or cloth: For gentle scrubbing without scratching the gasket. Microfiber cloths work well since they pick up fine debris.
- Old toothbrush or small brush: To reach into folds and corners. Toothbrushes are excellent for detailed cleaning because their bristles fit into small spaces.
- Mild dish soap: Cuts grease without damaging the material. Choose a soap that’s fragrance-free if you’re sensitive to smells.
- Baking soda: A gentle abrasive for tough stains. It’s safe and effective for removing stuck-on grime.
- White vinegar: Helps break down grime and deodorize. Vinegar also neutralizes odors that can linger in the gasket.
- Small bowl: For mixing cleaning solutions. This keeps your cleaning liquids contained and easy to use.
- Spray bottle: For even application of cleaners. Spraying ensures you don’t soak the gasket.
- Paper towels or microfiber cloths: For drying and wiping. Microfiber cloths absorb water quickly and leave the gasket dry.
- Cotton swabs: For tiny crevices. These are useful for the edges where the gasket meets the oven frame.
Optional Items
- Plastic scraper: For dried-on gunk (never use metal). Use gently to avoid damaging the gasket.
- Rubber gloves: Protects your hands from grime. Gloves are especially helpful if you have sensitive skin or are cleaning after a messy spill.
It’s important to avoid harsh chemicals, scouring pads, or anything that could tear or weaken the gasket. Using the right tools makes cleaning easier and protects your oven’s seal for years.
Credit: allthingshome.ca
Step-by-step Guide To Cleaning The Oven Door Gasket
Let’s break down the cleaning process into clear steps. Plan for about 20–30 minutes, depending on how dirty your gasket is. If your oven is older or you cook frequently, it may take a bit longer, so be patient and thorough.
1. Safety First: Turn Off And Cool Down
Always make sure your oven is completely off and cool before you start cleaning. Cleaning a hot gasket can cause burns or damage the seal. If your oven was recently used, wait at least an hour before starting. If you’re unsure, touch the oven door briefly to check for warmth.
2. Inspect The Gasket
Run your fingers gently along the gasket. Check for:
- Loose spots or cracks: These can mean the seal is failing.
- Tears or gaps: Dirt often hides in these areas.
- Heavy buildup: Look for dark, thick spots that need extra attention.
If the gasket is damaged, cleaning won’t fix it—you may need to replace it. But if it’s just dirty, you’re ready for the next step. Sometimes, the gasket might be slightly out of place; gently press it back into the groove if needed.
3. Remove Loose Debris
Use a dry paper towel or a soft brush to sweep away crumbs and loose dirt. Pay attention to the folds and corners. This step makes the later cleaning easier and prevents spreading grime around.
Pro tip: Tilt the oven door downward while brushing so debris falls onto a towel or the floor for easy cleanup.
4. Prepare Your Cleaning Solution
In a bowl, mix a few drops of dish soap with warm water. If you’re dealing with stubborn grime, sprinkle a little baking soda on the sponge or directly on the gasket for extra cleaning power. For a natural deodorizer, add a teaspoon of vinegar to the mix.
If you want a more paste-like cleaner, combine baking soda and water until it forms a thick paste. This paste sticks to the gasket better and works well for deep stains.
5. Scrub The Gasket Gently
Dip your sponge or cloth in the soapy water. Squeeze out excess water—the gasket should not get soaked. Wipe along the entire gasket, gently working into the folds. Move slowly to avoid missing any spots.
For stubborn spots, dip a toothbrush in the solution and scrub lightly. If you use baking soda, let it sit for 5 minutes before wiping clean. Baking soda’s mild abrasive action lifts grease without scratching the surface.
If you notice sticky residue, try using a circular motion with the sponge. This can help loosen grime more effectively than straight strokes.
6. Tackle Tough Grime With Vinegar
If grease or stains remain, spray a small amount of white vinegar onto the gasket. Let it bubble and fizz for a few minutes. Then wipe with a clean, damp cloth. Vinegar works well on old, oily stains and helps neutralize bad odors.
Pro tip: Never let vinegar soak for too long; rinse the gasket well so acid doesn’t damage the material. If you see foam or bubbling, that’s normal—it means the vinegar is breaking down residue.
7. Clean Small Crevices
For corners and tight spots, use a cotton swab or an old toothbrush. This helps remove hidden grime that a sponge can’t reach. Rotate the swab or brush often to prevent spreading dirt.
If you see buildup where the gasket meets the oven frame, gently lift the edge and clean underneath with a swab. Be careful not to pull too hard.
8. Dry The Gasket Thoroughly
Wipe the gasket with a dry cloth or paper towel. Moisture left behind can cause mold or weaken the adhesive. Microfiber cloths are best because they absorb water quickly and leave the surface dry.
If you cleaned with vinegar, wipe again with a damp cloth to remove any leftover acid.
9. Re-inspect For Cleanliness
Check your work in bright light. If any sticky or dirty spots remain, repeat the cleaning process. A clean gasket should look even, feel soft, and be free of food or grease. Run your fingers along the gasket to make sure it feels smooth and not sticky.
If you see stains that won’t come off, but the gasket is flexible and seals well, it’s usually safe to keep using your oven. The goal is cleanliness and function, not perfect appearance.
10. Leave The Oven Door Open
After cleaning, leave the oven door slightly open for at least 30 minutes. This helps the gasket dry completely and prevents mildew. Air drying is important because trapped moisture can lead to mold or odors.
If you’re in a humid climate, leave the door open longer or use a fan to speed up drying.
Tips For Long-lasting Gasket Health
Regular cleaning keeps your oven efficient and prevents damage. Here’s how to extend the life of your gasket:
- Wipe spills immediately. Don’t let food or grease sit for long. Quick action keeps stains from setting.
- Clean the gasket monthly. More often if you bake frequently. Set a reminder so you don’t forget.
- Don’t use sharp tools. Even a small tear can ruin the seal. Always use plastic or wooden tools if scraping is needed.
- Avoid harsh chemicals. Stick to mild soap, baking soda, and vinegar. Strong cleaners can dry out or crack the gasket.
- Check the gasket’s fit. If it feels loose, gently press it back into place. Make sure it sits evenly around the door.
Extra tip: If your oven door is hard to close, check for dirt under the gasket and clean it out. Sometimes small bits of food block the seal.

Credit: www.youtube.com
Common Mistakes To Avoid
Even experienced cooks make these errors when cleaning oven gaskets. Avoid them to keep your oven working its best.
Using Too Much Water
Soaking the gasket can loosen adhesives or cause mold. Always use a damp, not wet, sponge. Excess water can drip inside the oven, leading to hidden mold or rust.
Scrubbing Too Hard
Aggressive scrubbing can tear or stretch the gasket. Use soft tools and gentle pressure. If you need extra cleaning, repeat the process instead of scrubbing harder.
Ignoring Hidden Buildup
Crumbs often hide in the corners or under the gasket lip. Be thorough, or dirt will quickly build up again. Use a flashlight to spot debris in hard-to-see areas.
Using Bleach Or Strong Chemicals
These can break down the gasket material, leading to cracks and leaks. Mild cleaners are best. Bleach can also leave harmful fumes inside your oven.
Forgetting To Dry
A wet gasket can attract dirt and cause odors. Always dry completely after cleaning. If you forget to dry, moisture may cause the gasket to stick to the oven door, making it hard to open.
When To Replace Your Oven Door Gasket
Even with great care, gaskets eventually wear out. Here’s how to know when cleaning isn’t enough:
- Visible cracks, tears, or missing pieces: These can cause heat leaks and uneven cooking.
- Gasket feels hard or brittle: A healthy gasket should be flexible.
- Oven heat escapes during baking: If you feel warmth around the door, the seal is failing.
- Door doesn’t close tightly: Dirt or damage may prevent a snug fit.
A damaged gasket can’t seal heat, making your oven less efficient and more expensive to run. Sometimes, you’ll notice steam escaping during baking or a sudden drop in oven temperature.
How To Find The Right Replacement
Check your oven’s brand and model number, usually found on a label inside the door. Search for a gasket designed for your specific oven. Installation is often simple—most gaskets push into a groove around the door. If you’re unsure, look up a video tutorial or ask a professional.
Here’s a quick comparison of cleaning versus replacing:
| Cleaning Gasket | Replacing Gasket |
|---|---|
| Removes dirt, grease, and odors | Fixes cracks, gaps, or loose seals |
| Inexpensive (household cleaners) | Costs $15–$50 (plus possible labor) |
| Takes 20–30 minutes | Takes 30–60 minutes |
| Restores appearance and some function | Restores full sealing ability |
How A Clean Gasket Improves Oven Performance
A clean, well-sealed gasket does more than just look nice. Here’s what you gain:
- Faster heating: Seals in heat so your oven warms up quickly. This can save time, especially when preheating.
- Even baking: Prevents hot spots or undercooked food. Baked goods come out more consistent.
- Lower energy bills: Less heat escapes, so your oven uses less power. Over a year, this can add up to noticeable savings.
- Better safety: Stops spills and fumes from escaping. Grease and smoke stay inside the oven.
- Longer oven life: Keeps other oven parts from overheating. A tight seal protects sensitive components.
According to the US Department of Energy, a well-sealed oven can use up to 20% less energy than one with a worn gasket. That’s good for your wallet and the environment.
Natural Cleaning Solutions Vs. Commercial Cleaners
There are plenty of products for cleaning ovens, but most are too harsh for gaskets. Let’s compare options:
| Natural Cleaners | Commercial Oven Cleaners |
|---|---|
| Baking soda, vinegar, dish soap | Sprays, foams, gels with strong chemicals |
| Safe for most gasket materials | Can damage rubber or silicone |
| Gentle cleaning action | Strips grease quickly but may cause cracks |
| Environmentally friendly | May cause strong fumes or residue |
| Low cost | Usually more expensive |
Expert tip: If you’re not sure what your gasket is made of, always start with natural cleaners. Most oven manufacturers recommend natural cleaning for gaskets to avoid voiding warranties.
Special Cases: Self-cleaning Ovens And High-end Models
Some ovens have self-cleaning cycles. These heat the oven to very high temperatures to burn off food. However, self-cleaning can be tough on gaskets.
What To Know
- Check the manual: Some manufacturers warn that self-cleaning can shorten gasket life. Always follow the instructions given by your oven maker.
- Remove heavy debris first: Wipe the gasket before using self-cleaning mode. This prevents burnt residue from sticking more firmly.
- Inspect for damage after: High heat can harden or crack old gaskets. If you see new cracks, plan to replace the gasket soon.
If you have a high-end or European brand oven, the gasket may be made from special materials. Always consult your manual before using any cleaner, and never use sharp tools. Some gaskets are designed to be more heat-resistant but can still suffer from improper cleaning.
How Often Should You Clean The Oven Door Gasket?
Frequency depends on how often you cook and what types of food you make.
- Heavy bakers: Clean every 2–4 weeks. Baking often means more spills and crumbs.
- Average use: Clean once a month. This keeps dirt from building up.
- Rare use: Every 3 months, or if you notice dirt. Even if you use the oven rarely, check for dust or old spills.
Cleaning after a big spill or when you see visible grime keeps your oven fresh and safe. Make it part of your regular kitchen routine, like cleaning the stovetop or refrigerator.

Credit: www.youtube.com
Advanced Tips And Non-obvious Insights
Spot-test New Cleaners
Before using any new cleaner (even baking soda or vinegar), spot-test it on a small part of the gasket. This checks for unexpected reactions or discoloration. If the gasket changes color or texture, stop and use only water and mild soap.
Flip The Oven Light On
Bright light can reveal hidden grime or spots you missed. Turn on the oven light or use a flashlight for a careful inspection. Many gaskets look clean in regular light but reveal stains under stronger light.
Check For Warping Or Misalignment
Sometimes, gaskets look fine but don’t seal because the oven door is slightly bent. If the gasket is clean but the door doesn’t seal, check the hinges or door alignment. Misaligned doors can cause uneven cooking and waste energy.
Another insight: If your oven has removable gaskets, take them out for deep cleaning. Not all ovens allow this, but it can make cleaning much easier.
Safety Precautions
- Ventilate your kitchen. Open a window or turn on a fan when cleaning. This helps remove smells from vinegar or soap.
- Wear gloves if sensitive. Dish soap and baking soda are mild, but gloves protect sensitive skin. If you’re cleaning after a spill, gloves keep your hands safe.
- Never mix cleaners. Do not combine vinegar and bleach or other chemicals. Mixing can create dangerous fumes.
If you feel dizzy or smell strong fumes, stop cleaning and air out your kitchen.
Troubleshooting: If The Gasket Still Looks Dirty
Sometimes, even after cleaning, the gasket stays stained. This is common with older ovens.
What To Try
- Repeat cleaning with baking soda paste (let it sit for 10 minutes, then scrub). This often removes deep stains.
- Try a steam clean: Place a bowl of hot water in the oven (turned off, door closed) for 15 minutes, then clean as usual. Steam loosens stuck-on grime.
- If stains won’t budge but the gasket is flexible and seals well, the oven is still safe to use.
If you see cracks or the gasket feels hard, replace it. Stubborn stains are less important than the gasket’s ability to seal.
Environmental Benefits Of Caring For Your Gasket
A clean oven gasket means your oven uses less energy. That reduces your carbon footprint and keeps your utility bills lower. Regular cleaning also means fewer repairs and less waste sent to landfills. It’s a simple step that supports a greener kitchen.
For more on energy-efficient cooking, check out the ENERGY STAR guide to ovens and ranges.
Frequently Asked Questions
How Do I Know If My Oven Door Gasket Is Still Good?
Check for cracks, tears, or missing pieces. A good gasket should feel soft, flexible, and make full contact with the oven frame. If the door doesn’t close tightly or you see heat escaping, it may be time to replace the gasket.
Can I Use Commercial Oven Cleaner On The Gasket?
It’s best to avoid strong commercial cleaners on the gasket. Many contain harsh chemicals that can damage rubber or silicone. Stick to mild dish soap, baking soda, and vinegar for safe, effective cleaning.
How Often Should I Replace My Oven Door Gasket?
Most gaskets last 5–10 years with proper care. Replace it if you see cracks, hard spots, or if the door doesn’t seal properly. Frequent cleaning can extend the life of the gasket.
Is It Safe To Clean The Gasket With Bleach?
No, bleach is too harsh for most oven door gaskets. It can break down the material, causing it to dry out and crack. Use gentle cleaners like dish soap and baking soda instead.
What Happens If I Never Clean My Oven Door Gasket?
A dirty gasket can lead to poor oven performance, higher energy bills, bad smells, and even mold growth. Over time, it can cause the gasket to fail, requiring a replacement and possible oven repairs.
Keeping your oven door gasket clean is a simple task with big benefits. It helps your oven cook better, saves money, and keeps your kitchen safe. With these steps, tips, and answers, you’re ready to handle oven gasket care like a pro.