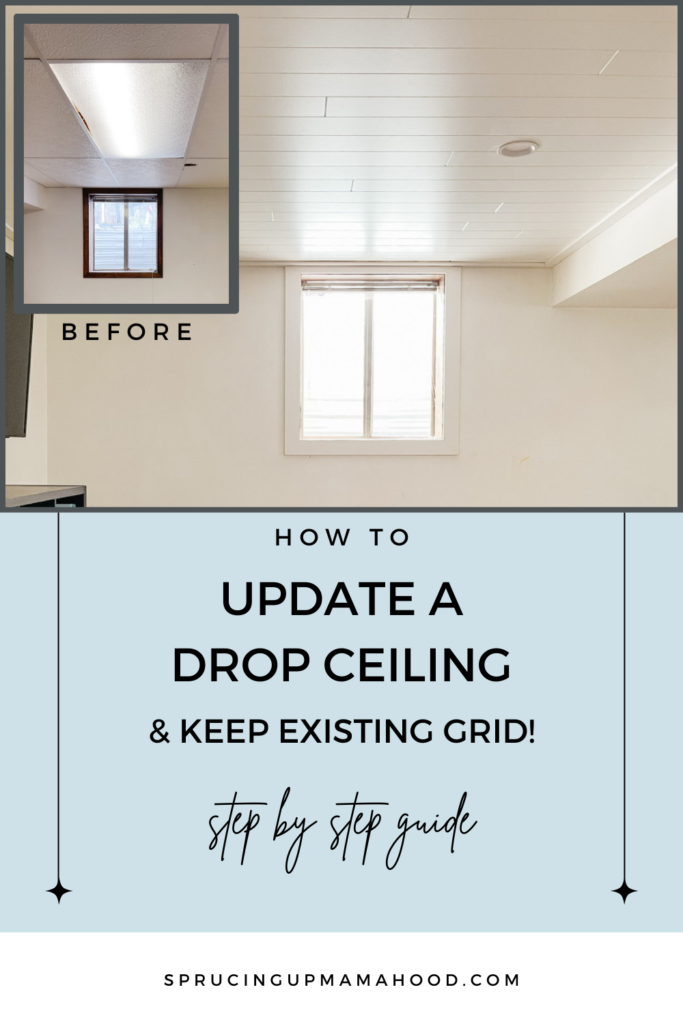
Changing a drop ceiling can transform the look and feel of any space. Many offices, basements, and older homes use drop ceilings—sometimes called suspended ceilings—for practical reasons. They hide pipes, wires, and ductwork, and make it easy to access these systems later.
But over time, drop ceilings can look stained, damaged, or simply outdated. The good news is, you don’t need to live with an old drop ceiling. With some planning and the right steps, you can update or change your drop ceiling yourself—even if you’re not a professional.
This guide will walk you through every stage of the process, from understanding what a drop ceiling is, to picking the right materials, to installing the new tiles. We’ll also cover common mistakes, tips for a smooth project, and what to expect if you decide to hire a professional instead.
If you’ve ever wondered how to change a drop ceiling, you’ll find clear answers here.
What Is A Drop Ceiling?
A drop ceiling is a secondary ceiling installed below the main structural ceiling. It’s made up of a grid of metal tracks and lightweight panels, usually 2×2 feet or 2×4 feet in size. People use drop ceilings for several reasons:
- To hide pipes, wires, or ductwork
- To improve room acoustics
- To make it easy to access utilities for repairs
- To lower the ceiling height, making the space feel cozier
Drop ceilings are common in basements, offices, schools, and commercial buildings. The panels can be easily lifted out for cleaning or replacement.
Reasons To Change A Drop Ceiling
There are many reasons you might want to change your drop ceiling:
- Stained or damaged panels: Water leaks, smoke, or age can stain or damage panels.
- Outdated appearance: Old ceiling tiles can make a room look dull or old-fashioned.
- Better insulation or acoustics: Newer tiles may offer better soundproofing or insulation.
- Modern design: There are now many styles and colors to fit modern tastes.
- Mold or mildew: Some panels can hold moisture and grow mold, which is unhealthy.
- Energy efficiency: New tiles may help reduce heating and cooling costs.
- Resale value: A fresh ceiling can make a home or office more attractive to buyers or renters.
Tools And Materials Needed
Before starting your project, gather all the tools and materials you’ll need. Having everything on hand will save time and reduce frustration.
Essential Tools
- Ladder (6-8 feet)
- Tape measure (at least 25 feet)
- Utility knife
- Tin snips (for cutting metal grid)
- Chalk line or laser level
- Drill or screwdriver
- Pry bar (for removing old grid, if needed)
- Safety glasses and gloves
- Putty knife (for prying or scraping)
Materials
- New ceiling tiles (2×2 or 2×4 feet, as needed)
- Ceiling grid system (if replacing the old grid)
- Hanger wire (typically 12 gauge)
- Wire cutters
- Eye bolts or anchors
- Fasteners (screws or nails appropriate for your ceiling)
- Molding (L-angle or wall molding for edges)
- Ceiling tile paint (optional, if you want to paint the grid or tiles)
Optional Items
- Soundproofing insulation (if you want extra noise control)
- Light panels or LED tiles (for built-in lighting)
- Decorative tiles (for a unique look)
Planning Your Drop Ceiling Change
A successful ceiling change starts with good planning. Here’s how to get started:
1. Measure The Room
Use your tape measure to check the length and width of the room. Multiply the numbers to get the square footage. For example, a 12×15 foot room = 180 square feet.
2. Decide What To Replace
Will you change just the ceiling tiles? Or the grid system too? If the grid is rusty, bent, or loose, it’s best to replace everything.
3. Choose The New Materials
There are many types of tiles: basic white, patterned, textured, or even metal. Make sure to match the size (2×2 or 2×4) to your grid.
4. Consider Lighting And Vents
If you have recessed lights, air vents, or speakers, plan for special tiles or cutouts. Some tiles have pre-cut holes for these features.
5. Order Extra Tiles
Always buy 10-15% more tiles than you need. Some will need to be cut, and a few may get damaged during installation.
6. Check Local Codes
Some cities have building codes for ceilings, especially in basements. It’s smart to check before starting.
Removing The Old Drop Ceiling
Taking out the old drop ceiling is the first big step. This part can be dusty, so wear safety glasses and gloves.
Step-by-step Removal
1. Clear The Room
Move furniture and cover anything that can’t be moved.
2. Remove The Old Tiles
Lift each tile up and tilt it to slide out of the grid. Stack tiles neatly for disposal or recycling.
3. Take Out Light Panels
If you have fluorescent light panels, turn off the power at the breaker first. Then carefully remove the panels.
4. Remove The Grid (if Replacing)
Use a screwdriver or drill to remove screws holding the grid to the walls and ceiling. Cut wires with wire cutters. If the grid is in good shape, you can leave it.
5. Clean Up
Sweep or vacuum the area to remove dust and debris.
Safety Tips
- Always wear safety glasses and gloves.
- Be careful with old tiles; some may contain asbestos if your home is very old (before 1980). If you suspect asbestos, call a professional.
Installing A New Drop Ceiling Grid
If you’re replacing the grid, this is the most technical part of the job. But with patience, you can do it yourself.
Lay Out The Room
Use a chalk line or laser level to mark a line around the room where the wall molding will go. This line should be level and about 3 to 6 inches below the lowest thing you want to hide (pipes or ducts).
Attach Wall Molding
Screw or nail the L-shaped wall molding along your marked line. This molding supports the edges of the grid.
Hang Main Tees
The main tees are the long metal strips that run the length of the room. They are suspended by hanger wire, attached to the ceiling joists above.
- Cut hanger wire to the right length.
- Use eye bolts or anchors to secure the wire to joists.
- Attach one wire every 4 feet along each main tee.
Install Cross Tees
Cross tees fit perpendicular to the main tees, creating the grid’s squares. They snap into place in the slots on the main tees.
- For 2×2 tiles, space cross tees every 2 feet.
- For 2×4 tiles, space them every 4 feet.
Check For Level
Use a level to make sure the entire grid is flat. Adjust the hanger wires as needed.
Add Grid Connectors
At corners and edges, use special connectors or clips so the grid is strong and secure.
Example Grid Layout
Here’s a simple comparison of grid spacing for different tile sizes:
| Tile Size | Main Tee Spacing | Cross Tee Spacing |
|---|---|---|
| 2×2 feet | 4 feet | 2 feet |
| 2×4 feet | 4 feet | 4 feet |
Installing New Ceiling Tiles
Once the grid is done, the fun part begins—putting in new tiles.
Fitting The Tiles
1. Start In The Center
It’s often best to start in the middle and work out, especially if you want a balanced look.
2. Tilt And Insert Tiles
Lift each tile above the grid, tilt, and lower it into place.
3. Cut Edge Tiles
Use a utility knife and straightedge to cut tiles for the edges. Measure carefully before cutting.
4. Install Light Panels
For lights, use special light-diffusing panels. Make sure the power is off before handling any wiring.
5. Work Around Obstacles
For vents or speakers, measure and cut holes in the tiles with a sharp utility knife.
Common Tile Types
Drop ceiling tiles come in many styles. Some common options include:
- Fiberglass tiles: Good for soundproofing.
- PVC tiles: Waterproof and mold-resistant.
- Mineral fiber tiles: Most common and affordable.
- Metal tiles: For a vintage or modern look.
Here’s a quick comparison of popular tile materials:
| Material | Pros | Cons |
|---|---|---|
| Fiberglass | Soundproof, lightweight | Can break if bent |
| PVC | Waterproof, mold-proof | More expensive |
| Mineral Fiber | Low cost, easy to cut | Can absorb moisture |
| Metal | Unique look, durable | Heavy, costly |
Tips For A Smooth Installation
- Keep hands clean to avoid marks on tiles.
- Replace broken or stained tiles right away.
- Work slowly on edge tiles for a neat finish.
Dealing With Drop Ceiling Lighting
Many drop ceilings include recessed lighting or fluorescent light panels. When changing your ceiling, you’ll need to:
- Turn off power at the breaker before removing any light panels.
- Measure and cut tiles to fit around lights.
- Consider switching to LED panels for better energy efficiency and longer life.
If you’re unsure about electrical work, hire a licensed electrician.
Painting Or Decorating The Grid
If your grid is still in good shape, you can give it a fresh look with paint.
- Clean the grid with soap and water.
- Use a special ceiling grid paint or spray.
- Cover tiles with painter’s tape or remove them before painting.
Decorative tiles or grid covers are also available. Some people use faux tin or wood-look tiles for a unique ceiling.
Soundproofing And Insulation Options
If you want to make your room quieter or keep it warmer, consider adding insulation above the tiles.
- Use acoustic tiles or add batts of insulation above the grid.
- Make sure your grid can support the extra weight.
Soundproofing is especially helpful in basements or home theaters.
Hiring A Professional Vs. Diy
Changing a drop ceiling is a project many homeowners can do, but it’s not for everyone. Here’s how DIY compares to hiring a pro:
| Factor | DIY | Professional |
|---|---|---|
| Cost | Lower (materials only) | Higher (labor + materials) |
| Time | Longer, especially for beginners | Faster, usually 1-2 days |
| Quality | Good with careful work | Professional finish |
| Warranty | No warranty | Often includes warranty |
Two non-obvious insights: First, if your ceiling is very uneven, a professional can adjust the grid more quickly than a DIYer. Second, many pros have access to higher-quality tiles and can get better prices than retail stores.
Common Mistakes When Changing A Drop Ceiling
Avoid these pitfalls for a smoother project:
- Not checking for asbestos: Old tiles (pre-1980) may contain asbestos. Test before removing.
- Incorrect measurements: Always measure twice before cutting tiles or grid.
- Overloading the grid: Don’t put heavy lights or insulation on a standard grid without checking weight limits.
- Ignoring local codes: Some cities have strict rules for basement ceilings.
- Buying the wrong size tiles: Double-check whether your grid is 2×2 or 2×4 feet.
- Forgetting extra tiles: Always have spares for mistakes or future repairs.
- Not leveling the grid: A crooked ceiling is very noticeable.
- Poor planning for lights/vents: Plan cutouts before installing tiles.
- Skipping safety gear: Protect your eyes, hands, and lungs from dust.
- Throwing away the old grid: If in good shape, you might reuse or donate it.
Credit: www.thelilypadcottage.com
Cost Breakdown And Budgeting
Changing a drop ceiling can be affordable or expensive, depending on your choices.
- Basic materials only: $2–$4 per square foot (tiles + grid)
- Premium tiles or LED panels: $5–$10 per square foot
- Professional installation: Add $2–$6 per square foot for labor
For a 200-square-foot room, expect to pay:
- DIY, basic: $400–$800
- DIY, premium: $1,000–$2,000
- Professional: $1,000–$3,200
Always add 10–15% extra for waste and mistakes. Get at least 2–3 quotes if hiring a contractor.
Environmental And Health Considerations
Modern ceiling tiles are often recyclable and made with recycled materials. If you’re removing old tiles, check for:
- Asbestos: Don’t disturb tiles if you suspect asbestos. Call a professional.
- Mold or mildew: Remove and replace any moldy or water-damaged tiles to protect health.
- Disposal: Many cities offer recycling for old mineral fiber tiles.
Choosing low-VOC (volatile organic compound) tiles is better for indoor air quality.

Credit: www.youtube.com
Upgrading To A Modern Drop Ceiling
Today’s drop ceilings are not just plain white tiles. You can choose from:
- Decorative tiles: Patterns, colors, faux metal or wood looks
- Specialty tiles: Mold-resistant, fire-rated, or acoustic panels
- Integrated lighting: LED panels that fit right in the grid
- Smart ceiling systems: Some new tiles can hide speakers or air filters
Check out modern options at large home improvement stores or specialty ceiling companies.
Step-by-step Summary For Changing A Drop Ceiling
Here’s a quick reference for the entire process:
- Measure your space and plan your project.
- Decide if you’re replacing just tiles or the entire grid.
- Remove old tiles and grid (if needed).
- Prepare the space (clean, check for hazards).
- Install new wall molding and grid, making sure it’s level.
- Add cross tees and connectors.
- Insert new ceiling tiles, starting at the center.
- Cut and fit edge tiles.
- Install light panels or make cutouts for vents.
- Clean up and admire your new ceiling.
When To Call A Professional
Some situations require expert help:
- The ceiling is very uneven or damaged.
- You find evidence of asbestos or extensive mold.
- There are complex lights or HVAC systems in the ceiling.
- You want a custom design or warranty.
A professional can often finish the job in a day or two, with a high-quality result.
Maintenance Tips For Your New Drop Ceiling
To keep your new drop ceiling looking good:
- Clean tiles gently with a damp cloth.
- Replace stained or damaged tiles right away.
- Avoid using harsh cleaners or bleach.
- Check for leaks above the ceiling after storms or plumbing work.
Credit: sprucingupmamahood.com
Where To Learn More
For even more information on drop ceilings and home renovation, you can visit resources like Family Handyman.
Frequently Asked Questions
What Size Are Standard Drop Ceiling Tiles?
Most drop ceiling tiles are either 2×2 feet or 2×4 feet. Always check your grid size before buying new tiles.
Can I Paint Drop Ceiling Tiles?
Yes, you can paint many ceiling tiles using latex paint. Remove them from the grid first for best results.
How Do I Cut Drop Ceiling Tiles For Vents Or Lights?
Use a sharp utility knife and a straightedge. Measure the opening, mark the tile, and cut slowly. Wear gloves to avoid injury.
Are Drop Ceilings Good For Soundproofing?
Some tiles are designed for sound absorption. Look for tiles with a high NRC (Noise Reduction Coefficient) rating for better soundproofing.
How Long Does It Take To Change A Drop Ceiling?
A DIYer can usually change a small room’s drop ceiling in 1–2 days. Professional installers may finish in a single day.
Changing a drop ceiling can be a rewarding project, giving your room a fresh, modern look with better function. With careful planning and the right materials, you can enjoy the results for years to come.