Repair Chipped Paint On Kitchen
A bright, clean kitchen makes every meal more enjoyable. But even the best kitchens face a common problem: chipped paint. Maybe it’s from moving chairs, scrubbing, or just years of cooking. Those little chips and scratches can make your kitchen look old and uncared-for, even if everything else is spotless.
Many people worry that fixing chipped paint is difficult or expensive. The truth is, you can repair chipped paint in your kitchen easily and make it look fresh again—often in just a weekend. With the right methods, a little patience, and some simple tools, you can restore your kitchen’s beauty and even protect your surfaces for years to come.
Below, you’ll learn everything you need to know: from understanding the causes of chipped paint to choosing the right products, fixing different types of chips, and making the finish last. Whether you’re dealing with walls, cabinets, or trims, this guide gives you the expert secrets and practical steps to get professional results at home.
Why Does Kitchen Paint Chip?
Understanding why paint chips helps you prevent future problems. Kitchens face more wear and tear than any other room in the house. Here’s why:
- Moisture: Steam from cooking, dishwashers, and sinks weakens paint over time.
- Heat: Stoves and ovens cause expansion and contraction, making paint crack or flake.
- Grease and Cleaning Chemicals: Grease build-up and strong cleaners eat away at paint layers.
- Physical Damage: Moving chairs, banging pans, or opening drawers can scratch surfaces.
- Poor Preparation: If the surface wasn’t cleaned or primed before painting, paint won’t stick well.
An often-missed insight: Even small chips let in moisture, which can lead to mold or deeper damage under the paint. Repairing quickly prevents bigger problems.
Assessing The Damage
Before you fix anything, look closely at the chipped areas. Not all chips are equal, and the right solution depends on what you see.
Types Of Chips
- Tiny Chips: Small spots, often from daily use.
- Peeling or Flaking: Larger sections, usually from moisture or bad prep.
- Deep Chips: Down to bare wood or drywall, possibly with dents.
Where The Damage Occurs
- Cabinets: Most common, especially near handles and edges.
- Walls: Behind sinks, stoves, or tables.
- Trim/Molding: Baseboards and corners get bumped often.
- Ceiling: Rare, but happens near vents or leaks.
Tools For Inspection
- Use a bright flashlight to see all chips.
- Run your hand over the surface to feel rough spots you might miss.
- For cabinets, open doors and check inner edges.
A professional tip: Mark each chip with painter’s tape or a sticky note. This helps you track progress and avoid missing spots.
Gathering Materials And Tools
Having the right supplies makes the job smoother. Here are the essentials for repairing chipped paint in your kitchen:
Basic Tools
- Putty knife (flexible, 1–2 inches)
- Sanding block (medium and fine grit, e.g., 120 and 220)
- Painter’s tape
- Clean rags or microfiber cloths
- Small paintbrushes (angled and fine-tip)
- Paint tray (for mixing small amounts)
Materials
- Spackle or wood filler (for filling chips)
- Primer (stain-blocking and bonding type)
- Matching paint (same finish as original: Semi-gloss, satin, etc.)
- Mild cleaner (dish soap and water, or TSP substitute)
- Protective gloves (optional, but helpful)
- Drop cloths or old sheets
Optional But Helpful
- Vacuum (for dust after sanding)
- Touch-up paint pen (for tiny chips)
- Hair dryer (to speed up drying in between steps)
- Small container (for mixing or thinning paint)
An often-overlooked tip: Always check the paint can for the exact color and finish used before. If you don’t have leftover paint, take a chip to a paint store for a color match.
How To Repair Chipped Paint On Kitchen Walls
Kitchen walls see a lot of action, from spills to splashes. Here’s how to repair chips for a flawless look.
1. Clean The Area
Start by cleaning the chipped spot and the surrounding wall. Use a mild cleaner (like dish soap and water) to remove grease and dust. Rinse with clean water and let it dry completely.
2. Sand The Chip
Use medium-grit sandpaper (120) to smooth the edges of the chip. Sand lightly beyond the chip so the patch blends with the wall. Wipe away dust with a damp cloth.
3. Fill The Chip
For small chips, use spackle. For deeper gouges, use a little more and press firmly. Apply with a putty knife, flattening it even with the wall. Let it dry according to package instructions.
4. Sand Again
Once dry, sand the patched area with fine-grit sandpaper (220) until it feels smooth and flush with the wall. Remove all dust.
5. Prime The Patch
Use a small brush to apply a stain-blocking primer. This step prevents the patch from showing through the topcoat. Let it dry thoroughly.
6. Paint
Using a small brush or roller, apply your matching paint over the primed area. Feather the edges to blend with the existing wall. Let it dry and apply a second coat if needed.
Real-world Example
If your wall behind the stove has several chips from hot oil splatters, follow this process on each chip. For best blending, paint the entire section from corner to corner. This keeps the repair invisible.
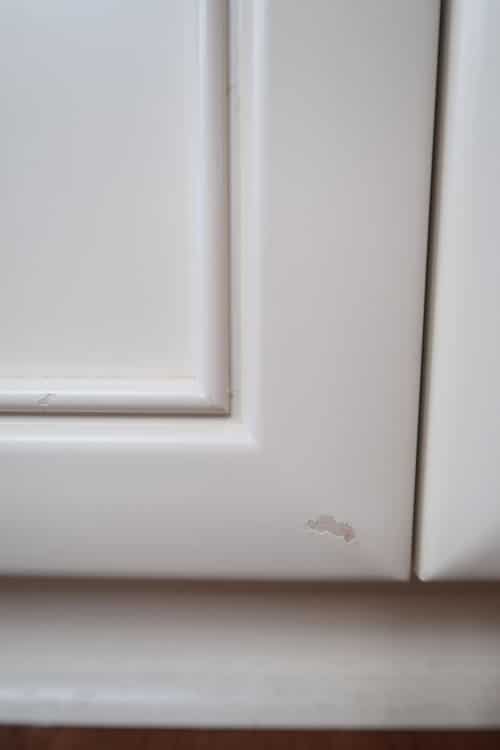
Repairing Chipped Paint On Kitchen Cabinets
Cabinets are often painted with a tougher finish, but they still chip—especially near handles, doors, and drawers.
1. Clean Thoroughly
Kitchen cabinets often have grease on them. Use a degreaser or a TSP substitute. Rinse with water and let dry.
2. Sand The Damaged Area
Use medium-grit sandpaper around the chip, feathering the edges so there’s no hard line between old paint and bare wood.
3. Fill If Needed
For deep chips, use wood filler. For surface chips, spackle works. Apply with a putty knife and let it dry.
4. Sand Smooth
Go over the filled area with fine-grit sandpaper until it’s perfectly smooth.
5. Prime
Cabinet surfaces are slick, so a bonding primer is essential. Paint a thin layer over the repaired area.
6. Paint And Blend
Use a small brush to match the cabinet’s paint finish. Feather the paint outward to blend. For best results, paint the entire door if you have many chips.
Pro Tip
Cabinet paint is often semi-gloss or gloss. If you don’t have the exact paint, a paint store can color-match and recommend the correct sheen.
Fixing Chipped Paint On Kitchen Trim And Molding
Trim gets kicked, bumped, and scuffed often. Here’s how to repair it:
1. Clean And Sand
Wipe with a damp cloth, then sand with medium grit to remove loose paint and rough edges.
2. Fill Chips
Use spackle for shallow chips or wood filler for deeper ones. Smooth out with a putty knife.
3. Sand And Prime
Once dry, sand flush and prime the patched spot.
4. Paint
Use an angled brush for clean lines. If your trim has a gloss finish, use the same for touch-ups.
Extra Insight
Trim paint is usually harder and shinier than wall paint. Using wall paint on trim will lead to more chips in the future.

Credit: www.reddit.com
Repairing Large Or Peeling Paint Areas
Sometimes, you find peeling or large chipped areas. These need special attention to prevent peeling from coming back.
Step-by-step Guide
- Remove Loose Paint: Use a putty knife to gently scrape away all loose or peeling paint. Don’t leave any flakes behind.
- Sand the Edges: Smooth the edges so there are no visible lines.
- Repair Surface Damage: Fill gouges with spackle or wood filler. Let it dry and sand smooth.
- Prime Entire Area: Use a stain-blocking, bonding primer over the whole section, not just the patch.
- Repaint: Paint from edge to edge of the section for a seamless look.
When To Repaint A Whole Section
If more than 20% of a wall, cabinet, or trim is affected, repainting the entire section gives the best result. This avoids a patchy look.
Choosing The Right Paint For Kitchen Repairs
Matching paint is crucial for a professional finish. Here’s how to get it right.
Paint Types
- Latex (Water-Based): Most common for walls and trim. Easy to clean.
- Alkyd (Oil-Based): Harder finish, used for cabinets and trim. Takes longer to dry.
- Hybrid Enamel: Tough, water-cleanup, good for cabinets.
Paint Finishes
- Flat/Matte: Hides flaws but not durable for kitchens.
- Eggshell/Satin: Good for walls, easy to clean.
- Semi-Gloss/Gloss: Best for cabinets and trim, resists moisture and stains.
Matching Color
If you don’t have leftover paint, take a paint chip (the size of a quarter) to your local hardware store. They can use a computer to match the color and finish.
Data Comparison: Paint Types And Best Uses
| Paint Type | Best For | Pros | Cons |
|---|---|---|---|
| Latex | Walls, trim | Quick drying, easy cleanup | Less durable on cabinets |
| Alkyd (Oil) | Cabinets, trim | Very durable, smooth finish | Slow drying, strong smell |
| Hybrid Enamel | Cabinets, doors | Tough, water cleanup | Costlier |
Non-obvious Insight
The “sheen” (gloss level) matters as much as color. If your repair is too shiny or too dull, it will stand out even if the color matches.

Credit: www.exquisitelyunremarkable.com
How To Blend Paint Repairs For Invisible Results
Many people worry that touch-up repairs will show. Here’s how pros blend repairs so they disappear.
Feathering Technique
When painting over a patch, use less paint at the edges and gently spread it outward. This blurs the line between old and new paint.
Paint The Whole Panel
If the chip is on a cabinet door, repaint the entire door rather than just the chip. On walls, consider painting “corner to corner” in the affected section.
Use The Right Brush
A small, angled brush works best for trim and cabinets. A mini roller is good for walls.
Lighting Check
After your repair dries, look at it from different angles and in both daylight and artificial light. Sometimes the difference only shows up at night.
Table: Tools For Invisible Repairs
| Surface | Best Brush/Roller | Feathering Needed? |
|---|---|---|
| Wall | Mini foam roller | Yes |
| Cabinet | Angled sash brush | Yes |
| Trim | Fine-tipped brush | Somewhat |
Insider Tip
If you see a “halo” after drying, very lightly sand the edge and apply a second feathered coat.
Preventing Future Chips In Your Kitchen
Fixing chips is only half the story. Preventing them keeps your kitchen looking good longer.
Simple Prevention Steps
- Use Gentle Cleaners: Harsh chemicals break down paint. Use mild soap and water for regular cleaning.
- Install Bumpers: Put small felt pads or silicone bumpers on cabinet doors and drawers.
- Touch Up Immediately: Fix small chips as soon as you see them. This stops them from getting worse.
- Avoid Metal Scrubbers: Use soft sponges or cloths on painted surfaces.
- Control Moisture: Use your range hood and fix leaks quickly.
- Choose the Right Paint: For high-traffic areas, always use durable, washable paint.
Often-missed Advice
Many people repaint without priming, especially after repairs. Skipping primer leads to more chips and stains later.
Common Mistakes To Avoid
Even experienced DIYers make errors with paint repairs. Here’s what to watch out for:
- Skipping Cleaning: Paint won’t stick to grease or dust, no matter how good the paint is.
- No Sanding: Not sanding makes the repair stand out.
- Wrong Paint Finish: Mismatched sheen is very obvious, especially on cabinets.
- No Primer: Paint over filler or raw wood will peel or show stains.
- Thick Paint Layers: Heavy coats take longer to dry and can look lumpy.
- Ignoring Manufacturer’s Dry Time: Rushing leads to smudges or fingerprints.
Advanced Tips For A Professional Finish
If you want your repairs to look like a pro did them, try these advanced techniques:
Wet Sanding
After the first coat of paint dries, use a damp, fine-grit sanding sponge to lightly smooth the area before the final coat. This gives a glassy finish, especially useful on cabinets.
Custom Touch-up Kits
Some paint brands sell touch-up kits with a color-matched pen and blending solution. These are perfect for tiny chips.
Using Additives
If your paint dries too fast, use a paint conditioner (like Floetrol for latex). This helps the paint blend better and reduces brush marks.
Repainting An Entire Section
If multiple chips are close together, repaint the whole panel, door, or wall section. This is often faster than doing many small repairs and gives a uniform look.
Credit: porchdaydreamer.com
When To Call A Professional
Most chips can be fixed by a homeowner, but some cases need expert help:
- Large Peeling Areas: More than 25% of the surface is peeling or chipping.
- Water Damage: Stains, mold, or soft drywall.
- Lead Paint: Homes built before 1978 might have lead-based paint—don’t sand or scrape these yourself.
- Matching Difficult Colors: If you can’t get a good match, pros have more tools for blending.
Cost Of Diy Vs Professional Repair
You might wonder if it’s worth doing yourself. Here’s a quick comparison:
| Repair Type | DIY Cost | Pro Cost | Notes |
|---|---|---|---|
| Small chip | $10–$25 | $75–$150 | DIY is much cheaper |
| Cabinet door (full repaint) | $25–$40 | $150–$400 | Pro finish lasts longer |
| Large area or water damage | $40–$80 | $250–$600 | Pro may spot hidden issues |
If you’re careful and follow the steps above, most people can get great results for a fraction of the professional cost.
Real-life Example: Chipped Paint On A Kitchen Cabinet
Imagine you find a chip on your white kitchen cabinet near the handle. Here’s how the process looks in real life:
- Clean the area with mild soap and water, then let it dry.
- Sand around the chip to smooth rough edges.
- Apply wood filler with a putty knife, smoothing it flat.
- After drying, sand until you can’t feel the repair.
- Prime the spot with a small brush and let it dry.
- Paint two thin coats of matching semi-gloss paint, feathering the edges.
- Let it cure for at least 24 hours before using the cabinet.
Even up close, the repair is almost invisible if you feather the paint and use the right sheen.
Frequently Asked Questions
What Kind Of Paint Should I Use To Repair Kitchen Cabinets?
Use a semi-gloss or gloss enamel paint for kitchen cabinets. These finishes are durable, washable, and match most factory-painted cabinets. Latex or hybrid enamel paints are best for DIYers because they are easy to use and clean up with water.
How Do I Match The Color If I Don’t Know The Original Paint?
Take a small paint chip (larger than a pencil eraser) from an inconspicuous spot to a paint store. They can scan and create a custom color match. Make sure to also match the finish (matte, satin, semi-gloss, etc.) for the best blend.
Can I Just Paint Over A Chip Without Sanding Or Priming?
No. If you skip sanding and priming, the repair will likely show and the paint may peel again. Sanding smooths the edge, and priming helps the paint stick and prevents stains from showing.
How Long Does It Take To Repair Chipped Paint In A Kitchen?
Simple repairs (one or two chips) can be finished in a few hours (allowing for drying time). Larger areas may take a weekend, especially if you need to repaint a whole section. Always follow drying times on filler, primer, and paint for the best results.
Is There A Way To Prevent Future Chipping?
Yes. Use durable paints (semi-gloss or gloss), avoid harsh cleaners, install bumpers on doors and drawers, and touch up chips as soon as you notice them. Keeping surfaces clean and dry also helps paint last longer.
Repairing chipped paint in your kitchen isn’t just about looks—it protects your cabinets and walls from bigger problems. With the right approach, you can restore beauty and keep your kitchen a space you’re proud of. If you want to explore more about different types of paints and their best uses, check the Bob Vila guide for expert advice.
Getting started is the hardest part. Once you fix a few chips, you’ll have the confidence to keep your kitchen looking its best for years to come.