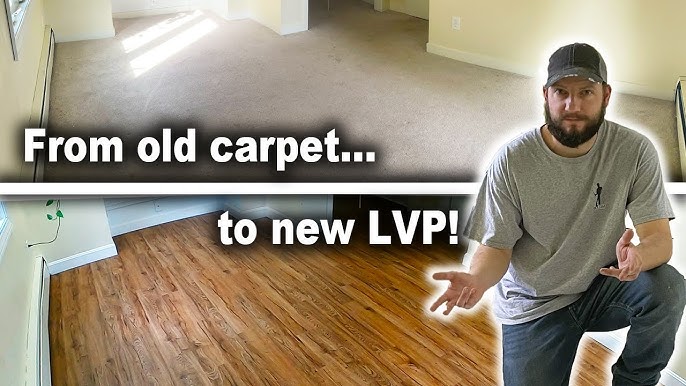
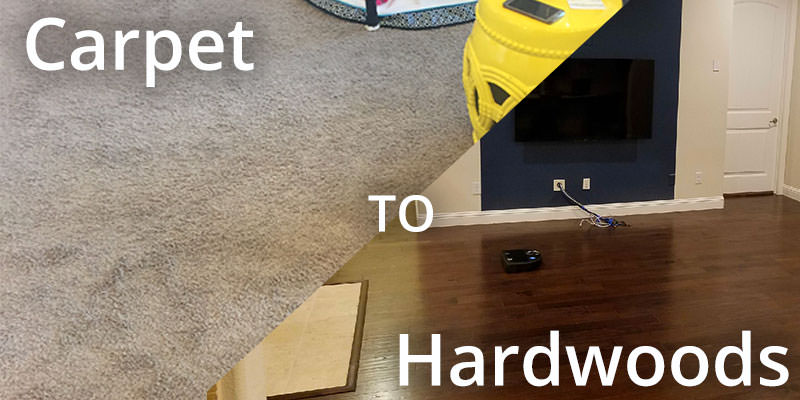
Removing carpet and installing hardwood floors can change the look and feel of your home. Many people choose hardwood for its natural beauty, durability, and the value it adds to a house. But the idea of taking up old carpet and putting down wood might feel overwhelming if you have never done it before.
The truth is, with the right tools, some patience, and clear guidance, you can handle this project yourself—even if you are not a professional.
This guide will walk you through each step, from preparing your room to finishing the last piece of hardwood. You will discover useful tips, common mistakes to avoid, and insights most beginners miss. Whether you want to refresh one room or your whole house, this article will help you make smart decisions and get great results.
Why Choose Hardwood Over Carpet?
Hardwood floors are more than just a style choice. They offer real benefits for your home and lifestyle.
- Durability: Hardwood can last 20–100 years with proper care, while carpet usually needs replacing every 5–10 years.
- Easy to Clean: Spills and dust are simple to wipe up from wood, making it a good choice for people with allergies.
- Home Value: Homes with hardwood flooring often sell faster and for higher prices.
- Allergy-Friendly: Carpets hold dust, pet hair, and pollen. Hardwood keeps allergens from building up.
- Modern Look: Wood floors give any room a warm, timeless look.
Some people worry that hardwood feels cold or noisy. Area rugs can help with both, and many new hardwoods are designed to reduce sound.
Tools And Materials You Will Need
Having the right tools ready will save you time and frustration. Here are the basics:
- Utility knife (with extra blades)
- Pry bar or crowbar
- Pliers
- Hammer or mallet
- Floor scraper (for stubborn glue or padding)
- Tape measure
- Chalk line
- Level
- Safety goggles and gloves
- Dust mask
- Shop vacuum or strong household vacuum
- Hardwood flooring (add 10% extra for cutting waste)
- Underlayment (if needed)
- Flooring nailer or stapler (for solid hardwood)
- Drill and screws (for squeaky subfloor)
- Wood filler or putty
- Saw (circular saw, miter saw, or hand saw)
- Spacers
- Tapping block and pull bar
- Moisture meter (optional but helpful)
- Transition strips and baseboards (if replacing)
Non-obvious tip: Renting specialty tools like a flooring nailer is often cheaper than buying—and rental stores can offer quick lessons.
Preparing The Room
Before you start, clear as much as possible out of the room. Take out furniture, curtains, and anything hanging near the floor. Open windows for ventilation and remove interior doors if they swing over the carpet.
- Remove everything from the floors, including lamps and electronics.
- Take off baseboards and door trim gently if you want to reuse them.
- Check for any nails or screws sticking out—these can damage your new floor or hurt you.
Insight: Some people forget to check under heavy furniture or in closets. Make sure every inch is clear before you begin.
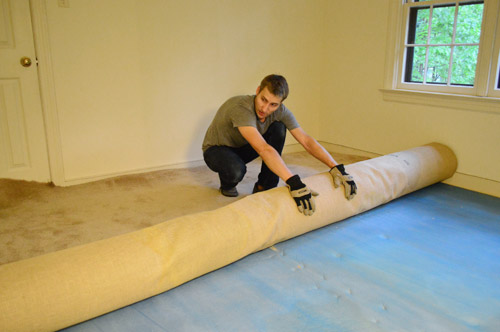
Removing The Old Carpet
Pulling up carpet is not as hard as you might think, but it can be messy. Here is how to do it safely and efficiently.
Step 1: Cut The Carpet
Start in a corner. Use your utility knife to slice the carpet into strips about 3 feet wide. This makes the pieces easier to roll up and carry.
- Wear gloves to protect your hands from staples or rough backing.
- Be careful not to cut into the subfloor.
Step 2: Roll And Remove Carpet
- Roll up each strip tightly.
- Use duct tape to hold rolls together.
- Carry rolls outside or to a disposal area.
Step 3: Remove Carpet Padding
Most padding is stapled or glued down. Pull it up by hand, then use a scraper for stuck areas.
- Roll up and dispose of padding like you did with carpet.
Step 4: Remove Tack Strips And Staples
Tack strips (thin wooden strips with nails) run along the edges. Use a pry bar and hammer to lift them up.
- Work carefully—tack strip nails are sharp.
- Pull out all visible staples with pliers.
- Sweep or vacuum the subfloor.
Non-obvious insight: Some old carpet may hide signs of moisture damage or mold. If you find black spots or musty smells, let the area dry out completely and treat before moving on.
Credit: www.youtube.com
Inspecting And Preparing The Subfloor
A strong, level subfloor is critical for hardwood. Here is how to check it:
- Use a level to look for dips or high spots.
- Walk the floor and listen for squeaks. Screw down loose boards to stop noise.
- Fill gaps or cracks with wood filler.
- Sand down any bumps.
Data point: For hardwood, the subfloor should not vary more than 3/16 inch over a 10-foot span.
Moisture can ruin hardwood. Use a moisture meter to check that levels are safe (usually below 12%).
- If your subfloor is concrete, you may need a vapor barrier.
- For wood subfloors, an underlayment paper helps with sound and minor imperfections.
Choosing The Right Hardwood Flooring
Not all hardwood is the same. Think about these factors:
- Solid vs. Engineered: Solid wood can be sanded many times and lasts for decades. Engineered wood is stable in changing humidity and easier to install.
- Species: Oak, maple, and hickory are popular for their strength. Softer woods like pine dent more easily.
- Width and Length: Wider planks look modern but may show gaps if your house shifts. Shorter planks are easier to handle.
- Finish: Pre-finished boards are quicker to install. Unfinished wood lets you customize stain and finish, but takes longer.
- Color and Style: Choose what fits your taste and room size. Light woods make rooms feel bigger, dark woods add warmth.
Here’s a quick comparison:
| Type | Pros | Cons |
|---|---|---|
| Solid Hardwood | Durable, can refinish many times | Can swell/shrink, harder to install |
| Engineered Hardwood | Stable, works in basements | Can refinish only once or twice |
| Laminated Wood | Cheaper, scratch-resistant | Not real wood, can’t refinish |
Credit: hardwoodfloorsfortworth.com
Acclimating The Hardwood
One key step many skip: let your hardwood acclimate to the room’s temperature and humidity. Stack the unopened boxes in the room for 3–7 days.
- Place boxes flat and stagger them for good airflow.
- Don’t open the boxes until you are ready to install.
- This prevents the wood from shrinking or expanding after installation.
Practical tip: If you skip acclimation, your floor may warp or gap later.
Planning Your Layout
Before you start, plan how your floorboards will run.
- Boards usually run parallel to the longest wall or towards the main light source.
- Avoid having very narrow boards at the wall—shift your layout so both sides look even.
- Use a chalk line to mark your starting row.
If your room is not square, measure from the center out. Make small adjustments to avoid ending up crooked.
Installing Underlayment (if Needed)
Underlayment is a thin layer that sits between your subfloor and the hardwood. It adds cushion, reduces noise, and helps with minor imperfections. Some hardwood products have underlayment attached.
- Roll out underlayment in the same direction you plan to lay your boards.
- Overlap seams and tape them down.
- Trim excess at the edges.
For concrete subfloors, use a moisture barrier.
Installing The Hardwood Flooring
Now you are ready for the main event. Here’s a step-by-step guide.
Step 1: First Row
- Place spacers (1/4 to 1/2 inch) between the wall and your first board for expansion.
- Lay the first row with the groove side facing the wall.
- Nail or glue the first row according to the manufacturer’s instructions.
Step 2: Stagger Joints
- Start the second row with a board cut at least 6 inches shorter than the first.
- Stagger the joints for strength and a natural look.
Step 3: Continue Laying Boards
- Fit each board tongue into the groove of the previous row.
- Use a tapping block and mallet to snug boards together.
- For nail-down, use a flooring nailer for each board. For floating floors, click or glue as needed.
- Check for tight seams and even rows as you go.
Step 4: Cutting To Fit
- Use a miter or circular saw to cut boards at the ends of rows.
- Always measure twice before cutting.
- Save larger off-cuts to start new rows, minimizing waste.
Step 5: Last Row
- You may need to rip (cut lengthwise) the last row to fit.
- Leave a spacer gap at the wall for expansion.
Pro tip: Mix boards from several boxes as you go. This blends color and grain differences for a more natural look.
Credit: www.younghouselove.com
Dealing With Doorways And Transitions
Hardwood often meets other flooring types at doorways. Use transition strips for a smooth look.
- Cut boards to fit around door frames using a jigsaw or handsaw.
- You may need to undercut the door trim so the wood slides underneath.
- Install threshold strips where hardwood meets tile, carpet, or vinyl.
Beginner mistake: Forgetting about transitions can leave ugly gaps or tripping hazards.
Securing And Finishing Touches
Once all boards are down, remove spacers around the room. Reinstall baseboards or quarter-round trim to cover the expansion gap.
- Use finishing nails to attach trim to the wall, not the floor.
- Fill any small nail holes with matching wood putty.
If you used unfinished wood, now is the time to sand and apply finish. For pre-finished boards, just clean up.
Cleaning Up And Caring For Your New Floor
Vacuum and mop the floor gently to remove dust. Move furniture back in carefully—lift, don’t drag.
- Add felt pads to chair and table legs to prevent scratches.
- Avoid heavy water for cleaning; use products made for wood floors.
Over time, sweep or vacuum regularly to keep grit from scratching the surface.
Common Mistakes And How To Avoid Them
- Skipping Subfloor Prep: Failing to fix squeaks or level problems leads to noisy, uneven floors.
- Not Letting Wood Acclimate: This can cause expansion, buckling, or gaps.
- Wrong Tools: Using a regular hammer instead of a floor nailer can damage boards.
- Tight Against Walls: Not leaving an expansion gap causes boards to pop up or crack.
- Ignoring Moisture: Install a vapor barrier over concrete to prevent future warping.
- Bad Cuts at Edges: Take your time measuring and cutting end boards, as mistakes are hard to hide.
- Mixing Board Batches Poorly: Always blend boards from multiple boxes for a natural look.
Extra insight: Many people throw away offcuts, but these can be useful for tight spots or future repairs.
Cost Comparison: Carpet Vs. Hardwood
Switching from carpet to hardwood is a big investment, but the long-term value is often higher.
| Flooring Type | Average Cost per sq. ft. (Installed) | Expected Lifespan | Maintenance |
|---|---|---|---|
| Carpet | $3–$7 | 5–10 years | Vacuum, shampooing |
| Solid Hardwood | $8–$15 | 20–100 years | Sweep, refinish as needed |
| Engineered Hardwood | $6–$12 | 20–40 years | Sweep, occasional refinish |
While hardwood costs more at first, it can last much longer, and you may only need to refinish instead of replace.
Environmental Impact And Health
Hardwood is a natural material. If you choose wood from certified forests, it can be an environmentally friendly choice. Carpets are often made from plastics and can off-gas chemicals. Old carpet can also hold dust mites, mold, and allergens.
Hardwood is easy to keep clean, improving air quality, especially for people with allergies or asthma.
When To Call A Professional
If you have large rooms, complex layouts, or subfloor problems, hiring a pro may be wise. Here are signs you should get help:
- Subfloor is rotted or very uneven.
- You need to match new flooring to old wood.
- You do not have the time or tools for the job.
- You want a warranty on labor.
Many stores offer installation or can recommend trusted contractors.
How Long Does The Project Take?
A typical 200 sq. ft. room takes:
- 2–3 hours to remove carpet and prep subfloor
- 1–2 hours for acclimation (but best to wait 3–7 days)
- 6–12 hours to install hardwood (longer if working alone or for beginners)
- 1–2 hours for trim and finishing
Total: About 2–3 days, depending on your pace and experience.
Practical Tips For A Smooth Project
- Borrow or rent heavy tools to save money.
- Take frequent breaks to avoid mistakes from fatigue.
- Work from multiple boxes of wood for a natural look.
- Keep pets and kids out of the room until you finish.
- Take before/after photos to track your progress.
Real-world Example
Sarah, a first-time homeowner, removed carpet in her bedroom and installed engineered oak herself over a weekend. She watched online videos for each step and rented a flooring nailer. The toughest part was removing the tack strips, but once she started laying boards, she found a rhythm.
After finishing, she saved $900 compared to hiring an installer—and her friends were amazed at the transformation.
If you want more technical details or examples, the This Old House guide offers more in-depth advice.
Frequently Asked Questions
How Do I Know If My Subfloor Is Good For Hardwood?
Check for flatness, solid construction, and dryness. Wood subfloors should not flex or squeak. Concrete subfloors need to be dry and level, with a vapor barrier.
Can I Install Hardwood Over Existing Tile Or Vinyl?
In some cases, yes—if the old floor is flat, clean, and not loose. Floating engineered wood is best for this. Solid wood usually needs a wood subfloor.
How Much Extra Hardwood Should I Buy?
Buy 10% more than your room size to account for cuts, mistakes, and future repairs. For example, if your room is 200 sq. Ft. , buy at least 220 sq. Ft.
Do I Need To Remove Baseboards Before Installing?
It is best to remove baseboards for a cleaner look and easier installation. You can reuse them, or install new trim afterward to cover expansion gaps.
How Do I Clean My New Hardwood Floor?
Sweep or vacuum regularly. Use a slightly damp mop with a cleaner made for wood floors. Avoid steam cleaners or lots of water, which can damage the wood.
Upgrading from carpet to hardwood is a project that can make your home feel newer, cleaner, and more valuable. By understanding each step and preparing carefully, you can do the job yourself and enjoy the results for many years. Take your time, follow the tips above, and do not hesitate to ask for help when needed.
Your new hardwood floor will be a source of pride every time you walk into the room.