Staining acacia wood can turn a simple table into a stunning centerpiece. Acacia is loved for its beautiful grain, strength, and durability. But if you want to highlight its natural beauty or match your decor, staining is the way to go.
Many people worry about making mistakes—will the stain go on evenly? Will the finish last? The good news is, with the right steps and some patience, you can achieve a gorgeous, professional look even if you’re a beginner.
This guide covers everything you need to know about how to stain an acacia wood table. You’ll learn what tools and materials you need, how to prepare your table, how to choose the right stain, and how to apply it for the best result. You’ll also find useful tips, examples, and answers to common questions. By the end, you’ll feel confident to take on your own acacia wood project and enjoy the process.
Why Stain Acacia Wood Tables?
Acacia wood is already beautiful, so why stain it? There are several good reasons:
- Enhance the natural grain: Stain brings out the unique patterns in acacia wood, making them stand out.
- Protect the surface: A good stain seals the wood, protecting it from spills, scratches, and sunlight.
- Match your style: Stains come in many shades. You can go darker for a modern look or lighter for something rustic.
- Increase longevity: Staining helps acacia resist water and humidity, which is important for furniture used daily.
Many people don’t realize that even new acacia tables may benefit from staining. Factory finishes are often thin and wear out quickly. By staining yourself, you can control the look and ensure the table stays beautiful for years.
Understanding Acacia Wood: Unique Qualities And Challenges
Before you start, it’s helpful to know what makes acacia wood special. Acacia is a hardwood, but it’s not as hard as oak or maple. It’s dense, heavy, and resists water well. The grain is usually straight but can sometimes be wavy or interlocked, giving each table a unique character.
However, acacia has some quirks:
- Tannins: Acacia contains natural tannins. These can react with some stains and create unexpected colors if you don’t prepare the wood properly.
- Oil content: Acacia is slightly oily, which can make stain or finish harder to stick. Cleaning and sanding help, but you need to be thorough.
- Varied grain: The grain absorbs stain unevenly. If you rush, you might get blotches or stripes.
Knowing these facts helps you avoid common mistakes and choose the right products for your project.
Credit: www.reddit.com
Tools And Materials You’ll Need
Gather all your tools and materials before you start. Here’s a checklist:
- Sandpaper (grits 80, 120, 220)
- Tack cloth
- Wood conditioner (pre-stain)
- Quality wood stain (oil-based or water-based)
- Brushes (foam or bristle)
- Clean rags (lint-free)
- Latex or nitrile gloves
- Drop cloth or old sheets
- Wood finish (polyurethane or lacquer)
- Stir sticks
- Painter’s tape
- Vacuum or brush (for dust)
- Mask (for sanding dust)
Some people skip items like wood conditioner or tack cloth, but these make a big difference. For example, a tack cloth removes tiny dust particles that a vacuum misses, giving a smoother finish.
Preparing The Acacia Wood Table
Preparation is the most important step. If you rush or skip it, the stain will not look good or last long.
Cleaning The Surface
Start by cleaning the table. Use a damp cloth to wipe away dirt, grease, or old food. If the table has a heavy wax or oil finish, use a mild wood cleaner or mineral spirits. Let the table dry completely before moving on.
Removing The Old Finish
If your table already has a finish (varnish, paint, or stain), you must remove it. Use a paint stripper for thick finishes, or sandpaper for thin ones. Start with 80-grit sandpaper to remove the old layer, always sanding with the grain. Don’t sand against the grain—it can leave scratches that show up later.
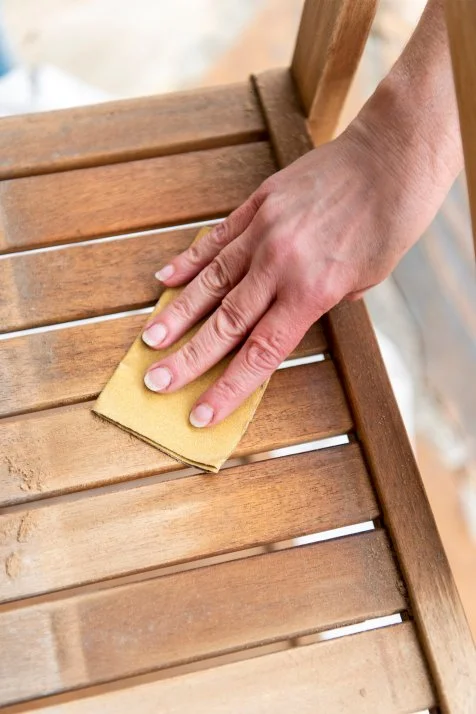
Sanding For A Smooth Base
Once the old finish is off, switch to 120-grit sandpaper to smooth the surface. Then finish with 220-grit sandpaper for a silky feel. Sanding opens the wood’s pores so the stain can soak in evenly.
Wipe away all dust using a vacuum and then a tack cloth. Even tiny dust particles can ruin the finish, so don’t skip this step.
Masking Areas
If your table has parts you don’t want to stain—like metal legs or decorative inlays—cover them with painter’s tape.
Using A Wood Conditioner
Acacia wood is known for uneven stain absorption. To prevent blotches, apply a pre-stain wood conditioner. Follow the instructions on the can—usually, you brush it on, let it soak for 15 minutes, and wipe off the excess. Let it dry according to the label.
Many beginners skip conditioner and regret it when the stain looks patchy. It’s a small step that makes a big difference.

Credit: www.reddit.com
Choosing The Right Stain For Acacia Wood
The type of stain you use affects both the look and durability. Here are the main types:
| Stain Type | Pros | Cons | Best For |
|---|---|---|---|
| Oil-based | Rich color, slow drying, penetrates well | Strong smell, longer cleanup | Deep, classic finishes |
| Water-based | Quick drying, easy cleanup, low odor | May raise grain, can dry too fast | Modern, lighter tones |
| Gel stain | Thick, less drip, even on verticals | Doesn’t soak in as deep, slower to apply | Tables with mixed grains |
Oil-based stains are the top choice for acacia. They soak deep into the wood and bring out the grain beautifully. Water-based stains are good if you want less odor or quick drying, but you need to watch for raised grain. Gel stains are less common but can help on tables with tricky, mixed grain.
Think about the color, too. Light stains highlight the natural beauty, while dark stains create a bold, modern look. Always test on a small, hidden area before staining the whole table.
How To Stain Acacia Wood Table: Step-by-step Guide
Now that you’ve prepped your table and chosen your stain, here’s how to get the perfect finish.
1. Set Up Your Work Area
Work in a well-ventilated space, like a garage with the door open or outside on a dry day. Lay down a drop cloth to catch spills. Wear gloves and a mask if you’re sensitive to dust or fumes.
2. Stir The Stain
Open the can and stir the stain thoroughly with a stir stick. Do not shake the can—it creates bubbles. Stirring mixes the pigments evenly. Stir again every 10-15 minutes during use.
3. Apply The First Coat Of Stain
Dip a foam brush or clean rag into the stain. Start at one end of the table and work with the grain. Apply a thin, even layer. If you use a rag, rub the stain into the wood in circles, then follow with long strokes along the grain.
Let the stain sit for 5-15 minutes. The longer it sits, the darker the color. Wipe off excess stain with a clean rag, moving with the grain.
Insight: Many beginners use too much stain. Thin coats are better than thick ones. You can always add another coat if you want a deeper color.
4. Let It Dry
Let the stain dry as directed (usually 4-8 hours). Do not rush this step. Dust and fingerprints at this stage can ruin your work.
5. Add More Coats (if Needed)
If you want a darker color, repeat the process: apply another thin coat, wait, and wipe off the excess. Most tables need 1-2 coats, but you can do 3 for a very rich look.
6. Buff The Surface
Once the last coat is dry, lightly buff the surface with 220-grit sandpaper or a fine sanding pad. This removes any raised grain and gives a smooth feel. Wipe with a tack cloth before finishing.
7. Apply A Clear Finish
Stain alone does not protect the wood. After staining, apply a clear finish like polyurethane, lacquer, or varnish. This step seals in the color and protects against spills and scratches.
- Water-based polyurethane dries fast and adds a clear coat.
- Oil-based polyurethane adds a warm glow but takes longer to dry.
Apply 2-3 thin coats, sanding lightly between each with 320-grit sandpaper for the smoothest result.
8. Final Curing
Let the table cure for at least 24-48 hours before using it. For heavy use (like dining tables), wait a week. The longer you wait, the tougher the finish.
Common Mistakes And How To Avoid Them
Many DIYers run into trouble with stain. Here’s how to avoid the most frequent issues:
- Skipping sanding: Stain won’t stick to rough or dirty wood. Always sand and clean thoroughly.
- Not using wood conditioner: This leads to blotchy, uneven color.
- Applying too much stain: Thick coats take forever to dry and can peel.
- Not wiping excess stain: This leaves a sticky, uneven surface.
- Using the wrong finish: Acacia needs a strong, clear finish for daily use. Don’t skip this step.
If you make a mistake, don’t panic. Lightly sand the area and try again. Stain is forgiving if you catch issues early.
How Long Does It Take To Stain An Acacia Wood Table?
Time needed depends on the table’s size, the number of coats, and drying time. Here’s a typical timeline:
| Step | Approximate Time |
|---|---|
| Cleaning and Prep | 1-2 hours |
| Sanding | 1-2 hours |
| Staining (per coat) | 30-60 minutes |
| Stain Drying (per coat) | 4-8 hours |
| Applying Finish (per coat) | 30-60 minutes |
| Finish Drying (per coat) | 4-6 hours |
| Final Curing | 24-48 hours |
Plan for at least 2-3 days from start to finish. Rushing leads to mistakes.
Maintenance And Care After Staining
After all your work, you’ll want your table to last. Here’s how to care for it:
- Clean spills quickly with a damp cloth.
- Avoid harsh cleaners. Use mild soap and water.
- Use coasters and placemats to prevent rings and scratches.
- Dust regularly with a soft cloth.
- Reapply finish every 2-3 years if the table gets heavy use.
Non-obvious tip: Acacia wood can darken over time with exposure to sunlight. Consider using a finish with UV blockers if your table sits in a sunny spot.
Examples Of Staining Acacia Wood Tables
Let’s look at a few real-life examples to show the variety of looks you can achieve.
Example 1: Modern Dark Finish
Anna wanted a bold, dramatic look for her dining table. She chose a dark walnut oil-based stain. After two coats and a satin polyurethane finish, the grain stood out, but the table looked modern and elegant.
Example 2: Rustic Light Finish
Ben restored an old acacia table from a flea market. He used a light, golden oak stain to keep the natural grain visible. After three coats of water-based poly, the table looked fresh but kept its rustic charm.
Example 3: Gray Wash Effect
Sarah wanted a trendy “weathered gray” look. She used a gray gel stain, applying it with a rag for a washed effect. The result was a stylish, farmhouse-style table that matched her kitchen perfectly.
These examples show that with the right products and steps, you can create almost any look.
Comparing Acacia Wood To Other Woods For Staining
Wondering How Acacia Compares To Other Common Furniture Woods?
| Wood Type | Stain Absorption | Grain Pattern | Difficulty Level |
|---|---|---|---|
| Acacia | Medium (can blotch) | Unique, wavy | Moderate |
| Oak | High (even) | Open, straight | Easy |
| Maple | Low (can blotch) | Straight, subtle | Challenging |
| Pine | High (uneven) | Knots, wild grain | Moderate |
Acacia is easier to stain than maple but needs more prep than oak. Always test the stain first to see how it reacts.
Troubleshooting: Fixing Common Staining Problems
Even with care, problems can happen. Here’s how to fix them:
- Blotchy finish: Sand the area, use a conditioner, and re-stain.
- Stain too dark: Lightly sand and wipe with mineral spirits to lift some color.
- Sticky surface: Wipe off excess stain, let dry, and apply a finish.
- Raised grain: Buff with fine sandpaper between coats.
- Peeling finish: Sand back to bare wood and reapply the finish.
Most issues are fixable if you act quickly. Don’t be afraid to make small corrections.
Credit: www.hgtv.com
Advanced Tips For A Pro-level Finish
Want to go beyond the basics? Try these advanced methods:
- Wet sanding: After the last coat of finish, use 600-grit sandpaper and water for a glass-smooth surface.
- Hand-rubbed oil finish: For a natural look, apply tung or Danish oil instead of polyurethane.
- Layered stains: Use two colors—start with a light stain, then add a darker one for depth.
- Tinted finishes: Add a small amount of stain to your clear finish for a subtle color boost.
These techniques require practice but can give your table a custom look.
Eco-friendly Staining: What To Know
Concerned about the environment? Many stains and finishes are now low-VOC (volatile organic compounds), meaning fewer harsh fumes. Look for products labeled “low-VOC” or “eco-friendly. ” Always dispose of rags and leftover stain safely, as some can be flammable.
For more information on safe wood finishing practices, visit the EPA Safer Choice program.
Frequently Asked Questions
How Do I Know If My Acacia Table Needs To Be Stained?
If your table looks dull, absorbs water, or shows scratches easily, it can benefit from staining. Even factory-finished tables can use a fresh stain after a few years.
Can I Stain Over An Old Finish?
No, the stain will not penetrate a sealed surface. You must remove the old finish by sanding or stripping before applying new stain.
What’s The Best Stain Color For Acacia Wood?
This depends on your style. Light stains highlight the natural grain, while dark stains create a modern, bold look. Always test on a hidden spot first.
How Do I Fix A Mistake After Staining?
If the color is uneven, lightly sand the area, apply wood conditioner, and re-stain. If too dark, wipe with mineral spirits. For most issues, sanding and patience solve the problem.
Is Staining Acacia Wood Safe For Food Surfaces?
Yes, if you use a food-safe finish (like water-based polyurethane or natural oils). Always let the finish cure fully before using the table for food.
Staining acacia wood is a rewarding DIY project. With careful prep and the right technique, your table will look stunning and last for years. Take your time, follow the steps, and don’t be afraid to experiment—your perfect finish is within reach.