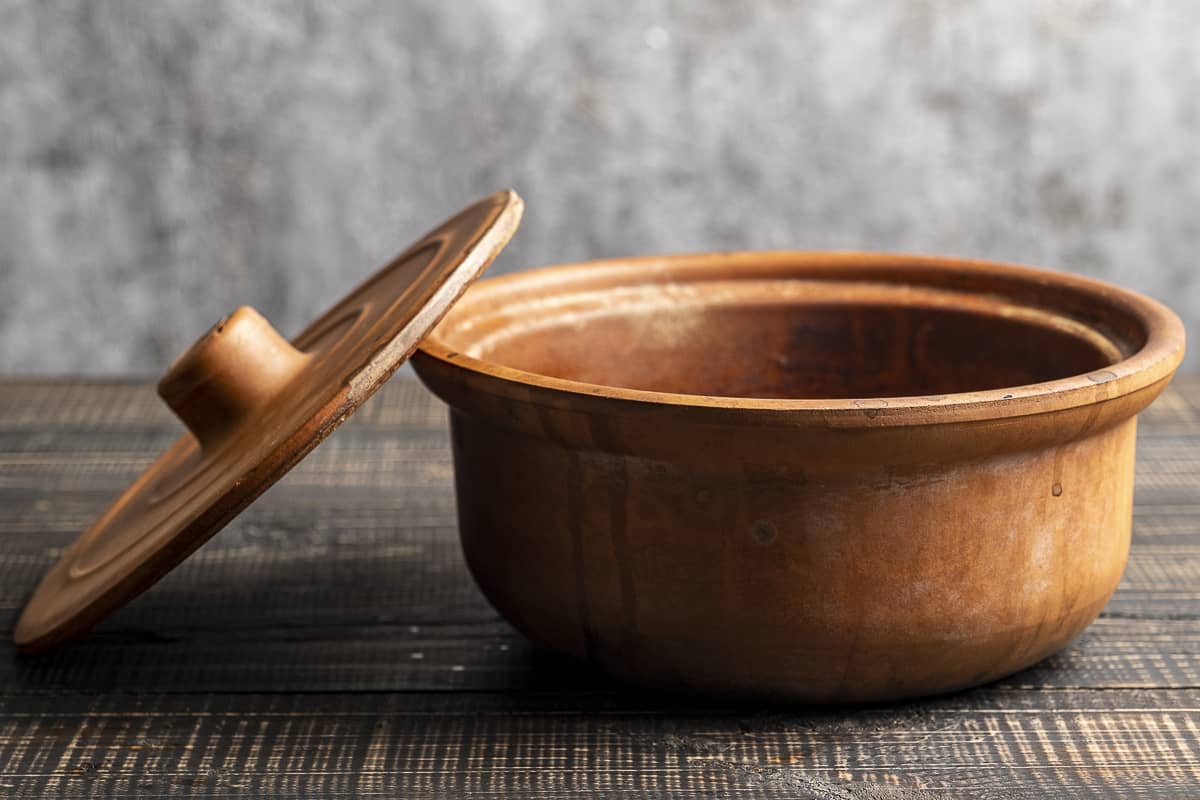
Seasoning a clay pot is a time-honored ritual for cooks who want to unlock the true magic of earthenware cooking. If you’ve ever tasted a stew or rice cooked in a well-seasoned clay pot, you know the difference: richer flavors, a gentle earthy aroma, and food that doesn’t stick. But for many beginners, the process of seasoning a clay pot is confusing or intimidating. How do you do it? What are the steps? Why is it even necessary? Let’s break down everything you need to know about seasoning a clay pot, so you can cook with confidence, protect your investment, and enjoy delicious results for years.
Why Seasoning A Clay Pot Matters
Many first-time users overlook the importance of seasoning. Clay pots are not just pretty kitchen tools—they’re porous ceramics. Without proper seasoning, they can crack or break suddenly when heated, or food can stick and ruin your meal. Seasoning fills the tiny holes in the clay with oil, making the surface smoother and less likely to absorb flavors, stains, or bacteria.
There are two main goals when seasoning:
- Strengthen the clay by slowly introducing it to heat and moisture.
- Create a natural non-stick surface by sealing the pores with oil.
A well-seasoned pot also develops a lovely patina—a soft, dark finish that enhances flavor over time. In many cultures, a seasoned pot is treasured and passed down through generations.
Types Of Clay Pots And Their Differences
Not all clay pots are identical. The type you have influences how you should season it. Here’s a comparison of the most common varieties:
| Type of Clay Pot | Main Features | Best For | Needs Seasoning? |
|---|---|---|---|
| Unguarded Earthenware | Porous, natural finish, no glaze | Stews, rice, curries | Yes, always |
| Glazed Clay Pots | Smooth, shiny coating inside/outside | Soups, baking, slow cooking | Sometimes (if inside is unglazed) |
| Black Pottery (La Chamba, Donabe) | Harder, dark color, may be pre-cured | Beans, rice, roasting | Usually, but check with maker |
| Flameware | Special clay, made for direct flame | High-heat cooking, grilling | Some require, some don’t |
Most traditional, unglazed clay pots absolutely need seasoning. If you’re unsure, check the instructions or ask the seller. Some modern clay pots are pre-seasoned in the factory, but it’s always safer to season again at home.
What You’ll Need To Season A Clay Pot
Before you start, gather these simple tools and ingredients:
- New clay pot (unglazed, if possible)
- Mild dish soap and a soft sponge
- Clean water
- Neutral cooking oil (vegetable, peanut, sunflower, or flaxseed are best)
- Rice flour, wheat flour, or all-purpose flour (optional, for extra sealing)
- Large container or sink (to soak the pot)
- Soft towel or cloth for drying
Do not use olive oil, as it can turn rancid. Avoid harsh detergents or abrasive scrubbers, which can damage the clay.
Step-by-step Guide: How To Season A Clay Pot
Seasoning is a patient process. Rushing it can weaken or crack your pot. Here’s how to do it right:
1. Inspect And Clean The Pot
When you first get your clay pot, check for any cracks or chips. Small imperfections are normal, but deep cracks can get worse with use.
Wash the pot (and lid, if included) gently with mild dish soap and warm water. Use a soft sponge, not steel wool. Rinse well to remove any clay dust or factory residue. Let it air dry for 1-2 hours.
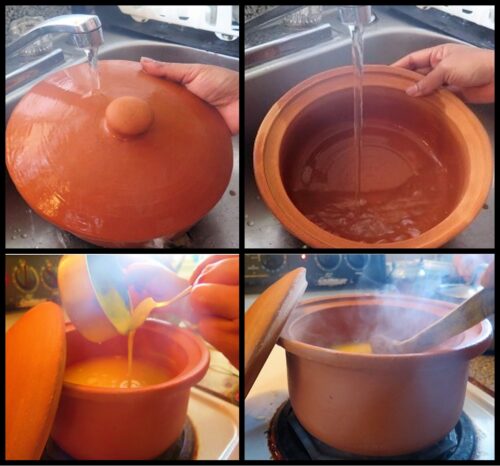
2. Soak The Pot In Water
This is the most important step. Submerge the entire pot (and lid) in a large container of clean, cool water. The water should cover the pot completely. Soak for 8 to 24 hours.
Why soak? Clay is thirsty. Soaking fills the tiny pores with water, preventing the pot from cracking when exposed to heat. For very thick pots, soak closer to 24 hours. For thin pots, 8-10 hours is enough.
Pro tip: Place a small plate or weight inside the pot to keep it from floating.
3. Dry The Pot Thoroughly
After soaking, remove the pot and let the water drip off. Use a soft towel to pat it dry, then let it air dry for several hours. The surface should be matte, not shiny or wet.
4. Rub The Pot With Oil
Pour a small amount of neutral cooking oil onto a clean paper towel or cloth. Rub the inside and outside of the pot with oil, including the rim and the lid. The oil should cover all surfaces, but not drip.
For better results, you can sprinkle a little rice flour or wheat flour inside the pot before adding oil. This creates a stronger seal.
Let the pot sit for at least 1 hour so the oil can soak in.
5. Slow Initial Heating
Place the oiled pot in a cold oven. This is important—never place a cold clay pot directly into a hot oven or on a hot stove. The sudden change in temperature can cause cracks.
Set the oven to 220°F (104°C) and let the pot heat for 30 minutes. Then, increase the temperature to 350°F (177°C) for another 30-45 minutes. Turn off the oven and let the pot cool inside the oven slowly.
If you’re using a stovetop, use the lowest heat setting possible, and gradually increase over 30 minutes.
6. Cook A Starchy Porridge
This step is traditional in many cultures. Cooking a simple rice or flour porridge seals the pores and removes any remaining clay taste.
Here’s how:
- Mix 1 cup of rice or wheat flour with 4 cups of water.
- Pour into the pot and bring to a gentle simmer.
- Cook for 30-40 minutes, stirring occasionally.
- Let it cool, then discard the porridge.
Repeat once if you want a stronger seal.
7. Final Rinse And Drying
Wash the pot with warm water (no soap) and a soft sponge. Rinse thoroughly and let it air dry completely before storing.
Your Pot Is Now Ready For Its First Real Meal!
Tips For Seasoning Different Types Of Clay Pots
Not all clay pots are exactly the same. Here are some adjustments you may need to make:
For Black Clay Pots (la Chamba, Donabe)
These pots are often pre-cured at the factory, but it’s still smart to season them at home. Use the same soaking, oiling, and slow heating steps, but you can skip the rice porridge if the manufacturer says it’s not necessary.
For Glazed Clay Pots
If the inside is glazed, seasoning is optional. If the inside is unglazed, always season. Glazed exteriors can be wiped with oil, but do not soak them as long, to avoid damaging the glaze.
For Flameware
Some flameware clay pots are specially formulated to handle direct flame without cracking. Always read the instructions. Many still benefit from seasoning, especially if the inside is unglazed.
For Terracotta Baking Dishes
These should be soaked and oiled, but you can skip the rice porridge. Use them for bread, casseroles, or roasting after seasoning.
Common Mistakes When Seasoning A Clay Pot
Even experienced cooks sometimes make errors. Here are mistakes to avoid:
- Skipping the soaking step. This almost always leads to cracks during first use.
- Using olive oil. It can go bad and leave a sticky smell.
- Heating too fast. Always start with a cold oven or a very low flame.
- Washing with strong soap. This removes the oil and can cause flavors to linger.
- Not drying completely. Storing a damp pot can cause mold or musty smells.
- Ignoring the lid. Season the lid too—steam travels everywhere!
- Putting on high heat empty. Always have some liquid or food inside during cooking.
Credit: www.giverecipe.com
How Seasoning Changes Over Time
A well-seasoned clay pot gets better with each use. The surface becomes smoother, darker, and more non-stick. Here’s how seasoning develops:
| Stage | Appearance | Cooking Results | Care Needed |
|---|---|---|---|
| After Initial Seasoning | Light brown, slightly oily | Food may stick a little | Gentle use, avoid acidic foods |
| 5-10 Uses | Darker, smoother inside | More non-stick, better flavor | Wash with water only |
| 20+ Uses | Deep brown/black patina | Rich flavor, food slides off | Minimal care, re-oil occasionally |
Non-obvious tip: If the pot develops a white, chalky surface after use, it’s just minerals from water or food. Scrub gently with a soft brush and rinse well.
Caring For Your Seasoned Clay Pot
Proper care keeps your pot in top shape and extends its life.
- Never use harsh detergents. Wash with warm water and a soft sponge.
- Dry completely before storing to prevent mold.
- Store with the lid off or with a paper towel inside to let air circulate.
- Re-season every few months by rubbing with oil and baking at low heat.
- Avoid cooking very acidic foods (like tomato sauce) in the first 10 uses.
If your pot develops a musty smell, fill it with water and a few tablespoons of baking soda. Let it sit overnight, then rinse and dry.
Why Clay Pots Make Food Taste Better
Many chefs and home cooks believe food cooked in clay pots tastes richer and more aromatic. There are good reasons for this:
- Even heat distribution: Clay heats slowly and evenly, so food cooks gently without burning.
- Moisture retention: The porous surface lets steam circulate, keeping food juicy.
- Natural minerals: Clay can add subtle earthiness to dishes, especially with repeated use.
- Healthier cooking: Less oil is needed thanks to the seasoned, non-stick surface.
For example, Indian biryani, Moroccan tagine, and traditional beans all taste better when slow-cooked in a clay pot.
Seasoning A Clay Pot: Cultural Traditions
Seasoning is not just a technical step—it’s a tradition in many parts of the world. In India, cooks often rub the pot with turmeric paste for extra antibacterial benefits. In Mexico, some families use lime water before oiling. In Japan, seasoning a donabe is a family event, with rice porridge simmered as a blessing for future meals.
These rituals show respect for the pot and the meals it will help create.
Troubleshooting: Common Seasoning Problems
Even with care, you might face a few issues. Here’s how to fix them:
Cracking During First Use
Usually caused by skipping the soaking step or heating too fast. Unfortunately, once cracked, the pot is hard to fix. For small hairline cracks, try simmering rice porridge to fill the gaps.
Musty Or Sour Smell
Happens if the pot was stored damp. Soak in water with a little vinegar or baking soda, rinse, and dry thoroughly in sunlight if possible.
Sticky Or Oily Surface
Too much oil was used. Wash with hot water and a little baking soda, then reheat the pot empty at low temperature to remove excess.
Food Tastes Like Clay
This is common with new pots. Simmer rice porridge or boil water with lemon peel inside the pot 2-3 times. The taste will fade with use.
Non-obvious tip: If you want to season a clay pot quickly, you can do two rounds of soaking, oiling, and porridge in one day—but never rush the heating or drying steps.
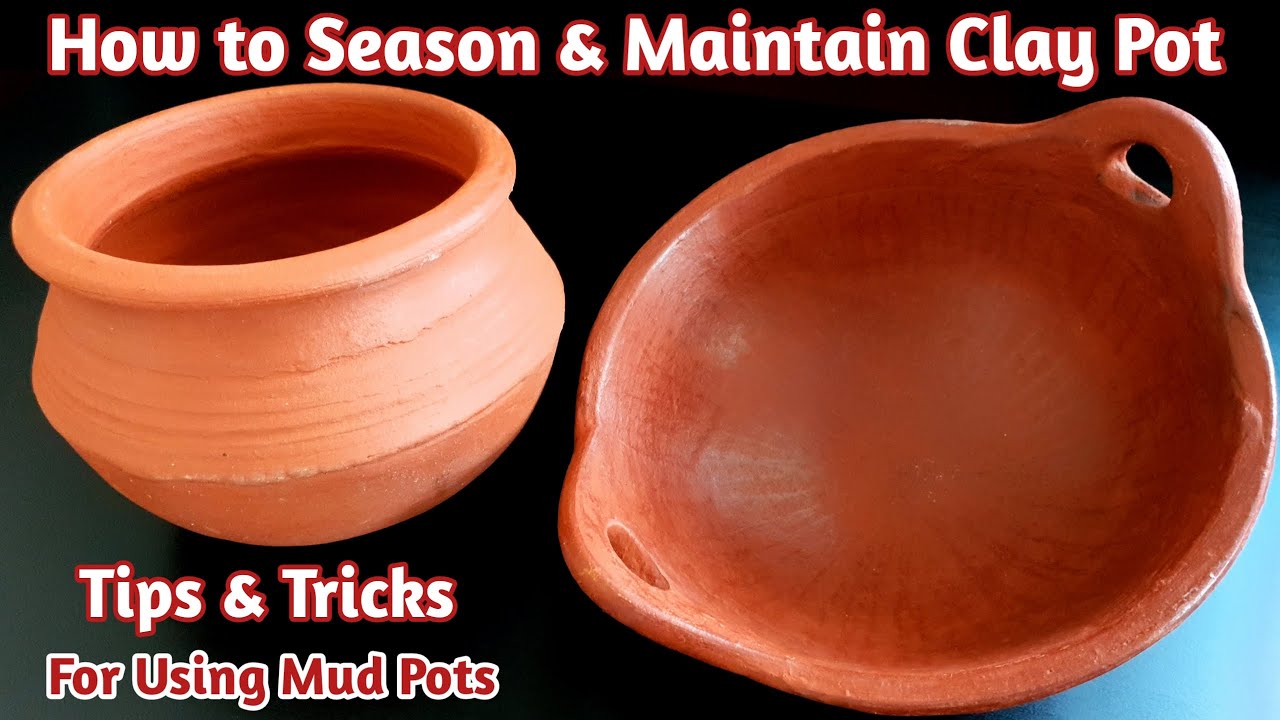
Using Your Seasoned Clay Pot: First Recipes
After seasoning, start with simple, starchy foods. These help build the patina and further seal the pot. Good first recipes include:
- Plain rice or congee
- Lentils or beans with little tomato or acid
- Mild vegetable stews
- Simple chicken broth
Avoid sticky or sugary foods at first, as they can burn and stick.
Credit: www.youtube.com
Myths About Clay Pot Seasoning
Let’s clear up some common myths:
- “You need to season only once.” False. The more you use your pot, the better it gets. Light re-seasoning every few months is helpful.
- “Any oil will work.” Not true. Use only neutral, high-smoke-point oils. Olive oil can spoil.
- “You can skip seasoning if the pot is glazed.” Sometimes, but most pots have unglazed areas that need care.
- “Clay pots are fragile.” They’re actually strong if seasoned and cared for properly.
Comparing Clay Pots To Other Cookware
Curious how clay pots stack up against other materials? Here’s a side-by-side look:
| Cookware Type | Heat Retention | Flavor Impact | Care Needs | Best For |
|---|---|---|---|---|
| Clay Pot | High, very even | Earthy, rich | Medium (seasoning, hand-wash) | Stews, grains, slow cooking |
| Cast Iron | Very high | Mild, sometimes metallic | High (seasoning, rust prevention) | Searing, frying, baking |
| Stainless Steel | Medium | Neutral | Low (dishwasher safe) | Boiling, sautéing |
| Non-stick | Low-medium | Neutral | Low (easy to clean, scratches easily) | Eggs, pancakes |
Clay pots are unique for their heat and flavor benefits, but require more care than modern cookware.
When To Re-season A Clay Pot
Over time, the seasoned layer can fade. You’ll know it’s time to re-season if:
- Food starts sticking more than usual
- The inside looks dull or chalky
- The pot has not been used for many months
- You cleaned with strong soap by mistake
To re-season, just repeat the oiling and low-heat baking steps. There’s no need to soak again unless the pot has been dry for a long time.
Environmental Benefits Of Clay Pots
Clay pots are made from natural materials—earth, water, and fire. They’re biodegradable, unlike non-stick pans or plastic. Making and using clay pots also requires less energy than metal cookware. In many regions, local potters use traditional, sustainable methods to craft each piece.
For those who care about the environment, cooking in a clay pot is a small but meaningful step.
Where To Buy Quality Clay Pots
Look for authentic, handmade clay pots at local markets, specialty kitchen stores, or online from trusted sellers. Avoid decorative pots, which may not be food-safe or heat-resistant. Always check for food-grade certification or ask the seller directly.
Good sources include:
- Traditional pottery markets
- Asian, Middle Eastern, or Latin American grocery stores
- Specialty cookware shops
For detailed background on clay pottery and its uses, see the Earthenware Wikipedia page.
Frequently Asked Questions
How Do I Know If My Clay Pot Needs Seasoning?
If your pot is unglazed or partially unglazed (especially inside), it always needs seasoning before first use. If it’s fully glazed inside and out, check with the manufacturer.
Can I Use Soap To Clean My Seasoned Clay Pot?
Use warm water and a soft sponge only. Strong detergents remove the seasoned layer and can leave a soapy taste. If food is stuck, soak with warm water and scrub gently.
What Oil Is Best For Seasoning A Clay Pot?
Choose a neutral, high-smoke-point oil like sunflower, peanut, or flaxseed. Do not use olive oil, as it can turn rancid.
My Clay Pot Smells Musty After Storage. What Should I Do?
Wash with water and let it dry in sunlight. For stubborn odors, fill with water and a little baking soda or vinegar, soak overnight, rinse, and dry fully.
Can I Use A Seasoned Clay Pot On A Gas Stove?
Yes, but always start with low heat and increase slowly. Never place a cold pot on a hot burner. Some modern clay pots are made for direct flame, but check the instructions.
Seasoning a clay pot is a rewarding process. With a little patience and care, you’ll enjoy delicious, healthy, and aromatic meals for years to come. Your clay pot will become more than a tool—it will be part of your kitchen’s story.
Credit: miriamsearthencookware.com