Hardwood floors bring warmth and beauty to any home, but they can face a tough enemy: moisture. When water sneaks in, the wood can swell and push upward—a problem called buckling. If you see parts of your floor rising or warping, it’s more than just an eyesore. Buckled floors can be a sign of deeper problems, from leaks to poor installation. The good news? You can often fix buckled hardwood floors yourself if you act quickly, understand the steps, and use the right tools.
Learning how to repair buckled hardwood floors can save you thousands of dollars. You’ll also protect your home from further damage and keep your space looking its best. This guide explains everything you need to know: what causes buckling, how to assess the damage, detailed repair steps, and even how to avoid buckling in the future. Whether you’re a confident DIYer or just want to understand the process before calling a pro, you’ll find clear advice here—plus real-world examples and mistakes to avoid.
What Causes Buckled Hardwood Floors?
Before you start any repairs, it’s important to know why hardwood floors buckle. Fixing the surface without solving the root cause means the problem will return.
Common Reasons For Buckling
- Water Damage: The most common reason. This can come from leaks, spills, flooding, or even high humidity. Wood absorbs water and expands, causing boards to lift.
- Poor Installation: If the floor lacks a proper expansion gap around the walls, boards have nowhere to expand, leading to buckling.
- Improper Acclimation: Hardwood boards need time to adjust to your home’s moisture and temperature before installation. Skipping this step means boards may change size after they’re installed.
- High Humidity: Even without leaks, rooms with high humidity—like basements—can cause floors to swell.
- Subfloor Issues: A wet or uneven subfloor can push boards up or trap moisture.
Non-obvious Causes Most People Miss
- Hidden Plumbing Leaks: Slow leaks under the floor might not be visible but can cause long-term moisture buildup.
- Seasonal Changes: Sudden changes in weather, especially in areas with damp springs and hot summers, can make wood expand and contract rapidly.
Identifying what caused your buckling floor will help you fix it for good.
How To Identify And Assess Buckled Hardwood Floors
Catching buckling early makes repairs easier and less expensive. But not every uneven spot is buckling. Here’s how to be sure.
Signs Of Buckled Floors
- Raised Boards: Sections of the floor lift higher than surrounding boards.
- Cupping: Board edges turn up, creating a cup shape.
- Crowning: Board centers rise above the edges.
- Gaps: Large gaps appear between boards.
- Loose or Moving Boards: Boards move when stepped on.
How To Test For Moisture
Use a moisture meter (available at hardware stores) to measure the water content in both the wood and subfloor. Healthy hardwood usually has 6-9% moisture content. Anything above 12% is a red flag.
Checking For Hidden Damage
Gently tap the floor near the buckled area. Listen for hollow sounds—this means the boards have lifted off the subfloor. If the area feels soft, the wood may have started to rot.
Example
A homeowner in Florida noticed their living room floor was raised in one corner. After checking with a moisture meter, they found the wood at 18% moisture content—far too high. The cause? A slow leak from a nearby refrigerator water line.

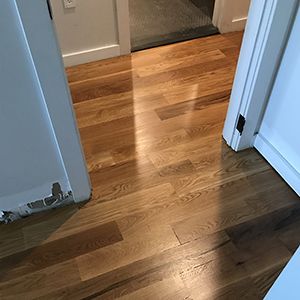
Credit: www.expressflooring.com
Tools And Materials Needed For Repair
Gathering the right tools and materials before you start will save time and reduce frustration. Here’s a list of what you’ll likely need for most buckled hardwood floor repairs:
- Pry bar: For gently lifting boards
- Hammer and finishing nails
- Circular saw or oscillating tool: For cutting damaged boards
- Drill and screws
- Wood glue
- Flooring adhesive (if applicable)
- Replacement boards: Matching the existing floor type and color
- Moisture meter
- Shop vacuum
- Fans or dehumidifier
- Wood putty or filler
- Sandpaper or floor sander
- Stain and finish (to match existing floor)
- Safety gear: Gloves, goggles, mask
Some repairs may need special materials, like vapor barriers or waterproof membranes, if water damage was severe.
Step-by-step Guide: Repairing Buckled Hardwood Floors
Fixing a buckled floor is more than just pushing boards down. You need to dry the area, repair or replace wood, and stop future problems. Here’s how to do it right.
1. Find And Fix The Source Of Moisture
Do not start repairs until the source of water is found and fixed. Otherwise, your new floor will buckle again.
- Check for leaks under sinks, appliances, or windows.
- Inspect the subfloor for dampness.
- Review recent weather (floods, storms, etc. ).
- If you’re unsure, call a plumber or building inspector.
2. Dry Out The Area
Remove all rugs, furniture, and anything else from the affected area. Use fans, a dehumidifier, and open windows to dry the floor as much as possible. This process may take several days.
Pro Tip: Do not rush this step. If you repair before the floor is dry, moisture will get trapped and cause more damage.
3. Remove Damaged Boards
Carefully remove buckled boards. Use a pry bar to lift them, working slowly to avoid damaging surrounding boards. If only a few boards are affected, you may only need to replace those.
Non-Obvious Insight: Sometimes, boards can be saved if they are not cracked or warped beyond repair. Lay them flat and let them dry; they may return to their original shape.
4. Inspect And Repair The Subfloor
Check if the subfloor is wet, soft, or moldy. If it is, you’ll need to dry or replace sections before new boards are installed.
Subfloor Repair Table
| Subfloor Problem | What to Do | Estimated Time |
|---|---|---|
| Wet but solid | Dry with fans/dehumidifier | 2-7 days |
| Soft or rotted | Cut out and replace section | 2-4 hours per 4×4 ft area |
| Mold present | Clean with bleach solution; replace if severe | 1-2 hours cleaning |
Practical Tip: If you find mold, always wear a mask and gloves. Mold spores can be harmful.
5. Allow The Floor To Acclimate
New boards must adjust to your room’s humidity and temperature before installation. Lay them in the room for 48-72 hours before fitting.
6. Install New Or Dried Boards
- Dry Fit First: Place replacement boards without glue or nails to check the fit.
- Glue or Nail Down: Follow the pattern of your existing floor. Use wood glue for floating floors or nails for traditional hardwood.
- Leave Expansion Gap: Always leave a small gap (usually 1/4 inch) between the boards and the wall to allow for future expansion.
7. Sand And Finish
Once boards are secure, sand the area to make it level with the rest of the floor. Use wood putty to fill small gaps or nail holes. Apply stain and finish to match the surrounding floor.
8. Clean Up And Monitor
Vacuum up dust and debris. Put furniture back only after the finish is fully dry (usually 24-48 hours).
Expert Insight: Keep checking the area for the next few weeks. If you see new buckling, moisture is likely still present.
When Should You Call A Professional?
DIY repairs can save money, but some situations need expert help:
- Large areas (more than 20 square feet) are buckled
- Severe water damage or black mold is present
- Structural damage to subfloor or joists
- Historic or high-value floors that require special care
Professional flooring contractors have tools for moisture detection, subfloor repair, and seamless board replacement. If you’re unsure, at least get an inspection. It may cost $100-$300 but can save much more in the long run.
Cost Of Repairing Buckled Hardwood Floors
Costs vary based on the problem’s size, your location, and floor type. Here’s a general breakdown:
| Repair Type | DIY Cost (Estimate) | Professional Cost (Estimate) |
|---|---|---|
| Small area (1-3 boards) | $50-$150 | $200-$500 |
| Medium area (10-20 boards) | $250-$600 | $600-$1,500 |
| Large area or subfloor replacement | $700-$1,500+ | $2,000-$6,000 |
Tip: Insurance may cover repairs if the damage is from a sudden leak or flood. Check your policy.
How To Prevent Hardwood Floor Buckling In The Future
Prevention is often easier (and cheaper) than repair. Here’s how you can keep your floors flat and beautiful:
1. Control Moisture
- Use a dehumidifier in humid areas, especially basements or during rainy seasons.
- Quickly clean up spills and leaks.
- Maintain your home’s humidity between 35% and 55%.
2. Proper Installation
- Make sure your installer leaves an expansion gap around the room.
- Use a vapor barrier over concrete subfloors or in damp climates.
3. Acclimate Boards Before Installation
Lay boards in the installation room for at least 48 hours before fitting. This allows them to adjust to the environment and prevents sudden expansion or contraction.
4. Routine Checks
- Inspect for leaks under sinks, around windows, and near appliances.
- Use a moisture meter to check floors and subfloors every few months.
5. Maintain Finish
Apply a new coat of finish every few years to protect wood from moisture.
Non-Obvious Insight: Floor mats at entry doors can prevent water from shoes or umbrellas from reaching your hardwood.
Repairing Engineered Vs. Solid Hardwood Floors
Not all hardwood floors are the same. Solid hardwood is made from one piece of wood, while engineered hardwood is several layers glued together. Repair methods may differ.
Engineered Hardwood
- Less likely to buckle but can still warp from water.
- Boards are thinner, so sanding may not be possible more than once.
- Damaged boards usually need to be replaced, not repaired.
Solid Hardwood
- Can be sanded and refinished multiple times.
- More sensitive to moisture changes, so expansion gaps are critical.
Comparison Table: Engineered Vs. Solid Hardwood Repairs
| Feature | Engineered Hardwood | Solid Hardwood |
|---|---|---|
| Repair Method | Replace boards | Sand/replace boards |
| Water Resistance | Moderate | Low |
| Refinishing Limit | Once or twice | Several times |
| Cost to Replace | Lower | Higher |
Common Mistakes To Avoid
Many homeowners try to fix buckled floors but make errors that lead to repeat problems. Here’s what to watch out for:
- Ignoring the moisture source: Fixing the floor but not the leak means the problem returns quickly.
- Skipping acclimation: Installing boards straight from the store often leads to future buckling.
- Not leaving an expansion gap: Wood needs room to expand and contract.
- Rushing the drying process: Installing new boards over a damp subfloor traps moisture.
- Mismatching boards: Using the wrong species, width, or finish looks unprofessional and can affect floor stability.
- Not sealing after repair: Failing to refinish the area can leave wood open to new moisture.
Real-life Example: Diy Floor Buckle Repair
Melissa, a homeowner in Ohio, found her dining room floor buckling after a dishwasher leak. She dried the area with fans for three days, removed four damaged boards, and checked the subfloor with a moisture meter. The subfloor was still wet, so she waited until readings dropped below 10%.
Then, she installed matching boards, sanded, and refinished the area. The floor looked seamless, and the problem did not return.
What Melissa learned: patience is critical, and using a moisture meter is non-negotiable.

Credit: www.reddit.com
How Long Does It Take To Repair Buckled Hardwood Floors?
Time depends on the damage size and drying needs. For a small area, the whole process might take 3-5 days:
- Drying: 2-3 days minimum
- Removing/replacing boards: 1 day
- Sanding/finishing: 1 day (plus drying time for finish)
Larger repairs, or those with wet subfloors, may take a week or more.
Is It Worth Repairing Or Should You Replace The Floor?
If only a few boards are affected and the subfloor is sound, repair is usually best. If more than 30% of the floor is buckled or there is widespread mold/rot, replacement may be more cost-effective. Always check with a professional if you’re unsure.
Where To Find Matching Replacement Boards
Matching boards can be a challenge, especially for older floors. Try these options:
- Contact the original installer or builder.
- Check with local flooring stores or lumber yards.
- Look for reclaimed wood suppliers for older or unique boards.
- If an exact match is impossible, choose a close color and refinish the whole area for a uniform look.
Environmental Considerations
Disposing of old boards? Many recycling centers accept wood flooring. For large repairs, consider donating usable boards to organizations like Habitat for Humanity. Using low-VOC stains and finishes helps indoor air quality.
Useful Resources
For more details about moisture and wood flooring, see the National Wood Flooring Association at woodfloors.org.
Frequently Asked Questions
Why Do Hardwood Floors Buckle?
Buckling happens when wood absorbs too much moisture, causing it to swell and lift above the subfloor. This is usually due to leaks, spills, high humidity, or poor installation.
Can You Fix A Buckled Hardwood Floor Without Replacing It?
If the wood is only slightly raised and not cracked or warped, it can sometimes be dried and pressed back into place. Severe buckling usually requires replacing the affected boards.
How Long Does It Take For Hardwood Floors To Dry After Water Damage?
It can take anywhere from 2 days to over a week, depending on the amount of moisture, room ventilation, and weather. Use a moisture meter to confirm dryness before repairs.
Will A Dehumidifier Fix A Buckled Floor?
A dehumidifier can help remove moisture from the air and dry the floor, but it will not flatten boards that are already buckled. Physical repair is needed.
Is It Cheaper To Repair Or Replace Buckled Hardwood Floors?
Repairing a small area is almost always cheaper. If damage is widespread or the subfloor is also affected, replacement may be more cost-effective.
Repairing buckled hardwood floors is a process, but it’s one that pays off in a beautiful, long-lasting floor. With patience, the right tools, and a focus on moisture control, you can restore your home’s comfort and value. If you ever feel unsure, don’t hesitate to consult a professional—sometimes expert guidance is the best investment you can make for your home.
Credit: hudsonfloorgroup.com