Repainting dining chairs can completely change the look and feel of your dining space. Many people believe it’s a hard, messy job or that you need to be an artist. In reality, with the right guidance, tools, and a bit of patience, anyone can repaint dining chairs successfully at home.
You do not need professional experience—just a willingness to learn and a careful approach.
This guide will show you how to repaint dining chairs from start to finish. We’ll cover everything: choosing the best paint, preparing your chairs, avoiding common mistakes, and adding final touches. Along the way, you’ll find practical advice, data tables for comparing paint types, and answers to questions most people never think to ask. Whether your chairs are old hand-me-downs or just need a refresh, this article will help you achieve smooth, lasting results.
Why Repaint Dining Chairs?
Dining chairs are used daily. Over time, their finish can wear out, get scratched, or simply fall out of fashion. Repainting is a cost-effective way to update your dining area without buying new furniture. It also allows you to personalize your space—choose colors and finishes that match your style.
Another benefit is sustainability. Instead of throwing away old chairs, repainting gives them new life and keeps them out of landfills. This process is also a great introduction to DIY furniture projects. Once you see the results, you might feel inspired to tackle other pieces in your home.
Understanding Your Dining Chairs
Before you start, it’s important to know what kind of chairs you have. The material and shape will affect how you prepare and paint them.
- Wooden chairs: Most common and easiest to repaint. They can be solid wood or wood veneer.
- Metal chairs: Require different primers and paints. Often used in modern settings.
- Plastic or laminate chairs: Need special preparation for paint to stick.
- Upholstered chairs: If only the frame is painted, extra care is needed to protect fabric.
Look for labels or manufacturer stamps under the seat. If you’re unsure, test a small spot with sandpaper. Wood will show dust and grain, plastic feels smooth, and metal is cold to touch.
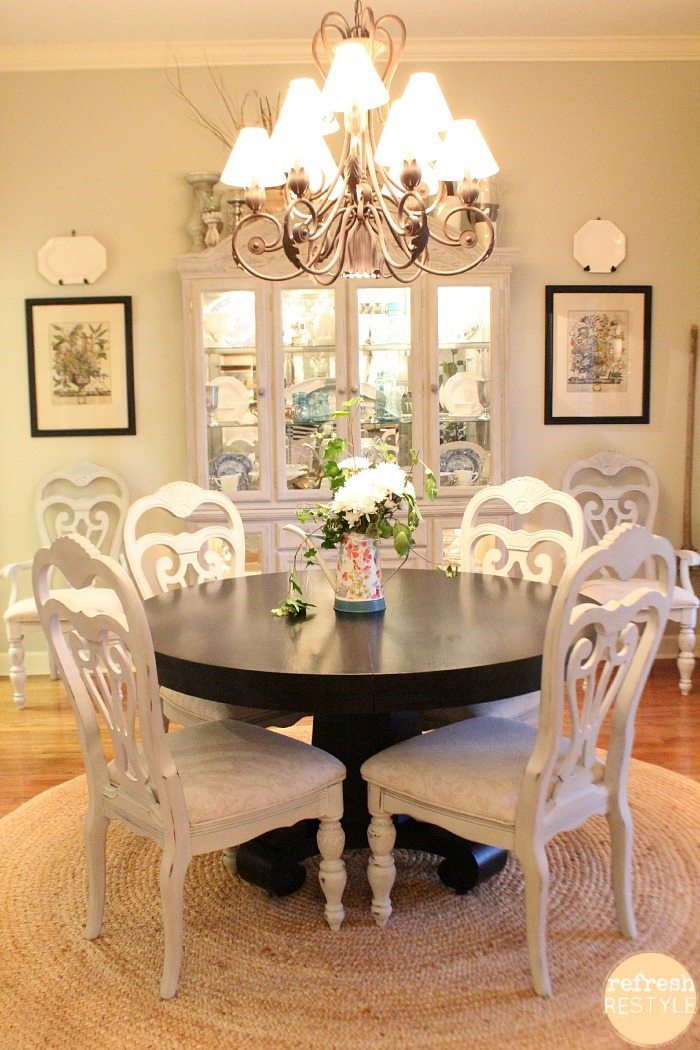
Credit: refreshrestyle.com
Choosing The Right Paint And Supplies
The success of your project depends on using the right materials. Not all paints work for all surfaces, and the wrong brush can leave marks or hairs behind.
Paint Types
Here is a comparison of popular paint types for dining chairs:
| Paint Type | Best For | Durability | Dry Time | Finish Options |
|---|---|---|---|---|
| Latex Paint | Wood, Metal | Good | 1-4 hours | Matte, Satin, Gloss |
| Chalk Paint | Wood, Veneer | Medium | 30 min-1 hour | Matte, Distressed |
| Spray Paint | Metal, Plastic | Excellent | 15-30 min | Gloss, Satin, Matte |
| Oil-Based Paint | Wood, Metal | Very High | 6-8 hours | Gloss, Satin |
Latex paint is popular for beginners because it’s easy to clean and dries quickly. Chalk paint is trendy for vintage or rustic styles. Spray paint is great for metal or curved surfaces but needs good ventilation. Oil-based paint gives a hard, smooth finish but takes longer to dry and has strong fumes.
Primer
Primer helps paint stick and prevents stains from coming through. Use a bonding primer for plastic or shiny surfaces. For wood, a regular stain-blocking primer works well.
Brushes, Rollers, And Other Tools
- Synthetic brushes: Best for water-based (latex) paints.
- Natural bristle brushes: Good for oil-based paints.
- Foam rollers: Give a smooth finish on flat surfaces.
- Spray cans or spray guns: Fastest for multiple chairs, but require practice.
- Sandpaper: 120-grit for initial sanding, 220-grit for smoothing before painting.
- Drop cloths: Protect floors and work areas.
- Painter’s tape: Mask off areas you don’t want to paint.
- Screwdriver: Remove chair seats or hardware.
Other Supplies
- Wood filler: Repairs dents and scratches.
- Tack cloth: Picks up dust after sanding.
- Gloves and mask: Protects from dust and fumes.
Planning Your Project
Before you start, plan each step. This prevents mistakes and saves time.
- Choose your work area: Pick a space with good ventilation, like a garage or outdoors. Cover the floor to catch drips.
- Check the weather: Paint dries best between 60-80°F (16-27°C) and low humidity.
- Set a timeline: One chair takes about 2-3 days (including drying time). For four chairs, plan a week.
- Gather all tools: Lay out everything before you begin. Running to the store mid-project can cause uneven results if paint dries halfway.
Preparing Dining Chairs For Painting
Preparation is the most important step. Many first-time painters rush or skip this, leading to peeling, uneven finishes, or visible damage under the paint.
Remove Seats And Hardware
If your chairs have upholstered seats or removable backs, unscrew and set them aside. Take off any metal parts (like handles or decorative nails) if possible. This keeps them clean and makes painting easier.
Clean The Surface
Chairs collect grease, oils, and old polish. Use a mild detergent or a mix of water and vinegar. Scrub all surfaces, especially armrests and the top of the backrest. Rinse with clean water and let dry completely.
Non-obvious tip: Even invisible oils from hands can stop paint from sticking. Always clean, even if the chairs look “clean.”
Repair Dents, Scratches, And Wobbles
Check for loose joints or cracks. Use wood glue to tighten loose legs. Fill dents or deep scratches with wood filler. Let it dry, then sand smooth. If a chair is wobbly, now is the time to fix it—painting won’t hide structural problems.
Sanding
Sanding is not about removing all old paint, but about giving the new paint something to grip. Use 120-grit sandpaper to lightly rough up the surface. For glossy finishes, sand until the shine is gone. Wipe away dust with a tack cloth.
Beginner’s mistake: Skipping sanding or using too fine a sandpaper. If the surface is too smooth, paint may peel off later.
Masking
Use painter’s tape to cover areas you don’t want painted, like leg tips, spindles, or any design elements you want to keep. Cover the seat if you can’t remove it.
Priming The Chairs
Primer is your insurance policy for a lasting finish. It helps block old stains, evens out the surface, and improves paint adhesion.
- For bare wood: Use a stain-blocking primer.
- For previously painted wood: Use a bonding primer if old paint is glossy.
- For metal: Use a rust-inhibiting metal primer.
- For plastic/laminate: Only use a bonding primer designed for slick surfaces.
Apply primer with a brush or roller in thin, even coats. Let it dry fully (check the can for exact time). Sand lightly with 220-grit sandpaper between coats for the smoothest result.
Painting Your Dining Chairs
Now comes the fun part—adding color! Take your time and don’t rush coats.
Brushing Vs. Spraying Vs. Rolling
| Method | Best For | Pros | Cons |
|---|---|---|---|
| Brushing | Detailed shapes, edges | Good control, easy for beginners | Brush marks possible, slower |
| Rolling | Flat surfaces, seat backs | Fast, smooth finish | Hard on curves or spindles |
| Spraying | All-over color, curves | No brush marks, fast for many chairs | Needs masking, can be messy |
For most people, a combination works best—brush corners and details, roll flat surfaces, spray for metal or plastic chairs.
How To Apply Paint
- Stir paint well. Do not shake—shaking adds bubbles.
- Dip brush about one-third of the way into the paint.
- Paint with the grain if wood is visible, using long, even strokes.
- Thin coats are best. Thick coats drip and take longer to dry.
- Let each coat dry completely before adding another. Two coats is usually enough; sometimes three for very light colors over dark wood.
- Sand lightly with 220-grit sandpaper between coats for a glass-smooth finish.
Non-obvious tip: Don’t paint the bottom of chair legs until the rest is dry. This prevents sticking to the floor or paper.
Drying And Curing
Even when paint feels dry to the touch, it may not be fully cured. Curing means the paint is hard and won’t scratch easily.
- Latex paint: 1-2 days to dry, up to 2 weeks to cure.
- Oil-based paint: 2-3 days to dry, up to 1 month to cure.
- Chalk paint: 1 hour to dry, but needs sealing.
Keep chairs out of heavy use until fully cured. Avoid stacking or dragging them.
Adding A Protective Topcoat
Paint alone may not be enough, especially for dining chairs that get daily use. A topcoat adds extra durability and shine.
- Polyurethane: Most durable, available in water- or oil-based versions. Use water-based for light colors to avoid yellowing.
- Polycrylic: Good for indoor furniture, dries fast, doesn’t yellow.
- Wax: Used for chalk paint finishes. Buff to a soft sheen but less protective.
Apply topcoat with a clean brush or foam applicator. Two thin coats are better than one thick coat. Let dry fully between coats.
Practical insight: Skipping a topcoat is a major reason repainted chairs chip or stain quickly.
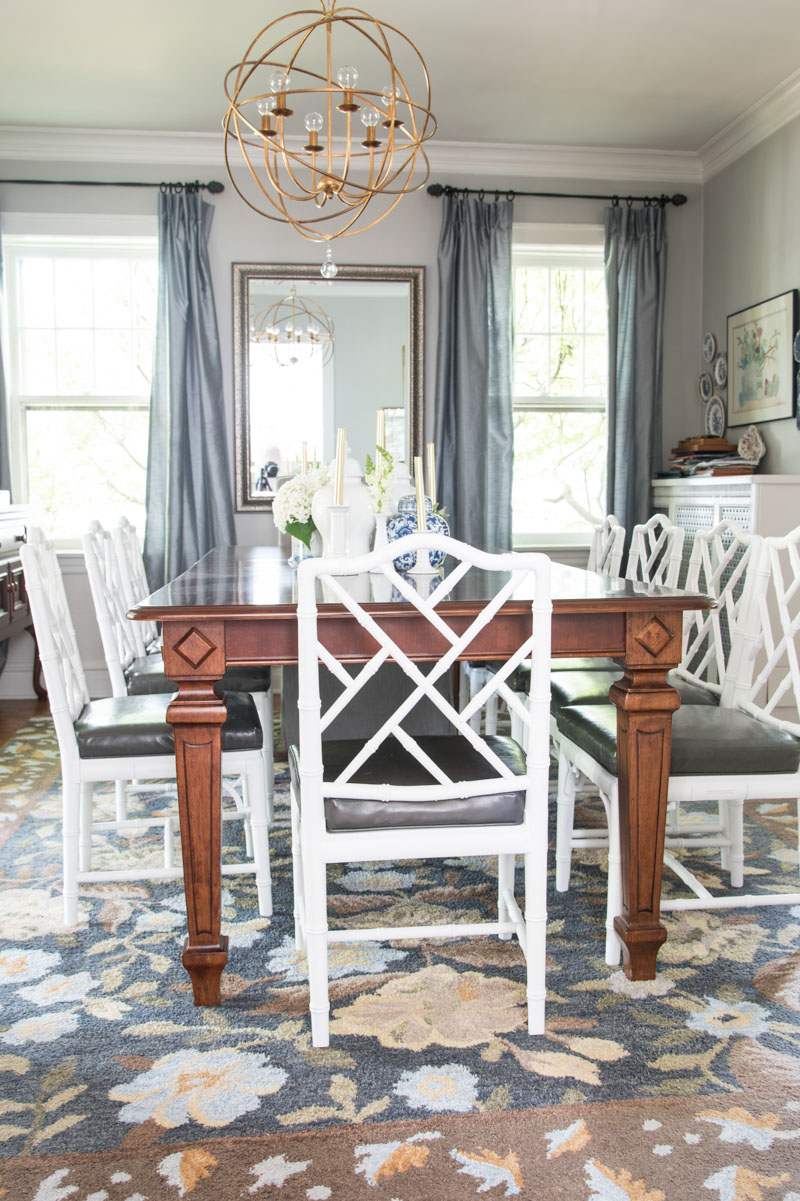
Credit: www.homewithkeki.com
Reassembling And Touching Up
Once everything is dry, remove the painter’s tape carefully. Reattach any hardware or seats. Check all surfaces for missed spots or drips and touch up as needed with a small brush.
If you had to fix wobbly legs, test the chair for stability before putting it back in use.
Styling Tips After Painting
Freshly painted chairs can change your whole dining room. Here are some ideas to finish your project in style:
- Mix and match colors: Use two or three complementary shades for a playful look.
- Add seat cushions: New paint plus new fabric can feel like brand new chairs.
- Distress edges: For a vintage look, sand some edges lightly after painting.
- Stencils or decals: Add patterns or names for a custom touch.
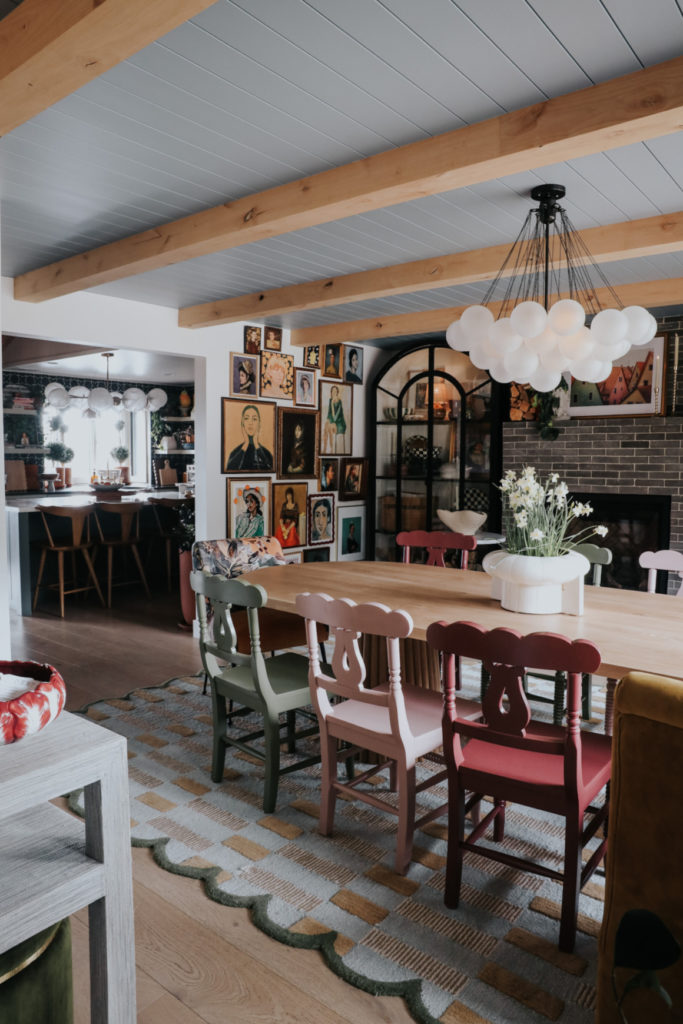
Credit: nestingwithgrace.com
Common Problems And How To Fix Them
Even careful painters run into issues. Here’s how to solve the most frequent problems:
Paint Peeling Or Lifting
- Cause: Poor sanding, oily surface, or no primer.
- Solution: Sand off loose paint, clean well, and use bonding primer before repainting.
Brush Marks
- Cause: Thick paint, poor brush, or overworking.
- Solution: Use a high-quality brush, thin paint slightly with water, and avoid going back over drying paint.
Drips And Sags
- Cause: Too much paint in one coat.
- Solution: Sand smooth when dry and repaint with thinner coats.
Sticky Finish
- Cause: Not enough drying time, or too much humidity.
- Solution: Wait longer before use; if still sticky after a week, remove and repaint.
Color Bleed-through
- Cause: Old stains or wood tannins.
- Solution: Use a stain-blocking primer and add another coat.
Real-life Example: Dining Chair Makeover
Let’s look at an example. Maria bought four old wooden chairs at a yard sale for $10 each. The finish was scratched, and one chair wobbled.
- She tightened all screws and glued a loose leg.
- Cleaned with vinegar-water and let dry.
- Sanded all surfaces and filled deep scratches with wood filler.
- Applied a stain-blocking primer, let dry, then sanded again.
- Painted two chairs navy blue, two light gray, using a brush for spindles and a roller for seats.
- Added two thin coats of water-based polyurethane.
- After a week, she added new seat cushions.
Maria’s total cost was under $50, and her friends loved the new look. The chairs have lasted two years with no chips or scratches.
Cost Breakdown Of Repainting Dining Chairs
Here’s an estimated cost table for repainting four dining chairs:
| Item | Estimated Price (USD) |
|---|---|
| Quart of paint | $15 – $25 |
| Primer | $10 – $15 |
| Sandpaper (pack) | $5 – $10 |
| Brushes/Rollers | $10 – $20 |
| Topcoat | $12 – $18 |
| Painter’s tape | $5 |
| Wood filler | $6 |
| Drop cloths | $7 |
| Total | $70 – $106 |
This is much less than buying new chairs and gives you creative control over the result.
Safety Tips And Environmental Concerns
- Always paint in a well-ventilated area. Fumes from primers and paints can be harmful.
- Wear a mask and gloves when sanding or spraying.
- Dispose of old paint and materials properly. Do not pour paint down the drain.
- Use low-VOC or water-based paints for better indoor air quality.
For more on safe paint disposal and eco-friendly products, see the guidance at the EPA Safer Choice program.
Advanced Ideas: Custom Paint Techniques
If you want something unique, try these advanced finishes:
- Ombre effect: Blend two colors from light to dark.
- Two-tone: Paint the seat one color, the legs another.
- Hand-paint designs: Use small brushes for flowers, geometric shapes, or initials.
- Color blocking: Tape off sections for sharp lines in different colors.
Practice on cardboard or scrap wood first. Custom finishes take more time but make your chairs one of a kind.
Mistakes Beginners Often Make
- Skipping prep steps: Cleaning and sanding are essential for a long-lasting finish.
- Rushing drying times: Paint and topcoat need time to cure, not just dry.
- Using the wrong paint: Not all paints work on all surfaces.
- Painting in poor light: Missed spots are easier to see in daylight.
- Forgetting a topcoat: Especially important for light colors or high-use chairs.
- Neglecting safety: Fumes and dust can be harmful—use protection.
How To Maintain Painted Dining Chairs
Good maintenance keeps your chairs looking fresh for years.
- Wipe spills quickly with a damp cloth.
- Avoid harsh chemicals for cleaning; use mild soap and water.
- Add felt pads under legs to prevent scratches on floors.
- Touch up chips promptly with leftover paint.
A well-painted chair can last 5-10 years or more with the right care.
Frequently Asked Questions
How Long Should I Wait Before Using My Repainted Chairs?
Wait at least 48 hours after the final coat of paint or topcoat before using your chairs for light use. For heavy, daily use, it’s best to wait a full week for latex paint, and up to a month for oil-based paint to cure completely.
Can I Repaint Over Old Paint, Or Do I Need To Strip It First?
You do not need to strip old paint unless it’s peeling or flaking. Light sanding and a good bonding primer are usually enough. However, if the old paint contains lead (common in furniture made before 1978), consult a professional for safe removal.
What Type Of Paint Is Safest For Dining Chairs?
Water-based latex paint is safest for indoor furniture because it has low odor and fewer chemicals. Look for paints labeled “low-VOC” or “no-VOC.” Chalk paint is also safe and popular for furniture.
How Do I Paint Chairs With Lots Of Spindles Or Curves?
Use a small angled brush for detailed areas, and spray paint for even coverage on curves and spindles. Take your time and rotate the chair to see all angles. Thin coats prevent drips.
What Is The Best Way To Fix A Chip Or Scratch In The Paint Later?
Clean the area with mild soap and water, let dry, then lightly sand the spot. Apply a thin layer of paint with a small brush, let dry, and add a topcoat if needed. Blending well can make the repair invisible.
Repainting dining chairs is a rewarding project that gives old furniture new life and adds character to your dining space. With the right preparation and careful steps, your chairs will look professionally finished and last for years. Enjoy your refreshed dining area!