Mold in crawl spaces is a hidden problem in many homes. It often grows silently, feeding on wood and moisture, and can damage your house and even affect your health. Many homeowners do not realize that mold on crawl space floor joists is not just an eyesore—it can weaken your home’s structure and lower indoor air quality. Tackling mold in this tricky area takes more than surface cleaning. You need the right method, tools, and understanding.
This article explains, step by step, how to remove mold from crawl space floor joists. You will learn why mold appears in crawl spaces, how to spot it early, and the safest ways to get rid of it. With practical advice for both new and experienced homeowners, you’ll find out what products work, what mistakes to avoid, and how to prevent mold from coming back.
By the end, you’ll have the confidence and knowledge to handle mold in your crawl space for good.
Why Mold Grows On Crawl Space Floor Joists
Crawl spaces are often dark, damp, and have little airflow. This creates a perfect environment for mold spores to settle and grow, especially on wood floor joists. Mold needs three things to grow: moisture, food (like wood), and warmth. Joists are usually made from untreated wood, which absorbs moisture easily.
Leaks, poor drainage, and high humidity can raise the moisture level. Even small plumbing leaks or heavy rain can add enough water for mold to start growing. In many homes, crawl spaces do not have enough ventilation, so the area stays humid for long periods.
Over time, this allows mold to thrive and spread.
Health And Structural Risks Of Mold
Many people think mold is just a smell or a stain. In reality, mold spores can affect your health. When disturbed, the spores float into the air and can be breathed in. For people with allergies or asthma, this may cause coughing, sneezing, or breathing problems. Some mold species, such as black mold (Stachybotrys chartarum), can be more dangerous.
Mold also weakens wood. If left untreated, it can cause wood rot. Floor joists are part of your home’s main support system. If they lose strength, you may notice sagging floors or even serious damage that requires expensive repairs.
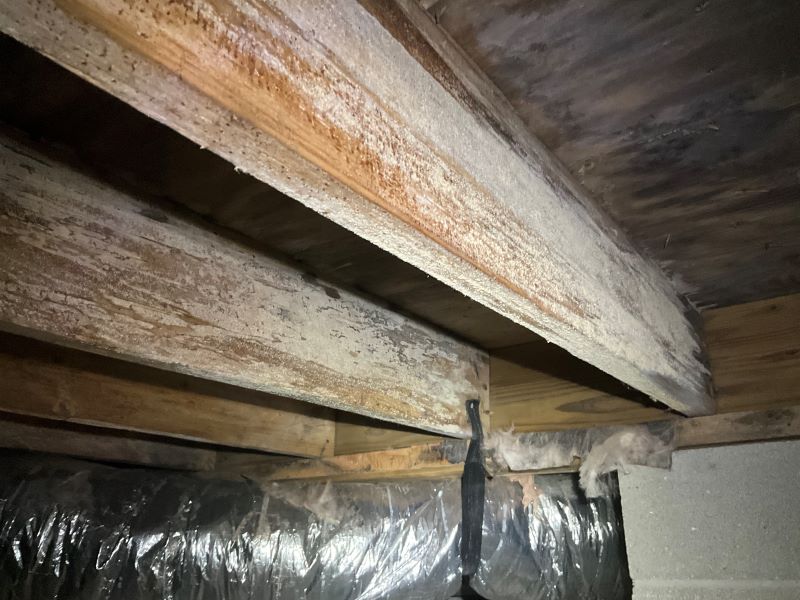
Credit: www.baycrawlspace.com
How To Identify Mold On Floor Joists
Finding mold in a crawl space is not always easy. Here are the main signs:
- Musty odor: Mold often smells earthy or damp.
- Black, green, or white spots: Look for patches or streaks along the wood.
- Discoloration: Wood may look darker or stained.
- Soft or crumbling wood: This means the wood is rotting, not just moldy.
- Increased allergy symptoms: If you sneeze more indoors, mold may be the cause.
A flashlight and safety gear help you spot mold in dark or tight spaces. Sometimes, what looks like dirt or mildew is actually mold. Try wiping with a damp cloth—if it smears, it’s probably mold.
Tools And Materials Needed
Before you begin, gather everything you’ll need. Safety is very important because you do not want to breathe in mold spores. Here’s a checklist:
- N95 respirator mask (not just a dust mask)
- Goggles
- Gloves (nitrile or rubber)
- Coveralls or old clothes
- Flashlight or headlamp
- Stiff scrub brush
- Buckets
- Plastic sheeting (for protecting clean areas)
- Duct tape
- Trash bags
- HEPA vacuum (if available)
- Mold cleaner (see types below)
- Dehumidifier (for drying)
Some people use a garden sprayer to apply cleaning solution. If your crawl space is very tight or mold is widespread, consider hiring a professional.
Choosing The Right Mold Cleaner
There are several options for killing mold on wood. Each has pros and cons:
| Product | Effectiveness | Safe for Wood? | Odor | Cost |
|---|---|---|---|---|
| Bleach | Medium | No (can damage wood) | Strong | Low |
| Vinegar | Low-Medium | Yes | Moderate | Low |
| Hydrogen Peroxide | High | Yes | Mild | Medium |
| Commercial Mold Remover | High | Yes | Varies | Medium-High |
| Borax | High | Yes | Low | Low |
Bleach is often used but is not the best choice. It does not soak into wood and may only kill surface mold. Vinegar is safer but less powerful. Hydrogen peroxide and borax both kill mold well and do not harm wood. Commercial products labeled “mold remover” or “fungicide” are also effective.
Preparing The Crawl Space
Proper preparation is key. Here’s what to do before cleaning:
- Protect other areas: Seal off crawl space vents and doors with plastic sheeting and duct tape. This stops spores from spreading into your home.
- Remove clutter: Take out any stored items, debris, or insulation blocking access to the floor joists.
- Check for water: If there is standing water, pump or mop it out. Fix leaks before cleaning.
- Ventilation: If possible, use a fan to blow air outside (not into your home). Never use a fan if there is a risk of spreading spores into living areas.
Step-by-step Guide: Removing Mold From Crawl Space Floor Joists
Cleaning mold from crawl space floor joists is not a quick job, but it can be done safely with patience and care.
Step 1: Suit Up For Safety
Wear your N95 mask, goggles, gloves, and coveralls. Mold spores can irritate your lungs and skin. If you have asthma or allergies, ask someone else to help.
Step 2: Dry The Area
Mold cannot grow without moisture. Use a dehumidifier or fans to dry the crawl space as much as possible before cleaning. The wood should not feel damp to the touch.
Step 3: Remove Loose Mold
Vacuum the area with a HEPA vacuum if available. This type of vacuum traps mold spores. Never use a regular vacuum, as it can blow spores into the air.
Step 4: Apply Mold Cleaner
Choose your cleaner (hydrogen peroxide, borax solution, or a commercial mold remover). If using a homemade borax solution, mix 1 cup borax with 1 gallon of warm water. Pour into a spray bottle or use a garden sprayer.
Spray the cleaner onto the moldy wood until it is wet. Let it soak for at least 10–15 minutes. This gives the cleaner time to kill the mold roots.
Step 5: Scrub The Mold
Use a stiff brush to scrub the joists. Scrub with the wood grain, not against it. Wipe up the dirty liquid with rags or paper towels, and place them in trash bags.
Step 6: Rinse (if Needed)
Some cleaners need rinsing; some do not. Check the label. If rinsing, use as little water as possible to avoid adding moisture back into the wood.
Step 7: Dry Again
After cleaning, dry the joists completely. Use fans, dehumidifiers, or open vents (if weather is dry). Mold can regrow if wood stays damp.
Step 8: Dispose Of Waste
Throw away all used rags, brushes, and plastic sheeting in sealed trash bags. Wash your clothes and shower after finishing.
Step 9: Inspect Your Work
Check for any missed spots or stains. If you find more mold, repeat the cleaning process. Sometimes stains remain, but as long as the wood is dry and not soft, the mold is likely dead.
Advanced Methods: When To Call A Professional
Small areas of mold (less than 10 square feet) can be handled by most homeowners. But if you find widespread mold or wood rot, call a mold remediation specialist. They have tools like soda blasting or dry ice blasting that clean large areas of wood quickly and safely.
| DIY Cleaning | Professional Remediation |
|---|---|
| Best for small patches | Large or hidden mold areas |
| Lower cost | High cost but thorough |
| Uses household cleaners | Uses special equipment |
| Requires safety gear | Certified and insured |
If you feel unsafe or notice a strong mold smell throughout your home, it’s safer and smarter to get a professional inspection.

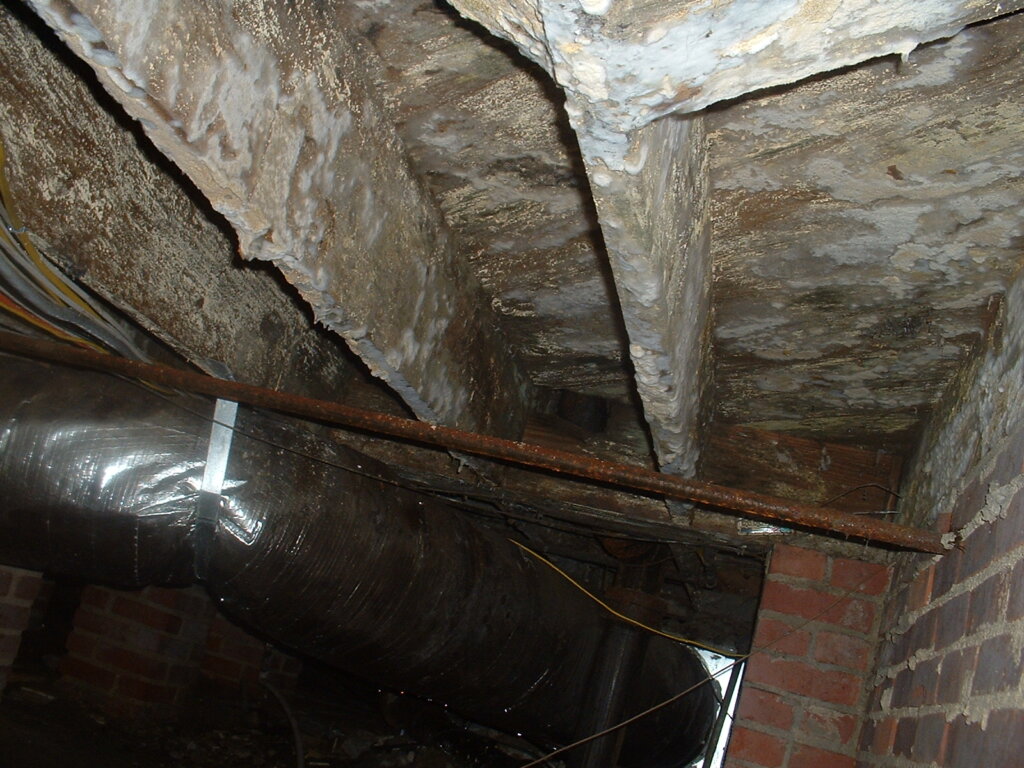
Credit: www.baycrawlspace.com
Preventing Mold From Returning
Cleaning mold is only half the job. To keep it from coming back, you must control moisture in your crawl space. Here’s how:
- Fix leaks: Check plumbing, gutters, and downspouts for leaks.
- Improve drainage: Make sure water runs away from your foundation.
- Install vapor barriers: Lay 6-mil polyethylene plastic over the ground to block moisture from the soil. Overlap and seal the edges.
- Add ventilation: Open or install vents if your area’s climate allows. In humid areas, sealed crawl spaces with a dehumidifier work better.
- Insulate pipes: This stops condensation from dripping onto joists.
- Monitor humidity: Use a hygrometer to keep humidity below 60%. Dehumidifiers help in wet climates.
- Regular checks: Inspect the crawl space at least twice a year, especially after heavy rain.
An often-missed tip: Check for HVAC duct leaks in the crawl space. Leaky ducts can add cool air, causing condensation and mold growth. Also, do not store cardboard, paper, or fabric in crawl spaces—these attract mold.
Common Mistakes To Avoid
Removing mold from crawl space joists is not risk-free. Here are mistakes many homeowners make:
- Using bleach on wood: Bleach does not soak into wood and may even feed mold by adding moisture.
- Ignoring the cause: Cleaning without fixing leaks or humidity means mold will return.
- Not drying after cleaning: Wet wood encourages regrowth.
- Poor safety gear: Basic masks or no gloves can expose you to spores.
- Spreading spores: Using fans without sealing vents can push mold into your home.
- Skipping inspections: Failing to check after storms or leaks allows mold to come back unnoticed.
Remember, prevention costs less than repairing rotted joists or cleaning moldy air ducts.
When Is Mold A Serious Problem?
Not all mold is the same. Sometimes, mold is only on the surface and easy to remove. Other times, it signals bigger issues. Here’s when you need more help:
- Wood is soft or crumbling: Indicates wood rot, not just surface mold.
- Mold covers large areas: Larger than 10 square feet or in hard-to-reach spots.
- Strong smell in the house: Means mold spores are entering living spaces.
- Family gets sick: Increased allergies or breathing issues.
- Repeat mold growth: Mold returns quickly after cleaning.
In these cases, have a professional test for mold types and check your home’s air quality.
Long-term Solutions: Encapsulation
One of the most effective ways to stop mold is crawl space encapsulation. This means sealing the crawl space floor and walls with heavy plastic and sometimes insulating the walls. A dehumidifier keeps the space dry year-round.
Encapsulation costs more up front but can save thousands in repairs and lower energy bills. It also keeps pests and radon gas out. If you live in a very humid area or have had repeated mold, encapsulation is worth considering.
Cost Comparison: Diy Vs. Professional Mold Removal
For many, cost is a big factor when dealing with crawl space mold. Here’s a general guide to help you plan:
| Service | DIY Cost (Approx.) | Professional Cost (Approx.) |
|---|---|---|
| Cleaning Supplies | $50–$200 | Included in service |
| Protective Gear | $40–$100 | Included in service |
| Mold Cleaning (Small Area) | $100–$300 total | $500–$1,500 |
| Mold Cleaning (Large Area) | $200–$500 (plus time) | $2,000–$6,000 |
| Encapsulation | N/A | $5,000–$15,000 |
DIY is cheaper but takes more time and effort. If you have health issues or a large problem, professionals are the safer choice.
Real-world Example
Consider a homeowner in Georgia who noticed a musty smell in their living room. They checked the crawl space and found black patches on the joists. After fixing a leaky pipe, they wore safety gear and cleaned the joists with borax and hydrogen peroxide.
They also installed a vapor barrier and a dehumidifier. After a few weeks, the smell was gone and the wood stayed clean.
An important lesson: even if you remove mold once, regular checks and moisture control are key. Many people forget to check after storms or in wet seasons, allowing mold to come back.
Practical Tips For Success
- Label breaker switches before entering the crawl space in case you need to turn off power quickly.
- Work in pairs if possible for safety, especially in small or tight spaces.
- Take photos before and after cleaning. This helps track progress and can help with insurance if needed.
- Use LED lights for better visibility—they stay cool and are safer in closed areas.
A detail beginners often miss: Crawl spaces can have nails, sharp objects, or pests. Wear thick gloves and boots.
Environmental And Legal Considerations
Some states have laws about mold removal and disposal. Always check your local rules, especially if renting or selling your home. Disposing of large amounts of moldy material may require special handling.
If you rent, your landlord is usually responsible for repairs and mold removal. Document all mold findings with photos and notify the property owner in writing.
For more details about the science of mold and its risks, see the EPA Mold Basics.
Credit: www.thefreshaircompanies.com
Frequently Asked Questions
What Is The Best Cleaner For Mold On Crawl Space Joists?
Hydrogen peroxide and borax are both safe and effective for wood. Commercial mold removers also work well. Avoid bleach, as it does not penetrate wood deeply and may only remove surface mold.
How Long Does It Take To Remove Mold From Floor Joists?
For small areas, you can clean and dry joists in 1–2 days. Larger areas or serious moisture problems may take a week or more, especially if drying time is needed between steps.
Can I Paint Over Mold On Wood Joists?
No, you should never paint over mold. This traps moisture and can make the problem worse. Clean and dry the wood completely before sealing or painting. Use special mold-resistant paint if needed.
How Do I Know If The Mold Is Dead?
Dead mold often leaves a stain, but it should not feel slimy or smear when touched. The wood should be dry and firm, not soft or crumbly. If in doubt, check with a professional.
Will Mold Come Back After Cleaning?
Mold can return if moisture is not controlled. Always fix leaks, improve drainage, and keep humidity below 60%. Regular inspections help catch problems early.
—
Taking the time to remove mold from crawl space floor joists is an investment in your home’s health and value. With the right knowledge, tools, and follow-up, you can solve this problem for good and enjoy safer, cleaner air.