Removing a closet is a project that many homeowners and renters consider, but few approach with full confidence. Maybe you want to open up a room, make space for a larger wardrobe, or simply change the layout. No matter your reason, taking out a closet is a task that requires careful planning, the right tools, and a solid understanding of how your home is built.
Done incorrectly, it can lead to more work, hidden costs, or even structural problems. But with the right approach, you can remove a closet safely and efficiently, transforming your space to better fit your needs.
In this guide, you’ll find everything you need to remove a closet the right way. You’ll learn about preparation, tools, safety, step-by-step removal, dealing with unexpected issues, and what to do after the closet is gone. Even if you’ve never done a demolition project before, you’ll get clear advice, practical examples, and tips that most beginners miss.
By the end, you’ll know exactly how to tackle this project with confidence.
Why People Remove Closets
There are many reasons someone might want to remove a closet. Understanding your motivation will help you plan better and avoid regrets later.
Some people want a larger bedroom or a more open living area. Removing a closet can make a small room feel much bigger. Others want to reconfigure the layout of their home—maybe converting a bedroom into an office or combining two rooms into one.
In older homes, closets are sometimes built in awkward places or in styles that no longer fit modern needs.
In some cases, the closet is simply not useful. Perhaps it’s too small, too shallow, or just in the wrong spot. Removing it can free up space for furniture, shelving, or even a new doorway. Finally, some people remove closets to prepare for bigger renovations, like adding a bathroom or walk-in closet.
Planning Your Closet Removal
Before you pick up a hammer, careful planning is essential. Poor planning is one of the most common mistakes and can lead to expensive surprises.
Inspect The Closet
Start by looking closely at the closet you want to remove. Is it a simple reach-in closet, a walk-in, or a built-in wardrobe? Check how the closet is constructed—are the walls full height, or do they stop below the ceiling?
Look for electrical outlets, light switches, or vents inside the closet. These will affect your plan.
Use a flashlight to check inside the closet for pipes, wiring, or anything hidden behind the walls. In some homes, old closets may contain heating or plumbing lines. If you find anything unusual, consider consulting a professional before moving forward.
Is The Closet A Load-bearing Wall?
Not all closet walls are the same. Some walls support the weight of your house (load-bearing), while others do not (partition walls). Removing a load-bearing wall can be dangerous and may require a structural engineer.
To check, look in your attic or basement to see which way the joists run. If the closet wall runs perpendicular to the floor joists, there’s a higher chance it’s load-bearing. If you’re unsure, ask a contractor or building inspector.
Never remove a wall if you’re not certain it’s non-load-bearing.
Get The Right Permits
In many cities and towns, removing a closet wall requires a building permit. Check with your local authorities before starting. Working without a permit can lead to fines and problems when you try to sell your home.
Prepare The Space
Remove everything from the closet and nearby area. Cover floors and furniture with drop cloths. If you have carpet, consider rolling it back to protect it from dust and debris. Dust and small debris travel further than you expect.
Notify Others
If you live in an apartment or multi-family building, let neighbors know about your project. Demolition work can be noisy and create vibrations. Giving advance notice helps maintain good relationships.
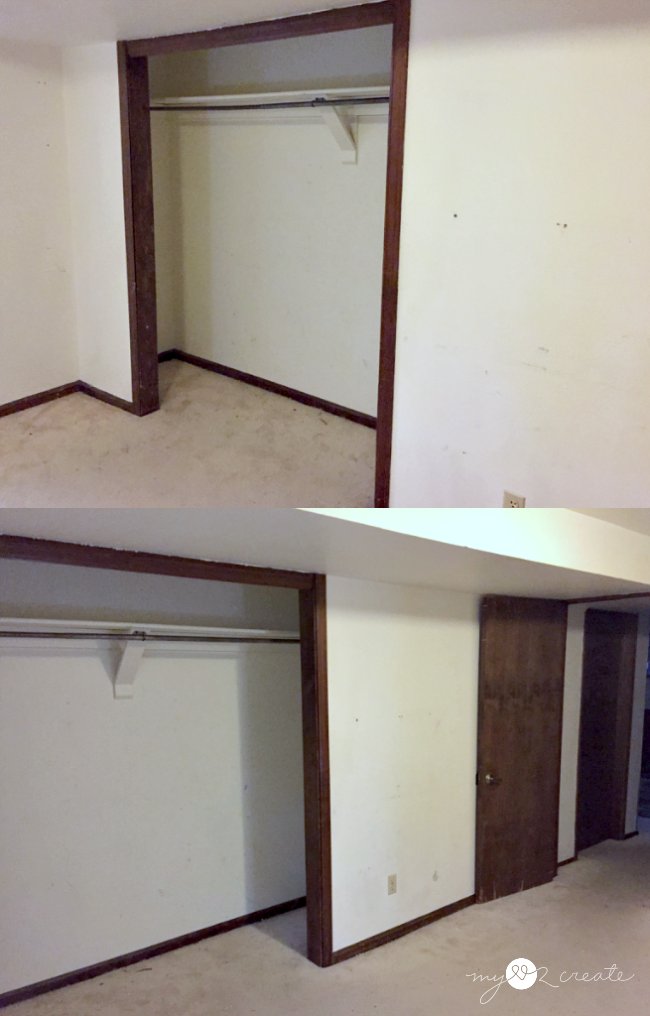
Credit: mylove2create.com
Tools And Materials You’ll Need
Having the right tools makes the job safer and faster. Here’s a checklist of what you’ll likely need:
- Hammer (for nails and general demolition)
- Pry bar (for pulling trim and drywall)
- Utility knife (for scoring drywall and carpet)
- Cordless drill (for screws and hardware)
- Screwdriver (manual or powered)
- Stud finder (to locate framing)
- Reciprocating saw (for cutting through framing)
- Handsaw (for precise cuts)
- Dust mask or respirator (for safety)
- Safety glasses
- Work gloves
- Measuring tape
- Shop vacuum (for cleanup)
- Heavy-duty trash bags or bins
If you need to handle electrical wiring or plumbing, you may also need wire cutters, pliers, and electrical tape. Always turn off the power at the breaker before working near wires.
Materials For After Removal
Plan for patching and finishing after the closet is out. You’ll likely need:
- Drywall sheets
- Joint compound
- Drywall tape
- Sandpaper
- Paint and primer
- Baseboard or trim
Step-by-step Guide To Removing A Closet
Let’s break down the removal process into clear steps. Taking it slow and steady is the key to a good result.
1. Empty The Closet
Take out all clothing, shelves, rods, and anything else inside. Remove closet doors—lift sliding doors off their tracks or unscrew hinges on swinging doors. Set aside any hardware you want to reuse.
2. Remove Trim And Molding
Use a utility knife to score along the edges of any baseboards, crown molding, or door trim. This helps prevent paint from peeling. Gently pry the trim away with a flat pry bar. Work slowly to avoid damaging the wall.
If you plan to reuse the trim, pull nails through the back with pliers.
3. Disconnect Electrical And Plumbing
If you found outlets, switches, or lights in your closet, turn off the power at the breaker box. Use a voltage tester to confirm the power is off. Unscrew and remove cover plates, then disconnect wires.
If there are pipes or vents, you’ll likely need a plumber or HVAC pro. Never cut into unknown pipes.
4. Remove Shelving And Hardware
Take out all shelves, rods, and brackets. Most will be held by screws or nails. Use a drill or screwdriver. Sometimes shelves are glued or nailed; use a pry bar gently to avoid damaging the wall.
5. Cut And Remove Drywall
Score the drywall with a utility knife along the seams, especially where the closet meets the ceiling or floor. Use a drywall saw or reciprocating saw to cut large panels. Start at the top and work down.
Remove drywall in sections. Drop debris into trash bags as you go to keep the area clean.
6. Remove The Framing
Once the drywall is gone, you’ll see the wood studs and framing. Use a reciprocating saw or handsaw to cut the studs. If you’re not removing the entire wall, cut just the section you need.
Be careful not to damage electrical wires or plumbing behind the studs. Knock the framing loose with a hammer, then pull it out.
7. Clean Up Debris
Use a shop vacuum to clean dust and small bits. Collect large pieces for disposal. Check with your local waste service for rules about disposing of construction debris.
8. Patch And Repair Surfaces
If you’re not rebuilding the wall, patch any holes in adjacent walls. Install new drywall if needed. Tape, mud, and sand the seams. Prime and paint for a seamless look.
If you removed baseboards or trim, cut new pieces to fit and nail them in place.
Common Challenges And How To Solve Them
Removing a closet isn’t always straightforward. Here are challenges many beginners don’t expect:
Hidden Electrical Or Plumbing
Old homes often have surprises behind walls. If you find wires or pipes you didn’t expect, stop work. Take a photo and consult a professional. Never cut or remove anything you’re unsure about.
Uneven Floors Or Ceilings
When you remove a closet, you may find the floor or ceiling underneath is unfinished or a different height. You’ll need to patch or level these areas for a clean look.
Matching Paint And Texture
It’s rare for the wall behind a closet to exactly match the rest of the room. After patching, you may need to repaint the whole wall or even the room for a uniform finish.
Structural Issues
If you accidentally start removing a load-bearing wall, stop immediately. Support the ceiling with temporary beams and call a contractor.
After The Closet Is Gone: What’s Next?
With the closet out, you have many options for your new space.
Open Concept
Many people choose to leave the area open. This can make a small room feel larger and brighter. Consider adding new lighting or painting the area a lighter color to enhance the effect.
New Storage Solutions
If you still need storage, consider a freestanding wardrobe, shelving units, or open racks. These options are flexible and can be moved or changed easily.
Built-in Furniture
Some homeowners use the space for built-in desks, bookcases, or window seats. Built-ins give a custom look but require more planning and carpentry skill.
Expanding A Room
If you removed a closet to join two rooms, you may need to repair the floor and ceiling where the wall used to be. Matching materials is key for a seamless appearance.

Credit: www.thehandymansdaughter.com
Safety Tips You Should Never Ignore
Demolition work has risks. Here are safety tips you must follow:
- Always wear safety glasses to protect your eyes from flying debris.
- Use a dust mask or respirator when cutting drywall or wood.
- Turn off electricity at the breaker box before working near wires.
- Work slowly and check for hidden hazards as you go.
- Lift heavy debris with your legs, not your back.
- Keep children and pets away from the work area.
If you feel unsure about any step, call a professional. Safety is more important than saving a few dollars.
Cost Comparison: Diy Vs. Hiring A Professional
Many people wonder whether to do the job themselves or hire a pro. Here’s a simple comparison to help you decide:
| Factor | DIY | Professional |
|---|---|---|
| Cost | $100–$400 (tools, materials, disposal fees) | $500–$2,000 (includes labor and cleanup) |
| Time Needed | 8–16 hours | 4–8 hours |
| Risk of Mistakes | Higher | Lower |
| Finish Quality | Depends on skill | Usually better |
| Permit Handling | Self-managed | Handled by contractor |
DIY is cheaper but requires time and effort. Hiring a pro is faster and more reliable, especially if you’re unsure about wiring, plumbing, or structural issues.
How Removing A Closet Affects Your Home’s Value
Homeowners often worry about resale value. Removing a closet can impact your home’s appeal to buyers.
Bedroom Requirements
In many real estate markets, a room must have a closet to be counted as a bedroom. Removing it might reduce the official bedroom count, lowering your home’s value.
Flexible Spaces
If you create a larger, more flexible space (like a home office or open den), you might attract buyers who value open layouts. But families with children usually prefer more bedrooms with closets.
Reversible Changes
If you plan to sell your home soon, consider making changes that are easy to reverse. Freestanding wardrobes or modular shelving can offer storage without permanent changes.
Real-life Examples: What To Expect
Let’s look at two real-life scenarios.
Small Reach-in Closet
Sarah wanted more space in her guest room. She removed a 3-foot-wide reach-in closet. The job took a weekend and cost about $200 in tools and materials. The biggest surprise was finding an old electrical outlet inside the wall, which she had to have disconnected by an electrician.
Large Walk-in Closet
Tom and Lisa wanted to join two bedrooms. Removing the large walk-in closet took two days and cost $600 (including tool rental and debris removal). They found the floor underneath was unfinished, adding $300 for new carpet. In the end, the open space made their home feel much bigger.
How To Patch Walls And Floors After Closet Removal
Finishing the space after removing a closet is just as important as the demolition. Here’s how to do it right:
Patching Drywall
Cut new drywall to fit any holes or gaps. Screw it into the studs. Use drywall tape and joint compound to cover seams. Let it dry, then sand smooth. Prime and paint to match the existing wall.
Repairing Floors
If you have hardwood floors, you may need to add new boards where the closet was. For carpet, you’ll need to stretch and re-tack it. For tile, try to find matching tiles—if not, consider adding a rug or threshold strip.
Replacing Trim
Install new baseboards or molding to match the rest of the room. Measure carefully and cut miters for clean corners. Nail and caulk for a finished look.
Environmental Considerations: Debris Disposal And Recycling
Demolition creates a lot of waste. Here’s how to handle it responsibly:
- Check if your local waste service accepts construction debris.
- Recycle wood, metal, and drywall where possible.
- Donate usable doors, hardware, or shelves to a reuse center.
- Rent a small dumpster for larger projects.
Some areas require special handling for painted wood or old drywall. Always follow local rules to avoid fines.
Mistakes To Avoid When Removing A Closet
Many people make avoidable errors. Here are some to watch out for:
- Skipping the prep: Not covering floors or moving furniture leads to more cleanup.
- Ignoring hidden utilities: Cutting into wires or pipes can be dangerous and costly.
- Not checking permits: Skipping permits can mean fines or failed inspections later.
- Rushing demolition: Fast, rough work causes more damage and higher repair costs.
- Poor finishing: Not patching walls and floors properly makes the space look unfinished.
Take your time and double-check each step.
Tool Comparison: Basic Vs. Advanced Tools
Using the right tools can make your project easier. Here’s a quick look:
| Task | Basic Tool | Advanced Tool |
|---|---|---|
| Demolition | Hammer, handsaw | Reciprocating saw |
| Cutting drywall | Utility knife | Oscillating multi-tool |
| Removing trim | Pry bar | Trim puller tool |
| Cleanup | Broom, dustpan | Shop vacuum |
Advanced tools speed up the process but are optional for small projects.
Unexpected Insights Most Beginners Miss
Many first-timers overlook these details:
- Wall texture rarely matches: Even after painting, the old closet area may look different. Plan to repaint or retexture the whole wall.
- Dust travels far: Even with doors closed, fine dust can spread through the house. Seal doorways with plastic sheeting.
- Disposal costs add up: Dump runs and debris bins can cost more than expected. Get quotes in advance.
- Old closets may hide pests: Sometimes you find evidence of mice, insects, or water damage. Be prepared to repair or treat these issues.
When To Call A Professional
Some situations require expert help:
- You find complex wiring or plumbing
- The closet wall is load-bearing
- You’re unsure about permits or building codes
- You have health concerns (asbestos, mold, lead paint)
- You want a fast, high-quality finish
A professional will have the tools, skills, and insurance to handle surprises.
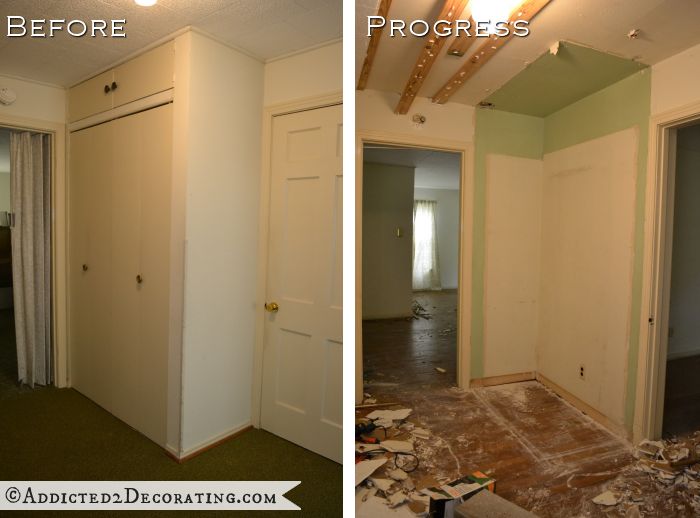
Credit: www.addicted2decorating.com
Frequently Asked Questions
What Should I Do If I Find Mold In My Closet Walls?
If you discover mold while removing a closet, stop work immediately. Mold can cause health problems if disturbed. Wear a respirator and gloves, and call a mold remediation expert. They will test and safely remove mold, preventing it from spreading to other parts of your home.
How Do I Know If My Closet Wall Is Load-bearing?
Check the direction of floor joists in your attic or basement. If the closet wall runs perpendicular to the joists, it may be load-bearing. Look for beams or other signs of support above the wall. If you’re unsure, consult a structural engineer or licensed contractor before removing the wall.
Can I Remove A Closet In A Rental Property?
Always check your lease agreement and talk to your landlord before making changes. Removing a closet is usually considered a major modification and may not be allowed. Unauthorized changes can lead to loss of your security deposit or even eviction.
How Long Does It Take To Remove A Closet?
Most small reach-in closets take 8–16 hours to remove, including demolition and cleanup. Larger walk-in closets or those with electrical/plumbing will take longer. Allow extra time for patching and painting.
What’s The Best Way To Dispose Of Closet Demolition Debris?
Contact your local waste disposal service to find out their rules. Many cities require you to separate wood, drywall, and metal. For large amounts, rent a dumpster or haul debris to a construction recycling center. Some materials may be reused or donated.
For more details about building codes and wall types, see this Partition Wall Guide.
Removing a closet is a rewarding project if you plan ahead and work carefully. Whether you’re expanding a room, opening up your space, or just updating your home, the steps above will help you avoid costly mistakes and achieve a professional result.
Take your time, focus on safety, and enjoy your new, improved space!