
Relocating a ceiling light fixture can completely change the look and feel of a room. Maybe you need to center a chandelier over a dining table, move a fixture away from a ceiling fan, or just want better lighting in a workspace.
Whatever the reason, moving a ceiling light is a project that many homeowners consider. But it’s also a task that brings up many questions about safety, wiring, tools, and the actual steps.
This guide will walk you through every part of the process, from planning to patching the old hole. You’ll learn what tools you need, how to deal with wiring, safety steps, and even how to avoid common mistakes. Even if you’re not an experienced DIYer, you’ll understand what’s involved and where you might want to call in a pro.
Let’s get started on making your room brighter, safer, and more stylish by moving that ceiling light exactly where you want it.
Understanding The Basics Of Ceiling Light Relocation
Before you start moving wires or taking down fixtures, it’s important to know what you’re getting into. Relocating a ceiling light fixture is more than just shifting a lamp. It involves electrical wiring, patching drywall, and, sometimes, dealing with support structures inside your ceiling.
A ceiling light fixture is usually attached to a junction box. This metal or plastic box hides the wiring and holds the fixture securely. If you move the light, you’ll need to move or add a junction box. You’ll also need to run wiring from the old location to the new one, and make sure everything is up to electrical code.
Two things beginners often overlook:
- Ceiling joists: These are the wooden beams inside your ceiling. You can’t always put a fixture just anywhere—you might hit a joist or need to use special hardware.
- Wire length and path: You can’t just stretch wires through open space. Wires must be protected inside the ceiling, following code, and connected safely in junction boxes.
Understanding these basics will help you avoid surprises once you start opening up your ceiling.
Tools And Materials You’ll Need
Having the right tools and materials makes the job much easier and safer. Here’s what you’ll need for most ceiling light relocations:
- Voltage tester: To confirm the power is off.
- Screwdrivers: Both flathead and Phillips.
- Drill and bits: For making new holes and attaching boxes.
- Wire stripper/cutter: To prep the wires.
- Fish tape or wire puller: For threading wire through ceilings.
- Drywall saw: To cut new holes.
- Tape measure and pencil: For marking locations.
- Wire nuts and electrical tape: For safe wire connections.
- New or additional electrical wire: Usually 14/2 or 12/2 Romex, depending on your circuit.
- Junction box or remodeling box: To mount the fixture at the new location.
- Ceiling patch kit or joint compound: To repair the old hole.
- Ladder or step stool: For safe access.
- Light fixture mounting hardware: If not reusing the old set.
Optional but very helpful:
- Stud finder: To locate joists and avoid unwanted surprises.
- Safety glasses and dust mask: For protection from debris.
Never skip safety gear, especially when working overhead or with electricity.
Safety First: Turning Off Power And Checking Circuits
Safety is always the top priority. Working with ceiling fixtures means dealing with live wires that can cause serious injury or worse. Here’s how to keep yourself safe:
- Turn off power at the breaker. Do not just flip the light switch—go to your home’s electrical panel and shut off the breaker that powers the light circuit.
- Double-check with a voltage tester. Before you touch any wires, use a non-contact voltage tester to confirm there’s no power in the wires.
- Label your breakers. If you’re not sure which breaker controls the light, turn off the main switch, or test each one until the light goes off.
- Test again at the fixture. Even after turning off the breaker, always test the wires in the ceiling box to be sure.
Never work on live circuits. If you’re unsure, stop and call a qualified electrician.
Planning The New Location
Where you move your ceiling light makes a big difference in how your room looks and functions. Take time to plan before you cut any holes.
Factors To Consider
- Purpose: Is this for task lighting, ambiance, or to illuminate a work area?
- Ceiling structure: Use a stud finder to check for joists or obstructions.
- Fixture weight: Heavy fixtures need special support (fan-rated boxes, braces).
- Wiring path: How will you run the new wires? Is there attic access, or will you fish wires through drywall?
- Switch location: The wall switch should still control the fixture easily.
Marking The Spot
- Use a tape measure to find the ideal spot (e.g., centered over a table).
- Use a pencil to mark the location for the new box.
- Check from below and above (if you have attic access) to avoid obstacles.
Room Lighting Considerations
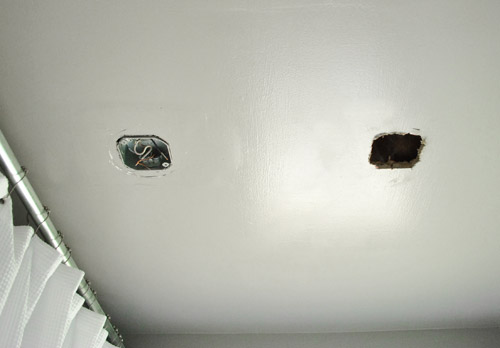
A common mistake is moving a fixture to a spot that creates shadows or glare. Think about how the new location will affect the room’s light, especially if this is the only ceiling fixture.
Credit: www.younghouselove.com
Removing The Old Ceiling Light Fixture
With your tools and safety steps ready, you’re set to remove the old fixture. Here’s how:
- Turn off power and verify with a voltage tester.
- Remove the light bulb(s) and any shades or covers.
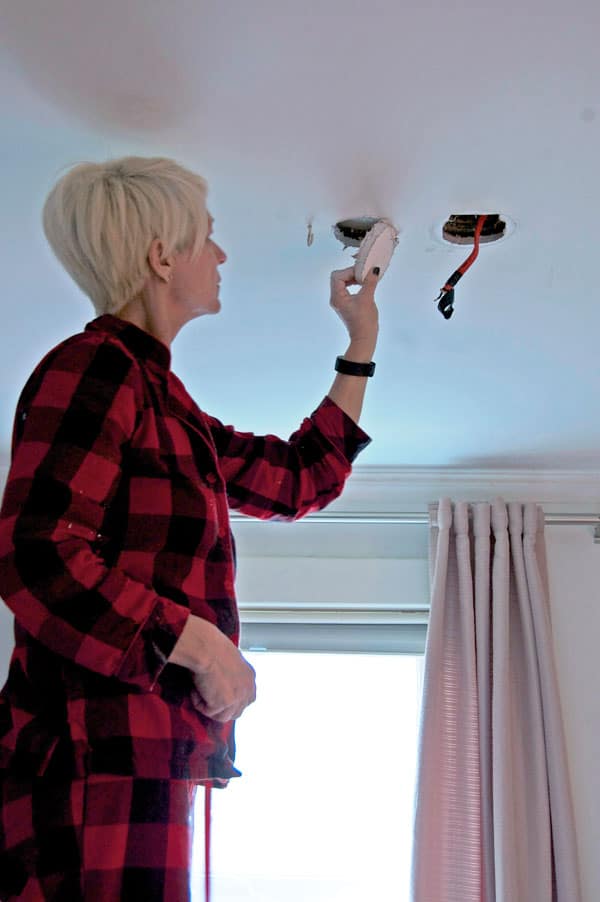
- Unscrew the fixture base. Most fixtures are held by two screws. Support the fixture as you remove them.
- Disconnect wires. Carefully untwist the wire nuts, keeping track of which wire is which (usually black, white, and ground).
- Inspect the electrical box. Make sure it’s in good shape—no cracks or loose parts.
If your old fixture is heavy or awkward, have someone help hold it while you disconnect wires.
Assessing And Modifying The Ceiling Structure
Relocating a fixture sometimes means dealing with joists, insulation, or even old wiring. Here’s what to look for:
Locating Joists
Run a stud finder across the ceiling to map out joists. Ceiling fixtures are usually attached to a joist or a brace between joists for support.
Cutting The New Hole
- Trace the outline of your new junction box on the ceiling.
- Use a drywall saw to cut the hole, being careful not to damage any wires or pipes.
- If you hit a joist, you may need a pancake box (for shallow spaces) or a fan-rated brace.
Dealing With Obstacles
- If insulation is in the way, gently move it aside.
- For ceilings with plaster or lath, use a masonry bit and go slow to avoid cracks.
Credit: www.theartofdoingstuff.com
Running New Electrical Wiring
This is often the trickiest part of relocating a ceiling light. Wires must be routed safely and in line with electrical code.
Choosing The Right Wire
Most ceiling lights use 14-gauge wire (for 15-amp circuits) or 12-gauge wire (for 20-amp circuits). Match the wire size to your breaker.
Planning The Wire Path
- The simplest path is often through the attic, fishing wire from the old box to the new one.
- If attic access isn’t possible, you may need to fish wire through ceiling joists using fish tape.
Step-by-step Wire Routing
- Turn off all power.
- Remove the old box if necessary, making a clear path for new wires.
- Thread the new wire from the power source (old box or junction) to the new location.
- Secure the wire with cable staples every 4.5 feet (per code) if running along joists.
- Leave about 8 inches of wire sticking into the new box for connections.
Pulling Wire Through Drywall
If you have to go through finished ceilings, make small holes near the old and new locations, and use fish tape. Patch the holes later with joint compound.
Installing The New Junction Box
Once your wire is in place, you’re ready to install the new box.
Types Of Boxes
- Old work/remodel boxes: For drywall ceilings, these clamp onto the drywall.
- Fan-rated boxes: Needed for heavy fixtures or ceiling fans.
- Pancake boxes: For shallow spaces.
Mounting The Box
- Feed the wire into the box through the knockout hole.
- Insert the box into the hole, and tighten the mounting clamps.
- If attaching to a joist, use screws to secure the box firmly.
Ensuring Support
A common beginner mistake is using a box that’s too flimsy or not rated for the fixture’s weight. Always check the box’s rating (it should say on the packaging).
Wiring The New Fixture
Now comes the part where you connect the wires and hang the fixture.
Making The Connections
- Strip about 3/4 inch of insulation from the end of each wire.
- Connect the black (hot) wire from the ceiling to the black wire on the fixture.
- Connect the white (neutral) wire to the fixture’s white wire.
- Connect the bare copper or green ground wire to the fixture’s ground screw or wire.
- Twist wire nuts onto each connection and wrap with electrical tape.
Securing The Fixture
- Tuck all wires neatly into the box.
- Attach the mounting bracket to the box.
- Mount the fixture according to the manufacturer’s instructions.
- Install bulbs and shades, but don’t turn power on yet.
Testing And Finishing Up
Before you patch any holes or clean up, make sure your new light works and is safe.
Turning Power Back On
- Restore power at the breaker.
- Flip the wall switch and check that the light works.
- Test for any flickering, sparking, or strange smells—if you notice any, turn off power and recheck your connections.
Securing Loose Parts
Double-check that the fixture is firmly attached and does not wobble. Tighten screws as needed.
Cleaning Up
Gather all tools and clean up any dust or debris from the ceiling or floor.
Patching The Old Fixture Hole
After moving the light, you’ll have a hole in your ceiling where the old fixture was. Here’s how to patch it so it blends in:
For Small Holes
- Use a ceiling patch kit (available at hardware stores).
- Apply the patch over the hole.
- Spread joint compound over the patch, feathering the edges.
- Let dry, sand smooth, and repaint to match the ceiling.
For Larger Holes
- Cut a piece of drywall to fit the hole.
- Screw it to a wood backing strip inside the ceiling.
- Tape the seams, apply joint compound, sand, and paint.
Ceiling Texture
Matching popcorn or other ceiling textures can be tricky. Special spray-on textures are available for a close match.
Common Mistakes And How To Avoid Them
Moving a ceiling light is not hard, but it’s easy to make mistakes that cause trouble later.
- Not turning off power properly. Always check with a voltage tester.
- Poor wire connections. Loose wires can cause fires or flicker. Twist tightly and use wire nuts.
- Using the wrong box. Heavy fixtures need a strong, rated box.
- Ignoring code requirements. Wires must be protected and supported by code.
- Bad patching. Take your time with ceiling repair—rushed jobs look obvious.
- Leaving old wires live. If you abandon wiring, cap it off in a junction box with a cover.
When To Call A Professional
Some situations are better left to an electrician:
- If you are not comfortable working with electricity.
- If you find old or damaged wiring (knob-and-tube, aluminum, brittle insulation).
- If the new location is far from the old one and requires lots of new wiring.
- If local codes require permits or inspections for electrical work.
A professional can ensure everything is safe, up to code, and will pass inspection.
Cost Comparison: Diy Vs. Hiring A Pro
To help you decide, here’s a basic comparison of the average costs:
| Item | DIY Cost | Pro Cost |
|---|---|---|
| Basic Tools & Materials | $50 – $100 | Included in service fee |
| New Wiring & Box | $20 – $50 | Included |
| Labor | Free (your time) | $150 – $350 |
| Ceiling Patch & Paint | $20 – $40 | May cost extra |
| Total | $90 – $190 | $150 – $400+ |
Remember, you may need to buy tools you don’t already have. Hiring a pro costs more, but saves time and guarantees safety.
Comparing Junction Box Types
Choosing the right junction box matters for safety and code compliance. Here’s a quick look at the most common types:
| Box Type | Best For | Weight Rating | Notes |
|---|---|---|---|
| Remodel Box | Drywall ceilings | Up to 10 lbs | Easy install, not for heavy fixtures |
| Fan-Rated Box | Ceiling fans, heavy lights | Up to 70 lbs | Extra secure |
| Pancake Box | Shallow ceilings | Up to 10 lbs | Very thin profile |
| New Work Box | Open framing (new construction) | Up to 50 lbs | Installed before drywall |
For most DIY ceiling light moves, a remodel box works, but check the fixture weight first.
Example: Moving A Dining Room Light Fixture
Let’s walk through a real-world example to pull everything together.
Imagine you’re moving a dining room pendant light so it hangs directly over your table.
- Turn off power at the breaker. Verify with a voltage tester.
- Remove the old fixture. Take down the shade, bulbs, and base. Disconnect wires.
- Mark the new location. Use a tape measure to center over your table.
- Cut a hole for the new box. Check for joists.
- Run new wire from the old box to the new location. Use fish tape in the attic.
- Install a remodel box in the new hole. Feed wire through and secure.
- Connect wires: Black to black, white to white, ground to ground.
- Mount the fixture and test it. Turn on power, check for proper operation.
- Patch the old hole. Use a drywall patch, joint compound, sand, and paint.
This process is similar for bedrooms, hallways, or other rooms.
Practical Tips For A Professional Finish
Here are a few tips that can make your finished project look great and work safely:
- Take photos of your wiring before disconnecting anything. It helps during reassembly.
- Label wires if colors are faded or confusing.
- Don’t overtighten screws on the fixture base—this can crack plaster or drywall.
- Prime and paint patches for a seamless look.
- Test with a bulb before fully installing shades or covers.
And remember: patience pays off. Rushing leads to mistakes and a poor finish.
Advanced Considerations: Smart Switches And Dimmers
If you want to upgrade while relocating, now’s a great time to add a dimmer switch or smart controls.
- Use compatible wiring and switches.
- Make sure your new fixture is dimmable if adding a dimmer.
- Follow manufacturer instructions carefully for smart switches.
These upgrades add value and convenience to your project.

Credit: www.youtube.com
Local Electrical Codes And Permits
Electrical codes exist for your safety. In many places, you can move a light fixture without a permit, but always check with your local building department.
- Use UL-listed boxes and wire.
- Follow codes for wire support, box fill, and connections.
- If selling your home, unpermitted electrical work may cause problems.
You can check the National Electrical Code or your city’s website for details, or visit NFPA’s NEC resource.
Frequently Asked Questions
How Hard Is It To Move A Ceiling Light Fixture?
The difficulty depends on your ceiling type, wiring access, and how far you’re moving the fixture. For short moves (a few feet), it’s a moderate DIY task. If you have attic access, it’s much easier. Long moves or complex wiring are best left to pros.
Do I Need To Run New Wire, Or Can I Reuse The Old One?
You may be able to reroute the existing wire if it’s long enough, but usually, you’ll need to add new wire to reach the new location. All wire connections must be made inside a covered junction box.
What If I Find Old Or Damaged Wiring?
Stop work and call a licensed electrician. Old wiring (like knob-and-tube or aluminum) can be dangerous and may not support modern fixtures. A pro can update your wiring safely.
Can I Cover The Old Fixture Hole With Just Paint?
No. The old hole must be patched with drywall or a proper ceiling patch. Never just paint over a hole or leave wires exposed. If you abandon wiring, it must be capped in a covered junction box.
Is A Permit Required To Relocate A Ceiling Light?
In most cases, a simple fixture move does not require a permit, but check local codes to be sure. If you’re adding new circuits, moving wiring a long distance, or working in a multi-unit building, a permit and inspection may be needed.
Relocating a ceiling light fixture is a project that can make a dramatic difference in your space. With careful planning, the right tools, and attention to detail, you can create a brighter and more functional room. Always put safety first, and don’t hesitate to seek help from a professional for challenging situations.