Refinishing a bathroom vanity can make your space look new without spending a lot of money. Over time, vanities get scratched, water-stained, or just look out of style. Replacing the whole unit can be expensive and complicated. But with the right steps, tools, and patience, you can refinish your bathroom vanity and enjoy a fresh look for years.
This guide walks you through every stage, from planning to finishing touches. Even if you have never done this before, you will find clear instructions, helpful tips, and expert advice to make your project a success.
Why Refinish A Bathroom Vanity?
A bathroom vanity is more than just a cabinet. It holds your sink, stores your essentials, and sets the style for your bathroom. Over time, water, soap, and daily use can cause damage. Scratches, faded finishes, and outdated colors can make the whole room look tired.
Refinishing gives you a new look without buying a new vanity.
Cost savings is one of the biggest reasons people refinish. A new vanity can cost between $300 and $2,000, not counting installation. Refinishing usually costs much less, often under $150, especially if you already own some tools. It is also eco-friendly because you reuse what you have instead of sending it to the landfill.
Another reason is customization. When you refinish, you can pick any color or finish you like. Want a bold blue or a soft gray? Prefer matte instead of glossy? You control the look. Many people also discover that after refinishing, their vanity is more durable and easier to clean.
Planning Your Vanity Refinish
A successful project starts with a good plan. Before you begin, look at your vanity and decide what needs to be fixed or changed. Is the wood damaged? Is the paint or finish peeling? Do you want to change the color or just freshen up the old one?
Make a list of what you need to do:
- Remove old hardware (like knobs, handles, and hinges)
- Repair any damage (such as dents, chips, or water stains)
- Sand the surfaces to remove old finish or paint
- Apply primer (if needed for your material)
- Paint or stain for your new look
- Seal the finish to protect from water and daily use
- Reinstall hardware or add new pieces
Think about the look you want. Look at pictures online or in magazines. Consider the rest of your bathroom. A dark vanity can add drama; a white one feels clean and bright. Choose a style that fits your space.
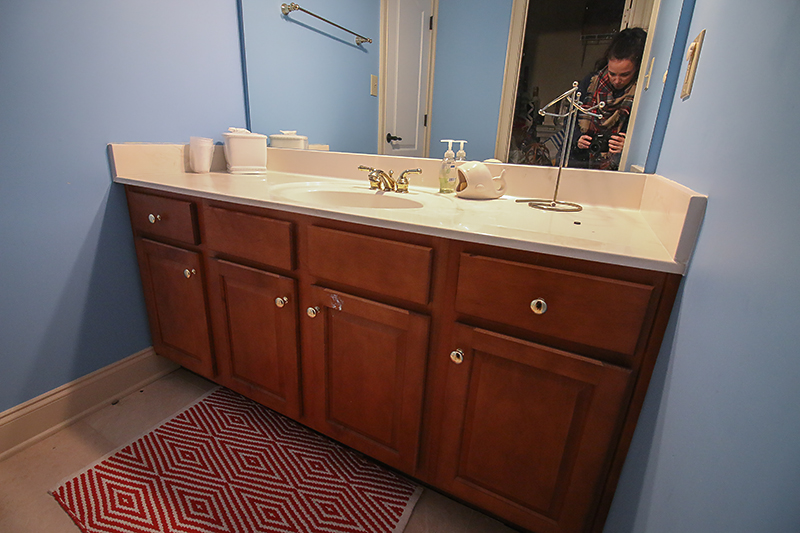
Credit: www.bowerpowerblog.com
Tools And Materials Needed
Gather everything before you start. This saves time and avoids surprises. Here is a list of common tools and materials for refinishing a bathroom vanity:
- Screwdriver (for removing doors and hardware)
- Drop cloth or old sheets (to protect floors)
- Painter’s tape
- Sandpaper (medium and fine grit, usually 120 and 220)
- Sanding block or orbital sander (for faster work)
- Wood filler (for repairing holes or dents)
- Putty knife
- Primer (if painting)
- Paint or stain (choose a bathroom-friendly formula)
- Paintbrushes and small rollers
- Clean rags or tack cloth
- Protective topcoat (polyurethane or polycrylic for bathrooms)
- New hardware (optional)
- Gloves and mask (for safety)
Some vanities need special products. For example, if yours is laminate (not real wood), you will need a bonding primer. Always check the product label to see if it’s right for your material.
Safety Precautions
Refinishing involves sanding, chemicals, and sometimes strong smells. Work in a well-ventilated area. Open windows and turn on a fan if possible. Always wear a mask and gloves when sanding or using paint and primer. Keep children and pets away from your work zone. Store all chemicals out of reach and follow label directions for use and disposal.
Removing The Vanity Components
Start by clearing off the vanity. Take out everything from the drawers and cabinet. Remove the sink and faucet if you feel comfortable; this gives better access to all surfaces. If you do not want to remove the sink, protect it with painter’s tape and plastic wrap.
Use a screwdriver to take off all hardware—knobs, handles, hinges. Put them in a safe place if you plan to reuse them. Label the doors and drawers if needed, so you remember where they go.
If your vanity has a back splash or side panels, see if they are easy to remove. If not, tape them off carefully to protect them from paint and dust.
Cleaning And Prepping The Surface
Cleaning is a step many beginners rush or skip. Don’t. Bathrooms are full of soap scum, hairspray, and dust. Any dirt left behind will ruin your finish.
Mix warm water with a little dish soap. Wipe every surface with a sponge or cloth. For tough grime, use a degreaser. Rinse with clean water and let everything dry fully.
Next, check for damage. Fill holes, dents, or deep scratches with wood filler. Press it in with a putty knife, smooth it out, and let it dry as the label says. Lightly sand the filled areas with fine sandpaper until smooth.
Sanding: The Essential Step
Sanding is what makes your new finish stick. If you skip this, paint or stain may peel off later. For wood vanities, start with medium-grit sandpaper (120). Sand all flat areas, edges, and corners. Use a sanding block or sander for large flat spots, and fold sandpaper for small details.
For laminate vanities, sand lightly just to rough up the surface. You do not want to sand through the top layer. Wipe all dust with a tack cloth or damp rag when done.
Sanding also helps remove gloss from old finishes. If your vanity is painted, you don’t need to sand off all the paint—just enough to dull the shine.
Choosing The Right Paint Or Stain
Not all finishes are equal, especially in a bathroom. Bathrooms are humid and get splashed with water. Choose products made for high-moisture areas.
Paint: Use a high-quality acrylic latex paint or special cabinet paint. Semi-gloss or satin finishes work best because they repel water and are easy to clean.
Stain: If you love the look of wood, use a water-based or oil-based stain. Water-based dries faster and smells less; oil-based can give richer color but takes longer to dry.
Primer: For painting, use a stain-blocking primer. This prevents old stains from showing through and helps paint stick. For laminate, always use a bonding primer.
Topcoat: Always finish with a protective coat. Polyurethane (oil-based) or polycrylic (water-based) makes your vanity strong and water-resistant.
Here’s a quick comparison of finishes:
| Finish Type | Water Resistance | Durability | Best For |
|---|---|---|---|
| Semi-gloss paint | High | Very Good | Modern, easy-to-clean surfaces |
| Stain + topcoat | Medium-High | Excellent | Natural wood look |
| Chalk paint + wax | Medium | Good | Vintage, farmhouse style |
Priming Your Vanity
Priming is often skipped, but it makes a huge difference. It seals the surface and gives paint something to grip. Stir your primer well. Use a brush for corners and a small roller for flat areas. Apply a thin, even coat.
Do not rush—let it dry fully as the label says. Lightly sand with fine sandpaper (220 grit) after it dries for a super-smooth finish. Wipe away dust before painting.
For laminate, a bonding primer is a must. Without it, paint can peel off in sheets.
Painting Or Staining The Vanity
Now the fun begins. Painting is easiest for beginners, but staining can give a beautiful wood look.
Painting
Stir your paint well. Use a brush for corners, edges, and detailed areas. Use a small foam roller for flat panels and sides. Paint in thin coats; thick paint drips and takes longer to dry. Let each coat dry fully before adding another.
Usually, two coats are enough, but sometimes three are needed for deep colors.
Paint the drawers and doors separately. Lay them flat for smooth results. Prop them up on paint cans or wood blocks so the edges don’t stick to the surface.
Staining
If using stain, brush it on with the wood grain. Wipe off extra with a clean rag. The longer you leave the stain, the darker the color. Let it dry before adding another coat.
After painting or staining, let everything dry at least overnight. Some products need 24-48 hours to cure fully, especially in humid weather.
Applying A Protective Topcoat
Bathrooms are tough on finishes. Water, soap, and cleaning products can damage paint or stain. A protective topcoat is your best defense.
Polycrylic is water-based, dries clear, and does not yellow over time. It is great for light-colored vanities. Polyurethane is stronger but can yellow, so it is better for dark colors or stained wood.
Apply with a clean brush in long, even strokes. Two thin coats are better than one thick coat. Let each coat dry and lightly sand between them for a glassy finish. Do not use the bathroom for at least 24 hours after the last coat.
Reinstalling Hardware And Doors
When everything is dry, it’s time to put your vanity back together. If you are using old hardware, clean it with soap and water or polish with a metal cleaner. If you bought new handles or knobs, install them now.
Attach the doors and drawers. Check that everything opens and closes smoothly. Tighten any loose screws. Remove painter’s tape and touch up any small chips with a brush.
Installing A New Countertop Or Sink (optional)
If your countertop or sink is damaged or out of style, now is the perfect time to upgrade. Many home stores sell ready-to-install countertops in standard sizes. Choose one that fits your space and budget. Popular materials include laminate, solid surface, and stone.
If you are changing the sink, look for one with the same size and drain location to make installation easier. Always turn off the water before removing plumbing. If you are not comfortable with plumbing, hire a pro for this step.
Here’s a quick look at common countertop materials:
| Material | Cost per sq. ft. | Water Resistance | Maintenance |
|---|---|---|---|
| Laminate | $10-$30 | High | Easy |
| Solid Surface (e.g., Corian) | $35-$85 | Very High | Easy |
| Natural Stone (granite, marble) | $40-$100+ | High | Needs sealing |
Adding Finishing Touches
Small details can make your vanity look custom and expensive. Here are some ideas:
- New hardware: Change handles and knobs for a modern look.
- Decorative trim: Add molding or beadboard panels for style.
- Soft-close hinges: Make doors and drawers close quietly.
- Drawer organizers: Keep your space neat and tidy.
- Matching faucet: Upgrade to match your new look.
Adding a backsplash with tile or stick-on panels can also protect your wall and add personality.
Cleaning Up And Maintenance
After the project, clean your brushes with soap and water (for water-based products) or mineral spirits (for oil-based). Throw away used rags safely; some can catch fire if left in a pile. Remove drop cloths, tape, and any dust.
To keep your vanity looking new:
- Wipe up water spills quickly
- Clean with mild soap, not harsh chemicals
- Avoid scrubbing with abrasive pads
- Check for chips or scratches and touch up as needed
With good care, your refinished vanity can last for many years.
Common Mistakes And How To Avoid Them
Many first-timers make mistakes that are easy to avoid:
- Skipping prep: Not cleaning or sanding well enough means the finish won’t stick.
- Using the wrong products: Regular wall paint or non-bathroom finishes can peel or bubble.
- Rushing drying times: Always let primer, paint, and topcoat dry fully. Shortcuts lead to sticky or uneven surfaces.
- Thick coats: Thin, even coats give smoother, longer-lasting results.
- Ignoring hardware: Old or dirty knobs can make a new finish look cheap.
One extra tip: if your bathroom is very humid, wait for a dry day to paint. Humidity slows drying and can cause problems.
Real-life Example: Before And After
Consider the case of Anna, who had a 15-year-old oak vanity with water stains and chipped paint. She spent about $80 on primer, paint, sandpaper, and new handles. The project took a weekend and made her bathroom look modern and clean. The best part? Friends thought she had bought a new vanity.
She learned two things: sanding is more important than she expected, and using a foam roller made the paint smooth like factory finish.
Non-obvious Insights For Beginners
Many guides miss these helpful tips:
- Label hardware and doors: When you remove everything, label where each piece goes. This saves time and headaches when putting it back together.
- Test your color: Paint a small spot inside a door before doing the whole vanity. Colors look different in bathroom light.
- Ventilation matters: If your bathroom has no window, use a fan and keep the door open. Paint fumes can be strong.
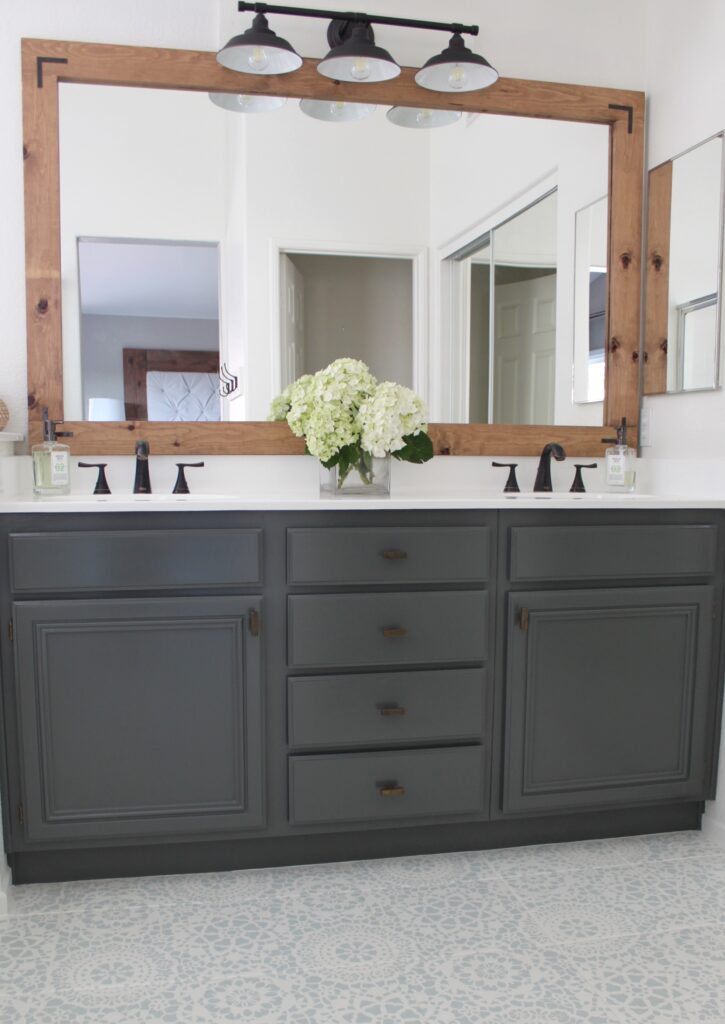
Credit: domesticblonde.com
Estimated Time And Cost
Most DIY refinishing jobs take one weekend. Here’s a rough breakdown:
- Day 1: Remove hardware, clean, sand, and repair
- Day 2: Prime, paint/stain, and apply topcoat
- Day 3 (optional): Install new hardware, touch up, and reassemble
Costs for a small vanity usually range from $50 to $150, depending on products and hardware. Larger vanities or premium finishes may cost more.
When To Call A Professional
Some situations are best left to pros:
- If your vanity has structural damage (rotted wood, mold)
- If you need to move plumbing or electrical
- If you want a new countertop cut from stone or quartz
For most cosmetic updates, DIY is safe and rewarding. But if in doubt, get a quote from a local contractor.
Environmentally Friendly Refinishing
Refinishing is greener than replacing. You keep old materials out of landfills. Choose low-VOC (volatile organic compound) paints and stains for better indoor air quality. Some brands offer eco-friendly finishes that are safer for your family and the planet.
You can find more about eco-friendly paints on EPA Safer Choice.
Frequently Asked Questions
What Type Of Paint Is Best For A Bathroom Vanity?
Use a high-quality acrylic latex or cabinet paint with a semi-gloss or satin finish. These resist water and are easy to clean. Avoid flat paints—they stain and absorb moisture.
Can I Refinish A Laminate Vanity?
Yes, but you must use a bonding primer before painting. Lightly sand the surface so the primer sticks. Use paint designed for cabinets or bathrooms for long-lasting results.
How Long Does It Take To Refinish A Vanity?
Most projects take two to three days, including drying time. You need time for cleaning, sanding, priming, painting, and letting each coat dry. Rushing leads to poor results.
Do I Need To Remove The Vanity From The Wall To Refinish It?
Not always. You can refinish in place. But removing doors, drawers, and hardware makes the job easier and cleaner. If you want to change the countertop or sink, removing the vanity may help.
Is It Cheaper To Refinish Or Replace A Bathroom Vanity?
Refinishing is much cheaper—often under $150. Buying and installing a new vanity can cost hundreds or even thousands of dollars. Refinishing also lets you customize the look and is better for the environment.
Transforming your bathroom vanity is a smart, budget-friendly way to refresh your space. With patience and careful steps, you can get a result you are proud of—and enjoy for years to come.

Credit: www.bowerpowerblog.com