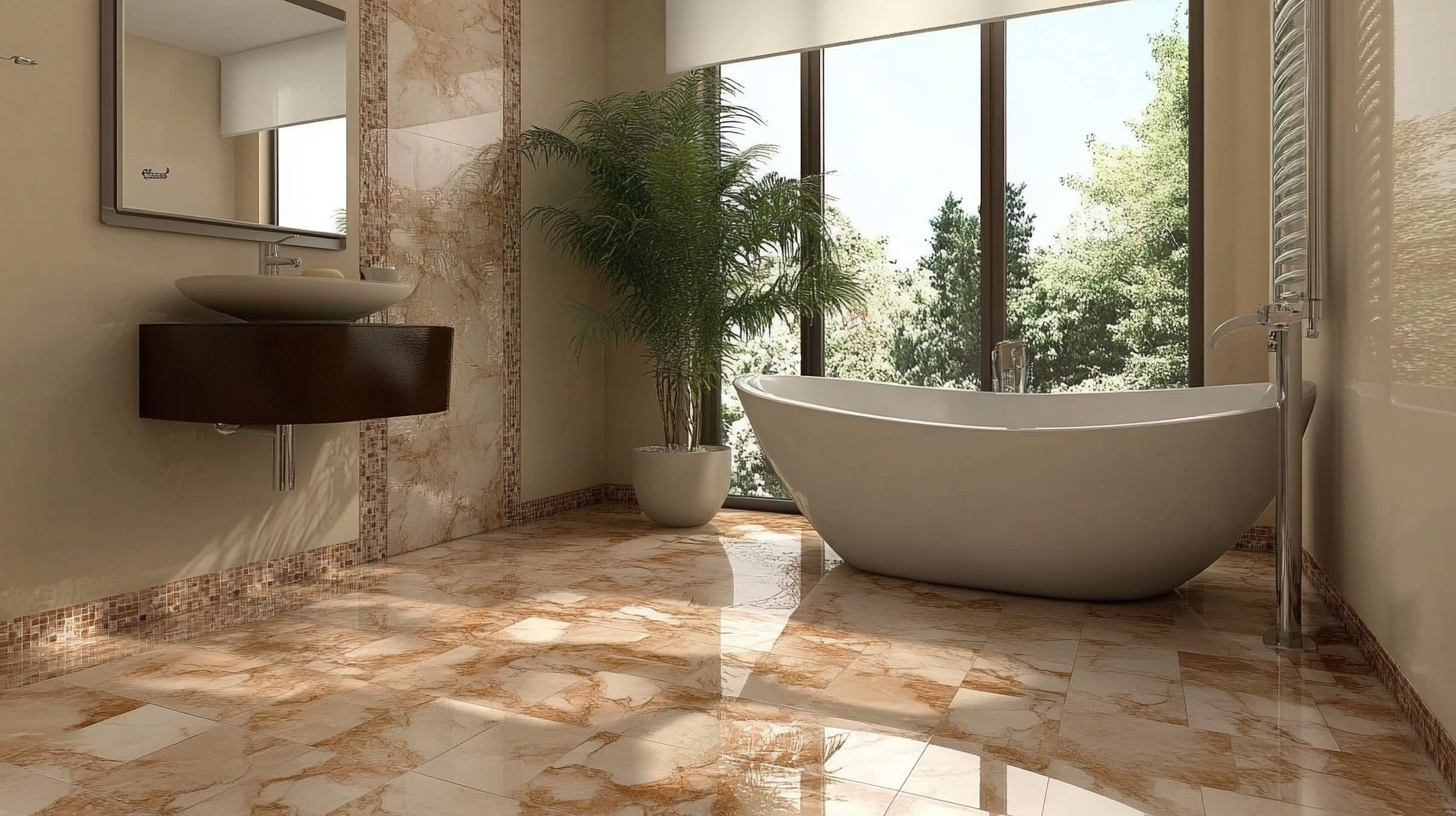
Putting a shine on tile floors does more than just make your home look beautiful—it helps the space feel clean, fresh, and welcoming. Whether you have ceramic, porcelain, or natural stone tiles, a shiny floor reflects light and gives the room a brighter appearance.
However, getting (and keeping) that glossy finish is not always easy. Everyday life brings dust, spills, and foot traffic, all of which can leave floors looking dull and tired. Many people mop and sweep but still feel their tiles look lackluster.
The good news is that with the right steps, products, and a little extra effort, you can bring back that sparkle and keep it shining for months.
In this article, you’ll learn proven ways to make your tile floors shine, no matter their type or age. We’ll break down the process into practical steps, cover common mistakes, and share both DIY and professional tricks. You’ll also find useful tables comparing products and methods, plus honest advice on what really works.
By the end, you’ll have everything you need to turn dull tiles into shining surfaces that impress family and guests alike.
Understanding Tile Types And Their Shine Potential
Before you start, it’s important to know what kind of tile you have. Each tile type reacts differently to cleaning and polishing methods.
Ceramic Tiles
Ceramic tiles are popular in kitchens and bathrooms because they’re durable and water-resistant. They have a glazed or unglazed finish. Glazed ceramic tiles already have a sheen, but it can fade with time.
Porcelain Tiles
Porcelain tiles are harder and less porous than ceramic. They often come with a glossy finish but can look dull if not cleaned properly. Unglazed porcelain can be more challenging to shine.
Natural Stone Tiles
Stone tiles (like marble, granite, or slate) offer natural beauty but need special care. They can be sensitive to strong chemicals and abrasive cleaning. These tiles often require sealing before polishing.
Vinyl And Other Tiles
Vinyl tiles are less common in the “tile” category but sometimes included. They have a different care routine and usually don’t achieve the same high-gloss finish as ceramic or porcelain.
Shine Potential Comparison
Here’s a quick comparison of how easy it is to achieve shine on different tile types:
| Tile Type | Ease of Achieving Shine | Special Considerations |
|---|---|---|
| Ceramic (Glazed) | Easy | Avoid abrasive cleaners |
| Ceramic (Unglazed) | Medium | May require sealant |
| Porcelain (Glazed) | Easy | Mop regularly |
| Porcelain (Unglazed) | Hard | Needs special polish |
| Marble/Stone | Medium-Hard | Use pH-neutral products |
| Vinyl | Low | Use vinyl polish only |
Knowing your tile type helps you choose the right cleaning method and product.
Preparing Tile Floors For Shining
Preparation is key. If you apply shine over dirt or grime, you’ll seal in imperfections and get uneven results.
1. Remove Dust And Debris
Start with a thorough sweep or vacuum. Grit and sand can scratch the surface, especially on glossy tiles. Use a soft broom or a vacuum with a hard floor setting.
Tip: Don’t forget corners and under appliances. These spots collect debris that can scratch tiles during polishing.
2. Deep Cleaning
Mopping is not enough if you want a high shine. Use a tile-safe cleaner and warm water. For extra dirty floors, mix a solution of:
- 1 gallon of warm water
- 1/4 cup of mild dish soap or pH-neutral tile cleaner
Mop the floor with this solution, then rinse with clean water to remove soap residue. Soap left behind can dull the finish.
3. Stain And Grout Treatment
Stains and dirty grout lines ruin the look of shiny tiles. Use a baking soda paste (3 parts baking soda, 1 part water) on grout lines. Scrub gently with a toothbrush.
If your grout is stained, consider a grout cleaner or a steam cleaner. Don’t use bleach on colored grout—it can cause fading.
4. Drying
Always let the floor dry completely before applying any polish or shine solution. Water left on the floor creates streaks and reduces shine.
Non-obvious insight: Many people skip the double rinse, but even one extra rinse with clean water can remove hidden soap film that prevents true shine.
Credit: www.proximitymillsflooring.com
Choosing The Right Cleaning And Polishing Products
Not all products are created equal. Some are designed for deep cleaning, others for shining. Using the wrong product can damage tiles or leave them looking hazy.
Tile-safe Cleaners
Look for products labeled as pH-neutral. Acidic or alkaline cleaners can etch natural stone and dull ceramic glazes. For natural stone, always use cleaners specifically made for stone.
Shine-boosting Solutions
These products leave a thin, glossy layer on the tile. Popular options include:
- Store-bought tile polish (for ceramic and porcelain)
- Floor wax (for some natural stones and unglazed tiles)
- Homemade shine boosters (like vinegar-water for glazed tiles)
Warning: Never use vinegar or acidic products on marble, travertine, or limestone. It can etch the surface and cause permanent dullness.
Comparing Shine Products
Here’s a look at common tile shine products:
| Product Type | Best For | Pros | Cons |
|---|---|---|---|
| Tile Polish (commercial) | Ceramic, Porcelain | Easy, quick results | May build up over time |
| Floor Wax | Unglazed tiles, some stones | High gloss | Slippery, can yellow |
| Homemade (vinegar-water) | Glazed ceramic only | Cheap, easy | Not for stone tiles |
| Stone Sealer/Polish | Marble, granite | Protects and shines | More expensive |
Pro tip: Always test a new product in a hidden spot before using it on the entire floor.
Step-by-step Process: How To Make Tile Floors Shine
Let’s get practical. Here’s how to actually put a shine on your tile floors.
Step 1: Clear And Prepare The Area
Move furniture, rugs, and any items off the floor. This gives you full access and prevents missed spots.
Step 2: Sweep And Vacuum
Go over the floor at least twice. First with a broom, then with a vacuum if possible. Make sure all dust, hair, and grit are gone.
Step 3: Wash The Floor
Mix your cleaner according to the label. Mop the floor with a damp—not wet—mop. For stubborn stains, use a soft scrub brush.
Practical example: If you have pets, consider a second rinse to remove pet hair and oils that can stick to tiles.
Step 4: Treat The Grout
Apply your grout cleaner or baking soda paste. Let it sit for 5-10 minutes, then scrub gently. Wipe up residue with a damp cloth.
Step 5: Rinse Well
Mop again with clean water. This step removes all cleaner residue. It’s essential for a streak-free, shiny finish.
Step 6: Dry Completely
Use a clean, dry microfiber mop or towel. Air drying can leave water spots, so hand drying gives a better shine.
Step 7: Apply Shine Solution
Depending on your tile type, choose the right shine-boosting product:
- For glazed ceramic or porcelain: Use a commercial tile polish or a vinegar-water solution (1/4 cup vinegar to 1 gallon water). Mop lightly, let air dry.
- For unglazed tile or stone: Use a compatible floor wax or stone polish. Apply a thin coat with a microfiber pad. Buff with a soft, dry cloth after it dries.
Step 8: Buff For Maximum Shine
After the floor is dry, buff with a clean microfiber or terry cloth. Use circular motions for best results.
Expert tip: If you want a mirror-like finish, use a floor buffer for large areas. For small spaces, hand-buffing works well.
Step 9: Replace Furniture And Rugs
After at least 1-2 hours, return furniture. Place felt pads under legs to avoid scratching your shiny new surface.
Credit: www.reddit.com
Common Mistakes To Avoid
Polishing tile floors seems simple, but many people make mistakes that leave tiles dull or even damaged.
1. Using Too Much Cleaner Or Polish
More is not better. Excess product leaves streaks and sticky residue. Follow label instructions carefully.
2. Skipping The Rinse
Not rinsing after cleaning is the most common reason tiles stay dull. Soap or cleaner residue builds up over time.
3. Using Abrasive Tools
Steel wool, rough pads, or hard brushes can scratch and dull tiles, especially glossy ones.
4. Applying Wrong Products On Stone
Acidic cleaners or vinegar can destroy natural stone. Always check compatibility before use.
5. Not Drying Floors
Letting floors air dry may seem easier but can leave water marks and streaks. Always dry with a microfiber mop.
Non-obvious insight: Even some “shine” products can build up and attract dirt if not used correctly. Less is often more.
Natural And Homemade Methods For Shiny Tile
If you prefer natural products, several homemade solutions can help maintain shine safely.
Vinegar And Water (for Ceramic And Porcelain Only)
Mix 1/4 cup white vinegar with 1 gallon of warm water. Mop lightly, rinse with plain water, and dry. Never use on natural stone.
Baking Soda Scrub
Sprinkle baking soda on the floor, mop with warm water, then rinse. This helps remove stains and freshen tiles.
Lemon Juice (for Glazed Tiles Only)
A few drops of lemon juice in water can add natural shine. Again, avoid on stone tiles.
Olive Oil Polish
For a quick shine, put a few drops of olive oil on a clean cloth and buff glazed tile surfaces. Wipe off excess to avoid slipperiness.
Warning: Natural solutions don’t last as long as commercial polishes but are safe and cost-effective for regular touch-ups.
Professional Methods And When To Hire A Pro
Sometimes, home methods aren’t enough. If your floor is stained, scratched, or never seems to shine, a professional service may be needed.
Professional Cleaning
Experts use industrial cleaners and machines that remove deep dirt and old product buildup. This creates a clean base for shining.
Machine Buffing
For commercial spaces or very large homes, a floor buffer can give a high-gloss finish quickly. Pros know how to use these machines safely.
Stone Polishing
Natural stone sometimes needs mechanical polishing or re-sealing. This process restores shine and protects the tile from stains.
When to call a pro: If tiles are etched, have deep stains, or the shine is gone after repeated cleaning, it’s time for expert help.
Maintaining Shine On Tile Floors
A shiny floor doesn’t stay that way by accident. Maintenance is critical to keep your hard work from fading.
Daily And Weekly Care
- Sweep or vacuum daily to remove dust and grit.
- Mop with a damp (not wet) mop weekly. Use a pH-neutral cleaner.
Monthly And Seasonal Care
- Buff the floor with a microfiber cloth every month.
- Reapply shine product or polish as needed (usually every 2-3 months).
- Seal grout lines once or twice a year for extra protection.
Preventing Dullness
- Place mats at entrances to catch dirt.
- Use felt pads under furniture.
- Clean spills right away to prevent stains.
Comparing Maintenance Levels
See how much care different tiles need to stay shiny:
| Tile Type | Maintenance Level | Shine Longevity |
|---|---|---|
| Glazed Ceramic | Low | Long-lasting |
| Porcelain | Low | Long-lasting |
| Natural Stone | Medium | Medium |
| Unglazed Tile | High | Shorter |
Practical tip: Even the shiniest tile will look dull if the grout is dirty. Clean grout makes tiles pop.
Additional Tips For Better And Longer-lasting Shine
Use The Right Mop
Microfiber mops are best for polishing. They don’t leave lint or streaks and help buff the shine as you clean.
Watch For Hard Water
If your water is “hard” (contains minerals), it can leave white spots after mopping. Use distilled water for the final rinse to prevent this.
Control Humidity
Excess moisture can dull tiles, especially in bathrooms. Use a dehumidifier or open windows for better drying.
Don’t Overuse Polish
Too much polish can create a sticky buildup that attracts dirt. Use sparingly and buff well.
Repair Scratches Quickly
Small scratches can make tiles look dull. Use a tile repair kit or color-matched polish to fill them.
Non-obvious insight: The shine of your tile floor depends as much on the grout and surroundings as on the tile itself. Clean baseboards and walls make the floor’s shine stand out.
Environmental And Health Considerations
Many commercial products contain strong chemicals. If you have children, pets, or allergies, consider:
- Choosing low-VOC or green cleaners
- Ventilating well during and after cleaning
- Storing chemicals out of reach
Homemade solutions are safer but may require more frequent application.
Example: A study by the Environmental Working Group found that many popular floor cleaners contain ingredients that can irritate the skin or lungs. Always read labels and follow safety instructions.
For more information about safe cleaning products, you can visit the EPA Safer Choice program.

Credit: www.reddit.com
Frequently Asked Questions
How Often Should I Polish My Tile Floors?
Most tile floors need polishing every 2-3 months, depending on foot traffic and cleaning habits. High-traffic areas may need it more often. Over-polishing can lead to buildup, so always buff and rinse between applications.
Can I Use Vinegar On All Tile Floors?
No, you should only use vinegar on glazed ceramic and porcelain tiles. Never use it on natural stone like marble, travertine, or limestone—vinegar’s acidity will damage them.
What’s The Best Way To Clean Grout Without Damaging The Tile?
Mix baking soda and water to make a paste. Apply to grout lines, scrub gently with a soft brush, and rinse well. For tough stains, use a grout-specific cleaner. Avoid bleach on colored grout.
Why Does My Tile Floor Look Dull Even After Cleaning?
Dullness is usually caused by residue from soap, cleaner, or hard water. Always rinse with clean water and dry the floor completely. If dullness remains, try a tile polish and buffing for extra shine.
Is It Worth Hiring A Professional For Tile Floor Shining?
If your floor is heavily stained, scratched, or you’ve tried everything without success, a professional cleaning or polishing service can restore the shine. Pros have equipment and products that aren’t available to consumers and can solve deeper problems.
Putting a shine on tile floors is a mix of the right products, good technique, and smart maintenance. With these steps and insights, you can keep your floors gleaming for years—making your home feel as fresh and inviting as it looks.