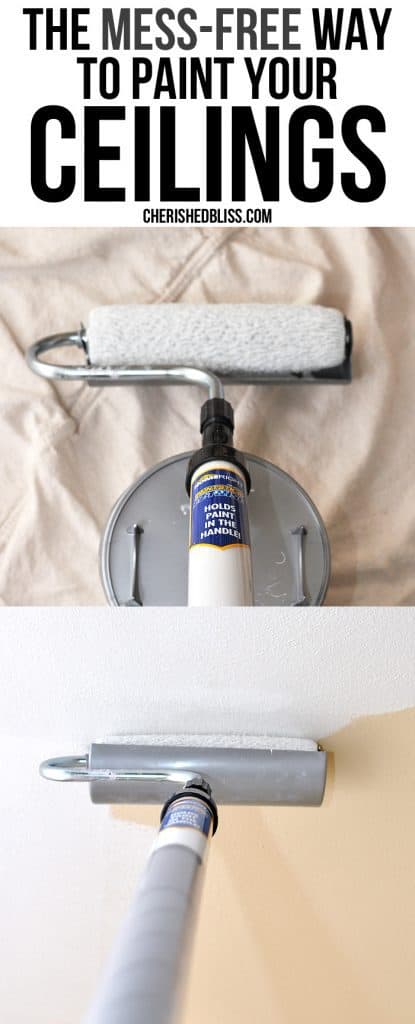
Painting a ceiling can transform a room, making it brighter, fresher, and more inviting. But many people avoid this project because they fear drips, splatters, and the hassle of cleaning up. The truth is, painting a ceiling without making a mess is completely possible if you follow the right steps, use the correct tools, and understand the process fully.
This guide will walk you through everything you need to know to paint your ceiling confidently—and keep your floors, furniture, and yourself free from unwanted paint.
Why Painting A Ceiling Is Messy—and How To Avoid It
Most homeowners underestimate the challenge of ceiling painting. Gravity works against you, causing paint to drip down. Rollers can spray tiny droplets, and even a small mistake can leave splatter marks on your walls, light fixtures, or carpets. Knowing the common pitfalls helps you prevent them.
Common reasons for mess:
- Using the wrong roller or brush
- Not prepping the room or ceiling
- Overloading the roller with paint
- Working too quickly or slowly
- Skipping cleaning between coats
But with careful preparation and the right technique, you can achieve a flawless finish without the chaos.
Gathering The Right Supplies
Before you start, having the right supplies is crucial. High-quality tools not only make the job easier but also reduce the risk of mistakes and mess.
Essential tools:
- Drop cloths or plastic sheeting – for protecting floors and furniture
- Painter’s tape – to shield walls, trim, and fixtures
- Step ladder or extension pole – to reach all areas safely
- Paint roller with extension handle – for even coverage
- Angled brush (2–2.5 inches) – for edges and corners
- Paint tray with liner – makes cleanup easier
- Ceiling paint – choose a flat or matte finish to hide flaws
- Primer (if needed) – for stained or unpainted surfaces
- Spackling paste and putty knife – for patching holes or cracks
- Sandpaper (120–220 grit) – to smooth patched areas
- Bucket of water and sponge – for quick clean-up of drips
- Safety goggles and mask – to protect eyes and lungs
Investing in quality rollers and brushes is a small cost for a big reduction in mess.

Credit: www.youtube.com
Preparing The Room: The Key To A Clean Job
Preparation is the most important part of painting a ceiling without making a mess. Take your time here, and you will save hours on cleanup later.
Clear And Cover
Move as much furniture out of the room as possible. For larger items, move them to the center and cover with plastic sheeting or old sheets. Cover the entire floor with drop cloths. Secure edges with painter’s tape so nothing slips.
Pro tip: Layering two drop cloths gives extra protection against spills.
Protect Walls And Fixtures
Apply painter’s tape where the ceiling meets the walls and around any fixtures. Remove ceiling fans and light shades if you can. If not, cover them completely with plastic and tape around the base.
Remove Dust And Debris
Ceilings collect dust and cobwebs, which can ruin your paint finish. Wipe the ceiling with a damp cloth or use a vacuum cleaner with a soft brush attachment. Pay special attention to corners and vents.
Repair And Prime
Look for cracks, holes, or water stains. Fill these with spackling paste, smooth with a putty knife, and sand once dry. For stained areas, apply a stain-blocking primer. If the ceiling has never been painted or is very porous, prime the entire surface.
Non-obvious insight: Skipping primer can cause stains to “bleed” through new paint, making your work look patchy and forcing you to repaint.
Choosing The Right Paint And Tools
The paint and tools you choose make a huge difference in how cleanly you can work.
Ceiling Paint
Use a paint made specifically for ceilings. These paints drip less, splatter less, and are often a true white or tinted to reflect light well.
Flat or matte finishes are best because they hide imperfections.
Rollers And Brushes
A 9-inch roller with a 3/8″ or 1/2″ nap is ideal for most ceilings. For textured ceilings, use a thicker nap (up to 3/4″). Choose a roller labeled “low splatter” for best results.
An angled brush is essential for cutting in edges, especially where rollers can’t reach.
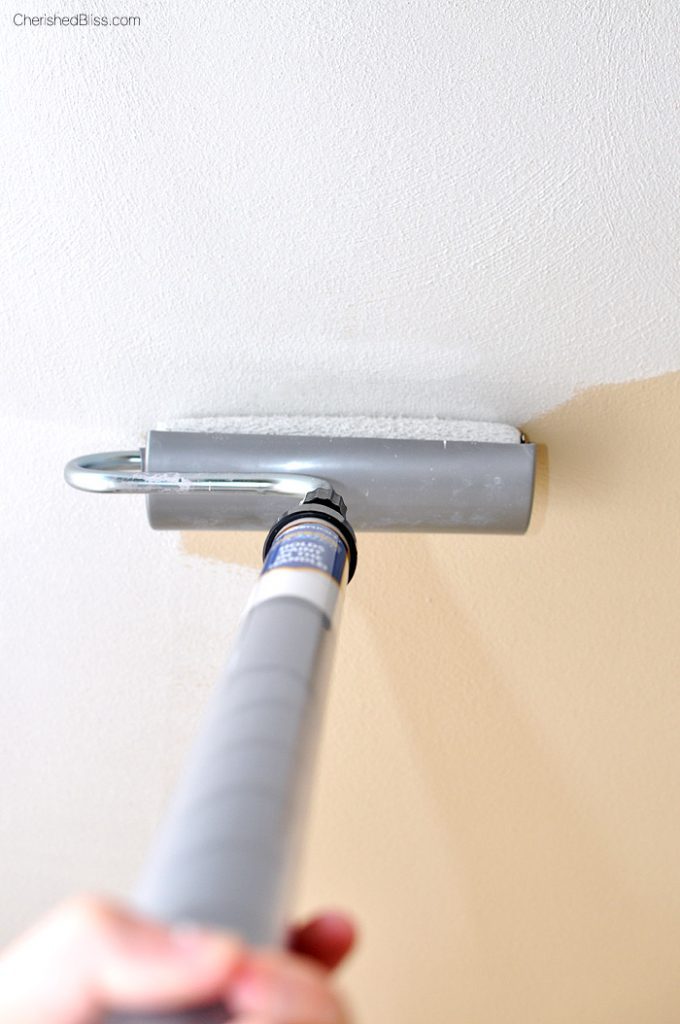
Extension Poles
Using an extension pole helps you keep a consistent angle and pressure, reducing drips and splatters. It also means you can stand further from the ceiling, so paint droplets are less likely to land on you.
Comparison: Ceiling Paints
Below is a comparison of popular ceiling paint types.
| Type | Finish | Drip Resistance | Best For |
|---|---|---|---|
| Flat Latex | Matte | High | Standard ceilings |
| Stain-Blocking Latex | Flat | Very High | Ceilings with stains or water marks |
| Zero VOC | Flat | High | Homes with allergies or children |
| Primer-Paint Combo | Matte | Medium | Ceilings needing both primer and paint |
Non-obvious insight: Some ceiling paints turn from pink to white as they dry. This helps you see where you have painted and avoid missed spots.
Step-by-step Guide: Painting The Ceiling Without Mess
Now that you’re prepared, here’s how to paint your ceiling cleanly and efficiently.
1. Mix And Pour Paint
Stir the paint thoroughly to ensure even color and consistency. Pour a small amount into a paint tray. Overfilling the tray makes it easy to overload your roller and cause drips.
Tip: If you’re using more than one can, mix them together in a large bucket (“boxing the paint”) for a consistent color.
2. Cut In Edges
Use an angled brush to paint a 2–3 inch strip around the edge of the ceiling where it meets the walls. This is called cutting in. It gives you a border that the roller can overlap, ensuring no missed areas.
Work in small sections so the edge paint is still wet when you roll.
3. Load The Roller Properly
Dip the roller into the paint tray, then roll it back and forth on the tray’s ridges to remove extra paint. The roller should be evenly covered but not dripping.
Common mistake: Overloading the roller leads to drips and splatters.
4. Start Rolling In Small Sections
Begin rolling near one corner, overlapping your cut-in edge. Work in sections about 3×3 feet at a time. Roll slowly and with steady pressure. Use a W or M pattern, then fill in to ensure even coverage.
5. Maintain A Wet Edge
Always overlap the wet paint as you move to the next section. This prevents visible lines and streaks.
6. Avoid Overworking The Paint
Don’t go back over areas that have started to dry. This can cause the paint to lift and splatter.
7. Check For Missed Spots
Use a good light source to check for thin spots or missed areas. Touch up as needed while the paint is still wet.
8. Let Dry And Apply A Second Coat
Allow the first coat to dry completely (usually 2–4 hours) before applying a second coat. Open windows or use fans for better ventilation.
9. Remove Tape Carefully
Once the final coat is dry to the touch, remove painter’s tape slowly at a 45-degree angle. This helps prevent peeling.
10. Clean Up
Wash brushes and rollers immediately with soap and water. Fold up drop cloths carefully to trap any stray drips.
Comparison: Roller Types For Ceilings
Choosing the right roller can reduce mess and improve results.
| Roller Type | Nap Length | Best For | Splatter Risk |
|---|---|---|---|
| Foam Roller | Short (1/4″) | Very smooth ceilings | Low |
| Microfiber Roller | Medium (3/8″) | Standard drywall ceilings | Very Low |
| Lambswool Roller | Thick (3/4″) | Textured or popcorn ceilings | Medium |
Practical Tips To Avoid Mess When Painting Ceilings
Even with the right tools and good technique, a few smart habits can keep your worksite spotless.
Work With Gravity
Always keep your roller directly below the area you are painting. If you reach at an angle, drips can fly off.
Use Minimal Paint
It’s better to apply two thin coats than one thick, drippy coat. Thin coats dry faster and cover more evenly.
Control Room Conditions
Paint in moderate temperatures (60–75°F) with low humidity. High humidity slows drying and can cause paint to drip.
Take Breaks And Check Progress
Step back frequently to check your work. It’s easier to fix a small mistake right away than a big one later.
Clean Up Spills Immediately
If you do drip paint, wipe it up with a damp sponge right away. Dried paint is much harder to remove.
Mistakes To Avoid When Painting Ceilings
Even experienced DIYers make avoidable mistakes. Watch out for these common errors.
- Ignoring prep work: Skipping taping, covering, or cleaning leads to more mess and a worse finish.
- Choosing the wrong paint: Wall paint on a ceiling leads to drips and uneven coverage.
- Painting over stains: Stains bleed through unless primed first.
- Overloading rollers: Too much paint causes splatter and roller marks.
- Rushing: Working too quickly increases mistakes and splatter.
- Painting in poor light: Missed spots are common in dim rooms.
- Not using a ladder safely: Stretching instead of moving the ladder is dangerous and messy.
- Using old or dirty tools: Dried paint flecks can end up on your ceiling.
- Not wearing protective gear: Paint in eyes or hair is no fun to clean.
- Leaving tape on too long: Dried paint can peel away with the tape.
Credit: thecraftyblogstalker.com
How To Paint Different Types Of Ceilings Without Mess
Not all ceilings are the same. Here’s how to adjust your approach for common ceiling types.
Popcorn Or Textured Ceilings
Popcorn ceilings require special care because the texture can break off or soak up too much paint.
- Use a thicker nap roller (3/4″ to 1″)
- Roll gently to avoid knocking off texture
- Do not brush; cut in with a mini roller instead
- Consider spraying if you have experience, but mask everything well
Vaulted Or High Ceilings
For high or sloped ceilings:
- Use an extension pole (6–12 feet)
- Work with a partner for safety when using ladders
- Secure drop cloths to cover larger floor areas
Ceiling With Water Damage
Always repair and prime before painting. Use a stain-blocking primer to seal stains. Allow primer to dry fully before applying ceiling paint.
Bathroom Or Kitchen Ceilings
These rooms have higher moisture. Use mildew-resistant ceiling paint and make sure the room is well ventilated during and after painting.
Safety Precautions When Painting Ceilings
Painting a ceiling involves physical activity and exposure to chemicals. Stay safe with these tips:
- Wear goggles to protect eyes from drips
- Use a mask to avoid inhaling paint fumes
- Ensure the ladder is on a flat, stable surface
- Never overreach from a ladder—move it instead
- Keep windows open for fresh air
Cleaning Up: Tips For A Spotless Finish
After you finish painting, a tidy clean-up makes the results even more satisfying.
- Remove drop cloths carefully, folding them inward to trap any paint
- Wash brushes and rollers with warm soapy water (for latex paint)
- Wipe down any paint splatters on walls or fixtures immediately
- Store leftover paint in a tightly sealed can for touch-ups
When To Call A Professional
Some ceilings are especially challenging—very high, large, or with dangerous damage (like mold). In these cases, hiring a professional might save you time, mess, and risk.
- Professional painters have specialized rollers and sprayers that reduce mess
- They can complete the job more quickly
- They’re insured in case of accidents
If you’re not confident or lack the right tools, asking for help can be a smart choice.
Real-world Example: A Living Room Transformation
Consider a homeowner who wanted to brighten their living room. They removed furniture, taped off the walls, and used a flat ceiling paint. By using a microfiber roller and working in small sections, they avoided drips. They checked their progress with a portable light, catching missed spots quickly.
After two coats and careful clean-up, the room looked refreshed—with no paint on the floor or walls.
Comparison: Brushes Vs. Rollers For Ceilings
Which tool is best for which job? Here’s how they compare:
| Tool | Best For | Coverage Speed | Mess Potential |
|---|---|---|---|
| Angled Brush | Edges, corners, detailed work | Slow | Low |
| Standard Roller | Large flat areas | Fast | Medium |
| Mini Roller | Small or hard-to-reach spots | Medium | Low |
Advanced Tips For A Pro-level Finish
If you want your ceiling to look like a professional did it, try these advanced strategies:
- Tint your primer to match your ceiling paint for better coverage
- Use a paint conditioner (like Floetrol) to reduce roller marks and splatter
- Paint during daylight for the best view of your work
- Apply paint in parallel strokes for a consistent texture
- For very smooth ceilings, lightly sand between coats for a flawless finish
Eco-friendly Options For Ceiling Painting
If you are concerned about indoor air quality, choose low-VOC or zero-VOC paints. These produce fewer fumes and are safer for children and pets.
- Ventilate well during and after painting
- Avoid oil-based paints, which have stronger odors and require harsh cleaners
For more details about low-VOC paints and their benefits, see EPA: What Are VOCs?.
Credit: thecraftyblogstalker.com
Frequently Asked Questions
What Is The Best Type Of Paint For Ceilings?
The best paint for most ceilings is a flat, latex-based ceiling paint. Flat finishes hide flaws and reduce glare. For bathrooms or kitchens, use a mildew-resistant paint.
How Do I Avoid Roller Marks When Painting A Ceiling?
Use a quality roller, don’t overload it with paint, and keep a wet edge. Paint in small sections and maintain consistent pressure. If marks appear, a second thin coat usually covers them.
Can I Paint A Ceiling Without Using Tape?
While it’s possible, painter’s tape makes clean lines much easier and protects your walls and trim. If you have a steady hand, you can “cut in” carefully with an angled brush, but tape is safer for beginners.
How Long Should I Wait Between Coats?
Wait at least 2–4 hours between coats, or follow the paint manufacturer’s instructions. Humidity and temperature can affect drying time.
Do I Need To Prime My Ceiling Before Painting?
Prime if your ceiling is stained, unpainted, or repaired. If you’re repainting a clean, previously painted ceiling, primer is usually not needed unless you’re making a big color change.
Painting a ceiling doesn’t have to be messy or frustrating. With the right preparation, tools, and a careful approach, you can achieve beautiful results and keep your home spotless throughout the process. Take your time, follow these steps, and enjoy your newly refreshed space.