Few things transform a piece of furniture quite like a high gloss lacquer finish. This mirror-like shine doesn’t just make old wood look new—it can turn any table, dresser, or chair into a modern showpiece. But achieving that deep, flawless gloss is more complex than simply brushing on a shiny paint. It’s a careful, step-by-step process that requires patience, the right materials, and attention to detail. Many DIYers rush into lacquering, only to end up with dull, uneven surfaces or sticky finishes that never seem to dry. In this guide, you’ll learn exactly how to lacquer furniture high gloss, avoid common mistakes, and get professional-looking results—even if you’re new to refinishing.
Understanding High Gloss Lacquer
Before you begin, it’s important to know what sets high gloss lacquer apart from other finishes. Lacquer is a fast-drying, solvent-based finish that dries to a hard, durable, and very shiny surface. While polyurethane or varnish can offer some shine, only lacquer creates that true “piano finish” look. It’s popular for modern furniture, mid-century pieces, and even antiques that need a fresh, dramatic update.
A high gloss lacquered surface reflects light like a mirror. This means every imperfection—dust, scratches, brush marks—will be visible. That’s why preparation is just as important as the lacquering itself. Many professionals spend more time on sanding and cleaning than on applying the lacquer.
If you want that showroom shine, you have to master both prep and finishing steps.
Choosing The Right Lacquer And Tools
Not all lacquers are the same. Here’s what you need to know to pick the right products and tools for a high gloss finish.
Types Of Lacquer
- Nitrocellulose lacquer: Classic, fast-drying, and gives a deep gloss. Used on pianos and guitars. It’s flammable and has strong fumes, so good ventilation is a must.
- Acrylic lacquer: Non-yellowing, water-clear, and often used for lighter woods or white finishes. Less toxic but still requires a respirator.
- Water-based lacquer: Lower odor, easier cleanup, and more eco-friendly. It dries fast but can sometimes be less durable or as glossy as solvent-based types.
- Pre-catalyzed lacquer: Professional-grade, very durable, and dries hard. Usually sold in spray cans for DIYers or bulk for spray guns.
Tools And Supplies
A high gloss lacquer job needs more than just a can of finish. You’ll need:
- Sandpaper (grits 120–2000)
- Tack cloths (sticky rags for dust removal)
- Foam or microfiber rollers (if not spraying)
- High-quality brushes (for detail work)
- Respirator mask
- Drop cloths or tarps
- Spray gun or HVLP sprayer (optional but best for large surfaces)
- Polishing compound
- Rubbing alcohol or mineral spirits
- Clean microfiber cloths
- Gloves and eye protection
Comparison: Types Of Lacquer
Here’s a quick overview to help you choose the best lacquer for your project:
| Lacquer Type | Gloss Level | Dry Time | Durability | Ease of Use | Best For |
|---|---|---|---|---|---|
| Nitrocellulose | Very High | Fast | High | Moderate | Musical instruments, antiques |
| Acrylic | High | Medium | Medium | Easy | Light woods, white finishes |
| Water-based | Medium-High | Very Fast | Medium | Easy | Eco-friendly projects |
| Pre-catalyzed | Very High | Fast | Very High | Difficult | Professional work |
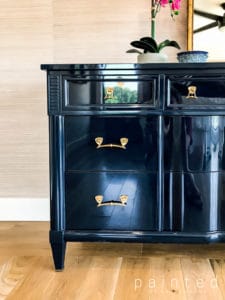
Credit: www.paintedbykaylapayne.com
Preparing The Furniture
Preparation is the secret to a flawless high gloss finish. Any bumps, dents, or dust will show up as shiny mistakes once you apply lacquer. Here’s how to prep like a pro.
Cleaning And Degreasing
Start by removing all hardware, knobs, and drawers. Wash the surface with mild soap and water to remove dirt and oils. For sticky residues (like wax or old polish), use mineral spirits or rubbing alcohol with a clean cloth. Let the piece dry fully before moving on.
Stripping Old Finish
If your furniture has an old finish—varnish, shellac, or paint—it must be stripped. Use a chemical stripper (following all safety directions) or a heat gun for thick layers. Scrape off the old finish with a plastic putty knife. Avoid metal scrapers, which can gouge the wood.
Sand any remaining finish with coarse sandpaper (120–150 grit).
Sanding For Smoothness
Sanding is the most important prep step for high gloss. Start with medium-grit sandpaper (120–150) to remove old finish or rough surfaces. Progress to finer grits (220, then 320) to smooth the wood. Always sand with the grain, not across it.
Wipe away dust with a tack cloth between grits.
For the final pass, use 400-grit sandpaper. The surface should feel as smooth as glass. Run your hand over the wood in good light—if you feel any bumps, sand them out now.
Repairing Imperfections
Fill any holes, cracks, or dents with wood filler that matches your furniture’s color. Let it dry, then sand flush with the surface. Even tiny scratches can ruin a high gloss look, so be thorough.
Dust Removal
High gloss lacquer shows every speck of dust. Use a tack cloth or a vacuum with a soft brush to remove all dust. Wipe the piece with a clean, slightly damp microfiber cloth and let it dry completely.
Surface Inspection Checklist
Before moving to the next step, ask yourself:
- Is the surface completely smooth to the touch?
- Are all old finishes removed?
- Are holes and dents filled and sanded flat?
- Is the surface free of dust and debris?
If you answer “no” to any, go back and fix it now.
Priming For High Gloss
Priming is often skipped by beginners, but it’s essential for a mirror-like finish—especially on open-grain woods like oak or mahogany.
Why Prime?
Primer seals the wood, fills tiny pores, and helps the lacquer stick evenly. A good primer also blocks old stains and prevents them from bleeding through the clear lacquer.
Choosing The Right Primer
- For light or white finishes, use a white shellac or acrylic primer.
- For dark woods, a clear sanding sealer is best.
- Use a high-build primer if the wood grain is very open.
Apply the primer with a foam roller or spray gun for the smoothest result. Let it dry completely, then sand with 400-grit sandpaper until perfectly smooth. Remove all dust with a tack cloth.
Priming Vs. Skipping: Results
See how priming affects the final gloss:
| Surface | With Primer | Without Primer |
|---|---|---|
| Sanded Wood | Even, mirror finish | Visible grain, uneven shine |
| Old Stained Wood | No bleed-through | Discoloration, stains show |
| Open Grain | Glass-smooth surface | Pores visible, dull spots |

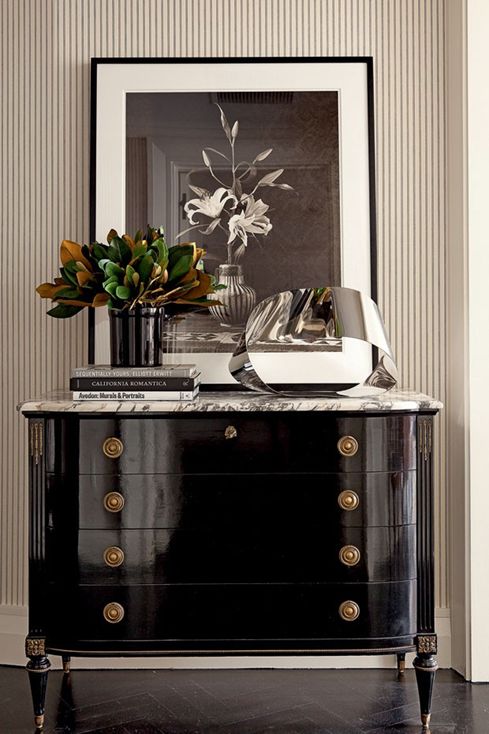
Credit: southernnellsgraciousliving.blog
Applying The Lacquer: Step-by-step
This is where the magic happens. Proper application is key for a true high gloss look. Here’s a practical, detailed guide.
Step 1: Choose Your Method
- Spraying: Best for large, flat surfaces. Gives the smoothest result with no brush marks. Use an HVLP spray gun or a quality aerosol can for small projects.
- Rolling: Foam rollers work for flat panels but may leave slight texture.
- Brushing: Only for small areas or touch-ups. Use high-quality synthetic brushes.
For most beginners, spraying is worth learning. Practice on scrap wood first to get comfortable.
Step 2: Set Up Your Workspace
- Work in a dust-free, well-ventilated area.
- Lay down drop cloths and protect nearby surfaces.
- Wear a respirator and gloves.
Temperature and humidity matter. Ideal: 65–75°F (18–24°C), humidity below 60%. Too cold or humid and the lacquer may dry cloudy or sticky.
Step 3: Thin The Lacquer (if Needed)
Some lacquers need thinning for smoother flow, especially when spraying. Check the manufacturer’s directions. Usually, add 10–20% lacquer thinner and mix well.
Step 4: Apply The First Coat
Spray or roll a thin, even coat. Don’t try to cover everything on the first pass. Overlapping strokes by 50% helps avoid streaks. Watch for drips or runs—wipe them immediately with a clean brush.
Let the first coat dry completely (usually 30–60 minutes for nitrocellulose, faster for water-based).
Step 5: Sand Between Coats
Once dry, sand lightly with 400–600 grit sandpaper. This removes dust nibs and helps the next coat stick. Wipe away dust with a tack cloth.
Step 6: Apply Additional Coats
Repeat the process—apply a thin coat, let dry, sand, and wipe dust. For true high gloss, you’ll need 4–6 coats. Each coat builds depth and shine. Be patient: rushing leads to drips and dull spots.
Step 7: Final Wet Sanding
After the last coat dries overnight, wet sand the surface with 1000–2000 grit sandpaper. Use water with a drop of dish soap for lubrication. Sand very gently, using circular motions. This removes minor imperfections and flattens the surface for a glass-like gloss.
Step 8: Polishing
Apply a small amount of polishing compound to a soft microfiber cloth. Rub in gentle circles until the surface shines like a mirror. For best results, use a dedicated furniture polish or a swirl remover for automotive finishes.
If you want an ultra-glossy, piano-like shine, finish with a high-speed buffer (optional).
Step 9: Curing
Lacquer hardens fast, but takes up to 2 weeks to fully cure. Avoid heavy use until the finish is completely hard. Keep the piece dust-free during this time for best results.
Common Mistakes And How To Avoid Them
Many beginners make the same errors when lacquering furniture. Here’s how to spot and fix them.
- Skipping surface prep: Any dust, grease, or old finish will ruin the gloss. Take time to prep.
- Thick coats: Thick lacquer runs, bubbles, and never dries right. Always apply thin, even coats.
- Not sanding between coats: Skipping this step leads to bumps and dull spots.
- Wrong temperature or humidity: Too cold or humid? Lacquer can turn cloudy or sticky. Wait for better conditions.
- Using poor-quality tools: Cheap brushes and rollers leave marks and shed fibers.
- Spraying too close or too far: Too close causes drips, too far creates rough, dry spray (“orange peel”).
- Not letting coats dry fully: Rushing leads to soft, damaged finishes. Always let each coat dry before sanding or recoating.
- Ignoring safety: Lacquer fumes are dangerous. Always wear a respirator and ventilate the area.
Advanced Tips For A Perfect High Gloss Finish
Once you’ve mastered the basics, these advanced techniques can take your work to the next level.
Grain Filling For Ultra-smoothness
Open-grain woods (oak, ash, mahogany) need extra help for a glassy finish. Use a grain filler before priming—apply with a plastic spreader, let dry, then sand smooth. This step creates a perfectly flat base for the lacquer.
Color Toning
Want a colored high gloss finish? Use a toner—a colored lacquer applied as a thin mist between clear coats. This gives a rich, even color without hiding the wood grain.
Using A Spray Booth
For flawless results, professionals use a spray booth or tent with filtered air. This keeps dust away and gives the smoothest possible finish. If you’re serious about furniture refinishing, consider investing in a small spray booth for home use.
High-speed Buffing
After final polishing, use a high-speed buffer with a foam pad and swirl remover. This step is what gives pianos and luxury cars their “liquid” gloss. Go slow and don’t press too hard—let the machine do the work.
Comparing Diy And Professional Results
Here’s a look at what you can expect from DIY vs. pro finishes:
| Aspect | DIY Lacquer | Professional Lacquer |
|---|---|---|
| Gloss Level | High (with care) | Ultra-high, mirror-like |
| Durability | Very good | Exceptional |
| Visible Defects | Possible if rushed | Rare, flawless |
| Cost | Low | High (labor, equipment) |
| Time Needed | Several days | Several days to weeks |
Maintenance And Care Of High Gloss Lacquer Furniture
Once your piece is finished, you want it to stay beautiful for years. High gloss lacquer is durable, but it can scratch or dull if not cared for correctly.
Cleaning
- Dust regularly with a soft, dry microfiber cloth.
- For sticky spots, use a damp (not wet) cloth, then dry immediately.
- Avoid harsh cleaners, ammonia, or abrasives—they can cloud the finish.
Polishing
Use a dedicated furniture polish for lacquered surfaces, but not too often. Over-polishing can build up and dull the shine. Once every few months is plenty.
Protecting From Damage
- Use coasters, placemats, and pads under hot dishes or sharp objects.
- Avoid exposing the piece to direct sunlight for long periods—UV light can yellow some lacquers.
- Keep away from heat sources, which can soften or warp the finish.
Repairing Small Scratches
Minor scratches can often be buffed out with a fine polishing compound and a soft cloth. For deeper damage, you may need to sand and re-lacquer the affected area.
Non-obvious Insights For Beginners
Many first-time lacquerers are surprised by a few aspects of the process:
- Ambient dust can be invisible, but will show up as bumps in your finish. Wet the floor before spraying to trap dust, and let the air settle before starting.
- The final shine comes from polishing, not just the lacquer itself. Even a well-applied lacquer coat can look dull until you buff it out.
- Lacquer can “blush” (turn cloudy) in high humidity. If this happens, a light re-coat when the weather is dry can usually fix it.
- Don’t be afraid to sand aggressively between coats. The lacquer builds up with each layer, so it’s better to sand out imperfections early than to hope they’ll disappear.
Frequently Asked Questions
How Many Coats Of Lacquer Do I Need For A High Gloss Finish?
Most projects need at least 4–6 thin coats of lacquer for a true high gloss finish. Each coat adds depth and shine. More coats can be added for extra durability or a deeper look, but always let each layer dry fully and sand between coats.
Can I Lacquer Over Old Paint Or Varnish?
It’s possible, but not recommended for high gloss results. Old finishes can react with lacquer or cause adhesion problems. For best results, strip the furniture back to bare wood, then sand and prime before applying lacquer.
What’s The Best Way To Avoid Dust In The Finish?
Work in a clean, dust-free area. Wet the floor, use tack cloths, and let the air settle before starting. Wearing lint-free clothes helps too. If dust lands on wet lacquer, wait until it dries, then sand it out before recoating.
Is It Safe To Lacquer Furniture Indoors?
Lacquer fumes are toxic and flammable. Always use a respirator and make sure the space is very well ventilated. Ideally, work outdoors or in a garage with the door open. Never use lacquer near open flames or pilot lights.
How Long Does It Take For Lacquer To Cure Fully?
Lacquer dries to the touch in about 30–60 minutes, but it takes up to 2 weeks to fully cure and harden. Wait until the finish is fully cured before heavy use, cleaning, or placing items on the surface.
Applying a high gloss lacquer finish to furniture is more than just a weekend project—it’s a true test of patience and skill. But with the right preparation, careful application, and a little practice, you can achieve results that look as good as anything from a designer showroom. Remember: the shine is in the details. Take your time, follow each step, and soon you’ll enjoy furniture that looks—and feels—like a work of art. For more on furniture finishes and advanced techniques, check reliable sources like Wikipedia. Happy lacquering!
Credit: evolutionofstyleblog.com