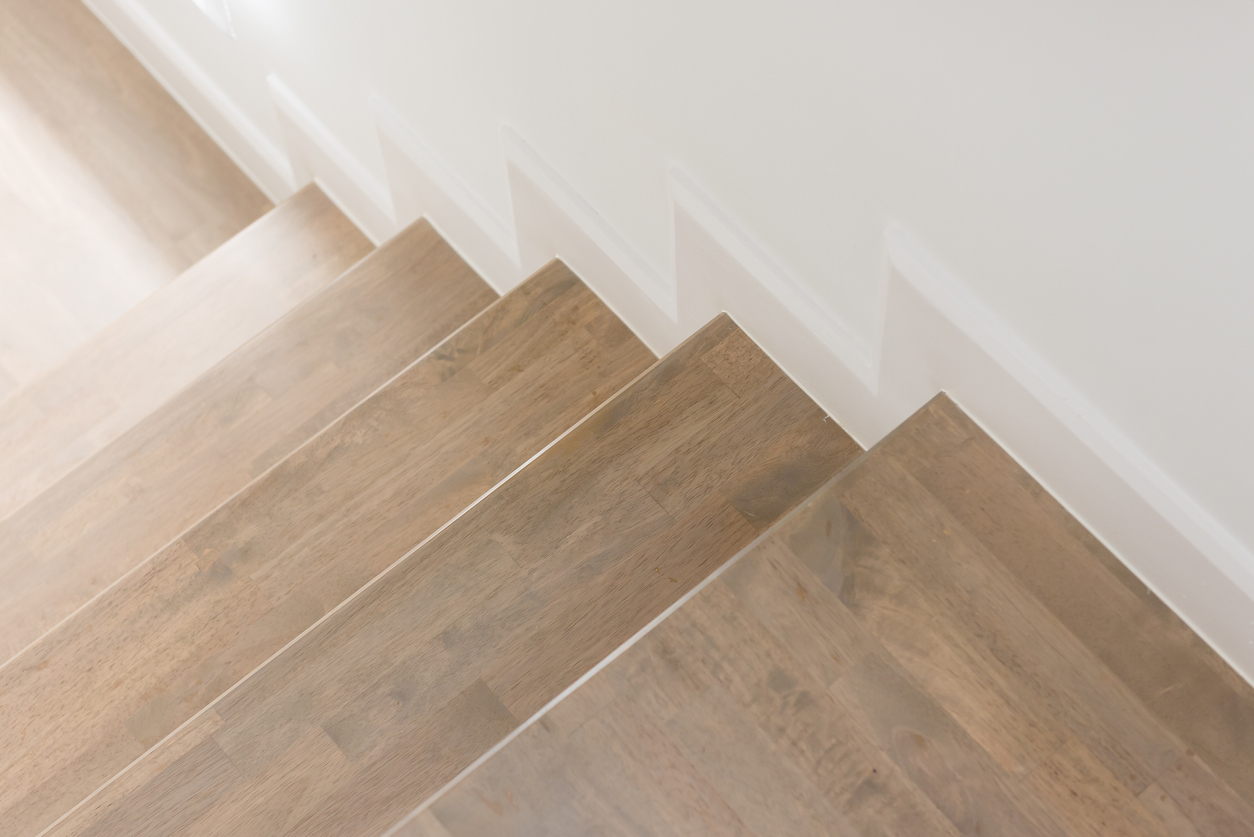
Installing vinyl plank flooring on stairs can change the look and feel of your whole home. Many homeowners choose vinyl plank because it is tough, water-resistant, and comes in many styles. But stairs are not like flat floors. They need careful planning and extra steps.
If you make mistakes, you may waste time and money—or worse, end up with unsafe stairs. If you want to do this project yourself, it is possible. You just need the right tools, clear instructions, and some patience.
This guide will walk you through everything you need to know about installing vinyl plank flooring on stairs. You will learn how to choose the right materials, prepare your stairs, make tricky cuts, and finish the job with a professional look. You will also find out about common mistakes, safety tips, and answers to common questions. Even if you have never done a flooring project before, you will find this guide clear and easy to follow.
Why Choose Vinyl Plank Flooring For Stairs?
Vinyl plank flooring is popular for many reasons. It combines the look of real wood with the strength and flexibility of modern materials. Here’s why it’s a top choice for stairs:
- Durability: Vinyl plank stands up to heavy foot traffic, pets, and kids.
- Water resistance: It won’t get damaged by spills or wet shoes.
- Easy cleaning: Dust and dirt wipe away easily.
- Style options: You can pick from many colors, patterns, and textures.
- Comfort: It feels softer and warmer underfoot than stone or tile.
Still, stairs are a special case. They get more use than regular floors, and each step must be safe and secure. Not all vinyl planks are made for stairs, so it is important to choose wisely.
Types Of Vinyl Plank Flooring For Stairs
There are two main types of vinyl plank flooring used on stairs: glue-down and floating (click-lock). Each has its pros and cons for stair installation.
| Type | How It Installs | Pros | Cons |
|---|---|---|---|
| Glue-down | Adhesive bonds planks directly to stairs | Very secure, suitable for high-traffic stairs | Harder to remove, messier installation |
| Floating (click-lock) | Planks lock together, rest on top of surface | Easy and fast to install, simple to replace | May shift or squeak without glue, not all brands allow on stairs |
Most experts recommend glue-down vinyl plank for stairs. It stays firmly in place, even with lots of use. Some manufacturers also make special stair treads and risers that match their plank flooring. Always check your product is rated for stair use.
Tools And Materials You’ll Need
To install vinyl plank flooring on stairs, you need both common and special tools. Gather everything before you start. Here’s a checklist:
Essential Tools:
- Tape measure
- Pencil and chalk line
- Utility knife with fresh blades
- Jigsaw or miter saw (for cutting planks)
- Pry bar (for removing old flooring or trim)
- Rubber mallet
- Speed square or carpenter’s square
- Caulk gun
Materials:
- Vinyl planks (enough for treads and risers)
- Stair nose pieces (for front edges)
- Construction adhesive (recommended type by manufacturer)
- Flooring adhesive (if glue-down planks)
- Finishing nails or screws (for stair nose)
- Wood filler or caulk (for gaps)
- Sandpaper or sander
Safety Gear:
- Knee pads
- Work gloves
- Eye protection
- Dust mask (when cutting)
Pro tip: Always order 10-15% more vinyl planks than the area you measure. This covers mistakes, cuts, and future repairs.
How To Measure And Plan Your Stair Project
Accurate measurement is the key to a smooth installation. Stairs come in many shapes and sizes—straight, curved, open sides, or closed. Here’s how to measure and plan:
- Count the steps: Each step has two main parts—the tread (flat part you step on) and the riser (vertical part).
- Measure each tread: Measure the depth (front to back) and the width (side to side) of every tread. Write down the largest numbers.
- Measure each riser: Measure the height and width of each riser. Again, use the largest size for all cuts.
- Check the stair nose: This is the front edge of the step. Decide if you will use a matching stair nose trim or cut a plank to fit.
- Plan plank direction: Most people run planks left to right (across the width). For a wood look, line up the grain with your hallway or main floor.
- Draw a cut plan: Mark on paper where each plank piece will go. This helps avoid mistakes or ugly joints.
Non-obvious insight: Not all stairs are perfectly square. Old houses often have steps that tilt or curve. Measure every step separately; don’t assume they are all the same.
Credit: flooringsuperstores.com
Removing Old Flooring And Preparing The Stairs
Never install new vinyl planks over carpet or loose flooring. The surface must be clean, dry, and level. Here’s how to prep your stairs:
- Remove old coverings: Pull up carpet, tacks, nails, or old wood. Use a pry bar and be careful not to damage the stair structure.
- Clean the surface: Sweep, vacuum, and wipe down each step. Remove glue or sticky residue with an adhesive remover.
- Fix damage: Fill holes, cracks, or low spots with wood filler. Let it dry, then sand smooth.
- Level the steps: Uneven stairs are dangerous. Use a long level to check. If needed, sand high spots and fill low ones.
- Remove trim: Take off old stair noses or quarter-round trim. You will replace these later for a clean finish.
Pro tip: If your stairs squeak, drive 2-inch finish nails into loose spots before installing planks. This small step can save you headaches later.
Cutting Vinyl Planks For Treads And Risers
Vinyl plank is easy to cut, but stairs need many special cuts. Here’s how to get perfect results:
Cutting Treads
- Measure each tread carefully.
- Mark the cut line on the back of the plank.
- Use a sharp utility knife for straight cuts (score and snap).
- For curves or corners, use a jigsaw.
- Dry-fit each piece before gluing.
Cutting Risers
- Cut risers to fit the height and width of the step.
- Some installers use one full plank per riser; others join two pieces with a tight seam.
- For open stairs, cut the plank to follow the shape of the stringer (side support).
Cutting Stair Nose
- Stair nose pieces cover the front edge for a finished look.
- Cut these to the width of each step.
- Some stair noses are made of vinyl, others are aluminum or wood. Make sure they match in color and thickness.
Non-obvious insight: Number each cut piece with a pencil before installing. This prevents mix-ups and saves time if you need to pause the project.
Gluing Down Vinyl Plank On Stairs
Most stair vinyl plank installations use glue. Floating (click-lock) planks can shift or squeak on stairs, so glue is safer. Follow these steps:
- Dry-fit all pieces: Place treads, risers, and stair noses in order. Make sure everything fits.
- Apply adhesive: Use a caulk gun to spread construction adhesive on the stair surface. Use enough, but don’t overdo it—too much glue can ooze out.
- Press planks in place: Start with the riser, then the tread, then the nose. Press down firmly. Use a rubber mallet to tap into place.
- Clean up glue: Wipe off any glue that leaks out before it dries.
- Nail or screw stair noses: For extra strength, fasten stair noses with finish nails or screws. Fill the holes with color-matched putty.
Wait at least 24 hours before walking on the stairs. This lets the glue set fully for maximum safety.
Dealing With Tricky Stair Shapes
Not all stairs are the same. Some have rounded edges, pie-shaped steps, or open sides. Here’s how to handle them:
Round Or Bullnose Stairs
- Buy special bullnose stair trim to cover the rounded front edge.
- Cut planks to fit up to the trim, then glue both down.
Pie-shaped Or Curved Steps
- Make a cardboard template for each step.
- Use the template to trace the shape onto your plank, then cut with a jigsaw.
- Dry-fit, then glue as usual.
Open-sided Stairs
- Cut planks to wrap around the side of the step for a finished look.
- Use matching trim to cover exposed edges.
Pro tip: Take your time with these tricky steps. Rushing leads to ugly gaps or wasted material.

Credit: floorecki.com
Installing Stair Nosing For Safety And Style
Stair nosing is a must for most vinyl plank stair jobs. It covers the front edge of each step, making it safer and more durable. Here’s what you need to know:
- Why you need it: Stair noses prevent slips and protect the plank edge from chipping.
- Types: Vinyl, wood, or metal. Choose the one that matches your planks in both color and thickness.
- How to install: Cut to width, glue down, then nail or screw for extra hold.
- Finishing: Fill any holes or gaps with matching putty or caulk.
Many building codes require stair noses for safety. Check your local rules before you start.
Finishing Touches: Caulking, Cleaning, And Inspection
Once the planks and stair noses are in place, you’re almost done. But a few finishing steps can make your stairs look professional:
- Fill gaps: Use color-matched caulk or wood filler along the edges and between planks.
- Replace trim: Reinstall or replace any wall trim or quarter-round you removed.
- Inspect for loose spots: Press on each plank and stair nose. Re-glue or re-nail if anything moves.
- Clean up: Wipe down all surfaces to remove dust or glue smears.
- Final check: Walk up and down the stairs to test for squeaks, loose parts, or sharp edges.

Credit: www.youtube.com
Common Mistakes And How To Avoid Them
Even careful DIYers can make mistakes. Here are the top errors and how to avoid them:
- Rushing measurements: Always measure twice and cut once. Small errors lead to ugly gaps or wasted planks.
- Skipping stair nose: This can make stairs unsafe and cause planks to break.
- Not using enough glue: Planks can shift or pop loose if not glued well.
- Forgetting to acclimate planks: Let vinyl planks sit in your home for 48 hours before installing. This prevents swelling or shrinking.
- Ignoring building codes: Always check local rules for stair safety before starting.
Pro tip: Keep a few extra planks and stair nose pieces for future repairs. Styles can be discontinued or change in color over time.
How To Maintain Vinyl Plank Stairs
After installation, good care will keep your stairs looking new for years:
- Sweep or vacuum often to remove dirt and grit.
- Wipe spills quickly to prevent stains.
- Use a damp mop with mild cleaner for regular cleaning.
- Avoid harsh chemicals that can dull the finish.
- Check for loose planks or noses every few months and re-glue if needed.
Vinyl plank is tough, but dragging heavy items or sharp objects across the steps can still cause scratches. Use stair runners or mats in high-traffic areas for extra protection.
Cost To Install Vinyl Plank Flooring On Stairs
Doing it yourself can save money, but it’s important to understand the costs involved. Here’s a breakdown:
| Material/Service | Average Cost (USD) | Notes |
|---|---|---|
| Vinyl Plank Flooring | $2 – $5 per sq ft | Special stair treads and risers cost more |
| Stair Nose Pieces | $20 – $50 each | One needed per step |
| Adhesive & Supplies | $50 – $100 total | Includes glue, caulk, nails |
| Tools (if needed) | $50 – $200 | Can be reused for other projects |
| Professional Labor | $50 – $100 per step | DIY saves this cost |
For a typical 13-step staircase, expect to spend $400 to $900 for a DIY project. Hiring a pro can double the total cost.
Safety Tips For Diy Stair Installation
Working on stairs is more dangerous than on flat floors. Here’s how to keep yourself safe:
- Always wear safety glasses and gloves when cutting planks.
- Use knee pads to protect your joints.
- Secure your tools so they don’t fall down the stairs.
- Don’t rush—take breaks and stay focused.
- Keep kids and pets away from the work area.
If you feel unsure at any point, call a pro for help. Safety comes first.
When To Call A Professional
Some stair projects are too complex for DIY. Call a flooring pro if:
- Your stairs are very old, uneven, or damaged.
- You need to meet strict building codes for rentals or commercial buildings.
- You don’t have the right tools or enough time.
- You want a warranty on the work.
A skilled installer can finish the job faster and guarantee a perfect fit. For most straight, indoor staircases, though, a careful homeowner can do a great job.
Real-world Example: Installing Vinyl Plank On Basement Stairs
Let’s look at how a homeowner, Mark, installed vinyl plank on his 12 basement steps:
- Planning: Mark measured each tread and riser, then bought 20% extra planks for mistakes.
- Preparation: He removed old carpet, sanded rough spots, and vacuumed each step.
- Cutting: Mark cut every tread and riser with a miter saw, numbering each piece.
- Installation: He glued risers first, then treads, then stair noses. Each piece was pressed and tapped with a mallet.
- Finishing: After filling gaps with caulk and reinstalling trim, Mark waited 24 hours before using the stairs.
Mark’s project took two weekends and cost about $600. The stairs now match his basement floor, and guests often ask if it’s real wood.
Frequently Asked Questions
How Do I Keep Vinyl Plank Stairs From Being Slippery?
Vinyl planks can be slick when wet. Use a textured stair nose and keep steps clean. You can also add clear, non-slip tape to each step for extra grip.
Can I Use Click-lock (floating) Vinyl Planks On Stairs?
Some brands allow it, but glue-down is much safer and longer-lasting for stairs. Always read the manufacturer’s guidelines.
Do I Need To Remove The Old Wood Treads Before Installing Vinyl Planks?
No, as long as the old treads are solid, level, and clean. If they are loose, damaged, or rotten, replace or repair them first.
How Long Does It Take To Install Vinyl Plank Flooring On Stairs?
A first-time DIYer can expect 2–3 hours per step, including prep and drying time. A pro can finish a typical staircase in 1–2 days.
Where Can I Find More Information About Stair Safety Codes?
Check the official NFPA Life Safety Code for current stair building guidelines.
Installing vinyl plank flooring on stairs is a rewarding project that can upgrade your home’s look and value. With careful planning, the right tools, and safe work habits, you can get professional-looking results—even as a DIY beginner. Take your time, follow each step closely, and enjoy your new, stylish stairs for years to come.