
Most people love using over the door shoe organizers. They save floor space, keep shoes tidy, and are easy to move around. But what if you cannot use hooks because of thick doors, rental rules, or simply want a cleaner look?
Many people struggle with this problem, and it can feel frustrating when the organizer you just bought comes with big metal hooks you cannot use. The good news is that you can still enjoy the benefits of a shoe organizer—without damaging your door or making holes.
This guide will show you how to hang an over the door shoe organizer without hooks. Whether you’re a renter, a homeowner who wants to avoid scratches, or just want a more stylish solution, you’ll find practical, tested methods here.
You will also learn the pros and cons of each approach, what to watch out for, and how to make your organizer secure, safe, and long-lasting. You’ll discover creative ideas and tips that go beyond what most people try. By the end, you’ll be ready to install your shoe organizer—even on tricky doors—without stress.
Why Go Hookless With Shoe Organizers?
Many people wonder if skipping hooks is worth the extra effort. The truth is, hookless shoe organizers offer several key advantages:
- They avoid door damage, scratches, or dents.
- Landlords often prohibit metal hooks on doors.
- They fit on thick, ornate, or non-standard doors.
- They look tidier and less cluttered.
You also avoid the noise of hooks rattling every time you open or close the door. For families, hookless solutions are safer—no sharp metal edges for kids to bump into. Plus, if you have custom-painted or glass doors, going hookless protects your investment.
But here’s something beginners often miss: not all shoe organizers can go hookless easily. Some are too heavy, have metal frames, or need strong support. Always check your organizer’s weight and design before starting. Lightweight fabric organizers work best for hookless methods.
Understanding Over The Door Shoe Organizers
Before you hang anything, it helps to know what you’re working with. Most over the door shoe organizers are made of:
- Fabric or canvas (lightweight, flexible)
- Plastic (PVC or vinyl) (easy to wipe clean)
- Mesh (breathable, light)
- Metal frame (rare, heavier)
Most come with 12 to 24 pockets, holding 6–12 pairs of shoes. The standard size fits doors 1. 5–1. 75 inches thick. Some versions have reinforced holes or grommets at the top for hooks, while others use fabric loops.
Important: If your organizer is very heavy or has a hard frame, hookless methods may not work well. For plastic, mesh, or fabric types, you have many options.
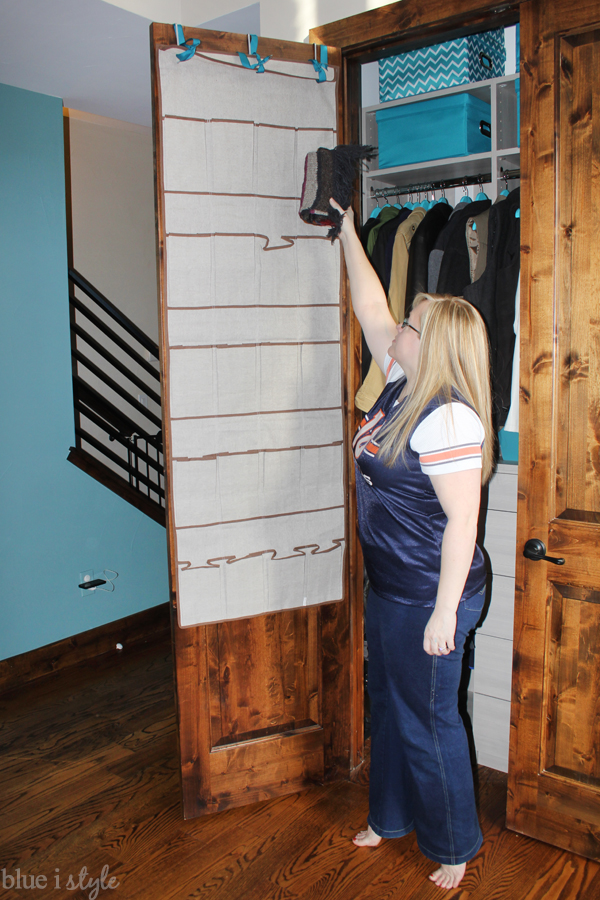
Credit: www.blueistyleblog.com
Preparing For A Hookless Installation
Don’t skip this step. Many people rush in and end up with a sagging or fallen organizer. Good prep saves time and frustration.
- Measure your door — width, thickness, and height. Check if there’s space above the door for any adhesive or mounting hardware.
- Check your door material — Wood, metal, glass, and painted doors each need different solutions.
- Clean the surface — Dust, grease, or moisture can make adhesives fail. Wipe down the top and back of the door.
- Weigh your organizer — Fill it with shoes you plan to store, then weigh it. Most hookless methods work best for organizers under 10 pounds when filled.
- Test your door action — Open and close the door a few times. Does it stick or move smoothly? Some solutions add thickness, so you want to be sure the door will still close.
Expert tip: If your door is hollow, avoid screws or nails. For glass doors, stick with adhesives or tension rods.
Top Methods To Hang Over The Door Shoe Organizer Without Hooks
Let’s dive into the best ways to mount your shoe organizer—no hooks needed. Each technique has its own strengths, so choose what fits your door and your needs.
1. Adhesive Hooks Or Strips
Adhesive hooks (like Command hooks) are a favorite for renters. They stick to most surfaces and remove cleanly.
How to Use:
- Buy adhesive hooks rated for at least 3–5 pounds each.
- Clean the door area with rubbing alcohol.
- Stick two or three hooks at the top of the door (space them to match the organizer’s grommets or loops).
- Wait one hour before hanging the organizer.
- Press the organizer’s grommets or loops onto the hooks.
Pros:
- No damage to doors.
- Easy to remove.
- Cheap and widely available.
Cons:
- Not ideal for very heavy organizers.
- May not stick to textured surfaces.
- Heat and moisture can weaken adhesive.
Insight: Most people use just two hooks. For better support, use three across the top. This spreads the weight and prevents sagging.
2. Over The Door Tension Rod
A tension rod works like a shower curtain rod. It presses between the two sides of your door frame, using pressure to hold in place.
How to Use:
- Buy a tension rod long enough to fit your door width.
- Place it near the top of the door, above the organizer’s height.
- Thread the organizer’s loops or grommets over the rod, or use shower curtain rings.
- Tighten the rod until secure.
Pros:
- No adhesives or screws needed.
- Easy to adjust and remove.
- Holds more weight than adhesive hooks.
Cons:
- May slip on smooth or narrow doors.
- Some doors may not allow for a rod above the frame.
Advanced tip: Use rubber end caps for extra grip, especially on painted or metal doors.
3. Magnetic Hooks
If you have a metal door (like many apartment entry doors), magnetic hooks are a clever solution.
How to Use:
- Buy strong neodymium magnetic hooks (rated for at least 10 pounds).
- Place them at the top of your metal door, spaced to match the organizer’s grommets.
- Hang the organizer directly.
Pros:
- No holes or adhesives.
- Very strong for their size.
- Easily repositioned.
Cons:
- Only works on metal doors.
- Can scratch paint—use a felt pad under the magnet.
Beginner mistake: Using weak fridge magnets. For shoe organizers, you need specialty magnetic hooks.
4. Suction Cups
For glass doors or smooth surfaces, suction cups with hooks can work.
How to Use:
- Buy large suction cups (3 inches or more) with hooks.
- Clean glass thoroughly.
- Wet the suction cup slightly, press firmly, and twist to lock.
- Hang the organizer.
Pros:
- No marks or residue.
- Good for glass or mirrored doors.
Cons:
- Only works on very smooth surfaces.
- Weight limit is low (usually 2–5 pounds per cup).
- Temperature changes can make them lose grip.
Pro tip: Check the suction every few weeks. Re-press if needed.
5. Velcro Strips
Heavy-duty Velcro strips (like industrial-strength Velcro) can hold organizers directly on the door.
How to Use:
- Cut strips of Velcro to match the top edge of your organizer.
- Stick one side to the door, the other to the organizer.
- Press firmly to bond.
Pros:
- Invisible from the front.
- No hardware needed.
- Good for light to medium loads.
Cons:
- Can pull paint if removed quickly.
- Not reusable—adhesive weakens after a few moves.
Non-obvious insight: Place extra strips along the sides to prevent swinging.
6. Double-sided Mounting Tape
Strong mounting tape (like 3M VHB) can secure lightweight organizers without any hardware.
How to Use:
- Apply strips of tape along the top and sides of the organizer.
- Press onto a clean, dry door for 30 seconds.
- Wait 1 hour before loading with shoes.
Pros:
- Fast, easy, and invisible.
- No holes or tools needed.
Cons:
- Tape can be hard to remove without damaging paint.
- Not suitable for heavy loads.
Hidden tip: Use a hairdryer to soften adhesive when removing.
7. Closet Rod Or Shower Curtain Rod (inside The Doorway)
If your door leads to a closet, you can hang the organizer on a closet rod or shower curtain rod installed inside the doorway.
How to Use:
- Install a rod across the inside top of the closet frame.
- Hang the organizer using shower curtain rings or S-hooks.
- The organizer stays out of sight when the door is closed.
Pros:
- No impact on the actual door.
- Can handle more weight.
Cons:
- Not suitable if you need to use the closet rod for clothes.
- Some doors have no frame for a rod.
Expert trick: If your closet has a shelf, hang the rod just below it for extra stability.
8. Over-the-door Hanger Adapters
Some brands sell special adapters that grip the top of the door with padded arms—no hooks or screws.
How to Use:
- Slide the adapter over the door.
- Attach the organizer to the adapter’s built-in loops or clips.
Pros:
- No marks or holes.
- Works on thick doors.
Cons:
- May need to order separately from organizer.
- Limited sizes.
Note: Always check the adapter’s width range before buying.
9. Door Frame Brackets
Door frame brackets are L-shaped pieces that rest on the top edge of the door, sometimes padded to avoid marks.
How to Use:
- Place the bracket on the top edge of the door.
- Attach the organizer to the bracket’s hook or slot.
Pros:
- No permanent marks.
- Holds more weight than adhesive.
Cons:
- Only fits certain door types.
- May prevent door from closing fully.
Advanced idea: Use felt pads to protect delicate finishes.
10. Screw-in Cup Hooks (for Permanent Installs)
If you own your home and don’t mind a small hole, cup hooks screwed into the top edge of the door (not the face) can hold an organizer nearly invisibly.
How to Use:
- Drill small pilot holes on the door’s top edge.
- Screw in hooks spaced to match the organizer.
- Hang the organizer loops on the hooks.
Pros:
- Very strong.
- Invisible from the front.
Cons:
- Leaves small holes.
- Not for renters or glass doors.
Bonus tip: Match hook color to door for a seamless look.
11. S-hooks And Eyelets (for Custom Installs)
If your organizer has loops, you can install eyelet screws on the door’s top edge and hang with S-hooks.
How to Use:
- Screw eyelets into the top edge of the door.
- Hang S-hooks, then attach organizer.
Pros:
- Removable and strong.
- Minimal door impact.
Cons:
- Leaves tiny holes.
- Tools required.
Not obvious: S-hooks let you adjust height easily, unlike fixed hooks.
12. Over-the-door Pockets With Built-in Foam Wedges
Some modern organizers have built-in foam wedges or pads that grip the door itself, needing no hooks or hardware.
How to Use:
- Slide the foam-backed organizer over the door.
- The foam compresses, holding it in place.
Pros:
- No hardware or marks.
- Silent, no rattling.
Cons:
- Hard to find.
- Limited to certain organizer brands.
Real-world insight: These are great for kids’ rooms or dorms.
Comparing Hookless Mounting Methods
Choosing the right solution depends on your door, organizer weight, and if you rent or own. Here’s a quick comparison for clarity:
| Method | Damage Risk | Max Weight | Removability | Best For |
|---|---|---|---|---|
| Adhesive Hooks | None | 10 lbs | Easy | Renters, light organizers |
| Tension Rod | None | 15 lbs | Easy | Wide doors, closets |
| Magnetic Hooks | None | 20 lbs | Easy | Metal doors |
| Velcro Strips | Paint risk | 5 lbs | Medium | Painted doors |
| Cup Hooks/Eyelets | Small holes | 20 lbs | Hard | Permanent installs |
Data from manufacturer packaging and user reviews.
Step-by-step Example: Hanging With Adhesive Hooks
Let’s walk through a full installation using one of the most popular methods—adhesive hooks. This method is renter-friendly, cheap, and works for most lightweight organizers.
What You’ll Need
- 3 adhesive hooks (rated for at least 3 lbs each)
- Rubbing alcohol or window cleaner
- Pencil or masking tape
- Tape measure
- Your shoe organizer
Step 1: Mark Hook Placement
Hold the organizer up to the door. Mark where the top grommets or loops will sit. Use a pencil or small pieces of tape.
Step 2: Clean The Surface
Wipe the marked area with rubbing alcohol. Let it dry fully. This helps the adhesive stick.
Step 3: Attach Hooks
Remove the backing from the adhesive hooks. Press them firmly onto your marks. Hold for 30 seconds each.
Step 4: Wait
Let the adhesive cure for at least one hour. This step is easy to skip, but it’s vital for strength.
Step 5: Hang Your Organizer
Slip the organizer’s grommets or loops onto the hooks. Press down gently to seat them.
Step 6: Test
Load a few shoes into the bottom pockets. Wait 5–10 minutes and check for slipping. If all looks good, finish loading the organizer.
Extra tip: If you want to hang heavier items, use more hooks or choose a different method.
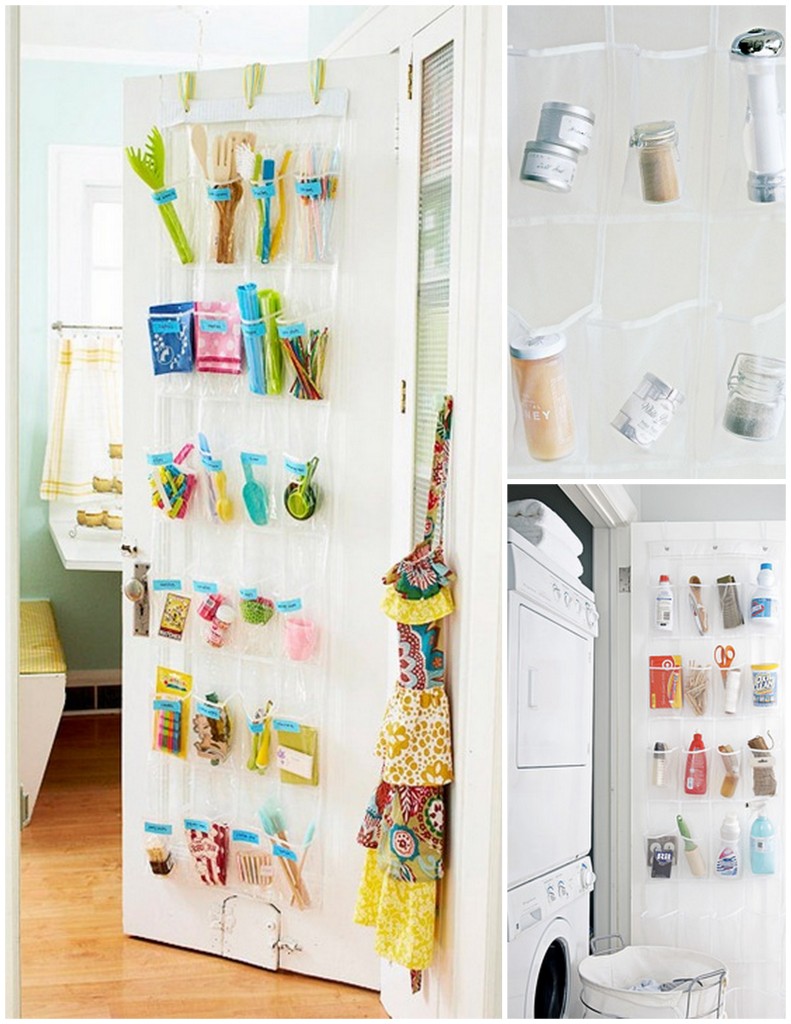
Credit: www.livesimplybyannie.com
Troubleshooting Common Problems
Even with good prep, things can go wrong. Here’s how to fix the most common issues.
Organizer Sags Or Falls
- Add more hooks or mounting points.
- Lighten the load—remove heavy shoes.
- Switch to a tension rod for more support.
Door Won’t Close
- Use thinner hooks or strips.
- Move the organizer down slightly.
- Try a rod inside the closet instead.
Adhesive Fails
- Clean surface again and let dry fully.
- Warm the adhesive with a hairdryer before pressing.
- Try a different brand—some stick better to certain paints.
Scratched Paint
- Use felt pads behind hooks or magnets.
- Stick to adhesives and avoid metal hardware.
Non-obvious fix: For stubborn paint, a dab of toothpaste can buff out small scratches.
Creative Ways To Use Shoe Organizers Without Hooks
You aren’t limited to just shoes! Over the door organizers are incredibly versatile, especially when mounted hookless.
- Pantry storage: Store snacks, spices, foil, and wraps on a pantry door using adhesive hooks.
- Craft supplies: Hang the organizer inside a closet for yarn, scissors, paint, and more.
- Cleaning closet: Store sprays, cloths, and gloves—just use a strong tension rod.
- Bathroom: Use suction cups for toiletries or hair tools on a glass shower door.
- Kids’ toys: Hang soft toys or art supplies at child height with Velcro strips.
Advanced tip: Use clear organizers for easy visibility, or label pockets for different items.
Safety And Maintenance Tips
To keep your organizer safe and in good shape:
- Check mounting points monthly for signs of wear.
- Don’t overload pockets—most are designed for one shoe per pocket.
- For heavy boots, store at the bottom to prevent tipping.
- Clean fabric or plastic organizers with a damp cloth every few weeks.
- If using adhesives, replace them every 6–12 months for best grip.
One more insight: For high-traffic areas, choose organizers with reinforced grommets—they last longer and don’t tear.
Cost Comparison: Hookless Vs. Hooked Solutions
Is going hookless more expensive or time-consuming? Here’s a simple cost breakdown:
| Method | Approx. Cost | Time Needed | Skill Level |
|---|---|---|---|
| Standard Hooks | $0 (included) | 2 min | Beginner |
| Adhesive Hooks | $8–$12 | 10 min | Beginner |
| Tension Rod | $12–$20 | 5 min | Beginner |
| Magnetic Hooks | $10–$16 | 3 min | Beginner |
| Velcro Strips | $7–$10 | 7 min | Beginner |
| Cup Hooks/Eyelets | $3–$5 | 10 min | Intermediate |
Source: Retailer websites and user reviews.
Mistakes To Avoid
It’s easy to make small errors that lead to big frustrations. Avoid these common mistakes:
- Hanging a heavy organizer with just two adhesive hooks.
- Not cleaning the door surface before applying adhesives.
- Using hookless methods on thick or ornate doors without measuring.
- Ignoring the door’s opening and closing—test before final install.
- Forgetting to check the load rating of mounting hardware.
Final tip: Always read the instructions for any adhesive, rod, or hardware you buy. Some brands have unique requirements.
When To Skip Hookless And Use Hooks
While hookless solutions are great for most, sometimes using hooks is just easier. If you own your home, don’t mind small marks, or need to hang a very heavy organizer, hooks may be the best choice. But for renters, families, or anyone who wants a clean, damage-free look, the hookless methods above work beautifully.
Where To Find Hookless Shoe Organizer Supplies
Most home stores (like Home Depot, Lowe’s, Walmart, or Target) carry everything you need. For specialty items like magnetic hooks or foam-backed organizers, check online retailers or specialty storage brands.
For more information about adhesive hooks and their proper use, visit Wikipedia’s Command Brand page.
Frequently Asked Questions
Can I Hang A Heavy Shoe Organizer Without Hooks?
Most hookless methods are best for lightweight to medium organizers (under 10–15 pounds). For heavy-duty organizers, use a tension rod or permanent hardware like cup hooks or eyelets. Always check the weight rating for your chosen method.
Will Adhesive Hooks Damage My Painted Door?
High-quality adhesive hooks are designed to remove cleanly, but some paints or old finishes can peel. To minimize risk, always clean the area first, remove slowly, and avoid adhesives on delicate or peeling paint.
What If My Door Is Extra Thick Or Has A Fancy Design?
Many hookless methods (like tension rods and adhesive strips) work on thick or ornate doors. Measure your door before buying supplies, and avoid standard hooks or brackets that might not fit.
Can I Use These Methods For Other Types Of Organizers?
Yes, most hookless methods work for other hanging organizers like pantry racks, craft supply holders, or bathroom storage. Just check the weight and surface compatibility before installing.
How Do I Remove Adhesive Residue After Taking Down My Organizer?
Use a mild adhesive remover, rubbing alcohol, or a soft cloth with warm soapy water. For stubborn spots, a plastic scraper or your fingernail works better than metal tools to avoid scratching.
—
With these techniques and tips, you can hang an over the door shoe organizer without hooks—safely, neatly, and without worry. No matter your door type or your living situation, hookless shoe organization is within reach.

Credit: www.amazon.com