As an Amazon Associate I earn from qualifying purchases.
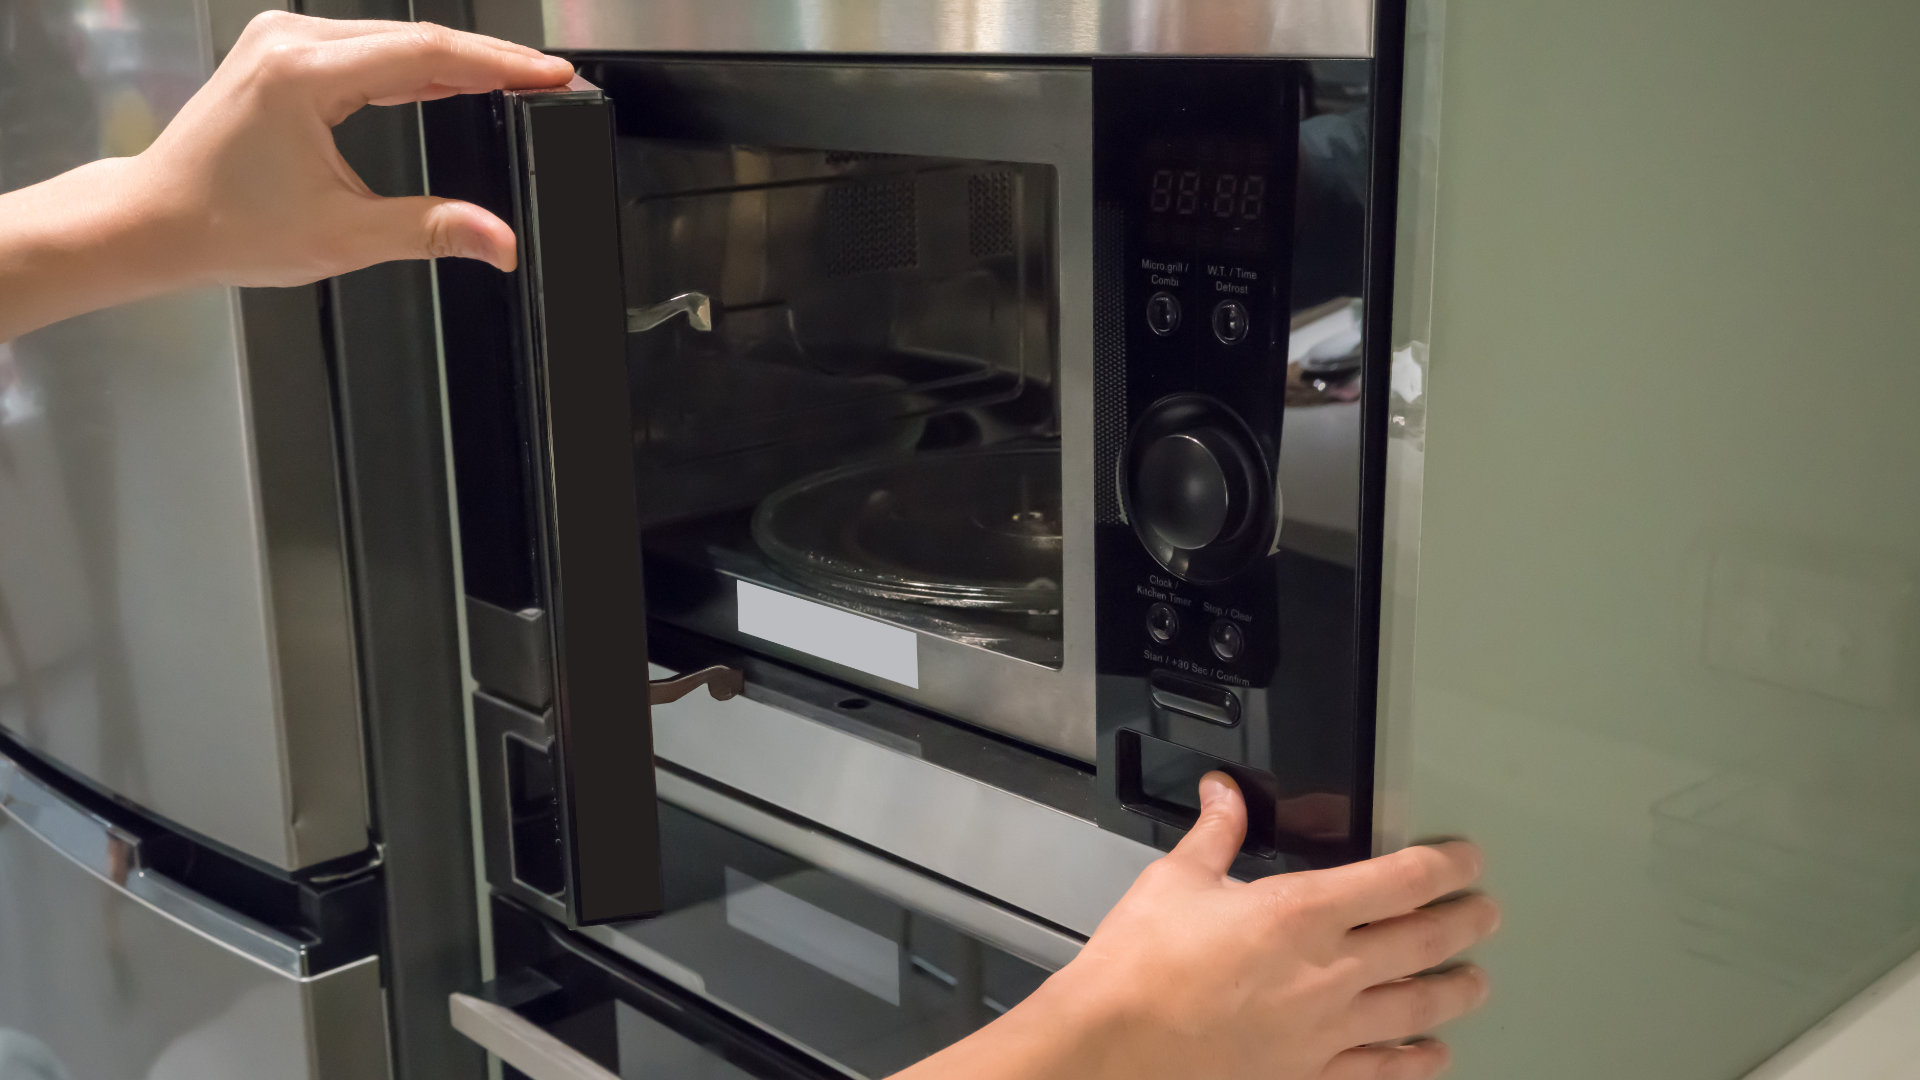
Microwave ovens are essential appliances in many homes, making quick meals and reheating leftovers easy. But when the microwave door does not close properly, is cracked, or feels loose, it can disrupt your kitchen routine and even pose safety risks. A faulty microwave door is not just annoying—it can prevent the microwave from running or cause dangerous microwave leaks. The good news is that many microwave door problems can be fixed at home with simple tools and basic guidance.
This guide will walk you through everything you need to know to fix a microwave door safely and effectively. You’ll learn how to spot the real problem, what tools you need, and how to perform step-by-step repairs for different types of door issues. Whether your door won’t latch, is misaligned, or has a broken handle, you’ll find clear instructions here. The article also covers safety tips, replacement advice, and answers to common questions. Let’s get started on restoring your microwave to perfect working order.
Understanding Microwave Door Problems
Before grabbing a screwdriver, it’s important to understand how a microwave door works and why fixing it matters. The door is not just a cover—it’s a critical safety feature that keeps microwaves inside the oven.
How The Door Mechanism Works
Most microwave doors have:
- Latch hooks: These click into the body of the microwave and start the cooking process.
- Springs and hinges: These allow the door to open and close smoothly.
- Door switches: Tiny switches inside the microwave frame sense if the door is closed.
- Seals and mesh: These prevent microwaves from leaking.
If any of these parts are damaged, the microwave may refuse to run or become unsafe.
Why Door Issues Are Serious
A loose or broken microwave door can lead to:
- Microwave energy leaks: This can be harmful to your health.
- Electrical shorts: If door switches are damaged, it may cause sparking.
- Poor cooking performance: Heat and steam may escape.
Microwave ovens are designed with several safety layers, but you should always treat door problems as urgent.
Diagnosing The Problem
The first step is to diagnose exactly what’s wrong with the door. Here’s how you can do it:
- Inspect for visible damage: Look for cracks, dents, or loose parts.
- Check the latch and hinges: Does the door feel wobbly, or does it not click when closed?
- Listen for clicks: When you close the door, do you hear the normal clicking sound?
- Test the microwave: Try running the oven. If it doesn’t start, the door switches may not be engaged.
- Check for gaps: Close the door and look from the side. Are there any gaps between the door and frame?
Take note of what you find. Sometimes, the problem is a simple loose screw, but other times, you may need to replace a part.

Credit: www.youtube.com
Safety Precautions Before Repair
Microwaves are safe to use but can be dangerous to repair if you don’t take precautions. Always:
- Unplug the microwave: Never work on a microwave while it’s plugged in.
- Discharge the capacitor: Microwaves store high voltage even when unplugged. If your repair needs you to open the outer case, you must discharge the capacitor. If you’re not sure how, it’s best to call a professional.
- Use insulated tools: Metal tools can cause short circuits if you touch the wrong parts.
- Handle glass with care: Microwave doors often have glass panels that can break.
If you ever feel unsure, stop and seek professional help.
Tools And Materials You’ll Need
Depending on your microwave’s brand and the specific problem, you’ll need some or all of these:
- Phillips and flathead screwdrivers
- Needle-nose pliers
- Replacement parts (handle, latch, spring, or switches)
- Multimeter (for checking switches)
- Adhesive or sealant (for glass or seals)
- Cleaning cloth
Some microwave doors are held with hidden clips or special screws. Before you start, check your owner’s manual for your model’s details.
Common Microwave Door Problems And How To Fix Them
Below are the most frequent issues with microwave doors and step-by-step solutions.
1. Door Won’t Close Or Latch Properly
This is one of the most common microwave door problems. It usually happens because the latch hooks are broken, the door is misaligned, or something is blocking the latch.
How To Fix:
- Inspect the latch hooks: Open the door and look at the plastic hooks. If they are bent or broken, they need replacement.
- Check for obstructions: Food spills or debris can block the latch. Clean the area with a damp cloth.
- Test the hinges: Wiggle the door gently. If it moves up and down, the hinges may be loose.
- Tighten screws: Use a screwdriver to tighten any loose hinge screws.
- Replace broken latches: If the hooks are broken, order a replacement latch for your model. Remove the inside panel (usually held by screws), swap the latch, and reassemble.
Pro Tip: Always check if the door aligns evenly with the microwave frame after fixing. Misalignment can prevent proper latching.
2. Door Handle Is Broken Or Loose
A broken handle makes opening and closing the door difficult. Most handles are attached with hidden screws on the inside of the door.
How To Fix:
- Unplug the microwave.
- Remove the inner door panel: There may be screws or plastic clips. Pry gently with a flathead screwdriver.
- Unscrew the old handle: Remove screws and pull off the handle.
- Install the new handle: Align it and screw it in place.
- Reattach the panel: Snap or screw it back.
Extra Insight: Some microwave handles have small alignment pins. Make sure these fit into their holes before tightening screws.
3. Door Is Misaligned
If your microwave door is crooked or doesn’t sit flush, it can let microwaves leak out or stop the oven from working.
How To Fix:
- Check the hinges: Open the door and look for wear or bending.
- Tighten or replace hinges: If screws are loose, tighten them. If hinges are bent or broken, replace them.
- Test the fit: Close the door and look for gaps.
- Adjust the latch: Sometimes, the latch plate inside the microwave is adjustable. Loosen its screws, nudge it slightly, and retighten.
Non-Obvious Tip: Repeated slamming can bend hinges over time. Always close the door gently to prevent future problems.
4. Door Switch Not Engaging
Microwaves have safety switches that detect when the door is closed. If the microwave doesn’t start, these switches might be faulty.
How To Fix:
- Unplug the microwave.
- Remove the outer cover: Usually held by screws at the back and sides.
- Locate the door switches: They’re small, button-like switches where the door latch enters.
- Test with a multimeter: Set to continuity. Press the switch and check for a beep or reading.
- Replace faulty switches: If a switch fails the test, disconnect and replace it.
- Reassemble the microwave.
Important Note: If you need to remove the outer case, be aware of the high-voltage capacitor. Only attempt this if you understand the risks.
5. Glass Panel Is Cracked Or Broken
A cracked door glass is dangerous—it can shatter or let microwaves escape. Most doors have two layers of glass.
How To Fix:
- Order the correct glass panel: Check your microwave’s model number.
- Remove the door from the microwave: Open the door fully and lift it off the hinges (some models require removing screws).
- Take apart the door: Remove screws holding the inner and outer frames.
- Swap the glass panel: Insert the new one carefully.
- Reassemble and reinstall the door.
Safety Tip: Wear gloves to avoid cuts from broken glass.
6. Door Seal (gasket) Is Loose Or Damaged
The door seal or gasket keeps microwaves and steam inside. If it’s loose, cooking smells may escape and the microwave may be less efficient.
How To Fix:
- Inspect the gasket: It’s usually a rubber or foam strip around the door frame.
- Clean the area: Remove any grease or food residue.
- Reattach or replace: If it’s loose but undamaged, use a food-safe adhesive to stick it back. If torn, order a new gasket.
- Test the seal: Close the door and check for a tight fit.
Expert Insight: Gaps in the seal can cause uneven cooking or microwave leaks.
7. Door Frame Is Bent Or Warped
If the door frame is bent, the door will not seal properly. This is common after the door is forced open or slammed.
How To Fix:
- Remove the door: If possible, take it off the hinges for easier handling.
- Check the bend: Minor bends can sometimes be straightened by hand or with pliers.
- Replace if needed: For major warping, order a new door frame or complete door assembly.
- Reinstall and test.
Caution: Never use a microwave with a badly bent door.
8. Door Springs Are Broken
Some microwaves use springs to help the door open and close smoothly. If the door flops open or doesn’t stay closed, the springs may be damaged.
How To Fix:
- Unplug the microwave.
- Remove the outer cover (if needed): Access the spring area near the hinges.
- Identify the broken spring: Compare with the good side if there are two.
- Replace with the correct part: Attach the new spring, making sure it’s secure.
- Test the door action.
9. Door Won’t Open
A stuck microwave door can be frustrating. Common causes are a jammed latch or broken release button.
How To Fix:
- Check the release button: If it feels loose, it may be broken inside.
- Remove the outer cover: Access the latch mechanism.
- Free a jammed latch: Gently push the latch with a screwdriver to release the door.
- Replace damaged parts: If the button or latch is broken, replace as needed.
- Test after reassembly.
Tip: Don’t force the door open or closed—this can cause more damage.
10. Door Makes Noise When Opening Or Closing
If you hear squeaks or grinding sounds, the hinges or springs may need attention.
How To Fix:
- Clean the hinges: Wipe away dirt or grease.
- Lubricate: Use a small amount of food-safe lubricant on the hinges.
- Check for wear: Replace any worn parts.
Hidden Insight: Never use oil or grease inside the cooking area—it can catch fire.
Comparing Diy And Professional Repairs
Choosing between fixing the microwave door yourself or hiring a professional depends on the issue’s complexity. Here’s a comparison to help you decide.
| Repair Type | DIY Difficulty | Cost | Safety Risk | When to Call a Pro |
|---|---|---|---|---|
| Replace handle or latch | Easy | Low ($10-30 parts) | Low | Rarely needed |
| Replace glass panel | Medium | Medium ($30-60 parts) | Medium (glass cuts) | If unsure about disassembly |
| Replace door switch | Medium | Low ($10-20 parts) | High (electrical risk) | If you must open outer case |
| Adjust hinges | Easy | Low (free) | Low | Rarely needed |
| Replace door frame | Hard | High ($60+ parts) | Medium | For major damage |
Key Takeaway: For most simple repairs, you can do it yourself with care. For anything involving electrical parts or the microwave’s outer case, consider hiring a technician.
How To Order Replacement Parts
Getting the right replacement part is crucial. Here’s what you need to do:
- Find the model number: Usually on a sticker inside the door or back of the microwave.
- Search online: Use the model number plus the part name (e.g., “ABC123 microwave door latch”).
- Buy from reputable sellers: Choose official brand websites or well-known appliance parts stores.
- Check return policies: In case the part doesn’t fit.
Example: If you own a Panasonic NN-SN966S, look for “NN-SN966S door handle” for the exact match.
Step-by-step Example: Replacing A Microwave Door Latch
Let’s walk through a practical example, replacing a broken door latch.
- Unplug the microwave.
- Open the door and locate screws: Most latches are behind the inner panel.
- Remove the inner panel: Use a flathead screwdriver to gently pry the panel off.
- Take out the old latch: It may be clipped or screwed in.
- Insert the new latch: Make sure it clicks or screws in securely.
- Reinstall the inner panel.
- Test the door: Close and open several times to check operation.
Extra Tip: Keep all screws and small parts in a dish so nothing gets lost.
Credit: danmarcappliance.com
What If You Can’t Fix The Door?
Sometimes, the damage is too great to repair safely. In these cases:
- Replace the entire door assembly: This is often easier than fixing multiple broken parts.
- Consider a new microwave: If the oven is old or repair costs are high, replacement may be a better value.
Data point: According to the US Department of Energy, microwave ovens last about 7–10 years on average. If yours is older, a new unit may save on energy and repair costs.
When To Call A Professional
Certain repairs should be left to an expert:
- Outer case removal: If you need to open the microwave’s outer shell, high voltage may be present.
- Door frame replacement: This can be complex and requires precision.
- Capacitor discharge: If you don’t know how to safely discharge the capacitor, seek help.
Hidden Danger: Even unplugged, some microwaves can give a dangerous shock due to stored electricity.
Cost Comparison: Repair Vs Replacement
Here’s a quick look at typical repair costs compared to buying a new microwave.
| Repair Type | DIY Cost | Professional Cost | New Microwave Cost |
|---|---|---|---|
| Handle/latch replacement | $10–30 | $80–120 | $80–250 |
| Glass panel replacement | $30–60 | $120–180 | $80–250 |
| Door switch repair | $10–20 | $90–130 | $80–250 |
| Full door assembly | $50–100 | $150–250 | $80–250 |
Insight: If repair costs approach or exceed half the price of a new microwave, replacement is usually smarter.
How To Prevent Future Microwave Door Problems
Prevention is always better than repair. To keep your microwave door in good shape:
- Close gently: Never slam the door shut.
- Clean regularly: Wipe the door and frame to prevent buildup.
- Check hinges and seals: Every few months, check for wear.
- Avoid overloading: Don’t push large plates or bowls against the door.
- Teach kids proper use: Children often slam or force the door, causing damage.
Expert Tip: A small investment in care can extend your microwave’s life by years.
Microwave Door Repair Myths
Many people misunderstand how microwaves work. Here are two common myths:
- Myth 1: Duct tape fixes a door seal. This is dangerous. Tape does not block microwaves and can melt or catch fire.
- Myth 2: Small cracks are safe. Even tiny cracks in the glass or frame can cause microwave leaks.
Always use proper parts and methods for repairs.
Environmental And Safety Considerations
When you replace microwave parts, dispose of broken pieces responsibly. Glass, plastics, and metal should be recycled where possible. Never throw away a microwave with the capacitor still charged.
If you’re not sure about microwave safety, you can read more on the FDA’s official microwave oven safety page.
Credit: www.reddit.com
Frequently Asked Questions
What If My Microwave Door Doesn’t Latch But Nothing Looks Broken?
Sometimes, the issue is inside the latch mechanism or with the door switches. Try cleaning the latch area first. If that doesn’t work, the internal latch or switch might need replacement. Listen for the “click” sound; if it’s missing, a switch may be faulty.
Is It Safe To Use Super Glue On A Cracked Microwave Door?
No. Super glue and similar adhesives aren’t food-safe and can give off fumes when heated. More importantly, they don’t block microwave energy. Always replace cracked glass or plastic with the correct parts.
How Do I Know If Microwaves Are Leaking From The Door?
Most leaks are invisible. If you see smoke, sparks, or notice a burning smell near the door, stop using the microwave immediately. You can buy a microwave leakage detector, but if you suspect a leak, have the oven checked by a professional.
Can I Replace A Microwave Door Myself?
Yes, for most brands, you can replace the door with basic tools. Make sure to order the correct part for your model. Follow safety steps and double-check the fit after installation. If the door is complex or you have to open the outer case, consider professional help.
What Should I Do If The Door Is Stuck And Won’t Open?
Do not force the door open. Unplug the microwave, remove the outer cover, and gently release the latch with a tool. Forcing can break the hinges or frame, making repair much harder. If you can’t fix it easily, call a technician.
A properly working microwave door is vital for safe, effective cooking. With careful diagnosis, the right tools, and attention to safety, most door problems can be fixed at home. Take your time, follow these steps, and your microwave will be back in action soon.
